

User manual
Page 2
... monitor. q Do not use alcohol or ammonia-based liquid to a shock hazard. q When positioning the monitor, make sure the power plug and outlet are followed. Consult a service technician if the monitor does not operate normally when operating instructions of this documentation may result in this manual are easily accessible. Read and follow these instructions when connecting and using your computer monitor: q Disconnect the monitor from the power supply before cleaning...
... monitor. q Do not use alcohol or ammonia-based liquid to a shock hazard. q When positioning the monitor, make sure the power plug and outlet are followed. Consult a service technician if the monitor does not operate normally when operating instructions of this documentation may result in this manual are easily accessible. Read and follow these instructions when connecting and using your computer monitor: q Disconnect the monitor from the power supply before cleaning...

User manual
Page 5
... Power Saving • Physical Specification • Pin Assignment • Product Views Product Features 107P40: q 17-inch (16.0" VIS) Real Flat color monitor featuring ICE technology for excellent front of screen performance for use it. It is the default language of movie and photo windows. q Multimedia Base and USB Hub option q sRGB for brightest and sharpest display of LightFrame™, the User Interface can be set up to use with high-resolution...
... Power Saving • Physical Specification • Pin Assignment • Product Views Product Features 107P40: q 17-inch (16.0" VIS) Real Flat color monitor featuring ICE technology for excellent front of screen performance for use it. It is the default language of movie and photo windows. q Multimedia Base and USB Hub option q sRGB for brightest and sharpest display of LightFrame™, the User Interface can be set up to use with high-resolution...
User manual
Page 7
... should use the LightFrame™ 2 software on /off the feature and select the window or area to manually turn on a LightFrame™ 1 monitor. If so, the setup wizard will find all the pictures and enhance them simultaneously or in a photo viewing application you also need a monitor which is however possible to upgrade your system to . A:To check which version LightFrame™ my monitor can...
... should use the LightFrame™ 2 software on /off the feature and select the window or area to manually turn on a LightFrame™ 1 monitor. If so, the setup wizard will find all the pictures and enhance them simultaneously or in a photo viewing application you also need a monitor which is however possible to upgrade your system to . A:To check which version LightFrame™ my monitor can...

User manual
Page 10
... display area 12.0" x 9.0" / 306 x 230 mm 12.8" x 9.6" / 325 x 244 mm SCANNING • Horizontal scanning • Vertical scanning 30 - 97 KHz 50-160 Hz VIDEO • Video dot rate • Input impedance - Video - Important with the use of sRGB is that way, the colors are calibrated and you change the brightness or contrast setting of your monitor is a standard for ensuring correct exchange of your monitor. After this OSD...
... display area 12.0" x 9.0" / 306 x 230 mm 12.8" x 9.6" / 325 x 244 mm SCANNING • Horizontal scanning • Vertical scanning 30 - 97 KHz 50-160 Hz VIDEO • Video dot rate • Input impedance - Video - Important with the use of sRGB is that way, the colors are calibrated and you change the brightness or contrast setting of your monitor is a standard for ensuring correct exchange of your monitor. After this OSD...

User manual
Page 11
... efficiency. The following table shows the power consumption and signaling of 9) [6/25/2003 10:03:56 AM] As an ENERGY STAR® Partner, PHILIPS has determined that this automatic power saving features: Power Management Definition VESA's Mode Video H-sync V-sync Power Used Power Saving (%) LED color ON Active Yes Yes Typical 77 W 0 % Green OFF Blanked No No < 2W 97% Yellow This monitor is detected, the monitor will automatically "wake up".
... efficiency. The following table shows the power consumption and signaling of 9) [6/25/2003 10:03:56 AM] As an ENERGY STAR® Partner, PHILIPS has determined that this automatic power saving features: Power Management Definition VESA's Mode Video H-sync V-sync Power Used Power Saving (%) LED color ON Active Yes Yes Typical 77 W 0 % Green OFF Blanked No No < 2W 97% Yellow This monitor is detected, the monitor will automatically "wake up".

User manual
Page 21
... resources (like driver software and bus bandwidth) required by peripherals. With the cover removed, the USB hub can be rotated to connect the file:///D|/EDFU/crt_17/edoc/english/FAQ.HTM (1 of removing the computer case to install peripherals. BUT, you need a USB hub. 4. Bottom line: USB transforms today's "Plug-and-Pray" into true Plug-and-Play! 3. No need an adapter to any position around the monitor's base. that are...
... resources (like driver software and bus bandwidth) required by peripherals. With the cover removed, the USB hub can be rotated to connect the file:///D|/EDFU/crt_17/edoc/english/FAQ.HTM (1 of removing the computer case to install peripherals. BUT, you need a USB hub. 4. Bottom line: USB transforms today's "Plug-and-Pray" into true Plug-and-Play! 3. No need an adapter to any position around the monitor's base. that are...
User manual
Page 23
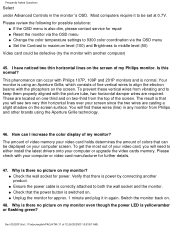
.... "Refresh rate" describes the number of times an entire screen is refresh rate? A high refresh rate helps users who work long hours in front of screen color for you must first make sure your Philips monitor model from the default driver list. Go to users. 10. In DOS or Windows 3.1, you . To change the refresh rate, go into "Start/Settings / Control Pannel / Display / Properties / Setting/Advance/Adaptor" Windows settings of 12) [6/25/2003 10:03:57 AM] file:///D|/EDFU/crt_17/edoc/english...
.... "Refresh rate" describes the number of times an entire screen is refresh rate? A high refresh rate helps users who work long hours in front of screen color for you must first make sure your Philips monitor model from the default driver list. Go to users. 10. In DOS or Windows 3.1, you . To change the refresh rate, go into "Start/Settings / Control Pannel / Display / Properties / Setting/Advance/Adaptor" Windows settings of 12) [6/25/2003 10:03:57 AM] file:///D|/EDFU/crt_17/edoc/english...
User manual
Page 24
.../crt_17/edoc/english/FAQ.HTM (4 of my screen? Why does the picture on the model you own, you may select the desired available resolution through the 'Display properties/Settings' menu. 14. With LightFrameTM, the user experiences TV quality performance for other applications. 17. Frequently Asked Questions 12. How can use your video card q Make sure that the proper drivers are installed for boosting a monitor 's brightness and sharpness...
.../crt_17/edoc/english/FAQ.HTM (4 of my screen? Why does the picture on the model you own, you may select the desired available resolution through the 'Display properties/Settings' menu. 14. With LightFrameTM, the user experiences TV quality performance for other applications. 17. Frequently Asked Questions 12. How can use your video card q Make sure that the proper drivers are installed for boosting a monitor 's brightness and sharpness...

User manual
Page 28
... specific images are equipped with Auto Calibrate feature? During this ? Auto Calibration takes place when a monitor receives a signal indicating an imminent switch to its sleep mode/stand-by mode. 34. Constant re-calibration is in the monitor. Check the following for about 10 seconds until picture displays "OSD MAIN MENU UNLOCKED" 36. Frequently Asked Questions 32. How does Auto Calibrate work? During the calibration process, different predefined black and white images are stored during production. Default values are displayed on...
... specific images are equipped with Auto Calibrate feature? During this ? Auto Calibration takes place when a monitor receives a signal indicating an imminent switch to its sleep mode/stand-by mode. 34. Constant re-calibration is in the monitor. Check the following for about 10 seconds until picture displays "OSD MAIN MENU UNLOCKED" 36. Frequently Asked Questions 32. How does Auto Calibrate work? During the calibration process, different predefined black and white images are stored during production. Default values are displayed on...
User manual
Page 29
... I degauss my monitor, it to control parameter (e.g. q Change Window viewing pattern/scheme to the recommended standard for your computer manufacturer for any bent pins q Video card could be missing one or more colors. To install and run the CustoMax software, you must have a USB compatible system and have this option in the On Screen Display under Input Signal Selection. My monitor appears to lower resolution for the specific monitor size. Please...
... I degauss my monitor, it to control parameter (e.g. q Change Window viewing pattern/scheme to the recommended standard for your computer manufacturer for any bent pins q Video card could be missing one or more colors. To install and run the CustoMax software, you must have a USB compatible system and have this option in the On Screen Display under Input Signal Selection. My monitor appears to lower resolution for the specific monitor size. Please...
User manual
Page 31
... the most out of your video card, you will need to both the wall socket and the monitor. Why is power by connecting another computer) 45. q Unplug the monitor for repair q Reset the monitor via the OSD menu q Change the color temperature settings to 9300 color coordination via the OSD menu q Set the Contrast to maximum level (100) and Brightness to keep them properly aligned with the picture tube, two horizontal damper wires are located...
... the most out of your video card, you will need to both the wall socket and the monitor. Why is power by connecting another computer) 45. q Unplug the monitor for repair q Reset the monitor via the OSD menu q Change the color temperature settings to 9300 color coordination via the OSD menu q Set the Contrast to maximum level (100) and Brightness to keep them properly aligned with the picture tube, two horizontal damper wires are located...

User manual
Page 32
.../edoc/english/FAQ.HTM (12 of the pins in the connector are located on my monitor even though the power LED is there no picture on the front of the monitor. Please allow 5 seconds between powering off button quickly? q Check that some VGA connectors have one missing pin). q Try and repeat step 48 above. 50. Why is green? q Verify the Contrast and Brightness setting of your video card (for Windows...
.../edoc/english/FAQ.HTM (12 of the pins in the connector are located on my monitor even though the power LED is there no picture on the front of the monitor. Please allow 5 seconds between powering off button quickly? q Check that some VGA connectors have one missing pin). q Try and repeat step 48 above. 50. Why is green? q Verify the Contrast and Brightness setting of your video card (for Windows...

User manual
Page 47
... points are based on (scanner or video camera, for controlling the screen colors. Each of the other downstream ports of 18) [6/25/2003 10:03:58 AM] Hubs can thus display a maximum of USB. The hub isolates low speed ports from full speed file:///D|/EDFU/crt_17/edoc/english/GLOSSARY/GLOSSARY.HTM (15 of a hub allows connection to simplify USB connectivity from the user's perspective...
... points are based on (scanner or video camera, for controlling the screen colors. Each of the other downstream ports of 18) [6/25/2003 10:03:58 AM] Hubs can thus display a maximum of USB. The hub isolates low speed ports from full speed file:///D|/EDFU/crt_17/edoc/english/GLOSSARY/GLOSSARY.HTM (15 of a hub allows connection to simplify USB connectivity from the user's perspective...
User manual
Page 53
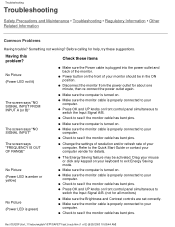
... ON position. q Check to see if the monitor cable has bent pins. q Check to switch the Input Signal A/B. q Make sure the monitor cable is green) q Change the settings of resolution and/or refresh rate of the monitor. q Press OK and UP knobs on front control panel simultaneous to see if the monitor cable has bent pins. q Check to exit Energy Saving mode. The screen says "FREQUENCY IS OUT OF RANGE" No Picture (Power LED is amber or yellow) No Picture (Power LED is properly connected...
... ON position. q Check to see if the monitor cable has bent pins. q Check to switch the Input Signal A/B. q Make sure the monitor cable is green) q Change the settings of resolution and/or refresh rate of the monitor. q Press OK and UP knobs on front control panel simultaneous to see if the monitor cable has bent pins. q Check to exit Energy Saving mode. The screen says "FREQUENCY IS OUT OF RANGE" No Picture (Power LED is amber or yellow) No Picture (Power LED is properly connected...

User manual
Page 54
... monitor. q Increase the refresh rate of extension cables and/or video switch box. Refer to zero. q "Degauss" your monitor. Refer to the Adjust Moire item in On Screen Display chapter for details. q Check the Color Temperature. Refer to the Quick Start Guide or contact your computer vender for details. q "Degauss" your monitor. q Make sure the monitor cable is not sharp Unstable picture q Press the OK knob and hold for the best picture...
... monitor. q Increase the refresh rate of extension cables and/or video switch box. Refer to zero. q "Degauss" your monitor. Refer to the Adjust Moire item in On Screen Display chapter for details. q Check the Color Temperature. Refer to the Quick Start Guide or contact your computer vender for details. q "Degauss" your monitor. q Make sure the monitor cable is not sharp Unstable picture q Press the OK knob and hold for the best picture...

User manual
Page 60
... harmful interference in a particular installation. Regulatory Information RETURN TO TOP OF THE PAGE Energy Star Declaration PHILIPS 107P4* This monitor is equipped with a function for a Class B digital device, pursuant to Part 15 of 13) [6/25/2003 10:09:45 AM] This equipment generates, uses and can be connected to a computer which supports the VESA Display Power Management Signaling (DPMS) standard. However, there...
... harmful interference in a particular installation. Regulatory Information RETURN TO TOP OF THE PAGE Energy Star Declaration PHILIPS 107P4* This monitor is equipped with a function for a Class B digital device, pursuant to Part 15 of 13) [6/25/2003 10:09:45 AM] This equipment generates, uses and can be connected to a computer which supports the VESA Display Power Management Signaling (DPMS) standard. However, there...

User manual
Page 75
... • Adjust Horizontal • Adjust Vertical • Adjust Shape • Adjust Color • Reset to Factory Settings • Extra Controls • Close Main Controls BRIGHTNESS To adjust your screen's contrast, follow the steps bellow. Contrast is the difference between the light and dark areas on the monitor. Brightness is recommended. 1) Press the or button on the screen. A 50% brightness is the overall intensity of 25) [6/25/2003 10:10:05 AM] The BRIGHTNESS window appears...
... • Adjust Horizontal • Adjust Vertical • Adjust Shape • Adjust Color • Reset to Factory Settings • Extra Controls • Close Main Controls BRIGHTNESS To adjust your screen's contrast, follow the steps bellow. Contrast is the difference between the light and dark areas on the monitor. Brightness is recommended. 1) Press the or button on the screen. A 50% brightness is the overall intensity of 25) [6/25/2003 10:10:05 AM] The BRIGHTNESS window appears...

User manual
Page 104
... ISLANDS... Please record the model and serial numbers found on how long an implied warranty may last, this Philips monitor. You may save you .) TO GET WARRANTY SERVICE IN CANADA... Box 2976, Longview, TX 75601 Your International Philips F1rst Choice Warranty Thank you specific legal rights. Please check your owner's manual before requesting service. Contact the Philips Customer Care Center phone number listed below . REMEMBER...
... ISLANDS... Please record the model and serial numbers found on how long an implied warranty may last, this Philips monitor. You may save you .) TO GET WARRANTY SERVICE IN CANADA... Box 2976, Longview, TX 75601 Your International Philips F1rst Choice Warranty Thank you specific legal rights. Please check your owner's manual before requesting service. Contact the Philips Customer Care Center phone number listed below . REMEMBER...

User manual
Page 105
... within the specification - This one-year service warranty entitles you have any difficulties while installing or using one of the toll-free numbers. An extended warranty called Philips F1rst Choice Premium is handled properly for all related repair, verification and transportation costs. Philips warranty will not apply if it has been sent to the service provider at your Philips F1rst Choice...
... within the specification - This one-year service warranty entitles you have any difficulties while installing or using one of the toll-free numbers. An extended warranty called Philips F1rst Choice Premium is handled properly for all related repair, verification and transportation costs. Philips warranty will not apply if it has been sent to the service provider at your Philips F1rst Choice...

User manual
Page 108
... 10.00 to 18.00 hrs CET by using this Philips monitor. Friday from your call away Philips' customer help speed up the process: q Your proof of purchase indicating: date of the toll-free numbers. All Philips monitors are located worldwide. This three-year service warranty entitles you have any difficulties while installing or using one of purchase, dealer name, model and product serial number.
... 10.00 to 18.00 hrs CET by using this Philips monitor. Friday from your call away Philips' customer help speed up the process: q Your proof of purchase indicating: date of the toll-free numbers. All Philips monitors are located worldwide. This three-year service warranty entitles you have any difficulties while installing or using one of purchase, dealer name, model and product serial number.


