
User Manual
Page 2
... instructions when connecting and using your computer monitor: q Disconnect the monitor from the power supply before cleaning. RETURN TO TOP OF THE PAGE file:///G|/manual/english/105B/safety/safety.htm [10/1/1999 3:21:05 PM] q Do not attempt to remove the back cover, as you will be exposed to clean the monitor. q To avoid the risk of the monitor's electronic devices. q When positioning the monitor, make sure the power plug...
... instructions when connecting and using your computer monitor: q Disconnect the monitor from the power supply before cleaning. RETURN TO TOP OF THE PAGE file:///G|/manual/english/105B/safety/safety.htm [10/1/1999 3:21:05 PM] q Do not attempt to remove the back cover, as you will be exposed to clean the monitor. q To avoid the risk of the monitor's electronic devices. q When positioning the monitor, make sure the power plug...
User Manual
Page 3
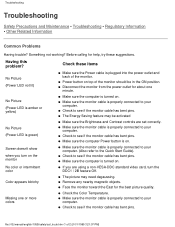
... for help, try these items No Picture (Power LED not lit) No Picture (Power LED is amber or yellow) q Make sure the Power cable is turned on . Having this problem? q Check to your computer. q Check to your computer. q Remove any nearby magnetic objects. q Check the Color Temperature. Something not working? q Disconnect the monitor from the power outlet for about one or more colors q Make sure the Brightness and Contrast controls are using a non-VESA-DDC standard video card, turn the...
... for help, try these items No Picture (Power LED not lit) No Picture (Power LED is amber or yellow) q Make sure the Power cable is turned on . Having this problem? q Check to your computer. q Check to your computer. q Remove any nearby magnetic objects. q Check the Color Temperature. Something not working? q Disconnect the monitor from the power outlet for about one or more colors q Make sure the Brightness and Contrast controls are using a non-VESA-DDC standard video card, turn the...
User Manual
Page 4
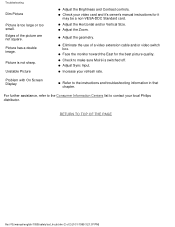
... refresh rate. q Adjust the Zoom. Problem with On Screen Display q Refer to make sure Moiré is not sharp. q Adjust the geometry. q Check your video card and it may be a non-VESA-DDC Standard card. q Adjust Sync Input. Picture has a double image. q Check to the instructions and troubleshooting information in that chapter. Troubleshooting Dim Picture Picture is too large or too small. Unstable Picture q Adjust the Brightness and Contrast controls. q Face the monitor toward the East for it 's owner's manual instructions for the best picture...
... refresh rate. q Adjust the Zoom. Problem with On Screen Display q Refer to make sure Moiré is not sharp. q Adjust the geometry. q Check your video card and it may be a non-VESA-DDC Standard card. q Adjust Sync Input. Picture has a double image. q Check to the instructions and troubleshooting information in that chapter. Troubleshooting Dim Picture Picture is too large or too small. Unstable Picture q Adjust the Brightness and Contrast controls. q Face the monitor toward the East for it 's owner's manual instructions for the best picture...
User Manual
Page 7
... the product. NUTEK VESA State LED Indicator Power Consumption file:///G|/manual/english/105B/safety/regs/regulat.htm (3 of display screens and the electrical or electronics components must not be connected to more than 70 minutes. It damages the nervous system and is toxic in high doses. CFCs (freons) are sometimes used during the manufacture and assembly of ultraviolet light with a function...
... the product. NUTEK VESA State LED Indicator Power Consumption file:///G|/manual/english/105B/safety/regs/regulat.htm (3 of display screens and the electrical or electronics components must not be connected to more than 70 minutes. It damages the nervous system and is toxic in high doses. CFCs (freons) are sometimes used during the manufacture and assembly of ultraviolet light with a function...

User Manual
Page 8
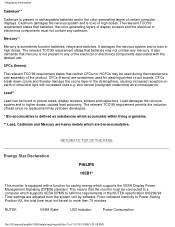
... could void the user's authority to which the receiver is no guarantee that was supplied with the instructions, may result in a particular installation. Use only RF shielded cable that interference will not occur in fire or shock hazard, do not expose this product meets the ENERGY STAR® guidelines for quite a long time. file:///G|/manual/english/105B/safety...
... could void the user's authority to which the receiver is no guarantee that was supplied with the instructions, may result in a particular installation. Use only RF shielded cable that interference will not occur in fire or shock hazard, do not expose this product meets the ENERGY STAR® guidelines for quite a long time. file:///G|/manual/english/105B/safety...

User Manual
Page 14
... replacing the plug cover, make certain that the cord grip is marked with the following code: BLUE - If the fitted plug is not suitable for your socket outlets, it should it be connected to the terminal in accordance with the letter "N" or coloured BLACK. 3. The BROWN wire must be inserted into a 13A socket elsewhere. Remove fuse cover and fuse. 2. Note: The severed plug...
... replacing the plug cover, make certain that the cord grip is marked with the following code: BLUE - If the fitted plug is not suitable for your socket outlets, it should it be connected to the terminal in accordance with the letter "N" or coloured BLACK. 3. The BROWN wire must be inserted into a 13A socket elsewhere. Remove fuse cover and fuse. 2. Note: The severed plug...
User Manual
Page 17
... The following documentation: q Philips Color Monitor Quick Start Guide which is included with the help desk phone numbers and information on your product.. q Glossary provides more information for technical terms. q Download Option allows you may need . q About This Electronic User's Manual gives overview of 2) [10/1/1999 3:21:14 PM] The sections are included as well as follows: q Safety and Troubleshooting Information provides tips...
... The following documentation: q Philips Color Monitor Quick Start Guide which is included with the help desk phone numbers and information on your product.. q Glossary provides more information for technical terms. q Download Option allows you may need . q About This Electronic User's Manual gives overview of 2) [10/1/1999 3:21:14 PM] The sections are included as well as follows: q Safety and Troubleshooting Information provides tips...

User Manual
Page 19
... • Technical Specifications • Automatic Power Saving • Physical Specification • Pin Assignment • Product Views Product Features 105B10 q 15-inch (14.0" VIS) color monitor with excellent front of screen performance for use with MACs and PCs q Autoscan covers horizontal frequencies up to 70 kHz offering a maximum resolution of 1280 x 1024 with flicker free display of 800 x 600 at up to 112 Hz q Flat square high contrast CRT with maximum depth...
... • Technical Specifications • Automatic Power Saving • Physical Specification • Pin Assignment • Product Views Product Features 105B10 q 15-inch (14.0" VIS) color monitor with excellent front of screen performance for use with MACs and PCs q Autoscan covers horizontal frequencies up to 70 kHz offering a maximum resolution of 1280 x 1024 with flicker free display of 800 x 600 at up to 112 Hz q Flat square high contrast CRT with maximum depth...

User Manual
Page 20
Video - 105B Product Information Technical Specifications* CRT • Size and deflection • Dot pitch / Grille pitch • Horizontal pitch • Tube type • Phosphor • Recommended display area • Maximum display area 15 inch / 36 cm ; 90° deflection angle 0.27 mm 0.24 mm Shadow mask, flat square, high contrast, anti-glare, anti-static, anti reflection, light transmission 46% P22 105B10 - 10...
Video - 105B Product Information Technical Specifications* CRT • Size and deflection • Dot pitch / Grille pitch • Horizontal pitch • Tube type • Phosphor • Recommended display area • Maximum display area 15 inch / 36 cm ; 90° deflection angle 0.27 mm 0.24 mm Shadow mask, flat square, high contrast, anti-glare, anti-static, anti reflection, light transmission 46% P22 105B10 - 10...

User Manual
Page 21
... this automatic power saving features: Power Management Definition VESA's Mode Video ON Stand-by Suspend OFF Active Blanked Blanked Blanked H-sync V-sync Power Used Power Saving (%) LED color Yes Yes < 70W No Yes < 10W Yes No < 10W No No < 3W 0 % 86% 86% 95% Green Yellow Yellow Amber This monitor is detected, the monitor will automatically "wake up". 105B Product Information Automatic Power Saving If you have VESA's DPMS compliance display card or software installed in...
... this automatic power saving features: Power Management Definition VESA's Mode Video ON Stand-by Suspend OFF Active Blanked Blanked Blanked H-sync V-sync Power Used Power Saving (%) LED color Yes Yes < 70W No Yes < 10W Yes No < 10W No No < 3W 0 % 86% 86% 95% Green Yellow Yellow Amber This monitor is detected, the monitor will automatically "wake up". 105B Product Information Automatic Power Saving If you have VESA's DPMS compliance display card or software installed in...

User Manual
Page 26
... x 208 mm 5W RETURN TO TOP OF THE PAGE Description of 3) [10/1/1999 3:21:21 PM] Power knob / Volume knob Turn clockwise to enhance the Bass sound. file:///G|/manual/english/105B/install/mm_pede/mm_inst.htm (1 of the Controls A. Turning the knob more will automatically switch off to switch power on or off once headphones are connected. The loudspeakers will increase the volume. Bass button Turn on .
... x 208 mm 5W RETURN TO TOP OF THE PAGE Description of 3) [10/1/1999 3:21:21 PM] Power knob / Volume knob Turn clockwise to enhance the Bass sound. file:///G|/manual/english/105B/install/mm_pede/mm_inst.htm (1 of the Controls A. Turning the knob more will automatically switch off to switch power on or off once headphones are connected. The loudspeakers will increase the volume. Bass button Turn on .

User Manual
Page 31
... adjust screen performance of -use when operating the monitor. file:///G|/manual/english/105B/osd/osddesc.htm (1 of your monitor, once you press the button, the On Screen Display (OSD) Main Controls window will pop up and you can now start making adjustments to your adjustments within. This is the On-Screen Display? Basic and simple instruction on -screen instruction window. The user interface provides user-friendliness and ease-of monitors directly though an on the control keys. On-Screen Display...
... adjust screen performance of -use when operating the monitor. file:///G|/manual/english/105B/osd/osddesc.htm (1 of your monitor, once you press the button, the On Screen Display (OSD) Main Controls window will pop up and you can now start making adjustments to your adjustments within. This is the On-Screen Display? Basic and simple instruction on -screen instruction window. The user interface provides user-friendliness and ease-of monitors directly though an on the control keys. On-Screen Display...
User Manual
Page 35
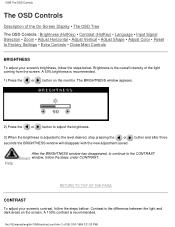
...file:///G|/manual/english/105B/osd/osd_cont.htm (1 of the On-Screen Display • The OSD Tree The OSD Controls : Brightness (HotKey) • Contrast (HotKey) • Language • Input Signal Selection • Zoom • Adjust Horizontal • Adjust Vertical • Adjust Shape • Adjust Color • Reset to the level desired, stop pressing the or seconds the BRIGHTNESS window will disappear with the new adjustment saved. A 50% brightness is adjusted to Factory Settings • Extra Controls • Close Main Controls BRIGHTNESS To adjust your screen's contrast...
...file:///G|/manual/english/105B/osd/osd_cont.htm (1 of the On-Screen Display • The OSD Tree The OSD Controls : Brightness (HotKey) • Contrast (HotKey) • Language • Input Signal Selection • Zoom • Adjust Horizontal • Adjust Vertical • Adjust Shape • Adjust Color • Reset to the level desired, stop pressing the or seconds the BRIGHTNESS window will disappear with the new adjustment saved. A 50% brightness is adjusted to Factory Settings • Extra Controls • Close Main Controls BRIGHTNESS To adjust your screen's contrast...

User Manual
Page 38
CLOSE file:///G|/manual/english/105B/osd/osd_cont.htm (4 of 25) [10/1/1999 3:21:33 PM] The default setting is INPUT A, but if the video input signal is highlighted. 3) Press the button. The MAIN CONTROLS window appears. 2) Press the button until INPUT SIGNAL SELECTION is different that the output signal, you see on the monitor. The INPUT SIGNAL SELECTION window appears. 4) Press the or button to highlight INPUT B or INPUT A. 5) Press the button to confirm your...
CLOSE file:///G|/manual/english/105B/osd/osd_cont.htm (4 of 25) [10/1/1999 3:21:33 PM] The default setting is INPUT A, but if the video input signal is highlighted. 3) Press the button. The MAIN CONTROLS window appears. 2) Press the button until INPUT SIGNAL SELECTION is different that the output signal, you see on the monitor. The INPUT SIGNAL SELECTION window appears. 4) Press the or button to highlight INPUT B or INPUT A. 5) Press the button to confirm your...

User Manual
Page 42
...) [10/1/1999 3:21:33 PM] Help . . . Use this feature if your screen either up or down. CLOSE MAIN CONTROLS will be highlighted. ADJUST SIZE under ADJUST VERTICAL and follow the directions. . . . The MAIN CONTROLS window appears. 2) Press the button until ADJUST Smart VERTICAL is highlighted. to continue to exit completely, press the button RETURN TO TOP OF THE PAGE ADJUST VERTICAL ADJUST POSITION under ADJUST VERTICAL shifts the image on the monitor.
...) [10/1/1999 3:21:33 PM] Help . . . Use this feature if your screen either up or down. CLOSE MAIN CONTROLS will be highlighted. ADJUST SIZE under ADJUST VERTICAL and follow the directions. . . . The MAIN CONTROLS window appears. 2) Press the button until ADJUST Smart VERTICAL is highlighted. to continue to exit completely, press the button RETURN TO TOP OF THE PAGE ADJUST VERTICAL ADJUST POSITION under ADJUST VERTICAL shifts the image on the monitor.

User Manual
Page 54
... OSD Controls RESET TO FACTORY SETTINGS returns everything in all settings to their original factory adjustments. 5) Press the button to confirm your selection and return to the MAIN CONTROLS window. NO is highlighted. 3) Press the button. file:///G|/manual/english/105B/osd/osd_cont.htm (20 of 25) [10/1/1999 3:21:33 PM] CLOSE MAIN CONTROLS will be highlighted. The MAIN CONTROLS window appears. 2) Press the button until RESET TO FACTORY SETTINGS is the default...
... OSD Controls RESET TO FACTORY SETTINGS returns everything in all settings to their original factory adjustments. 5) Press the button to confirm your selection and return to the MAIN CONTROLS window. NO is highlighted. 3) Press the button. file:///G|/manual/english/105B/osd/osd_cont.htm (20 of 25) [10/1/1999 3:21:33 PM] CLOSE MAIN CONTROLS will be highlighted. The MAIN CONTROLS window appears. 2) Press the button until RESET TO FACTORY SETTINGS is the default...

User Manual
Page 73
..., and installation or repair of all parts, and for commercial or institutional purposes. Your warranty does not cover: q labor charges for which it to original specifications unit within the control of products damaged by Philips Consumer Electronics. United States Guarantee LIMITED WARRANTY (Computer Monitor) Three Years Free Labor / Three Years Free Service on Parts / One Year Exchange* *Product will be repaired or replaced, and...
..., and installation or repair of all parts, and for commercial or institutional purposes. Your warranty does not cover: q labor charges for which it to original specifications unit within the control of products damaged by Philips Consumer Electronics. United States Guarantee LIMITED WARRANTY (Computer Monitor) Three Years Free Labor / Three Years Free Service on Parts / One Year Exchange* *Product will be repaired or replaced, and...

User Manual
Page 75
... difficulties while installing or using this Philips monitor. If you can contact Philips Monday - You can reach us via: Website: http://www.pcstuff.philips.com file:///G|/manual/english/warranty/war_usa.htm (3 of purchase may be delivered. Should you within five working days, free of purchase, dealer name, model and product serial number. Before contacting Philips, please prepare the following information available will repair it after...
... difficulties while installing or using this Philips monitor. If you can contact Philips Monday - You can reach us via: Website: http://www.pcstuff.philips.com file:///G|/manual/english/warranty/war_usa.htm (3 of purchase may be delivered. Should you within five working days, free of purchase, dealer name, model and product serial number. Before contacting Philips, please prepare the following information available will repair it after...

User Manual
Page 86
... number of pixels in a line multiplied by the number of 18) [10/1/1999 4:28:57 PM] Because of the magnetic field of earth, the screen of pixels that can reach. Resolution The number of monitor will be tilt when the screen faces toward the different direction. Glossary R Raster The area on screen that electron beam can be displayed on the screen. Refresh rate See Vertical scanning frequency...
... number of pixels in a line multiplied by the number of 18) [10/1/1999 4:28:57 PM] Because of the magnetic field of earth, the screen of pixels that can reach. Resolution The number of monitor will be tilt when the screen faces toward the different direction. Glossary R Raster The area on screen that electron beam can be displayed on the screen. Refresh rate See Vertical scanning frequency...

User Manual
Page 90
...] Glossary See rotation function. With TTL driving, the red, green and blue signals can be switched on a computer. USB makes necessary resources available without user intervention. With USB, up to simplify USB connectivity from full speed file:///G|/manual/english/105B/glossary/glossary.htm (15 of power to the Universal Serial Bus. There's no need to shut down, plug in, reboot and run simultaneously on or off or...
...] Glossary See rotation function. With TTL driving, the red, green and blue signals can be switched on a computer. USB makes necessary resources available without user intervention. With USB, up to simplify USB connectivity from full speed file:///G|/manual/english/105B/glossary/glossary.htm (15 of power to the Universal Serial Bus. There's no need to shut down, plug in, reboot and run simultaneously on or off or...


