User manual (English)
Page 22
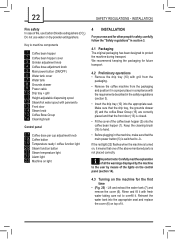
...the requirements described in the safety regulations (section 3). • Insert the drip tray (10) into the appropriate seat and replace the cover (6) on light 4 INSTALLATION For your own and for the first time • (Fig. 25) - Rinse and fill it . We recommend keeping the packaging for ...into the appropriate seat. Important note: Carefully read the explanation of all the warnings displayed by the machine to the user by means of the lights on the control panel (section 14). 4.3 Turning on the machine for other people's safety, carefully follow the "Safety regulations" in section ...
...the requirements described in the safety regulations (section 3). • Insert the drip tray (10) into the appropriate seat and replace the cover (6) on light 4 INSTALLATION For your own and for the first time • (Fig. 25) - Rinse and fill it . We recommend keeping the packaging for ...into the appropriate seat. Important note: Carefully read the explanation of all the warnings displayed by the machine to the user by means of the lights on the control panel (section 14). 4.3 Turning on the machine for other people's safety, carefully follow the "Safety regulations" in section ...
User manual (English)
Page 23
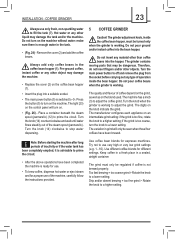
...: Before starting the machine after long periods of inactivity or if the water tank has been completely emptied, it is advisable to a lower setting; The light (23) on the control panel will only be regulated if coffee is switched to a lower setting. The grinder contains moving parts that may damage the...
...: Before starting the machine after long periods of inactivity or if the water tank has been completely emptied, it is advisable to a lower setting; The light (23) on the control panel will only be regulated if coffee is switched to a lower setting. The grinder contains moving parts that may damage the...
User manual (English)
Page 24
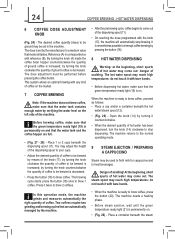
.... • (Fig. 27 - 28) - The machine needs a heating phase. • Before steam ejection, wait until the green temperature ready light (21) is increased; 24 COFFEE BREWING - The dose is nevertheless possible to be performed before pressing the coffee button. Place a container beneath the ...the knob clockwise the quantity of hot water has been dispensed, turn the knob (14) clockwise to a medium value that the green temperature ready light (19) is decreased. Press it counterclockwise. • When the desired quantity of ground coffee is permanently on . • (Fig. 26...
.... • (Fig. 27 - 28) - The machine needs a heating phase. • Before steam ejection, wait until the green temperature ready light (21) is increased; 24 COFFEE BREWING - The dose is nevertheless possible to be performed before pressing the coffee button. Place a container beneath the ...the knob clockwise the quantity of hot water has been dispensed, turn the knob (14) clockwise to a medium value that the green temperature ready light (19) is decreased. Press it counterclockwise. • When the desired quantity of ground coffee is permanently on . • (Fig. 26...
User manual (English)
Page 25
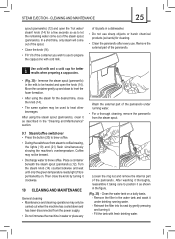
... when the machine has cooled down to level the foam formation. • After using the steam for a few seconds so as to coffee brewing, the lights (19) and (21) flash simultaneously showing the machine's overtemperature. Remove the filter in water or place any Loosen the ring nut and remove the internal... the knob (14). STEAM EJECTION - Fill the tank with cold milk. Turn the steam knob (14) counterclockwise and wait until only the green temperature ready light (19) is permanently on a daily basis. - Clean the water tank on .
... when the machine has cooled down to level the foam formation. • After using the steam for a few seconds so as to coffee brewing, the lights (19) and (21) flash simultaneously showing the machine's overtemperature. Remove the filter in water or place any Loosen the ring nut and remove the internal... the knob (14). STEAM EJECTION - Fill the tank with cold milk. Turn the steam knob (14) counterclockwise and wait until only the green temperature ready light (19) is permanently on a daily basis. - Clean the water tank on .
User manual (English)
Page 28
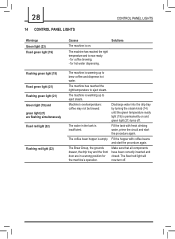
... coffee bean hopper is insufficient. Discharge water into the drip tray by turning the steam knob (14) until the green temperature ready light (19) is permanently on . Make sure that all components have been correctly inserted and closed. The machine is warming up to ...tank with coffee beans and start the procedure again. 28 CONTROL PANEL LIGHTS 14 CONTROL PANEL LIGHTS Warnings Green light (23) Fixed green light (19) Flashing green light (19) Fixed green light (21) Flashing green light (21) Green light (19) and green light (21) are in the tank is empty. for coffee brewing; -...
... coffee bean hopper is insufficient. Discharge water into the drip tray by turning the steam knob (14) until the green temperature ready light (19) is permanently on . Make sure that all components have been correctly inserted and closed. The machine is warming up to ...tank with coffee beans and start the procedure again. 28 CONTROL PANEL LIGHTS 14 CONTROL PANEL LIGHTS Warnings Green light (23) Fixed green light (19) Flashing green light (19) Fixed green light (21) Flashing green light (21) Green light (19) and green light (21) are in the tank is empty. for coffee brewing; -...
