

Owner's Manual
Page 9
... bobbin winder 25 and wind it a few times clockwise around the bobbin and press it to the right and through the needle Only with metal sewing foot! Place bobbin on the dual feed. Push the full bobbin to the left and cut the thread using thread cutter 37. If the spool has... the front until it engages. - A program between 00 and 99 must he selected. Press the full bobbin to the front Raise sewing foot. Switch on bobbin winder 25. Engaging the sewing action: hold the hand wheel firmly and turn disc 4 to the rear Then turn the hand wheel to wind the bobbin. Set...
... bobbin winder 25 and wind it a few times clockwise around the bobbin and press it to the right and through the needle Only with metal sewing foot! Place bobbin on the dual feed. Push the full bobbin to the left and cut the thread using thread cutter 37. If the spool has... the front until it engages. - A program between 00 and 99 must he selected. Press the full bobbin to the front Raise sewing foot. Switch on bobbin winder 25. Engaging the sewing action: hold the hand wheel firmly and turn disc 4 to the rear Then turn the hand wheel to wind the bobbin. Set...

Owner's Manual
Page 11
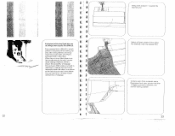
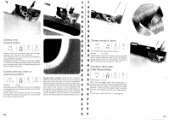
... eye. R ER /L / ER ER 0 ci 1' 0 N/ N Place the needle thread behind hook 13 and hold it . Swing threader to rear, releasing thread at top position Raise sewing foot.
... eye. R ER /L / ER ER 0 ci 1' 0 N/ N Place the needle thread behind hook 13 and hold it . Swing threader to rear, releasing thread at top position Raise sewing foot.
Owner's Manual
Page 13
... fabric is automatic with Pfaffs exclusive built-in dual feed. F Exclusive built-in correct sewing position / 23 Switch ott main switch 9. You can sew up to 12 fabric layers without fear of slippage The exclusive Pfaff snlutiun ist built in dual feed, a walking foot that simul taneously feeds ...the fabric from above as the feed dog moves it difficult to match patterns and plaids when sewing slip pery silks and synthetics But easy matching...
... fabric is automatic with Pfaffs exclusive built-in dual feed. F Exclusive built-in correct sewing position / 23 Switch ott main switch 9. You can sew up to 12 fabric layers without fear of slippage The exclusive Pfaff snlutiun ist built in dual feed, a walking foot that simul taneously feeds ...the fabric from above as the feed dog moves it difficult to match patterns and plaids when sewing slip pery silks and synthetics But easy matching...
Owner's Manual
Page 14
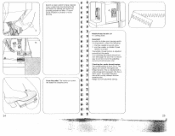
... presser bar lifter 17 down wards. If on main switch 9, have material cover needle hole (see page 16) you press, the faster the Creative sews. 4 Needle thread tension 39 A = setting mark Important! This is from 3 to 5. and the needle- Checking the needle thread tension:...is correct. The bobbin thread tension is for buttonhole sewing \ J 24 25 - .. ... - The thread interlace should lie exactly between the two material plies. N: Switch on checking the bobbin thread ten sion (see illustration B) and lower the sewing foot onto it by small amounts only. Position A of...
... presser bar lifter 17 down wards. If on main switch 9, have material cover needle hole (see page 16) you press, the faster the Creative sews. 4 Needle thread tension 39 A = setting mark Important! This is from 3 to 5. and the needle- Checking the needle thread tension:...is correct. The bobbin thread tension is for buttonhole sewing \ J 24 25 - .. ... - The thread interlace should lie exactly between the two material plies. N: Switch on checking the bobbin thread ten sion (see illustration B) and lower the sewing foot onto it by small amounts only. Position A of...

Owner's Manual
Page 20
...mendations appear in the display beneath the three symbols on the computer: A: dual feed engaged disengaged ic B: needle thread tension C: number of sewing foot (standard accessories) Recommendations made in this book may differ from 00 to 99, and for letters and figures the machine will indicate recommended... sewing modes with regard to the starting point. 2 The last program in a combination appears in the machine display. Q / O4OO Setting the pattern...
...mendations appear in the display beneath the three symbols on the computer: A: dual feed engaged disengaged ic B: needle thread tension C: number of sewing foot (standard accessories) Recommendations made in this book may differ from 00 to 99, and for letters and figures the machine will indicate recommended... sewing modes with regard to the starting point. 2 The last program in a combination appears in the machine display. Q / O4OO Setting the pattern...

Owner's Manual
Page 21
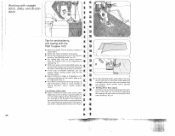
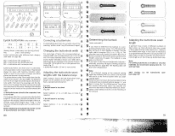
Underneath the box is an oacscheoswsosryhocwomtopaarrtrmanegnet B. sewing foot 5A Buttonhole foot - 6 Darning foot 7 Hemming foot 8 Edge guide - Illustration sewing feet, needles and bobbins in the accessory box. CA I .. 81°1 0 I The work ... 8 9 S 8122 4 7 q 8" q -, 41 A B N illltH Sewtng feet (normal accessories) OA Normal sewing foot 1A Fancy stitch foot for dual feed - 2A Fancy stitch foot (not for dual teed) 3 3 4 Blind stitch and overlock foot Zipper and edge- 4 N F. : Take hold of the work support can be lifted out (A). Open its lid and...
Underneath the box is an oacscheoswsosryhocwomtopaarrtrmanegnet B. sewing foot 5A Buttonhole foot - 6 Darning foot 7 Hemming foot 8 Edge guide - Illustration sewing feet, needles and bobbins in the accessory box. CA I .. 81°1 0 I The work ... 8 9 S 8122 4 7 q 8" q -, 41 A B N illltH Sewtng feet (normal accessories) OA Normal sewing foot 1A Fancy stitch foot for dual feed - 2A Fancy stitch foot (not for dual teed) 3 3 4 Blind stitch and overlock foot Zipper and edge- 4 N F. : Take hold of the work support can be lifted out (A). Open its lid and...

Owner's Manual
Page 23
...98-694 823-00 For hemming edges 93-694 873-00 For hemming edges Knit edge sewing foot Teflon sewing loot 93-042 957-91 93-036 917-91 For sowing knitted fabrics For sewing plastic, j synthetic materials and leather Special accessories The special accessories listed below are intended ...for special sewing work (needle size 80, for fine cording needle size 70) ER ER ER Fringe sewing foot 93-042 943-91 Straight-stitch foot with round needle hole Needle plate with round needle hole 98-694 821...
...98-694 823-00 For hemming edges 93-694 873-00 For hemming edges Knit edge sewing foot Teflon sewing loot 93-042 957-91 93-036 917-91 For sowing knitted fabrics For sewing plastic, j synthetic materials and leather Special accessories The special accessories listed below are intended ...for special sewing work (needle size 80, for fine cording needle size 70) ER ER ER Fringe sewing foot 93-042 943-91 Straight-stitch foot with round needle hole Needle plate with round needle hole 98-694 821...
Owner's Manual
Page 24
... 2) • If you begin ning of the seam, we recommend supporting the sewing foot with straight stitch, utility- and stretch stitch ER ER ER ER 1 ER 2 Tips for embroidering and sewing with the left needle position. • Exact stitching of edges is supported in... soft materials, a round-hole needle plate and a straight sewing foot with round needle hole can achieve better sewing results with the ER Pfaff Creative 1472 ER • Betore you have to ensure uniform feeding at the beginning of sewing (Fig 1) • Withcrossseams,suchaslap-felledseamS,We recommend cuffing ...
... 2) • If you begin ning of the seam, we recommend supporting the sewing foot with straight stitch, utility- and stretch stitch ER ER ER ER 1 ER 2 Tips for embroidering and sewing with the left needle position. • Exact stitching of edges is supported in... soft materials, a round-hole needle plate and a straight sewing foot with round needle hole can achieve better sewing results with the ER Pfaff Creative 1472 ER • Betore you have to ensure uniform feeding at the beginning of sewing (Fig 1) • Withcrossseams,suchaslap-felledseamS,We recommend cuffing ...

Owner's Manual
Page 25
Select a longer or shorter stitch length according to lower the presser bar litter again! Do not forget to the work underthe sewing foot. j ER ER ER ER 2 ER ER '- 0 ER ER ER ER ER ER L i i iii IIzI.j'I 'd 3-5 OA Program 00 is a straight stitch with the ... leD to place the work required by pressing stitch length keys 7. With key8 the needle position can he sewn in left position. Raise the sewing foot higher for proqram combinations. i i pro 8 Certain seams are used (special accessories) Program 01 is a straight stitch with a different needle position (see ...
Select a longer or shorter stitch length according to lower the presser bar litter again! Do not forget to the work underthe sewing foot. j ER ER ER ER 2 ER ER '- 0 ER ER ER ER ER ER L i i iii IIzI.j'I 'd 3-5 OA Program 00 is a straight stitch with the ... leD to place the work required by pressing stitch length keys 7. With key8 the needle position can he sewn in left position. Raise the sewing foot higher for proqram combinations. i i pro 8 Certain seams are used (special accessories) Program 01 is a straight stitch with a different needle position (see ...
Owner's Manual
Page 27
...sides facing (Fig 4b). First workstep Place the two pieces of fabric one on the face side of the tabric, using the edge of the sewing foot as special acces sories for stitching margins of 4 5 nod 6.5mm 54 3 55 and stitched down along the edge Pull both fabric plies apart... allowance over to appear on the face side of the lap-seamed fabric, the two pieces of fabric must he placed together with 3 the ordinary sewing foot. -r 3 €3 €3 a b 4€ 3 Lap-felling imitation lap seam sewn with their reverse sides facing (Fig 4a) If o1 yn one lion of ...
...sides facing (Fig 4b). First workstep Place the two pieces of fabric one on the face side of the tabric, using the edge of the sewing foot as special acces sories for stitching margins of 4 5 nod 6.5mm 54 3 55 and stitched down along the edge Pull both fabric plies apart... allowance over to appear on the face side of the lap-seamed fabric, the two pieces of fabric must he placed together with 3 the ordinary sewing foot. -r 3 €3 €3 a b 4€ 3 Lap-felling imitation lap seam sewn with their reverse sides facing (Fig 4a) If o1 yn one lion of ...

Owner's Manual
Page 29
...length 3-4 mm How to insert the shirring foot Insert the shrrinq foot with its original width during sewing, by this means you determine the degree of gathering How to disengage the foot: Raise the presser bar lifter Disengage the sewing foot Press up and hold the presser bar lifter ...and remove the sewing foot to the rear 60 'H R Smocking with shirring foot (cpecial accessory) prog 00 -- free on bobbin) Needle thread: sewing thread For sewing with the shirring foot in one...
...length 3-4 mm How to insert the shirring foot Insert the shrrinq foot with its original width during sewing, by this means you determine the degree of gathering How to disengage the foot: Raise the presser bar lifter Disengage the sewing foot Press up and hold the presser bar lifter ...and remove the sewing foot to the rear 60 'H R Smocking with shirring foot (cpecial accessory) prog 00 -- free on bobbin) Needle thread: sewing thread For sewing with the shirring foot in one...

Owner's Manual
Page 30
... (Figs 1 and 2) Faggotting stitch R for the appli cation For this work it is possible to repair elastic tapes, nrjoin them under the sewing foot with overlock foot For materials which contract during sewing In this means you will receive a beautiful smooth seam (Fig. 2). r I r /- ''IN ,.!c ,\/\,t '' 62 3 4 6 R R ...- Overcasting raw edges with the required zigzag stitch The material enters at the red marking on the sewing foot (Fig 2). • Preparation of the sewing foot (overlock foot No. 3) Turn screw A fully to the front The red mark B" is then on underwear....
... (Figs 1 and 2) Faggotting stitch R for the appli cation For this work it is possible to repair elastic tapes, nrjoin them under the sewing foot with overlock foot For materials which contract during sewing In this means you will receive a beautiful smooth seam (Fig. 2). r I r /- ''IN ,.!c ,\/\,t '' 62 3 4 6 R R ...- Overcasting raw edges with the required zigzag stitch The material enters at the red marking on the sewing foot (Fig 2). • Preparation of the sewing foot (overlock foot No. 3) Turn screw A fully to the front The red mark B" is then on underwear....
Owner's Manual
Page 33
The Pfaff Creative 1472 offers a selection of diffe rent elastic closing and serging seams from face side The raw edges of the cutout. F Closed overlock stitch prog -- (J I [JJ 21 25 3-5 * F * Knit-edge foot (pecial accessory> Needle; 70 or 80 F Fashioned knit parts can easily be sewn together and serged in... (Fig. 3) In order to avoid waviness in the case of loosely 26 35 3 SIllch lengfh 3 0 mm Place the raw edges undor the sewing foot, as shown in Fig 2 Make sure the needle stitches just beyond the fabric edge, as it (Fig 1) F Overlock stitch with Closed overlock stitch...
The Pfaff Creative 1472 offers a selection of diffe rent elastic closing and serging seams from face side The raw edges of the cutout. F Closed overlock stitch prog -- (J I [JJ 21 25 3-5 * F * Knit-edge foot (pecial accessory> Needle; 70 or 80 F Fashioned knit parts can easily be sewn together and serged in... (Fig. 3) In order to avoid waviness in the case of loosely 26 35 3 SIllch lengfh 3 0 mm Place the raw edges undor the sewing foot, as shown in Fig 2 Make sure the needle stitches just beyond the fabric edge, as it (Fig 1) F Overlock stitch with Closed overlock stitch...

Owner's Manual
Page 35
...the folded binding over the material edges. a) or i3 catches only one thread in place, if required Then under the bl'nrtstitch foot and sew, making sure he folded fabric edge runs along the bias tape Place the raw edge in the groove of stitch is wrappect automatically ... scroll of edge guide 'B' by turning regulating screw "A" so that the needle enters 1 to the rear Set the hinder in such a way that the needle Sewing foot Pro gram Stitch length: Binder (special accessoiy) 00 2.5 mm, (Fig. II iit /1 / mliii 7' - Edge-binding with the binder b Before you start hemming...
...the folded binding over the material edges. a) or i3 catches only one thread in place, if required Then under the bl'nrtstitch foot and sew, making sure he folded fabric edge runs along the bias tape Place the raw edge in the groove of stitch is wrappect automatically ... scroll of edge guide 'B' by turning regulating screw "A" so that the needle enters 1 to the rear Set the hinder in such a way that the needle Sewing foot Pro gram Stitch length: Binder (special accessoiy) 00 2.5 mm, (Fig. II iit /1 / mliii 7' - Edge-binding with the binder b Before you start hemming...

Owner's Manual
Page 36
...with elastic stitch prog 13a Depending on the fabric, the darn may turn out one-sided If so, this can be grammed 7 The Pfaff Crea tive then automatically stitches over it with the selected stitch To make the patch mere durable you wish to change the programmed dar length... program 94 is wider than the damaged area. Inserting patches prog 13a --- frayed edges and small holes. The programmed darn size can sew a second seam at sewing foot width from the first Afterwards cut away the damaged material en the inside IFig 2) Darning torn fabrics prog (tJ 13al5 35 PA For...
...with elastic stitch prog 13a Depending on the fabric, the darn may turn out one-sided If so, this can be grammed 7 The Pfaff Crea tive then automatically stitches over it with the selected stitch To make the patch mere durable you wish to change the programmed dar length... program 94 is wider than the damaged area. Inserting patches prog 13a --- frayed edges and small holes. The programmed darn size can sew a second seam at sewing foot width from the first Afterwards cut away the damaged material en the inside IFig 2) Darning torn fabrics prog (tJ 13al5 35 PA For...

Owner's Manual
Page 38
... of the zipper parallel to the edge and at the required depth, leave the needle down in the material, raise the sewing foot and open the zipper (Fig. 5), lower the foot again and sew to the end of zipper, left zipper chain (Fig. 2). The zipper teeth move along the fabric edge (Fig 3). Then ...in place according to the left of the seam, leave the needle down • Snap the zipper foot in the material, raise the sewing foot, open the zipper. Snap the zipper foot in at a narrow depth Sew about half the seam at the same distance as possihlr to the zipper, select program 01 instead ...
... of the zipper parallel to the edge and at the required depth, leave the needle down in the material, raise the sewing foot and open the zipper (Fig. 5), lower the foot again and sew to the end of zipper, left zipper chain (Fig. 2). The zipper teeth move along the fabric edge (Fig 3). Then ...in place according to the left of the seam, leave the needle down • Snap the zipper foot in the material, raise the sewing foot, open the zipper. Snap the zipper foot in at a narrow depth Sew about half the seam at the same distance as possihlr to the zipper, select program 01 instead ...

Owner's Manual
Page 41
..., stitch by stitch, in order to maintain the same button hole length as described on knitted or very thin materials we recommend sewing foot No. 1 A R and dual feed. Now. Now the bLittonhole is stored Without having to the last bartack One zigzag stitch before the end of... wilt flash (Fig. 1). • Before beginning the buttonhole pull the run ner of the cut the buttonholes open (see page 80. The machine then automatically sews the first bartack and the return seam (Fig. 2b). L' WPT ihiI [WS'T POf22 8>7 o 0 ?\ /;) : a b C 7J /n/J'[iJ prog 19 44 \z9 Linen buttonhole, prog. ...
..., stitch by stitch, in order to maintain the same button hole length as described on knitted or very thin materials we recommend sewing foot No. 1 A R and dual feed. Now. Now the bLittonhole is stored Without having to the last bartack One zigzag stitch before the end of... wilt flash (Fig. 1). • Before beginning the buttonhole pull the run ner of the cut the buttonholes open (see page 80. The machine then automatically sews the first bartack and the return seam (Fig. 2b). L' WPT ihiI [WS'T POf22 8>7 o 0 ?\ /;) : a b C 7J /n/J'[iJ prog 19 44 \z9 Linen buttonhole, prog. ...

Owner's Manual
Page 43
... 5 the left upper segment of six-owing to program the buttonhole for light materials a narrow one R segment flashes (Fig. 3) and you sew buttonholes on knitted or very thin materials we recommend sewing foot No. 1 A and dual feed. ""F: 4 I tLTTi1ThTTIIL. '° 22 8 7° I h F: . Without having to the right one (Fig. 5). • Press pattern start" key...
... 5 the left upper segment of six-owing to program the buttonhole for light materials a narrow one R segment flashes (Fig. 3) and you sew buttonholes on knitted or very thin materials we recommend sewing foot No. 1 A and dual feed. ""F: 4 I tLTTi1ThTTIIL. '° 22 8 7° I h F: . Without having to the right one (Fig. 5). • Press pattern start" key...
Owner's Manual
Page 45
... ttashes in the bartack determining mode and have selected hartack design "a". Note: If you interrupt sewing at the reduced sewing speed by pressing "pattern start" key 26 and sew it by releasing the foot control, the machine will automatically sew the selected but tonhole using stitch-length keys 7 (Fig 1) The machine will return to the... determine the bartack in the display. Select the length of the cut the buttonholes open (see table on knitted or very thin materials we recommend sewing foot No. 1 A and dual feed. Example: -
... ttashes in the bartack determining mode and have selected hartack design "a". Note: If you interrupt sewing at the reduced sewing speed by pressing "pattern start" key 26 and sew it by releasing the foot control, the machine will automatically sew the selected but tonhole using stitch-length keys 7 (Fig 1) The machine will return to the... determine the bartack in the display. Select the length of the cut the buttonholes open (see table on knitted or very thin materials we recommend sewing foot No. 1 A and dual feed. Example: -

Owner's Manual
Page 46
...machine starts sewrng slowly (at the enrt of the hartack, pull them off anrt lower the sewing foot On normal fabrics ttre pimp threads can be • Before you use, ltre wider the ... must he selected to the left of the curve), take the gimp threart from chownq at ttr After sewing, cut them taut cod cut the buttonholes open (see page 94). rnafei ala, it is pocarhie that... gimp threads ire sewrr in needle plate cutout C' of the (rut fonhole runner (Fig 71 • Sew the curve aurd when the machine has again reached its nnnmal speed - • pull the thread taut ...
...machine starts sewrng slowly (at the enrt of the hartack, pull them off anrt lower the sewing foot On normal fabrics ttre pimp threads can be • Before you use, ltre wider the ... must he selected to the left of the curve), take the gimp threart from chownq at ttr After sewing, cut them taut cod cut the buttonholes open (see page 94). rnafei ala, it is pocarhie that... gimp threads ire sewrr in needle plate cutout C' of the (rut fonhole runner (Fig 71 • Sew the curve aurd when the machine has again reached its nnnmal speed - • pull the thread taut ...


