

Owner's Manual
Page 3
Parts of the coverstyle 1 Upper needle-thread tension 2 Upper needle-thread tension 3 Carry handle 4 Thread tension/upper looper thread 5 Thread tension/lower looper thread 6 Thread tension/two-thread chainstitch looper/cover stitch looper 7 Looper cover 8 Blade guard 9 Looper disengaging lever 10 Standard presser foot 11 Needle plate 12 Swivel plate 13 Adjusting knob for seam width 14 Seam width viewing window 15 Needle holder 16 Sewing light cover 17 Adjusting knob for presser foot pressure 18 Upper overedge looper 19 Lower overedge looper 20 Two-thread chainstitch...
Parts of the coverstyle 1 Upper needle-thread tension 2 Upper needle-thread tension 3 Carry handle 4 Thread tension/upper looper thread 5 Thread tension/lower looper thread 6 Thread tension/two-thread chainstitch looper/cover stitch looper 7 Looper cover 8 Blade guard 9 Looper disengaging lever 10 Standard presser foot 11 Needle plate 12 Swivel plate 13 Adjusting knob for seam width 14 Seam width viewing window 15 Needle holder 16 Sewing light cover 17 Adjusting knob for presser foot pressure 18 Upper overedge looper 19 Lower overedge looper 20 Two-thread chainstitch...

Owner's Manual
Page 4
Accessory box Open the accessory box 47 by setting a higher differential feed and adjusting the stitch length. Sewing: 1. Cut a strip of the box inwards. Attach the Strap and Belt Loop Foot L to create straps and belt loops with a cover stitch. Set the machine for a 2-needle coverhem wide or a 3-needle coverhem. 2. Snap on thread guide 5 Cleaning brush 6 Screw driver 7 Machine oil 8 Needle threader 9 Needle inserting tool 10 Wrench 11 Replacement upper blade 12 Edge guide 13 Tweezers 14 Allen key 15 Converter Gathering/Shirring...
Accessory box Open the accessory box 47 by setting a higher differential feed and adjusting the stitch length. Sewing: 1. Cut a strip of the box inwards. Attach the Strap and Belt Loop Foot L to create straps and belt loops with a cover stitch. Set the machine for a 2-needle coverhem wide or a 3-needle coverhem. 2. Snap on thread guide 5 Cleaning brush 6 Screw driver 7 Machine oil 8 Needle threader 9 Needle inserting tool 10 Wrench 11 Replacement upper blade 12 Edge guide 13 Tweezers 14 Allen key 15 Converter Gathering/Shirring...
Owner's Manual
Page 5
... threading needle, changing needle, threading bobbin, or changing presser foot, etc. • Always unplug sewing machine from the electric outlet immediately after using this sewing machine only for examination, repair, electrical or mechanical adjustment. • Never operate the sewing machine with any object into water. Special care is being administrated. • To disconnect, turn all controls to the off ("0") when making any other user servicing adjustments mentioned in the instruction manual. • Never drop or insert any air openings...
... threading needle, changing needle, threading bobbin, or changing presser foot, etc. • Always unplug sewing machine from the electric outlet immediately after using this sewing machine only for examination, repair, electrical or mechanical adjustment. • Never operate the sewing machine with any object into water. Special care is being administrated. • To disconnect, turn all controls to the off ("0") when making any other user servicing adjustments mentioned in the instruction manual. • Never drop or insert any air openings...
Owner's Manual
Page 6
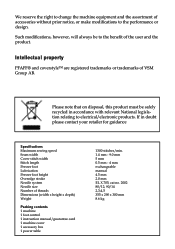
... 1 machine 1 foot control 1 instruction manual/guarantee card 1 machine cover 1 accessory box 1 power table 1300 stitches/min. 1.4 mm - 9.0 mm 5 mm 0.5 mm - 4 mm exchangeable manual 4.5 mm 2.0 mm EL X 705, cat no. 2002 80/12, 90/14 2,3,4,5 355 x 290 x 300 mm 8.6 kg Such modifications, however, will always be safely recycled in doubt please contact your retailer for guidance Specifications Maximum sewing speed Seam width Cover stitch width Stitch length Presser foot...
... 1 machine 1 foot control 1 instruction manual/guarantee card 1 machine cover 1 accessory box 1 power table 1300 stitches/min. 1.4 mm - 9.0 mm 5 mm 0.5 mm - 4 mm exchangeable manual 4.5 mm 2.0 mm EL X 705, cat no. 2002 80/12, 90/14 2,3,4,5 355 x 290 x 300 mm 8.6 kg Such modifications, however, will always be safely recycled in doubt please contact your retailer for guidance Specifications Maximum sewing speed Seam width Cover stitch width Stitch length Presser foot...

Owner's Manual
Page 8
... ...7 Light bulb (sewing lamp), changing ...60 Loopercover ...8 Lubricating the machine ...58 Machine cover ...6 Maintenance ...58 - 60 Needle holder ...13 Needle inserting tool ...13 Needle plate disengaging lever...38 Needle plate, removing ...38 Needle position ...12 Needle threader ...25 Needle, changing ...13 Power table ...35 Presser foot lifter ...10 Presser foot pressure...28 Presser foot...11 Presser foot, changing ...11 Program overview ...40 - 43 Rubber feet, cleaning ...58 Safety instructions...1, 2 Seam width adjusting knob ...33 Seam width viewing window ...33 Seam width, setting...
... ...7 Light bulb (sewing lamp), changing ...60 Loopercover ...8 Lubricating the machine ...58 Machine cover ...6 Maintenance ...58 - 60 Needle holder ...13 Needle inserting tool ...13 Needle plate disengaging lever...38 Needle plate, removing ...38 Needle position ...12 Needle threader ...25 Needle, changing ...13 Power table ...35 Presser foot lifter ...10 Presser foot pressure...28 Presser foot...11 Presser foot, changing ...11 Program overview ...40 - 43 Rubber feet, cleaning ...58 Safety instructions...1, 2 Seam width adjusting knob ...33 Seam width viewing window ...33 Seam width, setting...
Owner's Manual
Page 9
Contents Page Sewing problems and their solutions ...61 Spool disc ...10 Spool holder ...9 Stitch formation correction measures 46 - 56 Stitch length adjustment knob ...38 Stitch length, adjusting ...38 Stitch width latch, swivelling ...31 Telescoping thread guide ...9 Thread chain cutter ...29 Thread chart ...57 Thread guide, clip on...10 Thread net ...9 Thread tensions, setting ...39 Thread unreeling disc...9 Threading aid for the 2 thread chain stitch looped/cover stitch looped 19, 21 Threading paths/overview ...26 - 28 Threading the 2 thread chain stitch looped/cover stitch looped (...
Contents Page Sewing problems and their solutions ...61 Spool disc ...10 Spool holder ...9 Stitch formation correction measures 46 - 56 Stitch length adjustment knob ...38 Stitch length, adjusting ...38 Stitch width latch, swivelling ...31 Telescoping thread guide ...9 Thread chain cutter ...29 Thread chart ...57 Thread guide, clip on...10 Thread net ...9 Thread tensions, setting ...39 Thread unreeling disc...9 Threading aid for the 2 thread chain stitch looped/cover stitch looped 19, 21 Threading paths/overview ...26 - 28 Threading the 2 thread chain stitch looped/cover stitch looped (...

Owner's Manual
Page 13
... position. Place the thread unreeling disc on machine you hear the locking balls flick into place. Spool holder Before placing thread cones/spools on top of machine. Place the spool on the spool pin 35. Make sure the spool disc 37 is used under the spool. 9 Thread unreeling disc The thread unreeling disc (in the accessory box) is used for small spools/spools with notched or rough ends. To ensure optimum thread feed...
... position. Place the thread unreeling disc on machine you hear the locking balls flick into place. Spool holder Before placing thread cones/spools on top of machine. Place the spool on the spool pin 35. Make sure the spool disc 37 is used under the spool. 9 Thread unreeling disc The thread unreeling disc (in the accessory box) is used for small spools/spools with notched or rough ends. To ensure optimum thread feed...

Owner's Manual
Page 14
... on thread guide accessory when sewing with the same thread and presser foot. Use the thread net and/or the thread unreeling disc if needed. The fabric is sufficient to use the spool disc 37 when sewing with large spools (5,000 - 10,000 m). To do this onto the telescoping thread guide 32 and thread the machine as shown in smoother feeding of the presser foot using the presser foot lifter 43. It is automatically taken...
... on thread guide accessory when sewing with the same thread and presser foot. Use the thread net and/or the thread unreeling disc if needed. The fabric is sufficient to use the spool disc 37 when sewing with large spools (5,000 - 10,000 m). To do this onto the telescoping thread guide 32 and thread the machine as shown in smoother feeding of the presser foot using the presser foot lifter 43. It is automatically taken...

Owner's Manual
Page 15
... the presser foot holder. To attach: Place the presser foot behind and perpendicular to ensure that the presser foot is directly under the presser foot holder clamp. For all other programs use setting "A" on the springloaded presser foot latch. Transparent presser foot F from the accessories can also be released automatically from you . Changing the presser foot Turn off the electrical power To remove: Raise the needle(s) to the highest position by sliding foot away from the holder. Lower the presser foot lever and press lever...
... the presser foot holder. To attach: Place the presser foot behind and perpendicular to ensure that the presser foot is directly under the presser foot holder clamp. For all other programs use setting "A" on the springloaded presser foot latch. Transparent presser foot F from the accessories can also be released automatically from you . Changing the presser foot Turn off the electrical power To remove: Raise the needle(s) to the highest position by sliding foot away from the holder. Lower the presser foot lever and press lever...

Owner's Manual
Page 23
Thread the thread guides which are marked with a violet square in a sequence of the two thread chainstitch looper and the cover stitch looper (= threading point 11). Also refer to its position as soon as you start sewing. Note: The lever returns automatically to the drawing below. Thread from the front through the looper and place it to 9. Pull approximately 4" (10 cm) of thread through eye C of 1 to the left under the presser foot. 19 Push lever A upward and hook the thread into slot B.
Thread the thread guides which are marked with a violet square in a sequence of the two thread chainstitch looper and the cover stitch looper (= threading point 11). Also refer to its position as soon as you start sewing. Note: The lever returns automatically to the drawing below. Thread from the front through the looper and place it to 9. Pull approximately 4" (10 cm) of thread through eye C of 1 to the left under the presser foot. 19 Push lever A upward and hook the thread into slot B.

Owner's Manual
Page 25
Note: The lever returns automatically to 8. Pull approximately 4" (10 cm) of the threads guides are marked with a violet square. Thread the thread guides, as you start sewing. Press lever A upward and hook the thread into slot B. Also refer to the left under the presser foot. 21 Some of thread through eye C of 1 to its position as soon as shown in the diagram, in a sequence of the two-thread chainstitch looper and the cover stitch looper (= threading point 10). Thread from the front through the looper and place it to the drawing below.
Note: The lever returns automatically to 8. Pull approximately 4" (10 cm) of the threads guides are marked with a violet square. Thread the thread guides, as you start sewing. Press lever A upward and hook the thread into slot B. Also refer to the left under the presser foot. 21 Some of thread through eye C of 1 to its position as soon as shown in the diagram, in a sequence of the two-thread chainstitch looper and the cover stitch looper (= threading point 10). Thread from the front through the looper and place it to the drawing below.

Owner's Manual
Page 28
...) past the looper eye and placed to the spool and replace with the new threads, and pull the threads out of the needles. Important note on threading The needle(s) must pull the needle threads out of the needle eye, rethread the loopier thread and then rethread the needle threads. If the looper threads break, you must always be pulled continuously past the last thread guide in the machine with new spools.
...) past the looper eye and placed to the spool and replace with the new threads, and pull the threads out of the needles. Important note on threading The needle(s) must pull the needle threads out of the needle eye, rethread the loopier thread and then rethread the needle threads. If the looper threads break, you must always be pulled continuously past the last thread guide in the machine with new spools.

Owner's Manual
Page 32
The standard setting is suitable for medium heavy fabrics. Overview of the threading paths and threading sequences Program 09: 5-thread safety-stitch seam Program 10: 2-needle 3-thread assembly seam Presser foot pressure The pre-set presser foot pressure on the machine is "N". 28 The presser foot pressure does not need to be adjusted for the presser foot pressure 17. In this case, 6 setting positions are working with light or heavy fabrics then you can select using the adjusting knob for most fabrics. If you are available which you may need to adjust the pressure.
The standard setting is suitable for medium heavy fabrics. Overview of the threading paths and threading sequences Program 09: 5-thread safety-stitch seam Program 10: 2-needle 3-thread assembly seam Presser foot pressure The pre-set presser foot pressure on the machine is "N". 28 The presser foot pressure does not need to be adjusted for the presser foot pressure 17. In this case, 6 setting positions are working with light or heavy fabrics then you can select using the adjusting knob for most fabrics. If you are available which you may need to adjust the pressure.

Owner's Manual
Page 40
... seam when working with the differential feed dog. Instead, a smooth seam (A) will avoid gathering/puckering of material to be fed can also achieve decorative effekts with very light fabrics, such as the rear feed dog, causing the fabric to 0.5. The standard setting is 1.0, where the movement of fabric as the rear feed dog. Note: The function of the differential feed also depends on the set stitch length and the type...
... seam when working with the differential feed dog. Instead, a smooth seam (A) will avoid gathering/puckering of material to be fed can also achieve decorative effekts with very light fabrics, such as the rear feed dog, causing the fabric to 0.5. The standard setting is 1.0, where the movement of fabric as the rear feed dog. Note: The function of the differential feed also depends on the set stitch length and the type...

Owner's Manual
Page 43
... directions for setting thread tensions for adjusting thread tension are recommendations. Adjusting the tension settings is at the desired setting. Always sew off the electrical power It is secured. This screw should always be adjusted once the upper blade is recommended to its highest position and open the swivel plate. Adjust the thread tension if necessary. Securing the upper blade Turn off a test seam onto a piece of scrap fabric and check the thread loops. Raise the needle...
... directions for setting thread tensions for adjusting thread tension are recommendations. Adjusting the tension settings is at the desired setting. Always sew off the electrical power It is secured. This screw should always be adjusted once the upper blade is recommended to its highest position and open the swivel plate. Adjust the thread tension if necessary. Securing the upper blade Turn off a test seam onto a piece of scrap fabric and check the thread loops. Raise the needle...

Owner's Manual
Page 48
... this optional accessory you sew further along the fabric. The speed may need to lie perfectly smooth. The width of the machine. Note: The differential feed may be adjusted slightly to allow your fabric effortlessly without having to press under the presser foot so the needles pierce the fabric for the first stitch. To start sewing: Raise the presser foot and place the fabric under the hem edge prior...
... this optional accessory you sew further along the fabric. The speed may need to lie perfectly smooth. The width of the machine. Note: The differential feed may be adjusted slightly to allow your fabric effortlessly without having to press under the presser foot so the needles pierce the fabric for the first stitch. To start sewing: Raise the presser foot and place the fabric under the hem edge prior...

Owner's Manual
Page 49
... edge guide can be set as required by sliding it to the back of your accessory box) into the guide holder A from the machine. Edge guide Push the edge guide (included in your seam ' After the last stitch, turn the hand wheel towards you until the needles pierce the fabric and you until the needles are in their highest position. pant or sleeve hem: Sew around...
... edge guide can be set as required by sliding it to the back of your accessory box) into the guide holder A from the machine. Edge guide Push the edge guide (included in your seam ' After the last stitch, turn the hand wheel towards you until the needles pierce the fabric and you until the needles are in their highest position. pant or sleeve hem: Sew around...

Owner's Manual
Page 50
The looper thread (violet) is too loose, causing large loops on the underside of the fabric. The needle threads (green and blue) are just slightly visible on the underside of the fabric. The right needle thread (green) is situated loosely in the fabric. Set the green and blue thread tension to a higher value. Stitch formation correction measures cover stitch Program 02 When all tensions are correctly set, the needle threads (green and blue) are set too tightly causing folds in between. Set the green thread tension to a lower value. 46
The looper thread (violet) is too loose, causing large loops on the underside of the fabric. The needle threads (green and blue) are just slightly visible on the underside of the fabric. The right needle thread (green) is situated loosely in the fabric. Set the green and blue thread tension to a higher value. Stitch formation correction measures cover stitch Program 02 When all tensions are correctly set, the needle threads (green and blue) are set too tightly causing folds in between. Set the green thread tension to a lower value. 46

Owner's Manual
Page 65
... fabrics. Increase sewing foot pressure (see page 13). Reduce sewing foot pressure (see page 13). Sewing problems of the kind described below may occur as a result of thread tension. The fabric was not fully inserted. Needle not fully insert. Incorrect needle used . Incorrect needle used . Stitch formation faulty Incorrect setting of minor adjustment and operating errors. The converter is caught on the spool stand etc. Clean blades. They can be easily adjusted by following the in the seam. The needle...
... fabrics. Increase sewing foot pressure (see page 13). Reduce sewing foot pressure (see page 13). Sewing problems of the kind described below may occur as a result of thread tension. The fabric was not fully inserted. Needle not fully insert. Incorrect needle used . Incorrect needle used . Stitch formation faulty Incorrect setting of minor adjustment and operating errors. The converter is caught on the spool stand etc. Clean blades. They can be easily adjusted by following the in the seam. The needle...

Owner's Manual
Page 66
Parts of the coverstyle 31 Thread guides with color coding 32 Telescoping thread guide 33 Thread chain cutter 34 Thread spool stand 35 Thread spool pin 36 Cone thread adapter 37 Spool disc 38 Electrical power master switch 39 Machine socket, foot control 40 Handwheel 41 Regulator wheel for differential feed 42 Stitch length adjustment knob 43 Presser foot lifter 44 Rear thread guides 45 Power table 46 Foot control 47 Accessory box 62
Parts of the coverstyle 31 Thread guides with color coding 32 Telescoping thread guide 33 Thread chain cutter 34 Thread spool stand 35 Thread spool pin 36 Cone thread adapter 37 Spool disc 38 Electrical power master switch 39 Machine socket, foot control 40 Handwheel 41 Regulator wheel for differential feed 42 Stitch length adjustment knob 43 Presser foot lifter 44 Rear thread guides 45 Power table 46 Foot control 47 Accessory box 62


