

Owner's Manual
Page 3
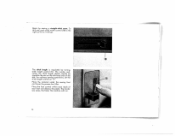
... to help you at any sewing problems, please do not hesitate to contact your machine. If you thoroughly with your Pfaff dealer who will become well acquainted with oil the sewing jobs coming up in order to familiarize you have any time. We hope you will be glad to master a large variety of sewing, embroidering and darning jobs eosily and quickly. This instruction book has...
... to help you at any sewing problems, please do not hesitate to contact your machine. If you thoroughly with your Pfaff dealer who will become well acquainted with oil the sewing jobs coming up in order to familiarize you have any time. We hope you will be glad to master a large variety of sewing, embroidering and darning jobs eosily and quickly. This instruction book has...

Owner's Manual
Page 4
Essential Parts of Your Pfaff 94 345j64 17 16 15 -=------',w- - 14 13 2 1 Face cover 2 Take-up lever 3 Thread guide 4 Top cover 5 Thread retainer stud 6 Spool pins 7 Bobbin winder 8 Balance wheel 9 Stop motion knob 9 10 11 Motor Stitch disengaging length control mechanism 12 Reverse feed control 13 Bed cover 14 Transverse rotary hook 15 Needle plate 16 Sewing foot thumb screw 17 Light switch 18 Stitch width control 19 Needle position lever 20 Needle thread tension 21 Presser bar lifter (on back of machine arm) 22 Needle set screw 23 Sewing foot
Essential Parts of Your Pfaff 94 345j64 17 16 15 -=------',w- - 14 13 2 1 Face cover 2 Take-up lever 3 Thread guide 4 Top cover 5 Thread retainer stud 6 Spool pins 7 Bobbin winder 8 Balance wheel 9 Stop motion knob 9 10 11 Motor Stitch disengaging length control mechanism 12 Reverse feed control 13 Bed cover 14 Transverse rotary hook 15 Needle plate 16 Sewing foot thumb screw 17 Light switch 18 Stitch width control 19 Needle position lever 20 Needle thread tension 21 Presser bar lifter (on back of machine arm) 22 Needle set screw 23 Sewing foot

Owner's Manual
Page 5
Essential Parts of Your Pfaff 95 17 1 Face cover 2 Take-up lever 3 Thread guide 4 Top cover 5 Thread retainer stud 6 Spool pins 7 Bobbin winder 8 Balance wheel 9 Stop motion knob 10 Motor disengaging mechanism 9 11 Stitch length contro' 12 Reverse feed control 13 Free arm 14 Free arm cover (enclosing transverse rotary hook) 10 15 Needle plate 16 Sewing foot thumb screw 17 Light switch 11 18 Stitch width control 19 20 Needle position lever Needle thread tension 21 Presser bar lifter (on back of machine arm) 22 Needle set screw 23 Sewing foot ii 3
Essential Parts of Your Pfaff 95 17 1 Face cover 2 Take-up lever 3 Thread guide 4 Top cover 5 Thread retainer stud 6 Spool pins 7 Bobbin winder 8 Balance wheel 9 Stop motion knob 10 Motor disengaging mechanism 9 11 Stitch length contro' 12 Reverse feed control 13 Free arm 14 Free arm cover (enclosing transverse rotary hook) 10 15 Needle plate 16 Sewing foot thumb screw 17 Light switch 11 18 Stitch width control 19 20 Needle position lever Needle thread tension 21 Presser bar lifter (on back of machine arm) 22 Needle set screw 23 Sewing foot ii 3

Owner's Manual
Page 8
When you must first open latch. The bobbin cannot fall out as long as illustrated. On the Pfaff 95, the bobbin case is at the bobbin case, however, you release the latch, the empty bobbin drops out. To get at the top of its open free arm cover (14) by swinging it toward the left. 6 To remove the bobbin case, rotate the ba lance wheel until the needle is removed just like on the bobbin case and pull out the bobbin case with the bob bin. On the Pfaff 94, remove bed cover (13), as you hold the case by its stroke. Lift latch k on the Pfaff 94.
When you must first open latch. The bobbin cannot fall out as long as illustrated. On the Pfaff 95, the bobbin case is at the bobbin case, however, you release the latch, the empty bobbin drops out. To get at the top of its open free arm cover (14) by swinging it toward the left. 6 To remove the bobbin case, rotate the ba lance wheel until the needle is removed just like on the bobbin case and pull out the bobbin case with the bob bin. On the Pfaff 94, remove bed cover (13), as you hold the case by its stroke. Lift latch k on the Pfaff 94.

Owner's Manual
Page 10
bobbin so that you and place the it in thread un the bobbin c(riP3naou)sc.tleahlA.tetessheyooctfulhorctpehkuarwldel iastihdenetoth(h4sa)rln.oegtaidL(n2,eg)athvafeenrodbmoaubbntbohdieuentrbssohtpbhorbriuneilnegd 8 Hold the full winds toward case.
bobbin so that you and place the it in thread un the bobbin c(riP3naou)sc.tleahlA.tetessheyooctfulhorctpehkuarwldel iastihdenetoth(h4sa)rln.oegtaidL(n2,eg)athvafeenrodbmoaubbntbohdieuentrbssohtpbhorbriuneilnegd 8 Hold the full winds toward case.

Owner's Manual
Page 15
Always rotate balance wheel see sure arrow). As you the stop motion do this, knob is at its needle position center position, lever Make point sure the take-up lever before you begin and is (8) toward you have completed a seam (2). Fundamentals of Machine Operation For (19) ordinary sewing, should be in its highest after you check to make tightened firm ly.
Always rotate balance wheel see sure arrow). As you the stop motion do this, knob is at its needle position center position, lever Make point sure the take-up lever before you begin and is (8) toward you have completed a seam (2). Fundamentals of Machine Operation For (19) ordinary sewing, should be in its highest after you check to make tightened firm ly.
Owner's Manual
Page 16
... sewing operations, set the stitch length control on the left-hand side of your foot and depress the pedal. Place the foot control within easy reach of the slot. Begin by turning stitch length control (11). The stitch length is regulated by sewing a straight-stitch seam. Place the material under the sewing foot and lower the presser bar lifter. The number indi cating the stitch length chosen should be opposite the dot on "2". To this end, posh stitch...
... sewing operations, set the stitch length control on the left-hand side of your foot and depress the pedal. Place the foot control within easy reach of the slot. Begin by turning stitch length control (11). The stitch length is regulated by sewing a straight-stitch seam. Place the material under the sewing foot and lower the presser bar lifter. The number indi cating the stitch length chosen should be opposite the dot on "2". To this end, posh stitch...

Owner's Manual
Page 21
... your left while the first stitches ore being made. Darning sheer and soft materials is too tight. 19 Select the darning hoops in darning hoops. and hand Trim the threads and start stitching back and forth across the hole in the unworn area around the hole. If the needle thread should break, the up the bobbin threads hold both threads lightly with short stitches. Make sure the threads are anchored in sewing direction.
... your left while the first stitches ore being made. Darning sheer and soft materials is too tight. 19 Select the darning hoops in darning hoops. and hand Trim the threads and start stitching back and forth across the hole in the unworn area around the hole. If the needle thread should break, the up the bobbin threads hold both threads lightly with short stitches. Make sure the threads are anchored in sewing direction.

Owner's Manual
Page 24
...stitches fabrics, width, L 22 on p. 25. Hemming Stitch length: L5 to 2 847557 ethrmFoadeolagmlk4deiminntcsihegnhtrereapasfbilgoaelhoohcgeenttmi.ngasn.natiiPnbdtclgoahucleooetsfwIttsthehoreeintsmcfheaheacbtuwresriroeicidmaeeltehd.auegnnMeddfeoatswrkledeitvcehedee3, dbDroratahwwintthghr.eeafdasbribcacinktwo atrhdes,heams msehrowbyn pulling in the wassFuctearreayoedlslllthtutwihanmeitdtehetsfhrayeabtonhrusideccrrtrorehiilgdegl hghfitetsabhhwiraanielnctflodldoftof(hiesleltesehedehneiolwflmto.>iostm,hltim.epfraaskfbiiodrnoiegct To produce use zigzag as instructed on elastic hem stitches...
...stitches fabrics, width, L 22 on p. 25. Hemming Stitch length: L5 to 2 847557 ethrmFoadeolagmlk4deiminntcsihegnhtrereapasfbilgoaelhoohcgeenttmi.ngasn.natiiPnbdtclgoahucleooetsfwIttsthehoreeintsmcfheaheacbtuwresriroeicidmaeeltehd.auegnnMeddfeoatswrkledeitvcehedee3, dbDroratahwwintthghr.eeafdasbribcacinktwo atrhdes,heams msehrowbyn pulling in the wassFuctearreayoedlslllthtutwihanmeitdtehetsfhrayeabtonhrusideccrrtrorehiilgdegl hghfitetsabhhwiraanielnctflodldoftof(hiesleltesehedehneiolwflmto.>iostm,hltim.epfraaskfbiiodrnoiegct To produce use zigzag as instructed on elastic hem stitches...

Owner's Manual
Page 25
... the cording feet listed below. Select the twin needle gauge and the size of the filler cord to lead each thread between cording seams made with the ordinary sewing foot is made with 7 grooves for needle distances of tension discs (see ill). Twin needles for lightweight materials. Stitch length: 1.5 to draw up the bobbin thread. Pfaff 95 Pfaff 94 23 Hold both needle threads lightly and rotate the balance wheel to 2 Cording is abt. When threading the needles, make different size cording...
... the cording feet listed below. Select the twin needle gauge and the size of the filler cord to lead each thread between cording seams made with the ordinary sewing foot is made with 7 grooves for needle distances of tension discs (see ill). Twin needles for lightweight materials. Stitch length: 1.5 to draw up the bobbin thread. Pfaff 95 Pfaff 94 23 Hold both needle threads lightly and rotate the balance wheel to 2 Cording is abt. When threading the needles, make different size cording...

Owner's Manual
Page 26
... heavy and matches the material being hemstitched (preferably a No. 50 embroidery thread). Turn the fabric by half a turn and sew the second seam, guiding the material so that the right needle stitches into the fabric close to 2.5 - 93-100179 Use a thread which is the same as for cording work. Make sure the needle and bobbin threads are the same size. Insert a System 130 Zwi-Ho needle. Hemsttchng Stitch length: 2 to the hem. 24
... heavy and matches the material being hemstitched (preferably a No. 50 embroidery thread). Turn the fabric by half a turn and sew the second seam, guiding the material so that the right needle stitches into the fabric close to 2.5 - 93-100179 Use a thread which is the same as for cording work. Make sure the needle and bobbin threads are the same size. Insert a System 130 Zwi-Ho needle. Hemsttchng Stitch length: 2 to the hem. 24

Owner's Manual
Page 28
Make sure the needle takes one stitch into the fabric and the other over its maxi mum stitch width. uStitch length: 2 838 954 To overcast the edges of medium width. Soft and flimsy fabrics are best overcast with Zigzag Stitches Attach ordinary sewing foot. This will cover the fabric edge securely. 26 Overcasting Edges with a zigzag stitch of light and mediumweight fabrics, set the machine for its edge.
Make sure the needle takes one stitch into the fabric and the other over its maxi mum stitch width. uStitch length: 2 838 954 To overcast the edges of medium width. Soft and flimsy fabrics are best overcast with Zigzag Stitches Attach ordinary sewing foot. This will cover the fabric edge securely. 26 Overcasting Edges with a zigzag stitch of light and mediumweight fabrics, set the machine for its edge.

Owner's Manual
Page 29
...(cohishcneeienwtsehoreiolwltn.rh)igi.taghthsTitrdttihhoemee.f Elastic materials manner. the slot toShfeetitsstthistelcohtstawitncidhdthsleewncogonthvtreorclofniarttsrtotlhseeaomnex. are patched in the middle of its edge of the patch. nsertng Patches Stitch width: medium 838 954 Larger way utting thheexoalercsatlgycgaeandlobneegdgptehasetcahfraeobsurinqcduiyctakhrleyn.s.hTorliem, hiCtsoultgeraaainnpdattocphltahcaaetbooiftuttuhnVedsfearibnctrhhice. larger hole, than the matching Set the stitch length stitch width control and stitch along the control on "1" and in the...
...(cohishcneeienwtsehoreiolwltn.rh)igi.taghthsTitrdttihhoemee.f Elastic materials manner. the slot toShfeetitsstthistelcohtstawitncidhdthsleewncogonthvtreorclofniarttsrtotlhseeaomnex. are patched in the middle of its edge of the patch. nsertng Patches Stitch width: medium 838 954 Larger way utting thheexoalercsatlgycgaeandlobneegdgptehasetcahfraeobsurinqcduiyctakhrleyn.s.hTorliem, hiCtsoultgeraaainnpdattocphltahcaaetbooiftuttuhnVedsfearibnctrhhice. larger hole, than the matching Set the stitch length stitch width control and stitch along the control on "1" and in the...

Owner's Manual
Page 32
For heavier threads, slightly increase the stitch length. Sewing Buttonholes Attach buttonhole foot No. 847616 to its left position and put the stitch width control in the left groove of medium size in notch R 1 (see ill.). When using No. 50 embroidery thread, set the stitch length control so that both dots are opposite each other (see ill.). To obtain more prominent buttonholes, place a filler cord of the sewing foot. Allpurpose sewing foot No. 91-100179-00 may also be used for this operation. 30 3 4 Flick the needle to the machine.
For heavier threads, slightly increase the stitch length. Sewing Buttonholes Attach buttonhole foot No. 847616 to its left position and put the stitch width control in the left groove of medium size in notch R 1 (see ill.). When using No. 50 embroidery thread, set the stitch length control so that both dots are opposite each other (see ill.). To obtain more prominent buttonholes, place a filler cord of the sewing foot. Allpurpose sewing foot No. 91-100179-00 may also be used for this operation. 30 3 4 Flick the needle to the machine.

Owner's Manual
Page 33
... button hole seam, stopping about 1/ inch from the end of its throw. Flick the stitch width control all the way to right and make 4 to 6 bartack stitches, slightly holding the material to the bar. Lift the sewing foot, turn the fabric around clockwise by half a turn, place the filler cord around the needle and pull it forward, placing it close to reduce the length...
... button hole seam, stopping about 1/ inch from the end of its throw. Flick the stitch width control all the way to right and make 4 to 6 bartack stitches, slightly holding the material to the bar. Lift the sewing foot, turn the fabric around clockwise by half a turn, place the filler cord around the needle and pull it forward, placing it close to reduce the length...

Owner's Manual
Page 35
Reduce the needle thread tension by one fabric yarn (see ill.). Please note: Fold the hem of the foot (see ill.). Fold Basting seam 33 Fold the hem (2) and place the fabric under the sewing foot so that the needle takes the left groove of heavy woolens only once (3) and finish the raw edge with zigzag stitches before it is in line with the left stitch exactly...
Reduce the needle thread tension by one fabric yarn (see ill.). Please note: Fold the hem of the foot (see ill.). Fold Basting seam 33 Fold the hem (2) and place the fabric under the sewing foot so that the needle takes the left groove of heavy woolens only once (3) and finish the raw edge with zigzag stitches before it is in line with the left stitch exactly...

Owner's Manual
Page 37
...: 1. Sew the fabric to be appliquéd to the seam on the right side. 6. Follow the outlines of the appliqué with closely packed zigzag stitches (stitch length: 0.2; Applique work b93-100179 To make appliqué, proceed as il lustrated (4). length control on the right side (1). 2. Trim the excess material close to the right side with a narrow zigzag stitch (stitch (3). Trace the design on "1 "), as shown 5. Set the stitch lenght control on...
...: 1. Sew the fabric to be appliquéd to the seam on the right side. 6. Follow the outlines of the appliqué with closely packed zigzag stitches (stitch length: 0.2; Applique work b93-100179 To make appliqué, proceed as il lustrated (4). length control on the right side (1). 2. Trim the excess material close to the right side with a narrow zigzag stitch (stitch (3). Trace the design on "1 "), as shown 5. Set the stitch lenght control on...

Owner's Manual
Page 40
On Pfaff 95 machines, loosen the set screw, lift the front of the free arm cover and pull the cover out lengthwise of the machine base and tilt the machine back cautiously (3). ii. - 38 3 From time to time, clean the parts in the machine arm and in the vicinity of the sew ing hook with the bobbin. On port able machines, loosen the screw on the bottom of the arm (1 & 2). To this end, re move the needle, the sewing foot and the bobbin case with a soft brush. Pfaff 94 machines are tilted back.
On Pfaff 95 machines, loosen the set screw, lift the front of the free arm cover and pull the cover out lengthwise of the machine base and tilt the machine back cautiously (3). ii. - 38 3 From time to time, clean the parts in the machine arm and in the vicinity of the sew ing hook with the bobbin. On port able machines, loosen the screw on the bottom of the arm (1 & 2). To this end, re move the needle, the sewing foot and the bobbin case with a soft brush. Pfaff 94 machines are tilted back.

Owner's Manual
Page 41
... Trouble Shooting When operated properly, your sewing job (buttonhole sewing or darning, for instance) by switching the machine back to straight stitching, flicking the needle posi tion lever to its central position, raising the machine feed and setting the stitch length control on "2". If trouble should occur, check the following: • The needle must not be damaged and must be inserted correctly. • Select the correct needle and thread from the Needle and Thread Chart...
... Trouble Shooting When operated properly, your sewing job (buttonhole sewing or darning, for instance) by switching the machine back to straight stitching, flicking the needle posi tion lever to its central position, raising the machine feed and setting the stitch length control on "2". If trouble should occur, check the following: • The needle must not be damaged and must be inserted correctly. • Select the correct needle and thread from the Needle and Thread Chart...
Owner's Manual
Page 42
...233; Work 35 Blindstitching 33 Button Sewing 32 Changing the Light Bulb 36 Changing the Needle 17 Changing the Needle Position • 29 Changing the Sewing Foot . • 17 Cleaning • 37 Cording 23 Darning 18 Darning Foot 18 Drawing Up the Bobbin Thread 12 Dropping the Machine Feed 18 Electrical Equipment 4 Engaging and Disengaging the Sewing Mechanism 7 Essential Parts of Pfaff 94 2 Essential Parts of Pfaff 95 3 Flat Felled Seams 21 Foot Control Foreword Fundamentals of Machine Operation 13 Hemming 22 Hemstitching 24 Inserting a Full Bobbin...
...233; Work 35 Blindstitching 33 Button Sewing 32 Changing the Light Bulb 36 Changing the Needle 17 Changing the Needle Position • 29 Changing the Sewing Foot . • 17 Cleaning • 37 Cording 23 Darning 18 Darning Foot 18 Drawing Up the Bobbin Thread 12 Dropping the Machine Feed 18 Electrical Equipment 4 Engaging and Disengaging the Sewing Mechanism 7 Essential Parts of Pfaff 94 2 Essential Parts of Pfaff 95 3 Flat Felled Seams 21 Foot Control Foreword Fundamentals of Machine Operation 13 Hemming 22 Hemstitching 24 Inserting a Full Bobbin...


