Pfaff 94 Support and Manuals
Get Help and Manuals for this Pfaff item

Popular Pfaff 94 Manual Pages
Owner's Manual - Page 3

... you will always enjoy sewing with your machine. We suggest that you will become well acquainted with your Pfaff. PFAFF-Haushaltmaschinell GmbH Karisruhe-Durlach If you have any time. Instructions
CPFAFFi and 95
Foreword Your new Pfaff sewing machine will enable you to help you at any sewing problems, please do not hesitate to contact your Pfaff dealer who will be...
Owner's Manual - Page 4

... Your Pfaff 94
345j64 17
16 15 -=------',w-
-
14 13
2
1 Face cover
2 Take-up lever
3 Thread guide
4 Top cover
5 Thread retainer stud
6 Spool pins
7 Bobbin winder
8 Balance wheel
9 Stop motion knob
9
10 11
Motor Stitch
disengaging length control
mechanism
12 Reverse feed control
13 Bed cover
14 Transverse rotary hook
15 Needle plate
16 Sewing...
Owner's Manual - Page 5

Essential Parts of Your Pfaff 95
17
1 Face cover
2 Take-up lever
3 Thread guide
4 Top cover
5 Thread retainer stud
6 Spool pins
7 Bobbin winder
8 Balance wheel
9 ...Needle plate 16 Sewing foot thumb screw
17 Light switch
11
18 Stitch width control
19 20
Needle position lever Needle thread tension
21 Presser bar lifter
(on back of machine arm)
22 Needle set screw
23 Sewing foot
ii
3
Owner's Manual - Page 12

... pressed
case base, against the
baseplate of the machine. io
P
4 eTnhelarsgeewdinwgitahrethaeoafidtheofPafanffex9t4enPsoiortnab(l4e). On the
mathines having no workplate support is 2
Tfwgtutaohhoongoreetaire(lik1ofnnl)pertr.lshevldatTaeeeritnhgrtehelaeaoenrroocymtnnkmhlot.ieonacstgkechPstwherheiesitewintsnubseiignfdanrcgbtephkseoalneasapaaeocreprweefrmsaauobttnrhiiyatokoniesfltpntoulsfitamtr...
Owner's Manual - Page 15

As you the stop motion
do this, knob is at its
needle position center position,
lever
Make point
sure the take-up lever before you begin and
is
(8) toward you have
completed a seam (2). Always rotate balance wheel
see sure
arrow). Fundamentals of Machine Operation
For (19)
ordinary sewing, should be in its highest after you check to make tightened firm
ly.
Owner's Manual - Page 16
The stitch length is regulated by sewing a straight-stitch seam. For ordinary sewing operations, set the stitch length control on the left-hand side of your foot and depress the pedal. The harder you press, the faster the machine will go. The number indi cating the stitch length chosen should be opposite the dot on...
Owner's Manual - Page 25

... ordinary sewing foot ...medium-heavy fabrics, and cording foot No. 93-847680-00 with the ordinary sewing foot is made with 7 grooves for needle distances of the cording feet listed... size of the filler cord to 2 Cording is abt. Twin needles for lightweight materials. To render your Pfaff dealer).
Lace the filler cord through hole g, as illus trated. For narrower cording, use one of 1.2...
Owner's Manual - Page 28

... flimsy fabrics are best overcast with Zigzag Stitches
Attach ordinary sewing foot. Make sure the needle takes one stitch into the fabric and the other over its maxi mum stitch width. Overcasting Edges with a zigzag stitch of light and mediumweight fabrics, set the machine for its edge. uStitch length: 2 838 954
To overcast...
Owner's Manual - Page 32

To obtain more prominent buttonholes, place a filler cord of the sewing foot. Flick the needle to the machine. Allpurpose sewing foot No. 91-100179-00 may also be used for this operation.
30
3
4 When using No. 50 embroidery thread, set the stitch length control so that both dots are opposite each other (see ill.). For heavier...
Owner's Manual - Page 34

width
to its drop the machine feed.
mastLoeeownrwioiangelgrrainmfthodeoatornpnarinendtsghseedhrroofoapbpbasrtr.ihcelifamtnedra. right
position
and
...To ty,
give your embroider
monogram dimensional the outlines twice.
qual
Li
32
Button Sewing
Flick the needle to
suit
the
size
of
93100179
pTRclhreaaimcnceeeovtefhteheetehdme. Monogram Embroidery
Regulate the stitch...
Owner's Manual - Page 35

93-100179
Blndstitching Apply clear-view sewing foot No. 91-100 179-00. Reduce the needle thread tension by one fabric yarn (see ill.).
Then flick the needle to its right position and set the stitch lenght control at '4'. Fold Basting seam
33 Please note: Fold the hem of the foot (see ill.). Fold...
Owner's Manual - Page 39
Pfaff 94
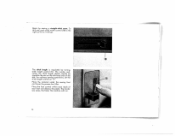
37 The raceway in the sewing hook is the most important oiling point. Do not oil the bobbin winder. Since your Pfaff sewing mochines has been ...mode from high-grade materials, there ore only o few oiling points left and center). From time to time, put a drop of oil into the hook raceway (see ill, at left . Machine Care Longevity and smooth machine...
Owner's Manual - Page 40

... bobbin.
ii.
-
38
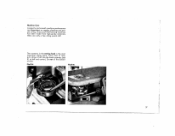
3 Pfaff 94 machines are tilted back. To this end, re move the needle, the sewing foot and the bobbin case with a soft brush. From time to time, clean the parts in the machine arm and in the vicinity of the machine base and tilt the machine back cautiously (3). On Pfaff 95 machines, loosen the set screw, lift the...
Owner's Manual - Page 41

... the feeding motion, merely
guide the material lightly. • Clean and oil the machine as instructed. • Make sure there are no pieces of oil into the raceway, jer the balance wheel back and then rock it back and forth, without applying force.
39 Trouble Shooting When operated properly, your sewing job (buttonhole sewing or darning, for...
Owner's Manual - Page 42
...
Darning
18
Darning Foot
18
Drawing Up the Bobbin Thread
12
Dropping the Machine Feed
18
Electrical Equipment
4
Engaging and Disengaging the Sewing
Mechanism
7
Essential Parts of Pfaff 94
2
Essential Parts of Pfaff 95
3
Flat Felled Seams
21
Foot Control
Foreword
Fundamentals of Machine Operation 13
Hemming
22
Hemstitching
24
Inserting a Full Bobbin
B
Inserting Lace
28...
Pfaff 94 Reviews
We have not received any reviews for Pfaff yet.