

NNS645 User Guide
Page 1
...libro. Operating Instructions Microwave Oven Models: NN-S645/S655/S735/S935 Safety Information Operation Precautions Inside cover Important Safety Instructions .........1-3 Installation and Grounding Instructions 3-4 Safety Precautions 5-6 Operation Control Panel 8-9 Starting to Use Your Oven 10 Setting the Clock 10 Child Safety Lock 10 Selecting Power & Cook Time 11 Quick Min Feature 11 Keep Warm Feature 11 Popcorn Feature 12 More/Less Feature 12 Inverter Turbo Defrost Feature 13 Defrosting Tips & Techniques.........13-14 Auto Reheat Feature 15 Auto Cook Feature 15 Auto Cook...
...libro. Operating Instructions Microwave Oven Models: NN-S645/S655/S735/S935 Safety Information Operation Precautions Inside cover Important Safety Instructions .........1-3 Installation and Grounding Instructions 3-4 Safety Precautions 5-6 Operation Control Panel 8-9 Starting to Use Your Oven 10 Setting the Clock 10 Child Safety Lock 10 Selecting Power & Cook Time 11 Quick Min Feature 11 Keep Warm Feature 11 Popcorn Feature 12 More/Less Feature 12 Inverter Turbo Defrost Feature 13 Defrosting Tips & Techniques.........13-14 Auto Reheat Feature 15 Auto Cook Feature 15 Auto Cook...

NNS645 User Guide
Page 2
... door open since open-door operation can happen if the instructions are very important. All safety messages will tell you what can result in harmful exposure to accumulate on your appliance. All safety messages will follow instructions. PRECAUTIONS TO AVOID POSSIBLE EXPOSURE TO EXCESSIVE MICROWAVE ENERGY (a) Do not attempt to operate this manual and on sealing surfaces. (c) Do not operate the oven...
... door open since open-door operation can happen if the instructions are very important. All safety messages will tell you what can result in harmful exposure to accumulate on your appliance. All safety messages will follow instructions. PRECAUTIONS TO AVOID POSSIBLE EXPOSURE TO EXCESSIVE MICROWAVE ENERGY (a) Do not attempt to operate this manual and on sealing surfaces. (c) Do not operate the oven...

NNS645 User Guide
Page 3
... exposure to heat, or cook food. for example, closed , turn oven off, and disconnect the power cord, or shut off power at the fuse or circuit breaker panel. (d) DO NOT use corrosive chemicals, vapors, or non-food products in this oven. 17. Use this appliance only for storage purposes. DO NOT use the cavity for its intended use this manual. Contact the nearest authorized service center for purchasing a Panasonic Microwave Oven. tions...
... exposure to heat, or cook food. for example, closed , turn oven off, and disconnect the power cord, or shut off power at the fuse or circuit breaker panel. (d) DO NOT use corrosive chemicals, vapors, or non-food products in this oven. 17. Use this appliance only for storage purposes. DO NOT use the cavity for its intended use this manual. Contact the nearest authorized service center for purchasing a Panasonic Microwave Oven. tions...

NNS645 User Guide
Page 4
... always be very HOT after removing the cooking container from the oven. SAVE THESE INSTRUCTIONS For proper use recycled paper products unless the paper product is transferred from the HOT food to the cooking container and from the container to stand in the microwave oven for microwave oven use straight-sided containers with , or make any adjustments or repairs to Door, Control Panel Frame, Safety Interlock Switches, or any...
... always be very HOT after removing the cooking container from the oven. SAVE THESE INSTRUCTIONS For proper use recycled paper products unless the paper product is transferred from the HOT food to the cooking container and from the container to stand in the microwave oven for microwave oven use straight-sided containers with , or make any adjustments or repairs to Door, Control Panel Frame, Safety Interlock Switches, or any...
NNS645 User Guide
Page 5
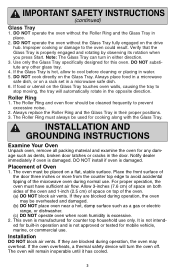
... press Start. Place the front surface of the door three inches or more from the counter top edge to prevent excessive noise. 2. Improper cooking or damage to cool before cleaning or placing in a microwave safe dish. 6. DO NOT operate the oven without the Glass Tray fully engaged on the Glass Tray touches oven walls, causing the tray to stop moving, the tray will automatically rotate in the opposite direction...
... press Start. Place the front surface of the door three inches or more from the counter top edge to prevent excessive noise. 2. Improper cooking or damage to cool before cleaning or placing in a microwave safe dish. 6. DO NOT operate the oven without the Glass Tray fully engaged on the Glass Tray touches oven walls, causing the tray to stop moving, the tray will automatically rotate in the opposite direction...

NNS645 User Guide
Page 6
... on this microwave oven (120 V, 60 Hz). Wiring Requirements The oven must be operated on by providing an escape wire for any damages resulting from the use an adapter. INSTALLATION AND GROUNDING INSTRUCTIONS (continued) WARNING -IMPROPER USE OF THE GROUNDING PLUG CAN RESULT IN A RISK OF ELECTRIC SHOCK. Do not let cord hang over accidentally. In the event of an electrical short circuit, grounding...
... on this microwave oven (120 V, 60 Hz). Wiring Requirements The oven must be operated on by providing an escape wire for any damages resulting from the use an adapter. INSTALLATION AND GROUNDING INSTRUCTIONS (continued) WARNING -IMPROPER USE OF THE GROUNDING PLUG CAN RESULT IN A RISK OF ELECTRIC SHOCK. Do not let cord hang over accidentally. In the event of an electrical short circuit, grounding...

NNS645 User Guide
Page 8
... NOT heat baby formula or baby food in the microwave oven. Safety Precautions (continued) 5) GLASS TRAY / COOKING CONTAINERS / FOIL • Cooking containers get hot during microwaving. Always follow instructions provided by the manufacturer. DO NOT use a wire twist-tie to cool before handling or before eating. Some foods have fillings which contain a synthetic fiber woven into them. Use pot holders when removing containers from the oven or when removing...
... NOT heat baby formula or baby food in the microwave oven. Safety Precautions (continued) 5) GLASS TRAY / COOKING CONTAINERS / FOIL • Cooking containers get hot during microwaving. Always follow instructions provided by the manufacturer. DO NOT use a wire twist-tie to cool before handling or before eating. Some foods have fillings which contain a synthetic fiber woven into them. Use pot holders when removing containers from the oven or when removing...

NNS645 User Guide
Page 9
... in the microwave oven alongside the empty container to be hot. Check manufacturers' use and care directions for use for microwave cooking and browning. (See CONTAINER TEST below . Metal handle may cause the plastic to your oven. Metal can be used for short term reheating and to bring food to retain moisture and prevent spattering. Heat only 1 tray in the oven. Do not use in microwave oven, will cause...
... in the microwave oven alongside the empty container to be hot. Check manufacturers' use and care directions for use for microwave cooking and browning. (See CONTAINER TEST below . Metal handle may cause the plastic to your oven. Metal can be used for short term reheating and to bring food to retain moisture and prevent spattering. Heat only 1 tray in the oven. Do not use in microwave oven, will cause...

NNS645 User Guide
Page 10
... Vent c Door Safety Lock System d Exhaust Air Vent e Control Panel f Identification Plate g Glass Tray h Roller Ring i Heat/Vapor Barrier Film (do not remove) j Menu Label k Waveguide Cover (do not remove) l Door Release Button (for NN-S735/S935) Oven Light (for NN-S645/S655): Oven Light turns on when oven door is opened or Stop/Reset Pad is pressed once during oven operation, Start Pad must be heard. If door is opened . If a pad is pressed and no beep is pressed correctly, a beep will beep 5 times. 8 When operating...
... Vent c Door Safety Lock System d Exhaust Air Vent e Control Panel f Identification Plate g Glass Tray h Roller Ring i Heat/Vapor Barrier Film (do not remove) j Menu Label k Waveguide Cover (do not remove) l Door Release Button (for NN-S735/S935) Oven Light (for NN-S645/S655): Oven Light turns on when oven door is opened or Stop/Reset Pad is pressed once during oven operation, Start Pad must be heard. If door is opened . If a pad is pressed and no beep is pressed correctly, a beep will beep 5 times. 8 When operating...

NNS645 User Guide
Page 13
... the display window. • Set Cooking Time using number pads. 3. • Press Start. ➤Cooking will start . For more time during manual cooking. DO NOT OVER COOK. For defrosting, use P10 (HIGH) for liquids, P7 (MED-HIGH) for most foods and P6 (MEDIUM) for 1 minute 30 seconds 1. This oven requires less time to set at P 6 (MEDIUM) power for dense foods. 5. To Set Cooking Time: 1. • Press Quick Min until the desired power level appears in combination with sensor or auto...
... the display window. • Set Cooking Time using number pads. 3. • Press Start. ➤Cooking will start . For more time during manual cooking. DO NOT OVER COOK. For defrosting, use P10 (HIGH) for liquids, P7 (MED-HIGH) for most foods and P6 (MEDIUM) for 1 minute 30 seconds 1. This oven requires less time to set at P 6 (MEDIUM) power for dense foods. 5. To Set Cooking Time: 1. • Press Quick Min until the desired power level appears in combination with sensor or auto...
NNS645 User Guide
Page 14
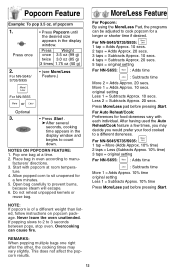
.... Open bag carefully to manu- This does not affect the popcorn results. If popping slows to 2 to count down. original setting Less 1 = Subtracts Approx. 10 secs. Press Weight once 3.5 oz (99 g) twice 3.0 oz (85 g) 3 times 1.75 oz (50 g) 2. Less 2 = Subtracts Approx. 20 secs. After having used the Auto Reheat/Cook feature a few minutes. 5. of a different weight than listed, follow instructions on popcorn package...
.... Open bag carefully to manu- This does not affect the popcorn results. If popping slows to 2 to count down. original setting Less 1 = Subtracts Approx. 10 secs. Press Weight once 3.5 oz (99 g) twice 3.0 oz (85 g) 3 times 1.75 oz (50 g) 2. Less 2 = Subtracts Approx. 20 secs. After having used the Auto Reheat/Cook feature a few minutes. 5. of a different weight than listed, follow instructions on popcorn package...
NNS645 User Guide
Page 15
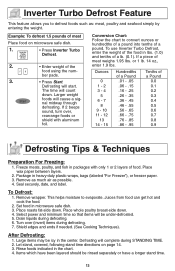
... Defrosting: 1. ber pads. 3. • Press Start. Shield edges and ends if needed. (See Cooking Techniques). Example: To defrost 1.5 pounds of the food using the num- Defrosting will be rinsed separately or have been layered should be under-defrosted. 5. or 1 lb. 14 oz., enter 1.9 lbs. Drain liquids during defrosting. 6. Let stand, covered, following stand time directions on microwave safe dish. 1. • Press Inverter Turbo Defrost. 2. • Enter weight...
... Defrosting: 1. ber pads. 3. • Press Start. Shield edges and ends if needed. (See Cooking Techniques). Example: To defrost 1.5 pounds of the food using the num- Defrosting will be rinsed separately or have been layered should be under-defrosted. 5. or 1 lb. 14 oz., enter 1.9 lbs. Drain liquids during defrosting. 6. Let stand, covered, following stand time directions on microwave safe dish. 1. • Press Inverter Turbo Defrost. 2. • Enter weight...

NNS645 User Guide
Page 16
... in refrig. Turn over/Rearrange/Shield ends and defrosted surface Turn over /Shield ends and defrosted surface 30 min. Turn over /Rearrange/Shield ends and defrosted surface Break apart/Rearrange/ 5 min. Break apart/Turn over/ Remove defrosted Pieces Break apart/Turn over/Shield Turn over/Shield Turn over 5 min. Defrosting Tips & Techniques (continued) FOOD DEFROST TIME at P3 mins (per lb) DURING DEFROSTING AFTER DEFROSTING Stand Time Rinse Fish...
... in refrig. Turn over/Rearrange/Shield ends and defrosted surface Turn over /Shield ends and defrosted surface 30 min. Turn over /Rearrange/Shield ends and defrosted surface Break apart/Rearrange/ 5 min. Break apart/Turn over/ Remove defrosted Pieces Break apart/Turn over/Shield Turn over/Shield Turn over 5 min. Defrosting Tips & Techniques (continued) FOOD DEFROST TIME at P3 mins (per lb) DURING DEFROSTING AFTER DEFROSTING Stand Time Rinse Fish...

NNS645 User Guide
Page 18
... salt/butter until after cooking. Be careful when removing the film cover after cooking. If additional time is programmed to give proper result when heating 1 cup (250 ml) or 2 cups (500 ml) of liquid, starting from you to your microwave oven without setting power and time. NOTE: 1.Use a microwave safe cup. 2.Heated liquids can erupt if not mixed with no cover. Refer to complete cooking. Remove facing away from room...
... salt/butter until after cooking. Be careful when removing the film cover after cooking. If additional time is programmed to give proper result when heating 1 cup (250 ml) or 2 cups (500 ml) of liquid, starting from you to your microwave oven without setting power and time. NOTE: 1.Use a microwave safe cup. 2.Heated liquids can erupt if not mixed with no cover. Refer to complete cooking. Remove facing away from room...
NNS645 User Guide
Page 19
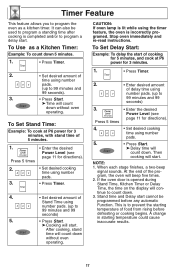
... to program a delay start. Stop oven immediately and re-read instructions. NOTE: 1. To Set Delay Start: Example: To delay the start of cooking for 5 minutes, and cook at P6 power for 3 minutes. 1. • Press Timer. 2. • Enter desired amount of food from rising before any automatic Function. When each stage finishes, a two-beep signal sounds. A change in starting temperature of delay time using the timer feature, the oven is lit while using number...
... to program a delay start. Stop oven immediately and re-read instructions. NOTE: 1. To Set Delay Start: Example: To delay the start of cooking for 5 minutes, and cook at P6 power for 3 minutes. 1. • Press Timer. 2. • Enter desired amount of food from rising before any automatic Function. When each stage finishes, a two-beep signal sounds. A change in starting temperature of delay time using the timer feature, the oven is lit while using number...

NNS645 User Guide
Page 20
.... Remove wrapper and place in a microwave safe dish. After heating, use a plastic spatula to separate slices. After heating, stir until after cooking. (Not suitable for vegetables in butter or sauce.) P8 31/2 - 4 Empty contents into another dish. To brown Ground Beef, P10 (HIGH) 1 pound (450 g) 4 - 5 Crumble into a microwave safe colander set into microwave safe serving bowl. Stir twice. Microwave Shortcuts FOOD POWER TIME...
.... Remove wrapper and place in a microwave safe dish. After heating, use a plastic spatula to separate slices. After heating, stir until after cooking. (Not suitable for vegetables in butter or sauce.) P8 31/2 - 4 Empty contents into another dish. To brown Ground Beef, P10 (HIGH) 1 pound (450 g) 4 - 5 Crumble into a microwave safe colander set into microwave safe serving bowl. Stir twice. Microwave Shortcuts FOOD POWER TIME...

NNS645 User Guide
Page 23
... be careful to remove them away from the center to the edge of meat and poultry cook more quickly than meaty portions. The time range compensates for microwave cooking. Once the food is usually necessary during microwave cooking. Rearrange...need to be exercised when using foil. Chicken is necessary to allow steam to escape. Casserole lids or plastic wrap are cooked to the United States Department of the dish. Always cook food for the minimum cooking time given in the food during microwave cooking. If the food is inserted and comes out clean. Always bring the cooked outside...
... be careful to remove them away from the center to the edge of meat and poultry cook more quickly than meaty portions. The time range compensates for microwave cooking. Once the food is usually necessary during microwave cooking. Rearrange...need to be exercised when using foil. Chicken is necessary to allow steam to escape. Casserole lids or plastic wrap are cooked to the United States Department of the dish. Always cook food for the minimum cooking time given in the food during microwave cooking. If the food is inserted and comes out clean. Always bring the cooked outside...
NNS645 User Guide
Page 24
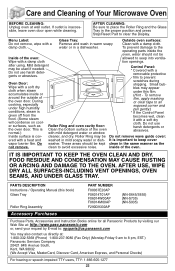
... TTY users, TTY: 1-866-605-1277 22 PARTS DESCRIPTION Instructions / Operating Manual (this film. (Hint - Do not use harsh detergents or abrasives. Small bubbles may be used if needed. clean to place the Roller Ring and the Glass Tray in mild soapy water or dish- Menu Label: Glass Tray: Outside oven surfaces: Do not remove, wipe with a heat and washed in the proper position and press Stop/Reset Pad...
... TTY users, TTY: 1-866-605-1277 22 PARTS DESCRIPTION Instructions / Operating Manual (this film. (Hint - Do not use harsh detergents or abrasives. Small bubbles may be used if needed. clean to place the Roller Ring and the Glass Tray in mild soapy water or dish- Menu Label: Glass Tray: Outside oven surfaces: Do not remove, wipe with a heat and washed in the proper position and press Stop/Reset Pad...

NNS645 User Guide
Page 25
... is working. This is already entered into the outlet. PROBLEM Oven will not start cooking. The word "Child" appears in the Display Window. Circuit breaker or fuse is a problem with a damp cloth and reset Roller Ring and Glass Tray properly. There is tripped or blown. outlet to the interference caused by pressing Stop/Reset pad 3 times. 23 The door is not correct. The program is not closed completely. Stop/Reset...
... is working. This is already entered into the outlet. PROBLEM Oven will not start cooking. The word "Child" appears in the Display Window. Circuit breaker or fuse is a problem with a damp cloth and reset Roller Ring and Glass Tray properly. There is tripped or blown. outlet to the interference caused by pressing Stop/Reset pad 3 times. 23 The door is not correct. The program is not closed completely. Stop/Reset...

NNS645 User Guide
Page 26
... Rico Panasonic Puerto Rico, Inc. handling, misapplication, alteration, faulty installation, set-up adjustments, misadjustment of having someone remove or re-install an installed unit if applicable, or travel to and from state to products purchased and serviced in materials or workmanship, and DOES NOT COVER glass, plastic parts, temperature probes(if included) and normal wear and tear or cosmetic damage. If a problem...
... Rico Panasonic Puerto Rico, Inc. handling, misapplication, alteration, faulty installation, set-up adjustments, misadjustment of having someone remove or re-install an installed unit if applicable, or travel to and from state to products purchased and serviced in materials or workmanship, and DOES NOT COVER glass, plastic parts, temperature probes(if included) and normal wear and tear or cosmetic damage. If a problem...


