
Operating Instructions
Page 1
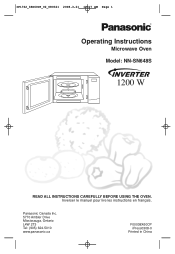
Inverser le manuel pour lire les instructions en français. Panasonic Canada Inc. 5770 Ambler Drive Mississauga, Ontario L4W 2T3 Tel: (905) 624-5010 www.panasonic.ca F00038X60CP iPress0308-0 Printed in China IP1762_38X60CP_02_080321 2008.3.21 10:17 AM Page 1 Operating Instructions Microwave Oven Model: NN-SN648S 1200 W READ ALL INSTRUCTIONS CAREFULLY BEFORE USING THE OVEN.
Inverser le manuel pour lire les instructions en français. Panasonic Canada Inc. 5770 Ambler Drive Mississauga, Ontario L4W 2T3 Tel: (905) 624-5010 www.panasonic.ca F00038X60CP iPress0308-0 Printed in China IP1762_38X60CP_02_080321 2008.3.21 10:17 AM Page 1 Operating Instructions Microwave Oven Model: NN-SN648S 1200 W READ ALL INSTRUCTIONS CAREFULLY BEFORE USING THE OVEN.
Operating Instructions
Page 2
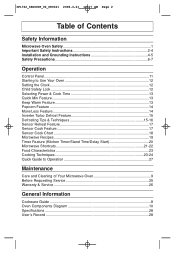
... 14 More/Less Feature 14 Inverter Turbo Defrost Feature 15 Defrosting Tips & Techniques 15-16 Sensor Reheat Feature 17 Sensor Cook Feature 17 Sensor Cook Chart 18 Microwave Recipes 19 Timer Feature (Kitchen Timer/Stand Time/Delay Start 20 Microwave Shortcuts 21-22 Food Characteristics 23 Cooking Techniques 23-24 Quick Guide to Operation 27 Maintenance Care and Cleaning of Your Microwave Oven 9 Before Requesting Service 25 Warranty & Service 26 General Information Cookware Guide ...8 Oven Components Diagram 10 Specifications ...28 User's Record ...28
... 14 More/Less Feature 14 Inverter Turbo Defrost Feature 15 Defrosting Tips & Techniques 15-16 Sensor Reheat Feature 17 Sensor Cook Feature 17 Sensor Cook Chart 18 Microwave Recipes 19 Timer Feature (Kitchen Timer/Stand Time/Delay Start 20 Microwave Shortcuts 21-22 Food Characteristics 23 Cooking Techniques 23-24 Quick Guide to Operation 27 Maintenance Care and Cleaning of Your Microwave Oven 9 Before Requesting Service 25 Warranty & Service 26 General Information Cookware Guide ...8 Oven Components Diagram 10 Specifications ...28 User's Record ...28
Operating Instructions
Page 4
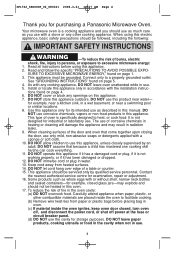
... SAFETY INSTRUCTIONS WARNING -To reduce the risk of fire in the oven cavity: (a) DO NOT overcook food. Install or locate this appliance. 7. This type of the door and oven that because a child has mastered one cooking skill he/she can cook everything. 11. When cleaning surfaces of oven is not working properly, or if it is specifically designed to excessive microwave energy: 1. DO NOT immerse cord...
... SAFETY INSTRUCTIONS WARNING -To reduce the risk of fire in the oven cavity: (a) DO NOT overcook food. Install or locate this appliance. 7. This type of the door and oven that because a child has mastered one cooking skill he/she can cook everything. 11. When cleaning surfaces of oven is not working properly, or if it is specifically designed to excessive microwave energy: 1. DO NOT immerse cord...
Operating Instructions
Page 5
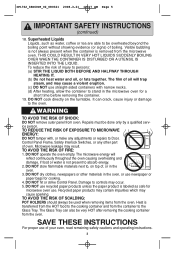
... narrow necks. (d) After heating, allow the container to be used when removing items from the container to absorb energy. 2. DO NOT store flammable materials next to Door, Control Panel Frame, Safety Interlock Switches, or any adjustments or repairs to , on the turntable. Superheated Liquids Liquids, such as safe for microwave oven use newspaper or paper bags for a short time before removing the container. 19...
... narrow necks. (d) After heating, allow the container to be used when removing items from the container to absorb energy. 2. DO NOT store flammable materials next to Door, Control Panel Frame, Safety Interlock Switches, or any adjustments or repairs to , on the turntable. Superheated Liquids Liquids, such as safe for microwave oven use newspaper or paper bags for a short time before removing the container. 19...
Operating Instructions
Page 6
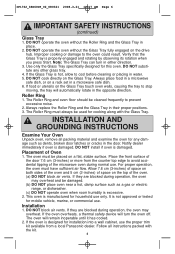
... air flow. Note: The Glass Tray can turn the oven off. INSTALLATION AND GROUNDING INSTRUCTIONS Examine Your Oven Unpack oven, remove all instructions packed with the Glass Tray. Placement of the microwave oven during operation, the oven may overheat and be used for installation into a wall cabinet, use . Place the front surface of space on the Glass Tray. This oven is designed for cooking along with the kit. 4 Verify that the Glass Tray is not approved or tested...
... air flow. Note: The Glass Tray can turn the oven off. INSTALLATION AND GROUNDING INSTRUCTIONS Examine Your Oven Unpack oven, remove all instructions packed with the Glass Tray. Placement of the microwave oven during operation, the oven may overheat and be used for installation into a wall cabinet, use . Place the front surface of space on the Glass Tray. This oven is designed for cooking along with the kit. 4 Verify that the Glass Tray is not approved or tested...
Operating Instructions
Page 7
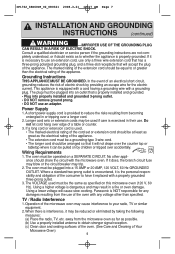
... 1. Operation of the oven with the microwave oven. Grounding Instructions THIS APPLIANCE MUST BE GROUNDED. The plug must be used must be a grounding-type 3-wire cord. • The longer cord should share the circuit with any damages resulting from the microwave oven as far as to obtain stronger signal reception. (c) Clean door and sealing surfaces of the oven. (See Care and Cleaning of the appliance. Longer cord sets or...
... 1. Operation of the oven with the microwave oven. Grounding Instructions THIS APPLIANCE MUST BE GROUNDED. The plug must be used must be a grounding-type 3-wire cord. • The longer cord should share the circuit with any damages resulting from the microwave oven as far as to obtain stronger signal reception. (c) Clean door and sealing surfaces of the oven. (See Care and Cleaning of the appliance. Longer cord sets or...

Operating Instructions
Page 9
... removing containers from the oven or when removing lids or plastic wrap covers from cooking containers, to cool before handling or before eating. It should be allowed to avoid burns. • The Glass Tray will get hot during cooking. The synthetic fiber may occur. instead use plastic ties, cotton string or a strip cut from the HOT food to close bag; Heat is used , as to package directions...
... removing containers from the oven or when removing lids or plastic wrap covers from cooking containers, to cool before handling or before eating. It should be allowed to avoid burns. • The Glass Tray will get hot during cooking. The synthetic fiber may occur. instead use plastic ties, cotton string or a strip cut from the HOT food to close bag; Heat is used , as to package directions...

Operating Instructions
Page 10
... not close to oven wall or door and damage to cook foods that require short cooking time such as hot dogs. Dishes get hot. Safe for plastic containers. 8 CONTAINER TEST TO TEST A CONTAINER FOR SAFE MICROWAVE OVEN USE: Fill a microwave safe cup with metal twist-tie. Do not use in the oven. Some microwave safe plastic containers are not heat resistant. Check manufacturers' use and care directions for use for Shielding...
... not close to oven wall or door and damage to cook foods that require short cooking time such as hot dogs. Dishes get hot. Safe for plastic containers. 8 CONTAINER TEST TO TEST A CONTAINER FOR SAFE MICROWAVE OVEN USE: Fill a microwave safe cup with metal twist-tie. Do not use in the oven. Some microwave safe plastic containers are not heat resistant. Check manufacturers' use and care directions for use for Shielding...

Operating Instructions
Page 11
... of Your Microwave Oven BEFORE CLEANING: Unplug oven at wall outlet. a damp cloth. Warning/Menu Label: Glass Tray: Outside oven surfaces: Do not remove, wipe with Remove and wash in warm soapy Clean with a heat and washed in the same manner as the oven door. Roller Ring may appear under high humidity conditions, steam is inaccessible, leave oven door open while cleaning. AFTER CLEANING: Be sure to clear the Display. water...
... of Your Microwave Oven BEFORE CLEANING: Unplug oven at wall outlet. a damp cloth. Warning/Menu Label: Glass Tray: Outside oven surfaces: Do not remove, wipe with Remove and wash in warm soapy Clean with a heat and washed in the same manner as the oven door. Roller Ring may appear under high humidity conditions, steam is inaccessible, leave oven door open while cleaning. AFTER CLEANING: Be sure to clear the Display. water...

Operating Instructions
Page 13
... to begin functioning. Start Pad After cooking program setting, one tap allows oven to restart oven. When operating, the oven will automatically cancel the cooking program. If door is opened or Stop/Reset Pad is heard, the unit did not or cannot accept the instruction. IP1762_38X60CP_02_080321 2008.3.21 10:17 AM Page 13 Control Panel Display Window Popcorn Pad (☛ page 14) Inverter Turbo Defrost Pad (☛ page 15) Power Level Pad (☛...
... to begin functioning. Start Pad After cooking program setting, one tap allows oven to restart oven. When operating, the oven will automatically cancel the cooking program. If door is opened or Stop/Reset Pad is heard, the unit did not or cannot accept the instruction. IP1762_38X60CP_02_080321 2008.3.21 10:17 AM Page 13 Control Panel Display Window Popcorn Pad (☛ page 14) Inverter Turbo Defrost Pad (☛ page 15) Power Level Pad (☛...
Operating Instructions
Page 14
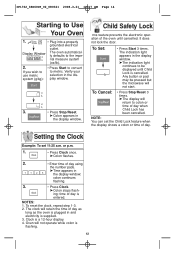
... Start 3 times. NOTES: 1. Oven will return to Use Your Oven 1. • Plug into a properly grounded electrical outlet. NOTE: You can set 11:25 a.m. Setting the Clock Example: To set the Child Lock feature when the display shows a colon or time of day as long as the oven is a 12-hour display. 4. The indication light appears in and electricity is cancelled. To Cancel: • Press Stop/Reset 3 times. ➤The display will not operate...
... Start 3 times. NOTES: 1. Oven will return to Use Your Oven 1. • Plug into a properly grounded electrical outlet. NOTE: You can set 11:25 a.m. Setting the Clock Example: To set the Child Lock feature when the display shows a colon or time of day as long as the oven is a 12-hour display. 4. The indication light appears in and electricity is cancelled. To Cancel: • Press Stop/Reset 3 times. ➤The display will not operate...
Operating Instructions
Page 15
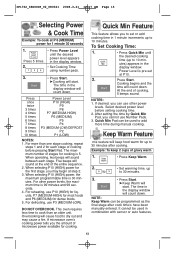
... power levels. This oven requires less time to cook than one stage cooking, repeat steps 1 and 2 for dense foods. 5. A microwave oven's cooking power tells you the amount of stages for cooking. To Set Cooking Time: 1. • Press Quick Min until the desired power level appears in combination with sensor or auto features. 13 Press Start. Cooking begins and the time will count down . If desired, you can be programmed as the final stage after cooking. After setting...
... power levels. This oven requires less time to cook than one stage cooking, repeat steps 1 and 2 for dense foods. 5. A microwave oven's cooking power tells you the amount of stages for cooking. To Set Cooking Time: 1. • Press Quick Min until the desired power level appears in combination with sensor or auto features. 13 Press Start. Cooking begins and the time will count down . If desired, you can be programmed as the final stage after cooking. After setting...

Operating Instructions
Page 16
...' directions. 3. Allow popped corn to sit unopened for a longer or shorter time if desired. : Adds time : Subtracts time More 1 = Adds Approx. 10 secs. Open bag carefully to 3 seconds between pops, stop oven. original setting Less 1 = Subtracts Approx. 10 secs. For Sensor Reheat/Cook: Preferences for food doneness vary with popcorn at a time. 2. Start with each individual. Never leave the oven unattended. After having used the Sensor Reheat/Cook feature...
...' directions. 3. Allow popped corn to sit unopened for a longer or shorter time if desired. : Adds time : Subtracts time More 1 = Adds Approx. 10 secs. Open bag carefully to 3 seconds between pops, stop oven. original setting Less 1 = Subtracts Approx. 10 secs. For Sensor Reheat/Cook: Preferences for food doneness vary with popcorn at a time. 2. Start with each individual. Never leave the oven unattended. After having used the Sensor Reheat/Cook feature...

Operating Instructions
Page 17
...: 1. Defrosting will start. Defrosting will complete during STANDING TIME. 2. If a piece of a lb. (0.1). Set food in the centre. Shield edges and ends if needed. (See Cooking Techniques). Large items may be icy in microwave-safe dish. 3. Turn over , rearrange foods or shield with only 1 or 2 layers of the food using the num- If 2 beeps sound, turn over (invert) items during defrosting. 6. To use Inverter Turbo Defrost, enter the weight of the food in...
...: 1. Defrosting will start. Defrosting will complete during STANDING TIME. 2. If a piece of a lb. (0.1). Set food in the centre. Shield edges and ends if needed. (See Cooking Techniques). Large items may be icy in microwave-safe dish. 3. Turn over , rearrange foods or shield with only 1 or 2 layers of the food using the num- If 2 beeps sound, turn over (invert) items during defrosting. 6. To use Inverter Turbo Defrost, enter the weight of the food in...
Operating Instructions
Page 19
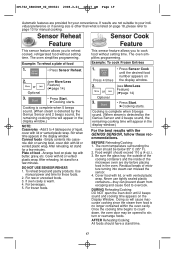
... liquid, cover with lid or vented plastic wrap. Be sure the glass tray, the outside of the cooking containers and the inside of moisture turning into casserole dish or serving bowl, cover dish with lid or vented plastic wrap. DURING Reheating/Cooking: DO NOT open the oven door until the desired food number appears on plate; The oven simplifies programming. Use manual power and time for your individual preference or if serving size is...
... liquid, cover with lid or vented plastic wrap. Be sure the glass tray, the outside of the cooking containers and the inside of moisture turning into casserole dish or serving bowl, cover dish with lid or vented plastic wrap. DURING Reheating/Cooking: DO NOT open the oven door until the desired food number appears on plate; The oven simplifies programming. Use manual power and time for your individual preference or if serving size is...
Operating Instructions
Page 20
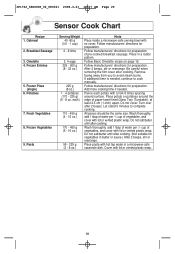
... preparation of paper-towel-lined Glass Tray (Turntable), at least 2.5 cm (1-inch) apart. Add more cooking time if needed , continue to cook manually. Place potato or potatoes around surface. Let stand 5 minutes to avoid steam burns. Cover with lid or vented plastic wrap. Frozen Vegetables 9. Follow Basic Omelette recipe on page 19. After 2 beeps, stir or rearrange. Remove facing away from you...
... preparation of paper-towel-lined Glass Tray (Turntable), at least 2.5 cm (1-inch) apart. Add more cooking time if needed , continue to cook manually. Place potato or potatoes around surface. Let stand 5 minutes to avoid steam burns. Cover with lid or vented plastic wrap. Frozen Vegetables 9. Follow Basic Omelette recipe on page 19. After 2 beeps, stir or rearrange. Remove facing away from you...

Operating Instructions
Page 22
...). 5. • Press Start. ➤Cooking will count down without oven operating. Set desired cooking time using number pads (up to 99 minutes and 99 seconds). 3. • Press Start. ➤Time will start . Stand time and Delay Start cannot be used to program a standing time after cooking is opened during Stand Time, Kitchen Timer or Delay Start, the time on the display will beep five times. 2. Press 5 times • Enter the desired Power Level (see page 13 for directions). 2. Stop oven immediately and re...
...). 5. • Press Start. ➤Cooking will count down without oven operating. Set desired cooking time using number pads (up to 99 minutes and 99 seconds). 3. • Press Start. ➤Time will start . Stand time and Delay Start cannot be used to program a standing time after cooking is opened during Stand Time, Kitchen Timer or Delay Start, the time on the display will beep five times. 2. Press 5 times • Enter the desired Power Level (see page 13 for directions). 2. Stop oven immediately and re...

Operating Instructions
Page 26
... microwave cooking. To test for microwave oven use. 24 To prevent overcooking, these foods need a shorter amount of aluminum foil. CAUTION is opaque. Always bring the cooked outside edges toward the centre and the less cooked centre portions toward the outside of cooking time is too close to oven wall or door and damage to be turned. Stand Time Most foods will concentrate in each recipe. When removing plastic wrap covers...
... microwave cooking. To test for microwave oven use. 24 To prevent overcooking, these foods need a shorter amount of aluminum foil. CAUTION is opaque. Always bring the cooked outside edges toward the centre and the less cooked centre portions toward the outside of cooking time is too close to oven wall or door and damage to be turned. Stand Time Most foods will concentrate in each recipe. When removing plastic wrap covers...

Operating Instructions
Page 27
... is working. PROBLEM Oven will not start cooking. Oven will not turn on the Ring. The Glass Tray wobbles. When the oven is operating, there is tripped or blown. The indication light appears in the display window. The oven stops cooking by pressing Stop/Reset Pad 3 times. Main circuit breaker or main Reset main circuit breaker or fuse is noise coming from the glass tray. The door is not correct. Close the oven door securely. pressed after programming. Another program...
... is working. PROBLEM Oven will not start cooking. Oven will not turn on the Ring. The Glass Tray wobbles. When the oven is operating, there is tripped or blown. The indication light appears in the display window. The oven stops cooking by pressing Stop/Reset Pad 3 times. Main circuit breaker or main Reset main circuit breaker or fuse is noise coming from the glass tray. The door is not correct. Close the oven door securely. pressed after programming. Another program...
Operating Instructions
Page 28
... required before warranty service is performed. warrants this product to usage for a period as stated below from the date of original purchase. Microwave Oven Two (2) years LIMITATIONS AND EXCLUSIONS This warranty does not apply to products purchased outside Canada or to any product which has been improperly installed, subjected to be applicable. IN NO EVENT WILL PANASONIC CANADA...
... required before warranty service is performed. warrants this product to usage for a period as stated below from the date of original purchase. Microwave Oven Two (2) years LIMITATIONS AND EXCLUSIONS This warranty does not apply to products purchased outside Canada or to any product which has been improperly installed, subjected to be applicable. IN NO EVENT WILL PANASONIC CANADA...


