Operating Instructions
Page 1
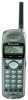
... of the features of the charger AC Adaptor Fasten the AC adaptor cord to prevent it from being disconnected. • USE ONLY WITH Panasonic AC ADAPTOR KX-TCA1 (Order No. KX-TGA200B Operating Instructions PLEASE READ BEFORE USE AND SAVE. KX-TGA200B is normal for further details.... the Belt Clip 12 Battery Replacement 12 Installation Connecting the AC adaptor to the charger Power Outlet (AC 120 V, 60 Hz) Bottom of this cordless handset. Accessories (included) For extra orders, call 1-800-332-5368 Charger one AC Adaptor............one Order No. KX-TCA1-G Belt Clip one Order No...
... of the features of the charger AC Adaptor Fasten the AC adaptor cord to prevent it from being disconnected. • USE ONLY WITH Panasonic AC ADAPTOR KX-TCA1 (Order No. KX-TGA200B Operating Instructions PLEASE READ BEFORE USE AND SAVE. KX-TGA200B is normal for further details.... the Belt Clip 12 Battery Replacement 12 Installation Connecting the AC adaptor to the charger Power Outlet (AC 120 V, 60 Hz) Bottom of this cordless handset. Accessories (included) For extra orders, call 1-800-332-5368 Charger one AC Adaptor............one Order No. KX-TCA1-G Belt Clip one Order No...
Operating Instructions
Page 2
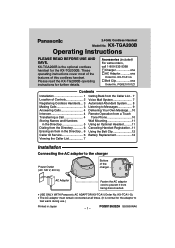
...or high humidity. Otherwise the battery may not charge properly. Charge Contacts Clean more often if the unit is in use . Location of the handset and the charger with a soft, dry cloth once a month. " " flashes on the charger and charge for about 4 days • .../EXIT) (REDIAL/EDIT) Charge Contacts (INTERCOM/HOLD/TRANSFER) (LINE!1) (LINE!2) (CLEAR) Headset Jack (ENTER)/ (Voice Mail) CHARGE Indicator -2- Charging the battery Place the cordless handset on the display, or - CHARGE Indicator Handset battery information After your Panasonic battery is displayed, -
...or high humidity. Otherwise the battery may not charge properly. Charge Contacts Clean more often if the unit is in use . Location of the handset and the charger with a soft, dry cloth once a month. " " flashes on the charger and charge for about 4 days • .../EXIT) (REDIAL/EDIT) Charge Contacts (INTERCOM/HOLD/TRANSFER) (LINE!1) (LINE!2) (CLEAR) Headset Jack (ENTER)/ (Voice Mail) CHARGE Indicator -2- Charging the battery Place the cordless handset on the display, or - CHARGE Indicator Handset battery information After your Panasonic battery is displayed, -
Operating Instructions
Page 3
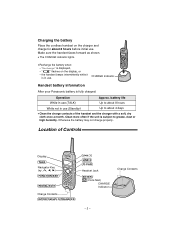
...standby mode. Registration must be handled simultaneously on the charger. • To adjust the handset volume (3 levels), press or while talking. one cordless handset allows you to 8 cordless handsets at registration. If a PIN (Personal Identification Number) has been stored: Follow steps ...or , and press H. 3 Select "HS registration" by pressing or , and press H. 4 Cordless handset: Press (FUNCTION). 5 Select "Registration" by pressing or , and press H. 6 Select "HS registration" by 2 cordless handsets). 1 Press (TALK). • You can register up to have: - To dial after ...
...standby mode. Registration must be handled simultaneously on the charger. • To adjust the handset volume (3 levels), press or while talking. one cordless handset allows you to 8 cordless handsets at registration. If a PIN (Personal Identification Number) has been stored: Follow steps ...or , and press H. 3 Select "HS registration" by pressing or , and press H. 4 Cordless handset: Press (FUNCTION). 5 Select "Registration" by pressing or , and press H. 6 Select "HS registration" by 2 cordless handsets). 1 Press (TALK). • You can register up to have: - To dial after ...
Operating Instructions
Page 4
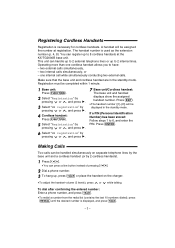
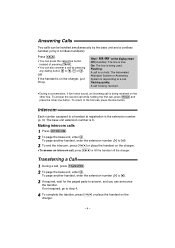
... pressing (TALK). • You can also answer a call by 2 cordless handsets). OR If the handset is on the charger. • To answer an intercom call, press (TALK) or lift the handset off the charger. To page another handset, enter the extension number ((1) to (8)). 3 If required, wait for ...calls 1 Press (INTERCOM). 2 To page the base unit, enter (0). Answering Calls Two calls can be handled simultaneously by the base unit and a cordless handset (or by pressing any dialing button (0) to the first call, press the line button. Flashing: A call is on the charger. -4- The Automated...
... pressing (TALK). • You can also answer a call by 2 cordless handsets). OR If the handset is on the charger. • To answer an intercom call, press (TALK) or lift the handset off the charger. To page another handset, enter the extension number ((1) to (8)). 3 If required, wait for ...calls 1 Press (INTERCOM). 2 To page the base unit, enter (0). Answering Calls Two calls can be handled simultaneously by the base unit and a cordless handset (or by pressing any dialing button (0) to the first call, press the line button. Flashing: A call is on the charger. -4- The Automated...
Operating Instructions
Page 5
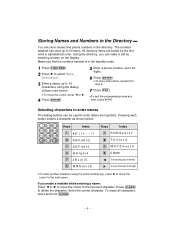
...; To store other items, repeat from step 2. 7 Press (EXIT). • To exit the programming mode any time, press (EXIT). Make sure that the cordless handset is in the standby mode. 1 Press (FUNCTION). 2 Press H to select "Save directory". 3 Enter a name, up to 50 items. All directory items ... move the cursor, press I or H to move the cursor to enter names The dialing buttons can store names and phone numbers in alphabetical order. The cordless handset can make a mistake while entering a name: Press I or H. 4 Press (ENTER). 5 Enter a phone number, up to 16 characters, using the ...
...; To store other items, repeat from step 2. 7 Press (EXIT). • To exit the programming mode any time, press (EXIT). Make sure that the cordless handset is in the standby mode. 1 Press (FUNCTION). 2 Press H to select "Save directory". 3 Enter a name, up to 50 items. All directory items ... move the cursor, press I or H to move the cursor to enter names The dialing buttons can store names and phone numbers in alphabetical order. The cordless handset can make a mistake while entering a name: Press I or H. 4 Press (ENTER). 5 Enter a phone number, up to 16 characters, using the ...

Operating Instructions
Page 6
Erasing an Item in the Directory Make sure that the cordless handset is in the standby mode. 1 Press I or H to enter the directory. 2 Press or to display his/her information, the display will show "Private caller". -6- The ...
Erasing an Item in the Directory Make sure that the cordless handset is in the standby mode. 1 Press I or H to enter the directory. 2 Press or to display his/her information, the display will show "Private caller". -6- The ...
Operating Instructions
Page 7
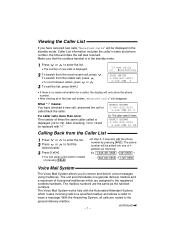
... includes the caller's name and phone number, the time and date the call entries, "Received calls" will disappear. Make sure that the cordless handset is in the standby mode. To search from the oldest call, press . • To scroll between callers, press or . 3 To...(continued \) After checking, ×2 to ×9 will be replaced with the Automated Attendant System, which are assigned to the registered cordless handsets. Viewing the Caller List If you to receive and deliver voice messages using mailboxes. The phone number will be edited into one general...
... includes the caller's name and phone number, the time and date the call entries, "Received calls" will disappear. Make sure that the cordless handset is in the standby mode. To search from the oldest call, press . • To scroll between callers, press or . 3 To...(continued \) After checking, ×2 to ×9 will be replaced with the Automated Attendant System, which are assigned to the registered cordless handsets. Viewing the Caller List If you to receive and deliver voice messages using mailboxes. The phone number will be edited into one general...
Operating Instructions
Page 8
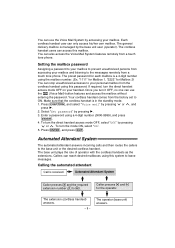
... (ENTER), and press (EXIT). Automated Attendant System Caller presses (#) and the required extension number ((1) to leave messages. The extension (cordless handset) answers. -8- Setting the mailbox password Assigning a password to your mailbox to prevent unauthorized persons from accessing your personal mailbox from a ...your mailbox and listening to the messages remotely from the factory set to the base unit or the desired cordless handset. The preset password for each mailbox is managed by pressing H. 3. You can also access the Voice Mail System features remotely from...
... (ENTER), and press (EXIT). Automated Attendant System Caller presses (#) and the required extension number ((1) to leave messages. The extension (cordless handset) answers. -8- Setting the mailbox password Assigning a password to your mailbox to prevent unauthorized persons from accessing your personal mailbox from a ...your mailbox and listening to the messages remotely from the factory set to the base unit or the desired cordless handset. The preset password for each mailbox is managed by pressing H. 3. You can also access the Voice Mail System features remotely from...
Operating Instructions
Page 11
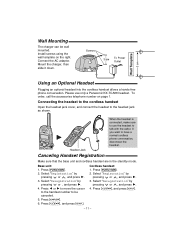
...Registration" by pressing or , and press H. 3. Connect the AC adaptor. Connecting the headset to the cordless handset Open the headset jack cover, and connect the headset to have a normal cordless phone conversation, disconnect the headset. If you want to the headset jack as shown. Press (CLEAR), and...then slide it down. When the headset is connected, make sure to use only a Panasonic KX-TCA88 headset. Headset Jack Canceling Handset Registration Make sure that the base unit and cordless handset are in the standby mode. Press (ENTER). 6. To order, call the accessories telephone...
...Registration" by pressing or , and press H. 3. Connect the AC adaptor. Connecting the headset to the cordless handset Open the headset jack cover, and connect the headset to have a normal cordless phone conversation, disconnect the headset. If you want to the headset jack as shown. Press (CLEAR), and...then slide it down. When the headset is connected, make sure to use only a Panasonic KX-TCA88 headset. Headset Jack Canceling Handset Registration Make sure that the base unit and cordless handset are in the standby mode. Press (ENTER). 6. To order, call the accessories telephone...
Operating Instructions
Page 12
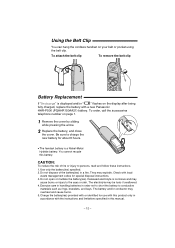
... the instructions and limitations specified in order not to short the battery to the eyes or skin. Charge the battery(ies) provided with a new Panasonic HHR-P506 (PQHHR150AA21) battery. They may overheat and cause burns. 5. Released electrolyte is displayed and/or " " flashes on the display after ...conductive materials such as rings, bracelets, and keys. Exercise care in handling batteries in this battery. Using the Belt Clip You can hang the cordless handset on page 1. 1 Remove the cover by sliding while pressing the arrow. 2 Replace the battery, and close the cover. Do not open or...
... the instructions and limitations specified in order not to short the battery to the eyes or skin. Charge the battery(ies) provided with a new Panasonic HHR-P506 (PQHHR150AA21) battery. They may overheat and cause burns. 5. Released electrolyte is displayed and/or " " flashes on the display after ...conductive materials such as rings, bracelets, and keys. Exercise care in handling batteries in this battery. Using the Belt Clip You can hang the cordless handset on page 1. 1 Remove the cover by sliding while pressing the arrow. 2 Replace the battery, and close the cover. Do not open or...


