Operating Instructions
Page 6
... 7.3 Specifying Operation Times 115 7.4 Changing the Indicator Display 117 7.5 Privacy Mode ...118 8 Camera Administration and Maintenance 119 8.1 Confirming Camera Status 119 8.2 Confirming Wireless Status (BL-C131A Only 120 8.3 Confirming Session Status 121 8.4 Confirming Alarm Logs 122 8.5 Restarting the Camera 123 8.6 Updating the Camera Firmware 124 8.7 Saving Settings in a Configuration File 125 8.8 Restoring Settings from a Configuration File 126...
... 7.3 Specifying Operation Times 115 7.4 Changing the Indicator Display 117 7.5 Privacy Mode ...118 8 Camera Administration and Maintenance 119 8.1 Confirming Camera Status 119 8.2 Confirming Wireless Status (BL-C131A Only 120 8.3 Confirming Session Status 121 8.4 Confirming Alarm Logs 122 8.5 Restarting the Camera 123 8.6 Updating the Camera Firmware 124 8.7 Saving Settings in a Configuration File 125 8.8 Restoring Settings from a Configuration File 126...

Operating Instructions
Page 55
Click [Delete Buffered Images]. 2.7 Deleting Buffered Images Note • • When restarting the camera (see Page 123), buffered images for all triggers are deleted. Restarting, updating firmware or resetting the camera to factory default. Operating Instructions 55 Saving the Date and Time page. - The following operations also delete buffered images for all triggers. - Turning off the camera. - 4.
Click [Delete Buffered Images]. 2.7 Deleting Buffered Images Note • • When restarting the camera (see Page 123), buffered images for all triggers are deleted. Restarting, updating firmware or resetting the camera to factory default. Operating Instructions 55 Saving the Date and Time page. - The following operations also delete buffered images for all triggers. - Turning off the camera. - 4.
Operating Instructions
Page 124
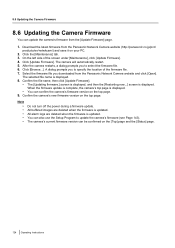
......]. All alarm logs are deleted when the firmware is updated. When the firmware update is complete, the camera's top page is updated. Click the [Maintenance] tab. 3. Click [Update Firmware]. All buffered images are deleted when the firmware is displayed. • You can confirm the camera's firmware version on your PC. 2. 8.6 Updating the Camera Firmware 8.6 Updating the Camera Firmware You can update the camera's firmware from the Panasonic Network Camera website and click [Open].
......]. All alarm logs are deleted when the firmware is updated. When the firmware update is complete, the camera's top page is updated. Click the [Maintenance] tab. 3. Click [Update Firmware]. All buffered images are deleted when the firmware is displayed. • You can confirm the camera's firmware version on your PC. 2. 8.6 Updating the Camera Firmware 8.6 Updating the Camera Firmware You can update the camera's firmware from the Panasonic Network Camera website and click [Open].
Operating Instructions
Page 125
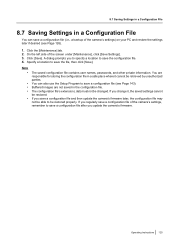
...8226; • • The saved configuration file contains user names, passwords, and other private information. If you update the camera's firmware. On the left side of the camera's settings, remember to save a configuration file after you change it cannot be restored properly. A dialog prompts you ...save a configuration file and then update the camera's firmware later, the configuration file may not be able to save the configuration file. 4. The configuration file's extension (.dat...
...8226; • • The saved configuration file contains user names, passwords, and other private information. If you update the camera's firmware. On the left side of the camera's settings, remember to save a configuration file after you change it cannot be restored properly. A dialog prompts you ...save a configuration file and then update the camera's firmware later, the configuration file may not be able to save the configuration file. 4. The configuration file's extension (.dat...
Operating Instructions
Page 126
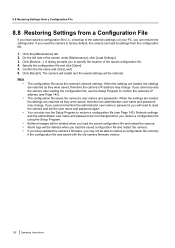
... the camera's network settings. When the settings are loaded, the settings are restored as they were saved, therefore the camera's IP address may change . Buffered images will be deleted when you load the saved configuration file and restart the camera. 8.8 Restoring Settings from a Configuration File 8.8 Restoring Settings from a Configuration File If you have updated the camera's firmware...
... the camera's network settings. When the settings are loaded, the settings are restored as they were saved, therefore the camera's IP address may change . Buffered images will be deleted when you load the saved configuration file and restart the camera. 8.8 Restoring Settings from a Configuration File 8.8 Restoring Settings from a Configuration File If you have updated the camera's firmware...
Operating Instructions
Page 143
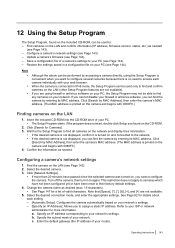
... The Setup Program, found on the CD-ROM. 2. Update a camera's firmware (see Page 144). Restore the settings saved in IPv6 mode, the Setup Program can be used to your network. Click [Search for details about each camera individually with 0080F0.) 4. Confirm the information as needed . Configuring a camera's network settings 1. Click [Network Settings]. • If more information. Turn off...
... The Setup Program, found on the CD-ROM. 2. Update a camera's firmware (see Page 144). Restore the settings saved in IPv6 mode, the Setup Program can be used to your network. Click [Search for details about each camera individually with 0080F0.) 4. Confirm the information as needed . Configuring a camera's network settings 1. Click [Network Settings]. • If more information. Turn off...
Operating Instructions
Page 144
... on your PC. • The Setup Program starts. Download the latest firmware from the Panasonic Network Camera website (http://panasonic.co.jp/pcc/ products/en/netwkcam/) and save the file, then click [Save]. 6. Select the firmware file you regularly save a configuration file and then update the camera's firmware later, the configuration file may not be able to your PC...
... on your PC. • The Setup Program starts. Download the latest firmware from the Panasonic Network Camera website (http://panasonic.co.jp/pcc/ products/en/netwkcam/) and save the file, then click [Save]. 6. Select the firmware file you regularly save a configuration file and then update the camera's firmware later, the configuration file may not be able to your PC...
Setup Guide
Page 1
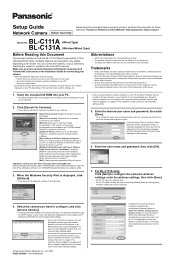
... the [Network Camera Recorder with Viewer Software Single Camera Version] software. (See "Installing the Network Camera Recorder with your PC, the Setup Program may vary from what is required to view them. • [Update Firmware]: Allows you to use the selected program to configure the camera's wireless settings, enter the wireless settings, then click [Save]. • BL-C111A users can...
... the [Network Camera Recorder with Viewer Software Single Camera Version] software. (See "Installing the Network Camera Recorder with your PC, the Setup Program may vary from what is required to view them. • [Update Firmware]: Allows you to use the selected program to configure the camera's wireless settings, enter the wireless settings, then click [Save]. • BL-C111A users can...

Service Manual
Page 2
... Electrical Parts Location(BLC111A 72 16.2. Replacement Parts List (BL-C131A 80 2 RF Block Check(BL-C131A 35 8.10. Update Firmware 37 8.15. How To Change MAC Address Label 38 8.16. Disassembly Instructions(BL-C111A 40 9.2. Terminal Guide of Schematic Diagram -------- 71 15.1....----------- 72 16.1. For Service Technicians 6 1.4. Internal Memory Capacity for Buffered Images-----8 3 Features 9 4 Technical Descriptions 10 4.1. Camera Block Check 30 8.5. Cleaning 49 11 Factory Setting 50 11.1. Main Board (Component View 65 14.2. Sub Board (Component View...
... Electrical Parts Location(BLC111A 72 16.2. Replacement Parts List (BL-C131A 80 2 RF Block Check(BL-C131A 35 8.10. Update Firmware 37 8.15. How To Change MAC Address Label 38 8.16. Disassembly Instructions(BL-C111A 40 9.2. Terminal Guide of Schematic Diagram -------- 71 15.1....----------- 72 16.1. For Service Technicians 6 1.4. Internal Memory Capacity for Buffered Images-----8 3 Features 9 4 Technical Descriptions 10 4.1. Camera Block Check 30 8.5. Cleaning 49 11 Factory Setting 50 11.1. Main Board (Component View 65 14.2. Sub Board (Component View...

Service Manual
Page 20
... firmware update. *2) What is IPv6? ・IPv6 is short for a number of Category 5 straight cable). Note: Refer to fulfill the system requirements. • Ethernet Router or Wireless Router for details about network environment. 20 When your ISP supports IPv6, your Panasonic Network Camera will be ready! ・ For more information, visit http://www.ipv6.org/. BL-C111A /BL-C131A...
... firmware update. *2) What is IPv6? ・IPv6 is short for a number of Category 5 straight cable). Note: Refer to fulfill the system requirements. • Ethernet Router or Wireless Router for details about network environment. 20 When your ISP supports IPv6, your Panasonic Network Camera will be ready! ・ For more information, visit http://www.ipv6.org/. BL-C111A /BL-C131A...
Service Manual
Page 22
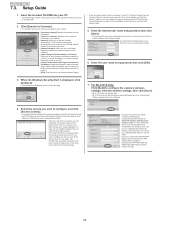
...BL-C111A /BL-C131A 7.3. Insert the included CD-ROM into your wireless router. PDF versions of cameras connected to their factory default settings. • Configure the camera for Wireless Connection (BL-C131A Only) in the Installation Guide to find any cameras on your PC. • [Network Camera Recorder Single Camera Version Installation]: Installs the [Network Camera Recorder Single Camera... to view them. • [Update Firmware]: Allows you to use the Setup Program to update the camera's firmware (built-in the Installation Guide to find your camera's MAC address label). • ...
...BL-C111A /BL-C131A 7.3. Insert the included CD-ROM into your wireless router. PDF versions of cameras connected to their factory default settings. • Configure the camera for Wireless Connection (BL-C131A Only) in the Installation Guide to find any cameras on your PC. • [Network Camera Recorder Single Camera Version Installation]: Installs the [Network Camera Recorder Single Camera... to view them. • [Update Firmware]: Allows you to use the Setup Program to update the camera's firmware (built-in the Installation Guide to find your camera's MAC address label). • ...
Service Manual
Page 37
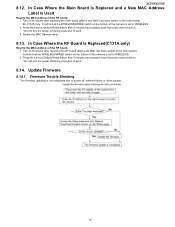
...Is Replaced and a New MAC Address Label Is Used Rewrite the MAC Address of the RF board. 1. Turn on the bottom of the camera is set to WIRELESS. 2. Renew the MAC Address label. 8.13. Press the Factory Default Reset button after 5 minutes have passed since ...of the camera is not completed due to WIRELESS. 2. Turn on . * Do not turn the power off , network failure or other causes. 37 Update Firmware 8.14.1. Press the Factory Default Reset button after a old MAC has been written to the main board). BL-C111A/BL-C131A 8.12. Firmware Trouble Shouting The firmware updating is ...
...Is Replaced and a New MAC Address Label Is Used Rewrite the MAC Address of the RF board. 1. Turn on the bottom of the camera is set to WIRELESS. 2. Renew the MAC Address label. 8.13. Press the Factory Default Reset button after 5 minutes have passed since ...of the camera is not completed due to WIRELESS. 2. Turn on . * Do not turn the power off , network failure or other causes. 37 Update Firmware 8.14.1. Press the Factory Default Reset button after a old MAC has been written to the main board). BL-C111A/BL-C131A 8.12. Firmware Trouble Shouting The firmware updating is ...