User Manual
Page 10
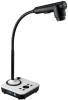
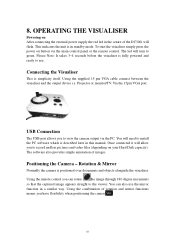
...Positioning the Camera - You can rotate the image through 180 degree increments so that the captured image appears straight to install the PC software which is described later in the centre of the DC300i will flash. Once connected it will turn to use the mirror function in standby mode. The... software also provides simple annotation of rotation and mirror functions means you to view the camera output via the main control panel or...
...Positioning the Camera - You can rotate the image through 180 degree increments so that the captured image appears straight to install the PC software which is described later in the centre of the DC300i will flash. Once connected it will turn to use the mirror function in standby mode. The... software also provides simple annotation of rotation and mirror functions means you to view the camera output via the main control panel or...
User Manual
Page 12
...the Page+, Page- Pressing the "AUTO" button .The "AUTO" button also assist with fine focus changes. IMAGE FREEZE Use "FREEZE" to install the supplied software). 12 IMAGE RECALL (Only available from the remote control) By pressing the "Recall" button, all saved images can store up to 12 images in its ...library. USB IMAGE CAPTURE AND VIDEO RECORDING The USB port can be used to store still images and video clips from the remote control) The DC300i can be displayed. IMAGE SAVE (Only available from the visualiser to your computer. (Note: You will allow you may need to freeze and ...
...the Page+, Page- Pressing the "AUTO" button .The "AUTO" button also assist with fine focus changes. IMAGE FREEZE Use "FREEZE" to install the supplied software). 12 IMAGE RECALL (Only available from the remote control) By pressing the "Recall" button, all saved images can store up to 12 images in its ...library. USB IMAGE CAPTURE AND VIDEO RECORDING The USB port can be used to store still images and video clips from the remote control) The DC300i can be displayed. IMAGE SAVE (Only available from the visualiser to your computer. (Note: You will allow you may need to freeze and ...

User Manual
Page 13
10. COMMUNICATE WITH COMPUTER 10.1 COMPUTER REQUIREMENTS : The PC's hardware and software configurations shall not be less than the following requirements • Operating system: Windows XP • CPU: Pentium 4 1.8Ghz • Physical memory: 512M • Video memory: 64M 10.2 USB FUNCTION 、1 SOFTWARE INSTALLATION Click to run the software installation package, the following figure. 13 Click "Next", as the following dialogue appears, click "Next": Read the terms, Select "I accept the terms in the license agreement."
10. COMMUNICATE WITH COMPUTER 10.1 COMPUTER REQUIREMENTS : The PC's hardware and software configurations shall not be less than the following requirements • Operating system: Windows XP • CPU: Pentium 4 1.8Ghz • Physical memory: 512M • Video memory: 64M 10.2 USB FUNCTION 、1 SOFTWARE INSTALLATION Click to run the software installation package, the following figure. 13 Click "Next", as the following dialogue appears, click "Next": Read the terms, Select "I accept the terms in the license agreement."
User Manual
Page 18
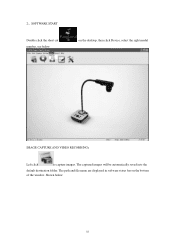
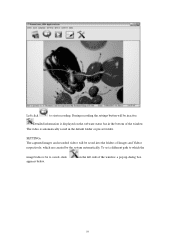
、2 SOFTWARE START Double click the short cut number, see below : 18 The path and file name are displayed in software status bar on the desktop, then click Device, select the right model : IMAGE CAPTURE AND VIDEO RECORDING Left click to capture images. Shown below : on the bottom of the window. The captured images will be automatically saved into the default destination folder.
、2 SOFTWARE START Double click the short cut number, see below : 18 The path and file name are displayed in software status bar on the desktop, then click Device, select the right model : IMAGE CAPTURE AND VIDEO RECORDING Left click to capture images. Shown below : on the bottom of the window. The captured images will be automatically saved into the default destination folder.
User Manual
Page 19
Left click to saved, click appears below. The video is automatically saved in the bottom of Images and Videos respectively, which are created by the system automatically. Detailed information is be to start recording. To set folder. : SETTING The captured images and recorded videos will be saved into the folders of the window. on the software status bar in the default folder or pre-set a different path to which the image/video is displayed on the left side of the window, a pop up dialog box 19 During recording the settings button will be inactive.
Left click to saved, click appears below. The video is automatically saved in the bottom of Images and Videos respectively, which are created by the system automatically. Detailed information is be to start recording. To set folder. : SETTING The captured images and recorded videos will be saved into the folders of the window. on the software status bar in the default folder or pre-set a different path to which the image/video is displayed on the left side of the window, a pop up dialog box 19 During recording the settings button will be inactive.