N10 Manual
Page 2
... of the digital photo frame ¾ Keep your Digital Photo Frame out of direct sunlight ¾ To avoid electric shock and maintain your warranty, do not disassemble the Digital Photo Frame How to clean LCD Screen ¾ Wipe the screen gently to avoid scratches or breakage of glass. ¾ To clean fingerprints and dust from the LCD screen, use a soft, non-abrasive cloth such as camera lens...
... of the digital photo frame ¾ Keep your Digital Photo Frame out of direct sunlight ¾ To avoid electric shock and maintain your warranty, do not disassemble the Digital Photo Frame How to clean LCD Screen ¾ Wipe the screen gently to avoid scratches or breakage of glass. ¾ To clean fingerprints and dust from the LCD screen, use a soft, non-abrasive cloth such as camera lens...
N10 Manual
Page 3
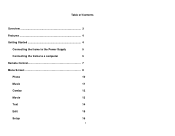
Table of Contents Overview 3 Features 4 Getting Started 4 Connecting the frame to the Power Supply 5 Connecting the frame to a computer 5 Remote Control 7 Menu Screen 8 Photo 10 Music 11 Combo 12 Movie 13 Text 14 Edit 15 Setup 16 2
Table of Contents Overview 3 Features 4 Getting Started 4 Connecting the frame to the Power Supply 5 Connecting the frame to a computer 5 Remote Control 7 Menu Screen 8 Photo 10 Music 11 Combo 12 Movie 13 Text 14 Edit 15 Setup 16 2
N10 Manual
Page 4
... the TV screen 3 it has many pre-programmed slide transitions ¾ The Remote Control provided can be transferred from memory cards ¾ You can enjoy your photos any time and anywhere ¾ The frame is a digital photo album that lets you display hundreds of pictures anywhere in your home or office ¾ You can play Music in card reader reads memory cards ¾ Pictures can connect the photo frame to TV to view all of...
... the TV screen 3 it has many pre-programmed slide transitions ¾ The Remote Control provided can be transferred from memory cards ¾ You can enjoy your photos any time and anywhere ¾ The frame is a digital photo album that lets you display hundreds of pictures anywhere in your home or office ¾ You can play Music in card reader reads memory cards ¾ Pictures can connect the photo frame to TV to view all of...
N10 Manual
Page 5
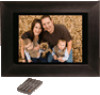
...: • Digital photo frame • AC Power Adapter • USB Extended Cable • Remote control • Stand for display • User manual 4 Features ¾ Your frame supports JPEG photo files, MP3 music files, and MPEG-1, and -4 and AVI Motion JPEG video files. ¾ The screen resolution is 800x600 pixels. ¾ Your fame is compatible with Compact Flash (CF), Secure Digital (SD), Multimedia Card (MMC), Memory Stick (MS) memory cards. ¾ USB 2.0 connection ¾ The frame allows users to delete, rotate and/or pan pictures, play music (MP3 format), play movie...
...: • Digital photo frame • AC Power Adapter • USB Extended Cable • Remote control • Stand for display • User manual 4 Features ¾ Your frame supports JPEG photo files, MP3 music files, and MPEG-1, and -4 and AVI Motion JPEG video files. ¾ The screen resolution is 800x600 pixels. ¾ Your fame is compatible with Compact Flash (CF), Secure Digital (SD), Multimedia Card (MMC), Memory Stick (MS) memory cards. ¾ USB 2.0 connection ¾ The frame allows users to delete, rotate and/or pan pictures, play music (MP3 format), play movie...
N10 Manual
Page 6
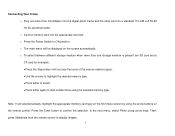
o The main menu will be displayed on the remote control. In the next menu, select Photo using arrow keys. Then, press Slideshow from the remote control to confirm the selection. Note: If not selected already, highlight the appropriate memory card type on the first menu screen by using the arrow buttons on the screen automatically. Press the Enter button to display images. 5 o To select between different storage medium when more than one...
o The main menu will be displayed on the remote control. In the next menu, select Photo using arrow keys. Then, press Slideshow from the remote control to confirm the selection. Note: If not selected already, highlight the appropriate memory card type on the first menu screen by using the arrow buttons on the screen automatically. Press the Enter button to display images. 5 o To select between different storage medium when more than one...
N10 Manual
Page 7
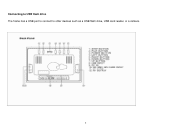
Connecting to USB flash drive The frame has a USB port to connect to other devices such as a USB flash drive, USB card reader, or a camera. 6
Connecting to USB flash drive The frame has a USB port to connect to other devices such as a USB flash drive, USB card reader, or a camera. 6
N10 Manual
Page 9
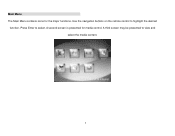
A second screen is presented for the major functions. Use the navigation buttons on the remote control to select. Press Enter to highlight the desired function. A third screen may be presented to view and select the media content. 8 Main Menu The Main Menu contains icons for media control.
A second screen is presented for the major functions. Use the navigation buttons on the remote control to select. Press Enter to highlight the desired function. A third screen may be presented to view and select the media content. 8 Main Menu The Main Menu contains icons for media control.
N10 Manual
Page 10
... to enlarge the picture. The media selection screen appears. The Zoom button allows you to activate. Use arrows to Play/Pause. The image selection screen appears with audio Play movies Play text data on the display Copy/Delete Set System Menu Menu Screen Navigation Use the arrows to navigate to the desired function. Function Photo Music Combo Movie Text Edit Setup Description Play photos in slideshow Play MP3 audio Play slideshow with the name of the function changes color. Press...
... to enlarge the picture. The media selection screen appears. The Zoom button allows you to activate. Use arrows to Play/Pause. The image selection screen appears with audio Play movies Play text data on the display Copy/Delete Set System Menu Menu Screen Navigation Use the arrows to navigate to the desired function. Function Photo Music Combo Movie Text Edit Setup Description Play photos in slideshow Play MP3 audio Play slideshow with the name of the function changes color. Press...
N10 Manual
Page 11
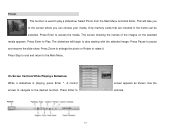
... will begin to the screen where you can be selected. Use the activate. 10 Press Enter to the Main Menu. Only memory cards that are inserted in the frame can choose your media. On Screen Controls While Playing a Slideshow While a slideshow is used to Play. Press Zoom to enlarge the photo or Rotate to access the media. Press Enter to rotate it. Press Enter to play starting with the selected...
... will begin to the screen where you can be selected. Use the activate. 10 Press Enter to the Main Menu. Only memory cards that are inserted in the frame can choose your media. On Screen Controls While Playing a Slideshow While a slideshow is used to Play. Press Zoom to enlarge the photo or Rotate to access the media. Press Enter to rotate it. Press Enter to play starting with the selected...

N10 Manual
Page 12
... Main Menu. Press Enter to pause the clip. Press Pause to Play. Press Enter to the desired function in the selected media. Music and press Enter. The next screen displays the names of the MP3 files available in the control screen that appears. Select the media from the screen that appears. On Screen Controls While Playing Music Press Enter when the audio clip plays♦.Use the direction buttons to...
... Main Menu. Press Enter to pause the clip. Press Pause to Play. Press Enter to the desired function in the selected media. Music and press Enter. The next screen displays the names of the MP3 files available in the control screen that appears. Select the media from the screen that appears. On Screen Controls While Playing Music Press Enter when the audio clip plays♦.Use the direction buttons to...

N10 Manual
Page 13
... and return to play an audio slideshow. In this mode MP3 audio will be an MP3 file on the media with background music. The pictures are shown in a slideshow with the images. To stop, press Pause. 3. Select memory card, choose the file that appears. There must be played in the control screen that you want to activate. 12 Press Enter to watch, press Enter. Operation steps: 1. Use the direction buttons to navigate...
... and return to play an audio slideshow. In this mode MP3 audio will be an MP3 file on the media with background music. The pictures are shown in a slideshow with the images. To stop, press Pause. 3. Select memory card, choose the file that appears. There must be played in the control screen that you want to activate. 12 Press Enter to watch, press Enter. Operation steps: 1. Use the direction buttons to navigate...

N10 Manual
Page 14
... to activate 13 Press Enter to activate. Use the direction buttons to navigate to the desired function. Use the arrows to navigate to the desired function. on the selected media. Movie This function is used to play . Then, select the media. Select Movie from the Main Menu Press Enter to Play. The next screen shows the name of the clips to...
... to activate 13 Press Enter to activate. Use the direction buttons to navigate to the desired function. Use the arrows to navigate to the desired function. on the selected media. Movie This function is used to play . Then, select the media. Select Movie from the Main Menu Press Enter to Play. The next screen shows the name of the clips to...
N10 Manual
Page 15
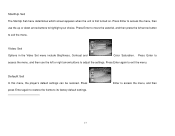
Use the arrows on the remote control to display text files. Text This function is used to scroll up and down. 14
Use the arrows on the remote control to display text files. Text This function is used to scroll up and down. 14

N10 Manual
Page 16
... and Down arrows to tag the files. 4. To delete an item that you to copy the files on the external memory to copy or delete files from the next screen where the "From" files are located. Press the right button to locate the desired files. 3. Now use the Left arrow to get back to access the control screen. While copying, the screen will display a busy message followed by pressing the...
... and Down arrows to tag the files. 4. To delete an item that you to copy the files on the external memory to copy or delete files from the next screen where the "From" files are located. Press the right button to locate the desired files. 3. Now use the Left arrow to get back to access the control screen. While copying, the screen will display a busy message followed by pressing the...
N10 Manual
Page 17
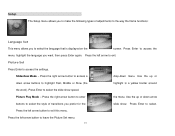
... settings. Press the right-arrow button to exit this menu. Press the left arrow button to enter the menu. Picture Play Mode - Setup The Setup menu allows you to make the following types of transitions you prefer for the slide show speed. Press Enter to access the menu, highlight the language you to select the language that is a yellow border around the word). Slideshow Mode - Use...
... settings. Press the right-arrow button to exit this menu. Press the left arrow button to enter the menu. Picture Play Mode - Setup The Setup menu allows you to make the following types of transitions you prefer for the slide show speed. Press Enter to access the menu, highlight the language you to select the language that is a yellow border around the word). Slideshow Mode - Use...
N10 Manual
Page 18
... then use the up or down arrow buttons to exit the menu. Enter to exit the menu. Press Enter to move the asterisk, and then press the left or right arrow buttons to its factory default settings. StartUp Set The StartUp Set menu determines which screen appears when the unit is first turned on. Press press Enter again to restore the frame to adjust the settings. Video Set...
... then use the up or down arrow buttons to exit the menu. Enter to exit the menu. Press Enter to move the asterisk, and then press the left or right arrow buttons to its factory default settings. StartUp Set The StartUp Set menu determines which screen appears when the unit is first turned on. Press press Enter again to restore the frame to adjust the settings. Video Set...
N10 Manual
Page 19
Nextar may reserve the right to visit our website at: www.Nextar.com Or write us at any time, without notice. All specifications and features are subject to change or update this at : Nextar Inc. 1661 Fairplex Dr. La Verne, CA 91750 USA 18 We may find it necessary to modify, amend or otherwise change without any prior notice. For other information, be sure to do this manual.
Nextar may reserve the right to visit our website at: www.Nextar.com Or write us at any time, without notice. All specifications and features are subject to change or update this at : Nextar Inc. 1661 Fairplex Dr. La Verne, CA 91750 USA 18 We may find it necessary to modify, amend or otherwise change without any prior notice. For other information, be sure to do this manual.


