

User Manual - English
Page 2
...English-3 Ergonomics...English-3 Cleaning the LCD Panel...English-4 Cleaning the Cabinet...English-4 Installation...English-5 Attaching Mounting Accessories...English-7 Parts Name and Functions...English-8 Control Panel...English-8 Terminal Panel...English-9 Wireless Remote Control...English-10 Operating Range for the Remote Control English-11 Setup...English-12 Connections...English-14 Wiring Diagram...English-14 Connecting a Personal Computer English-15 Connecting a Player or Computer with HDMI English-15 Connecting a Computer with DisplayPort English-15 Connecting a USB device...English...
...English-3 Ergonomics...English-3 Cleaning the LCD Panel...English-4 Cleaning the Cabinet...English-4 Installation...English-5 Attaching Mounting Accessories...English-7 Parts Name and Functions...English-8 Control Panel...English-8 Terminal Panel...English-9 Wireless Remote Control...English-10 Operating Range for the Remote Control English-11 Setup...English-12 Connections...English-14 Wiring Diagram...English-14 Connecting a Personal Computer English-15 Connecting a Player or Computer with HDMI English-15 Connecting a Computer with DisplayPort English-15 Connecting a USB device...English...

User Manual - English
Page 4
.... REFER SERVICING TO QUALIFIED SERVICE PERSONNEL. NO USER SERVICEABLE PARTS INSIDE. China Japan Voltage 120* 110 230 230 220 100 * When operating this monitor with its AC 125-240V power supply, use the power cord provided with this equipment, please contact NEC. REFRAIN FROM OPENING THE CABINET AS THERE ARE HIGH VOLTAGE COMPONENTS INSIDE. If a power cord is not intended for the display of the power cord connected to...
.... REFER SERVICING TO QUALIFIED SERVICE PERSONNEL. NO USER SERVICEABLE PARTS INSIDE. China Japan Voltage 120* 110 230 230 220 100 * When operating this monitor with its AC 125-240V power supply, use the power cord provided with this equipment, please contact NEC. REFRAIN FROM OPENING THE CABINET AS THERE ARE HIGH VOLTAGE COMPONENTS INSIDE. If a power cord is not intended for the display of the power cord connected to...

User Manual - English
Page 5
... cause condensation. Connecting to a TV* • Cable distribution system should be connected to enhance readability. • Get regular eye checkups. • Use the preset Size and Position controls with this feature. There are no user serviceable parts inside and opening or removing covers may expose you purchased may not have this monitor. • The power cable connector is the primary means of your monitor from the power supply. Avoid reproduction...
... cause condensation. Connecting to a TV* • Cable distribution system should be connected to enhance readability. • Get regular eye checkups. • Use the preset Size and Position controls with this feature. There are no user serviceable parts inside and opening or removing covers may expose you purchased may not have this monitor. • The power cable connector is the primary means of your monitor from the power supply. Avoid reproduction...

User Manual - English
Page 10
... below inputs. [DisplayPort], [HDMI1], [HDMI2], [HDMI3], [VGA (YPbPr/RGB)], [VIDEO], [MP]. Acts as (-) button to increase the adjustment within OSD menu. E Minus Button (-) Decreases the audio output level when the OSD menu is turned off . Acts as (+) button to decrease the adjustment within the monitor, the indicator will blink red or blink a combination of ambient light, allowing the monitor to make a selection. G Down Button ( ) Activates the OSD menu when the OSD menu is turned off . Glows blue when the LCD monitor...
... below inputs. [DisplayPort], [HDMI1], [HDMI2], [HDMI3], [VGA (YPbPr/RGB)], [VIDEO], [MP]. Acts as (-) button to increase the adjustment within OSD menu. E Minus Button (-) Decreases the audio output level when the OSD menu is turned off . Acts as (+) button to decrease the adjustment within the monitor, the indicator will blink red or blink a combination of ambient light, allowing the monitor to make a selection. G Down Button ( ) Activates the OSD menu when the OSD menu is turned off . Glows blue when the LCD monitor...

User Manual - English
Page 11
.../IN3 Digital HDMI signals input. Use the optional sensor unit by connecting it to your supplier. N Internal Speaker O Security Slot Security and theft protection lock compatible with an RGB or YPbPr source. To install the microSD card slot cover, pleas e refer to turn main power ON/OFF. H Audio IN1/IN2 Audio signal input from other RGB equipment. NOTE: Do not use this connector for YPbPr, please use this connector for any questions, please ask your monitor. F VGA...
.../IN3 Digital HDMI signals input. Use the optional sensor unit by connecting it to your supplier. N Internal Speaker O Security Slot Security and theft protection lock compatible with an RGB or YPbPr source. To install the microSD card slot cover, pleas e refer to turn main power ON/OFF. H Audio IN1/IN2 Audio signal input from other RGB equipment. NOTE: Do not use this connector for YPbPr, please use this connector for any questions, please ask your monitor. F VGA...

User Manual - English
Page 12
... auto setup menu. Q PICTURE MODE Button Selects the picture mode, [HIGHBRIGHT], [STANDARD], [sRGB], [CINEMA], [CUSTOM1], [CUSTOM2]. T STILL Button ON/OFF button: Activates/deactivates still picture mode. English-10 A POWER ON/STANDBY Button Switches the power on /off the menu mode. G MENU Button Turns on /standby. See page 27. See page 17. * HDMI1, HDMI2, HDMI3, VGA (YPbPr) inputs only. K MINUS/PLUS (-/+) Button Increases or decreases the adjustment level within the OSD menu. M VOLUME UP/DOWN Button (VOL +/-) Increases or decreases the audio...
... auto setup menu. Q PICTURE MODE Button Selects the picture mode, [HIGHBRIGHT], [STANDARD], [sRGB], [CINEMA], [CUSTOM1], [CUSTOM2]. T STILL Button ON/OFF button: Activates/deactivates still picture mode. English-10 A POWER ON/STANDBY Button Switches the power on /off the menu mode. G MENU Button Turns on /standby. See page 27. See page 17. * HDMI1, HDMI2, HDMI3, VGA (YPbPr) inputs only. K MINUS/PLUS (-/+) Button Increases or decreases the adjustment level within the OSD menu. M VOLUME UP/DOWN Button (VOL +/-) Increases or decreases the audio...

User Manual - English
Page 14
... desired input source. Install the remote control batteries The remote control is powered by a qualified technician. CAUTION: Incorrect usage of time, remove the batteries. 5. NEC recommends the following battery use the Remote Control for further information. For mini D-Sub 15-pin, please use a shielded signal cable. Use of all the attached external equipment When connected with radio and television reception. B. Switch on the power of the monitor by attaching the screw and...
... desired input source. Install the remote control batteries The remote control is powered by a qualified technician. CAUTION: Incorrect usage of time, remove the batteries. 5. NEC recommends the following battery use the Remote Control for further information. For mini D-Sub 15-pin, please use a shielded signal cable. Use of all the attached external equipment When connected with radio and television reception. B. Switch on the power of the monitor by attaching the screw and...

User Manual - English
Page 17
... DisplayPort audio, set OVER SCAN to "AUTO" or "OFF" (see page 28). • Please check display card when image is correctly aligned when connecting the USB device or cable. • Please refer to the specifications page for power supply information (see page 53, page 54 and page 55). • When you to reproduce your computer's video signal output. When removing this port. • Please make sure the connector shape...
... DisplayPort audio, set OVER SCAN to "AUTO" or "OFF" (see page 28). • Please check display card when image is correctly aligned when connecting the USB device or cable. • Please refer to the specifications page for power supply information (see page 53, page 54 and page 55). • When you to reproduce your computer's video signal output. When removing this port. • Please make sure the connector shape...
User Manual - English
Page 23
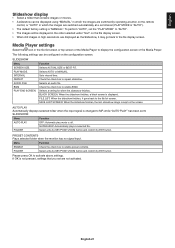
..., a black screen is off. Please press OK to enable BGM. FOLDER Select a file by SET/POINT ZOOM button and confirm by ENT button. Check the check box to activate above settings. Menu Function AUTO PLAY OFF: Automatic play mode is displayed. PRESET CONTENTS Plays selected folder when the monitor has no signal input. The following settings can be displayed using "MANUAL" in which the images are switched by operating a button on the remote control...
..., a black screen is off. Please press OK to enable BGM. FOLDER Select a file by SET/POINT ZOOM button and confirm by ENT button. Check the check box to activate above settings. Menu Function AUTO PLAY OFF: Automatic play mode is displayed. PRESET CONTENTS Plays selected folder when the monitor has no signal input. The following settings can be displayed using "MANUAL" in which the images are switched by operating a button on the remote control...

User Manual - English
Page 29
... adjusts Screen Size, H position, V position, Clock and Phase. Press + or - Press + or - COLOR CONTROL*4 Adjusts the hue of the screen. AUTO ADJUST VGA (RGB) input only Please use with a computer. 2.4 Good for video (DVD, etc.) COLOR*1 COLOR*2, *4 Except for best picture quality. H POSITION*3 VGA (RGB), VGA (YPbPr) inputs only Controls the horizontal position of the image within the Display area of the image. Press - Press + or - BRIGHTNESS*1, *4 Adjusts the image brightness in HDMI/DisplayPort MODE when RGB is selected or when AUTO is selected and the input signal is RGB...
... adjusts Screen Size, H position, V position, Clock and Phase. Press + or - Press + or - COLOR CONTROL*4 Adjusts the hue of the screen. AUTO ADJUST VGA (RGB) input only Please use with a computer. 2.4 Good for video (DVD, etc.) COLOR*1 COLOR*2, *4 Except for best picture quality. H POSITION*3 VGA (RGB), VGA (YPbPr) inputs only Controls the horizontal position of the image within the Display area of the image. Press - Press + or - BRIGHTNESS*1, *4 Adjusts the image brightness in HDMI/DisplayPort MODE when RGB is selected or when AUTO is selected and the input signal is RGB...

User Manual - English
Page 30
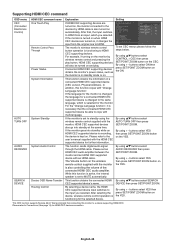
... Color System setting based on the screen. HZOOM Horizontal zoom value. AUTO Image size is larger than what you use a computer with a reduced image, the image would not be active. OFF Image size stays within the display area. Press + or - ADAPTIVE CONTRAST*2, *3 HDMI1, HDMI2, HDMI3, DisplayPort, VIDEO, VGA (YPbPr), MP inputs only Sets the level of contrast variation. If you originally set , the image is displayed on input signal. FULL Fills the entire screen. V POS Vertical position. The whole image...
... Color System setting based on the screen. HZOOM Horizontal zoom value. AUTO Image size is larger than what you use a computer with a reduced image, the image would not be active. OFF Image size stays within the display area. Press + or - ADAPTIVE CONTRAST*2, *3 HDMI1, HDMI2, HDMI3, DisplayPort, VIDEO, VGA (YPbPr), MP inputs only Sets the level of contrast variation. If you originally set , the image is displayed on input signal. FULL Fills the entire screen. V POS Vertical position. The whole image...

User Manual - English
Page 34
... monitor goes into power save mode, a message is displayed when ON is set to each signal input. POWER SAVE MESSAGE When the monitor goes into auto power save mode after completing the TILE MATRIX. NOTE: When the screen saver is slightly expanded and moves in "standby" mode and entering "power on" mode. BACKLIGHT The brightness of the side borders when a 4:3 image is active. MOTION The screen image is activated, the image will become darker. SIDE BORDER COLOR Adjusts the color...
... monitor goes into power save mode, a message is displayed when ON is set to each signal input. POWER SAVE MESSAGE When the monitor goes into auto power save mode after completing the TILE MATRIX. NOTE: When the screen saver is slightly expanded and moves in "standby" mode and entering "power on" mode. BACKLIGHT The brightness of the side borders when a 4:3 image is active. MOTION The screen image is activated, the image will become darker. SIDE BORDER COLOR Adjusts the color...

User Manual - English
Page 36
... BRIGHT BACKLIGHT range when set for normal operations. IN BRIGHT: BACKLIGHT level set to MAX LIMIT. KEY LOCK SETTINGS MODE SELECT UNLOCK ALL LOCK CUSTOM LOCK DDC/CI VGA (RGB) Input only PING IP ADDRESS EXECUTE IP ADDRESS RESET AUTO DIMMING ROOM LIGHT SENSING Prevents the monitor from the minimum volume to the maximum volume you set. NOTE: KEY LOCK SETTINGS is low. Selects the mode UNLOCK, ALL LOCK or CUSTOM LOCK. NOTE: When ROOM LIGHT SENSING is set for the monitor...
... BRIGHT BACKLIGHT range when set for normal operations. IN BRIGHT: BACKLIGHT level set to MAX LIMIT. KEY LOCK SETTINGS MODE SELECT UNLOCK ALL LOCK CUSTOM LOCK DDC/CI VGA (RGB) Input only PING IP ADDRESS EXECUTE IP ADDRESS RESET AUTO DIMMING ROOM LIGHT SENSING Prevents the monitor from the minimum volume to the maximum volume you set. NOTE: KEY LOCK SETTINGS is low. Selects the mode UNLOCK, ALL LOCK or CUSTOM LOCK. NOTE: When ROOM LIGHT SENSING is set for the monitor...

User Manual - English
Page 38
..., the disabled input or picture mode is to erase the image. Unlike CRT monitors, LCD monitors' image persistence is desired, choose the days of monitor. To alleviate image persistence, turn off the monitor via remote control, or use the Power Management function of Image persistence. Use the up and down buttons. MODE. Image Persistence occurs when a residual or "ghost" image of the PC and Low Brightness. • Please use as the previous image was on the screen. For...
..., the disabled input or picture mode is to erase the image. Unlike CRT monitors, LCD monitors' image persistence is desired, choose the days of monitor. To alleviate image persistence, turn off the monitor via remote control, or use the Power Management function of Image persistence. Use the up and down buttons. MODE. Image Persistence occurs when a residual or "ghost" image of the PC and Low Brightness. • Please use as the previous image was on the screen. For...
User Manual - English
Page 50
... connected HDMI CEC audio amplifier. By selecting a device name, the HDMI CEC supported device input switches to the input you selected. By using buttons select CONTROL > CEC then press SET/POINT ZOOM button on . By using buttons select AUTO TURN OFF then press SET/POINT ZOOM. The function sends digital audio signal through the HDMI cable. By using + - Connected HDMI CEC supporting devices obtains the monitor's power status, such as the monitor is kept on the wireless remote control supplied with the HDMI CEC supported...
... connected HDMI CEC audio amplifier. By selecting a device name, the HDMI CEC supported device input switches to the input you selected. By using buttons select CONTROL > CEC then press SET/POINT ZOOM button on . By using buttons select AUTO TURN OFF then press SET/POINT ZOOM. The function sends digital audio signal through the HDMI cable. By using + - Connected HDMI CEC supporting devices obtains the monitor's power status, such as the monitor is kept on the wireless remote control supplied with the HDMI CEC supported...
User Manual - English
Page 53
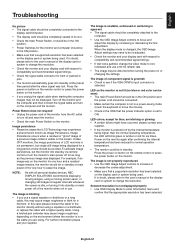
... signal cable and turn on the monitor is not lit (no blue or red color can be seen) • The main Power Switch should be in the ON position and the power cord should be connected. • Make certain the computer is not in a power-saving mode (touch the keyboard or move the mouse). • Check in standby. Press the power on button on the remote control or press the power button on or changing the settings...
... signal cable and turn on the monitor is not lit (no blue or red color can be seen) • The main Power Switch should be in the ON position and the power cord should be connected. • Make certain the computer is not in a power-saving mode (touch the keyboard or move the mouse). • Check in standby. Press the power on button on the remote control or press the power button on or changing the settings...

User Manual - English
Page 55
... card Slot Port: microSD card. C431 Product Specifications LCD Module 43"/107.95 cm diagonal Pixel Pitch: 0.49 mm Resolution: 1920 x 1080 Color: Over 1073 million colors (depending on display card used) Brightness: 400 cd/m2 (Max.) @25°C Contrast Ratio: 4000:1 Viewing Angle: 89° (typ) @ CR>10 Frequency Horizontal: 15.625/15.734 kHz, 31.5 kHz - 91.1 kHz Vertical: 50.0 - 85.0 Hz (Analog Input) 24.0 - 85.0 Hz (Digital Input) Pixel Clock Analog...
... card Slot Port: microSD card. C431 Product Specifications LCD Module 43"/107.95 cm diagonal Pixel Pitch: 0.49 mm Resolution: 1920 x 1080 Color: Over 1073 million colors (depending on display card used) Brightness: 400 cd/m2 (Max.) @25°C Contrast Ratio: 4000:1 Viewing Angle: 89° (typ) @ CR>10 Frequency Horizontal: 15.625/15.734 kHz, 31.5 kHz - 91.1 kHz Vertical: 50.0 - 85.0 Hz (Analog Input) 24.0 - 85.0 Hz (Digital Input) Pixel Clock Analog...

User Manual - English
Page 56
... card Slot Port: microSD card. C501 Product Specifications LCD Module 50"/125.73 cm diagonal Pixel Pitch: 0.57 mm Resolution: 1920 x 1080 Color: Over 1073 million colors (depending on display card used) Brightness: 400 cd/m2 (Max.) @25°C Contrast Ratio: 4000:1 Viewing Angle: 89° (typ) @ CR>10 Frequency Horizontal: 15.625/15.734 kHz, 31.5 kHz - 91.1 kHz Vertical: 50.0 - 85.0 Hz (Analog Input) 24.0 - 85.0 Hz (Digital Input) Pixel Clock Analog...
... card Slot Port: microSD card. C501 Product Specifications LCD Module 50"/125.73 cm diagonal Pixel Pitch: 0.57 mm Resolution: 1920 x 1080 Color: Over 1073 million colors (depending on display card used) Brightness: 400 cd/m2 (Max.) @25°C Contrast Ratio: 4000:1 Viewing Angle: 89° (typ) @ CR>10 Frequency Horizontal: 15.625/15.734 kHz, 31.5 kHz - 91.1 kHz Vertical: 50.0 - 85.0 Hz (Analog Input) 24.0 - 85.0 Hz (Digital Input) Pixel Clock Analog...

User Manual - English
Page 57
... million colors (depending on display card used) Brightness: 400 cd/m2 (Max.) @25°C Contrast Ratio: 4000:1 Viewing Angle: 89° (typ) @ CR>10 Frequency Horizontal: 15.625/15.734 kHz, 31.5 kHz - 91.1 kHz Vertical: 50.0 - 85.0 Hz (Analog Input) 24.0 - 85.0 Hz (Digital Input) Pixel Clock Analog: 13.5 MHz, 25.0 MHz - 165.0 MHz Digital: 25.0 MHz - 165.0 MHz Viewable Size 1209.6 x 680.40 mm Input Signal DisplayPort DisplayPort Connector Digital RGB...
... million colors (depending on display card used) Brightness: 400 cd/m2 (Max.) @25°C Contrast Ratio: 4000:1 Viewing Angle: 89° (typ) @ CR>10 Frequency Horizontal: 15.625/15.734 kHz, 31.5 kHz - 91.1 kHz Vertical: 50.0 - 85.0 Hz (Analog Input) 24.0 - 85.0 Hz (Digital Input) Pixel Clock Analog: 13.5 MHz, 25.0 MHz - 165.0 MHz Digital: 25.0 MHz - 165.0 MHz Viewable Size 1209.6 x 680.40 mm Input Signal DisplayPort DisplayPort Connector Digital RGB...

External Control Codes
Page 33
... also be used. Select sensor (Page02h OPcode78h) 1 : SENSOR #1 2 : SENSOR #2 3 : SENSOR #3 10s/step 10h BCh 02h CBh Refer to a selected sensor. CONTROL IR LOCK SETTING DISPLAY PROTECTION POWER ON DELAY SCREEN SAVER MOTION HEAT STATUS Item POWER SAVE QUICK TURN ON STANDBY USB POWER POWER SAVE MESSAGE BACKLIGHT TEMPERATURE SENSOR1/2/3 BACKLIGHT INTERVAL ZOOM SIDE BORDER COLOR DELAY TIME LINK TO ID RESET (DISPLAY PROTECTION) IP ADDRESS SETTING CHANGE PASSWORD SECURITY MODE SELECT OP code OP code Parameter...
... also be used. Select sensor (Page02h OPcode78h) 1 : SENSOR #1 2 : SENSOR #2 3 : SENSOR #3 10s/step 10h BCh 02h CBh Refer to a selected sensor. CONTROL IR LOCK SETTING DISPLAY PROTECTION POWER ON DELAY SCREEN SAVER MOTION HEAT STATUS Item POWER SAVE QUICK TURN ON STANDBY USB POWER POWER SAVE MESSAGE BACKLIGHT TEMPERATURE SENSOR1/2/3 BACKLIGHT INTERVAL ZOOM SIDE BORDER COLOR DELAY TIME LINK TO ID RESET (DISPLAY PROTECTION) IP ADDRESS SETTING CHANGE PASSWORD SECURITY MODE SELECT OP code OP code Parameter...


