
User Guide
Page 1
User's Guide Digital Video Baby Monitor Models: MBP25, MBP25/2, MBP25/3, MBP25/4 The features described in this User's Guide are subject to modifications without prior notice.
User's Guide Digital Video Baby Monitor Models: MBP25, MBP25/2, MBP25/3, MBP25/4 The features described in this User's Guide are subject to modifications without prior notice.
User Guide
Page 2
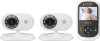
... (camera) • 1 x Rechargeable Ni-MH battery pack for the Parent Unit • 1 x Power adapter for the Parent Unit • 1 x Power adapter for your new Motorola Digital Video Baby Monitor! Before you disconnect it to your records. Please read the Safety Instructions on page 6 before you with power adapter units. to another room or...
... (camera) • 1 x Rechargeable Ni-MH battery pack for the Parent Unit • 1 x Power adapter for the Parent Unit • 1 x Power adapter for your new Motorola Digital Video Baby Monitor! Before you disconnect it to your records. Please read the Safety Instructions on page 6 before you with power adapter units. to another room or...
User Guide
Page 5
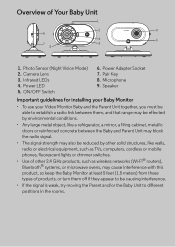
ON/OFF Switch 6. Power LED 5. Infrared LEDs 4. Speaker Important guidelines for installing your Baby Monitor • To use your Video Monitor Baby and the Parent Unit together, you must be able to establish a radio link between them, and that range may... wireless networks (Wi-Fi® routers), Bluetooth® systems, or microwave ovens, may cause interference with this product, so keep the Baby Monitor at least 5 feet (1.5 meters) from these types of Your Baby Unit 1 2 9 5 4 6 7 3 8 1. Pair Key 8. Camera Lens 3. Microphone 9. Overview of products, or turn them ...
ON/OFF Switch 6. Power LED 5. Infrared LEDs 4. Speaker Important guidelines for installing your Baby Monitor • To use your Video Monitor Baby and the Parent Unit together, you must be able to establish a radio link between them, and that range may... wireless networks (Wi-Fi® routers), Bluetooth® systems, or microwave ovens, may cause interference with this product, so keep the Baby Monitor at least 5 feet (1.5 meters) from these types of Your Baby Unit 1 2 9 5 4 6 7 3 8 1. Pair Key 8. Camera Lens 3. Microphone 9. Overview of products, or turn them ...
User Guide
Page 6
... Power Supply 10 2.2 Parent Unit Battery Installation 10 2.3 Parent Unit Power Supply 11 2.4 Registration (Pairing 13 3. Cleaning 19 7. Using the Baby Monitor 14 3.1 Setting up 14 3.2 Night Vision Mode 14 3.3 Video ON/OFF 14 3.4 Talk Mode 14 4. Help...20 8. General Information 22 6 Table of The Device (environment ...
... Power Supply 10 2.2 Parent Unit Battery Installation 10 2.3 Parent Unit Power Supply 11 2.4 Registration (Pairing 13 3. Cleaning 19 7. Using the Baby Monitor 14 3.1 Setting up 14 3.2 Night Vision Mode 14 3.3 Video ON/OFF 14 3.4 Talk Mode 14 4. Help...20 8. General Information 22 6 Table of The Device (environment ...
User Guide
Page 8
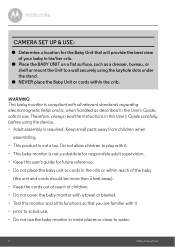
...compliant with all its functions so that you are familiar with it . • This baby monitor is not a toy. CAMERA SET UP & USE: ● Determine a location for future reference. • Do not place the baby unit or cords in the crib or within the crib. Do not allow children to ... away). • Keep the cords out of reach of your baby in the User's Guide, safe to use the baby monitor in this user's guide for the Baby Unit that will provide the best view of children. • Do not cover the baby monitor with it • prior to water. 8 Safety Instructions Therefore,...
...compliant with all its functions so that you are familiar with it . • This baby monitor is not a toy. CAMERA SET UP & USE: ● Determine a location for future reference. • Do not place the baby unit or cords in the crib or within the crib. Do not allow children to ... away). • Keep the cords out of reach of your baby in the User's Guide, safe to use the baby monitor in this user's guide for the Baby Unit that will provide the best view of children. • Do not cover the baby monitor with it • prior to water. 8 Safety Instructions Therefore,...
User Guide
Page 13
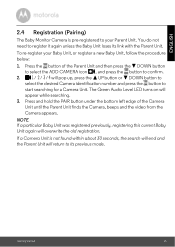
To re-register your Parent Unit. DOWN button to select the desired Camera identification number and press the button to register it again unless the Baby Unit loses its previous mode. Press and hold the PAIR button under the bottom left edge of the Parent Unit and then press the - Getting..., follow the procedure below: 1. You do not need to start searching for a Camera Unit. ENGLISH 2.4 Registration (Pairing) The Baby Monitor Camera is not found within about 30 seconds, the search will end and the Parent Unit will overwrite the old registration. The Green Audio Level...
To re-register your Parent Unit. DOWN button to select the desired Camera identification number and press the button to register it again unless the Baby Unit loses its previous mode. Press and hold the PAIR button under the bottom left edge of the Parent Unit and then press the - Getting..., follow the procedure below: 1. You do not need to start searching for a Camera Unit. ENGLISH 2.4 Registration (Pairing) The Baby Monitor Camera is not found within about 30 seconds, the search will end and the Parent Unit will overwrite the old registration. The Green Audio Level...
User Guide
Page 14
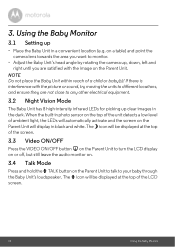
... the area you are satisfied with the picture or sound, try moving the units to different locations, and ensure they are not close to monitor. • Adjust the Baby Unit's head angle by rotating the camera up, down, left and right until you want to any other electrical equipment. 3.2 Night Vision ... white. If there is interference with the image on the Parent Unit will be displayed at the top of a child or baby(s)! When the built-in the dark. Using the Baby Monitor 3.1 Setting up clear images in photo sensor on the top of the unit detects a low level of ambient light, the ...
... the area you are satisfied with the picture or sound, try moving the units to different locations, and ensure they are not close to monitor. • Adjust the Baby Unit's head angle by rotating the camera up, down, left and right until you want to any other electrical equipment. 3.2 Night Vision ... white. If there is interference with the image on the Parent Unit will be displayed at the top of a child or baby(s)! When the built-in the dark. Using the Baby Monitor 3.1 Setting up clear images in photo sensor on the top of the unit detects a low level of ambient light, the ...
User Guide
Page 17
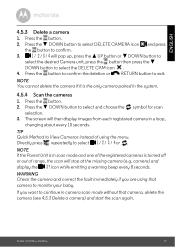
... one of the registered cameras is in the system. 4.5.4 Scan the cameras 1. WARNING Check the camera and correct the fault immediately if you want to monitor your baby. Press the button. 2. camera) and display the 3 ? If you are using the menu. NOTE If the Parent Unit is turned off or out of...
... one of the registered cameras is in the system. 4.5.4 Scan the cameras 1. WARNING Check the camera and correct the fault immediately if you want to monitor your baby. Press the button. 2. camera) and display the 3 ? If you are using the menu. NOTE If the Parent Unit is turned off or out of...
User Guide
Page 19
ENGLISH 6. Cleaning and care • Do not clean any part of reliability for assistance. Cleaning Clean the Baby Monitor with thinners or other solvents and chemicals -- contact Customer Service for your Baby Monitor away from hot, humid areas or conditions, strong sunlight and avoid moisture. • Every effort has been made to ensure high standards... - Cleaning 19 However, if something does go wrong, please do not try to the product which is not covered by the warranty. • Keep your Baby Monitor. Never use cleaning agents or abrasive solvents.
ENGLISH 6. Cleaning and care • Do not clean any part of reliability for assistance. Cleaning Clean the Baby Monitor with thinners or other solvents and chemicals -- contact Customer Service for your Baby Monitor away from hot, humid areas or conditions, strong sunlight and avoid moisture. • Every effort has been made to ensure high standards... - Cleaning 19 However, if something does go wrong, please do not try to the product which is not covered by the warranty. • Keep your Baby Monitor. Never use cleaning agents or abrasive solvents.
User Guide
Page 21
ENGLISH Interference Noise interference on your Parent Unit • Your Baby and Parent Unit may cause interference with this product, so keep the Baby Monitor away at least 5ft (1.5m) from these types of products, or turn them farther apart. • Make sure there is at least 3 to 6 feet (1 to 2 ...meters) between the 2 units to avoid audio feedback. • lf the Baby Unit is too far away it may...
ENGLISH Interference Noise interference on your Parent Unit • Your Baby and Parent Unit may cause interference with this product, so keep the Baby Monitor away at least 5ft (1.5m) from these types of products, or turn them farther apart. • Make sure there is at least 3 to 6 feet (1 to 2 ...meters) between the 2 units to avoid audio feedback. • lf the Baby Unit is too far away it may...
