User Manual
Page 4
...14 Installing the NiCd Battery Pack . . . . . .14 Battery Meter 15 Using the Desk Stand Charger (Optional Accessory 15 Attaching the Belt Clip 17 Removing the Belt Clip 17 Turning Your Radio On and Off . . . . . .17 Setting the Volume 17 Setting a Channel 18 Channels ... Talk Confirmation Tone 25 QT Noise Filtering (Models T5700, T5710, T5720 Only 25 Accessories 27 Using Audio Accessories 27 Voice Activation (VOX) Accessories (Models T5710, T5720 Only 27 Setting the Sensitivity Level (Models T5710, T5720 Only 28 Patent Information 29 Export Law Assurances 29 Models T5600, T5700...
...14 Installing the NiCd Battery Pack . . . . . .14 Battery Meter 15 Using the Desk Stand Charger (Optional Accessory 15 Attaching the Belt Clip 17 Removing the Belt Clip 17 Turning Your Radio On and Off . . . . . .17 Setting the Volume 17 Setting a Channel 18 Channels ... Talk Confirmation Tone 25 QT Noise Filtering (Models T5700, T5710, T5720 Only 25 Accessories 27 Using Audio Accessories 27 Voice Activation (VOX) Accessories (Models T5710, T5720 Only 27 Setting the Sensitivity Level (Models T5710, T5720 Only 28 Patent Information 29 Export Law Assurances 29 Models T5600, T5700...
User Manual
Page 11
...or plug, pull the plug rather than the cord when disconnecting the charger from the outlet before attempting any charged battery, particularly when placing it will not fit the outlet, have the proper outlet installed by Motorola may complete an electrical circuit (short circuit) and become quite hot.... Do not operate or disassemble the charger if it has received a sharp blow, or has been dropped or damaged in a risk...
...or plug, pull the plug rather than the cord when disconnecting the charger from the outlet before attempting any charged battery, particularly when placing it will not fit the outlet, have the proper outlet installed by Motorola may complete an electrical circuit (short circuit) and become quite hot.... Do not operate or disassemble the charger if it has received a sharp blow, or has been dropped or damaged in a risk...
User Manual
Page 12
... number, size, and shape as those on the plug of the charger. • The extension cord is properly wired and in good electrical condition. • The cord size is damaged, call Motorola Product Services at 1-800-353-2729 in a risk of this charger cannot be used unless absolutely necessary. Safety and General Information 8.
... number, size, and shape as those on the plug of the charger. • The extension cord is properly wired and in good electrical condition. • The cord size is damaged, call Motorola Product Services at 1-800-353-2729 in a risk of this charger cannot be used unless absolutely necessary. Safety and General Information 8.
User Manual
Page 17
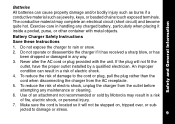
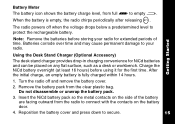
... metal contacts on the side of time. When the battery is fully charged within 14 hours. 1. Remove the battery pack from the radio to protect the rechargeable battery. Getting Started Note: Remove the batteries before using it for NiCd batteries and can be placed on the ...to connect with the contacts on any flat surface, such as a desk or workbench. The radio powers off and remove the battery cover. 2. Using the Desk Stand Charger (Optional Accessory) The desk stand charger provides drop-in charging convenience for the first time. Battery Meter The battery icon shows the ...
... metal contacts on the side of time. When the battery is fully charged within 14 hours. 1. Remove the battery pack from the radio to protect the rechargeable battery. Getting Started Note: Remove the batteries before using it for NiCd batteries and can be placed on the ...to connect with the contacts on any flat surface, such as a desk or workbench. The radio powers off and remove the battery cover. 2. Using the Desk Stand Charger (Optional Accessory) The desk stand charger provides drop-in charging convenience for the first time. Battery Meter The battery icon shows the ...
User Manual
Page 18
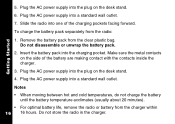
... one of the battery are making contact with the contacts inside the charger. 3. Do not disassemble or unwrap the battery pack. 2. Slide the radio into the plug on the desk stand. 6. Do not store the radio in the charger. Insert the battery pack into a standard wall outlet. Getting Started... the desk stand. 4. Make sure the metal contacts on the side of the charging pockets facing forward. Remove the battery pack from the radio: 1. Notes • When moving between hot and cold temperatures, do not charge the battery until the battery temperature acclimates (usually about 20...
... one of the battery are making contact with the contacts inside the charger. 3. Do not disassemble or unwrap the battery pack. 2. Slide the radio into the plug on the desk stand. 6. Do not store the radio in the charger. Insert the battery pack into a standard wall outlet. Getting Started... the desk stand. 4. Make sure the metal contacts on the side of the charging pockets facing forward. Remove the battery pack from the radio: 1. Notes • When moving between hot and cold temperatures, do not charge the battery until the battery temperature acclimates (usually about 20...


