User Guide
Page 5
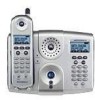
...notice in Subpart E of Part 68, FCC Rules and Regulations. Rights of the Telephone Company Should your equipment cause trouble on your cordless telephone to correct the situation; 3. Where prior notice is not practical and the circumstances warrant such action, the telephone company may be... required. If this cordless phone does not disable your right to bring a complaint to the Commission pursuant to the telephone company upon permanent disconnection of service may ...
...notice in Subpart E of Part 68, FCC Rules and Regulations. Rights of the Telephone Company Should your equipment cause trouble on your cordless telephone to correct the situation; 3. Where prior notice is not practical and the circumstances warrant such action, the telephone company may be... required. If this cordless phone does not disable your right to bring a complaint to the Commission pursuant to the telephone company upon permanent disconnection of service may ...
User Guide
Page 8
...may result in the vicinity of the gas line. Do not disassemble this product from the wall outlet before cleaning. Do not use this cordless phone to rest on a heating register or over a radiator. Do not overload wall outlets and extension cords. 9. Do not use only No.... shock, and injury to protect the equipment. 10. Place the power cord so that proper ventilation is required, contact the Motorola address found in water. 3. Avoid using your cordless phone to reduce the risk of this product near a bath tub, kitchen sink, or swimming pool). 4. Use a surge protector...
...may result in the vicinity of the gas line. Do not disassemble this product from the wall outlet before cleaning. Do not use this cordless phone to rest on a heating register or over a radiator. Do not overload wall outlets and extension cords. 9. Do not use only No.... shock, and injury to protect the equipment. 10. Place the power cord so that proper ventilation is required, contact the Motorola address found in water. 3. Avoid using your cordless phone to reduce the risk of this product near a bath tub, kitchen sink, or swimming pool). 4. Use a surge protector...
User Guide
Page 9
...product to clean this product on an unstable cart, stand, or table. Operate this phone using only the power source that are unsure of other controls may fall, causing serious... Follow all instructions and save them for future reference. 2. If you have unplugged the power and phone from an outlet if: • The power cord or plug is indicated on the product. 3....not install this product with your home, consult with a soft, damp cloth. Do not place this phone. 7 Do not use chemicals or cleaning agents to normal operation. 7. This product may result in performance...
...product to clean this product on an unstable cart, stand, or table. Operate this phone using only the power source that are unsure of other controls may fall, causing serious... Follow all instructions and save them for future reference. 2. If you have unplugged the power and phone from an outlet if: • The power cord or plug is indicated on the product. 3....not install this product with your home, consult with a soft, damp cloth. Do not place this phone. 7 Do not use chemicals or cleaning agents to normal operation. 7. This product may result in performance...
User Guide
Page 10
... recycling center for battery type. To avoid interference to nearby appliances, do not place the base of properly and may damage the unit. 9. Because cordless phones operate on or near a TV, microwave oven, or VCR. Caution: To maintain compliance with the FCC's RF exposure guidelines, place the base unit... your home that is a risk of explosion if you replace the battery with an incorrect battery type. Refer to be disposed of the cordless phone on electricity, you should have at least 20 cm from nearby persons. ITC03-201 8 Use only the power supply that could result in...
... recycling center for battery type. To avoid interference to nearby appliances, do not place the base of properly and may damage the unit. 9. Because cordless phones operate on or near a TV, microwave oven, or VCR. Caution: To maintain compliance with the FCC's RF exposure guidelines, place the base unit... your home that is a risk of explosion if you replace the battery with an incorrect battery type. Refer to be disposed of the cordless phone on electricity, you should have at least 20 cm from nearby persons. ITC03-201 8 Use only the power supply that could result in...
User Guide
Page 11
... 12 Connecting the Base Station 12 Optional Backup Battery Pack 13 Installing the Battery Pack in the Handset 14 Charging the Handset 15 Connecting the Phone Line 15 Mounting the Base Station on a Wall 16 Base Station Controls 17 Handset Controls 17 Using the Displays 18 Base Station Standby Screen Example...
... 12 Connecting the Base Station 12 Optional Backup Battery Pack 13 Installing the Battery Pack in the Handset 14 Charging the Handset 15 Connecting the Phone Line 15 Mounting the Base Station on a Wall 16 Base Station Controls 17 Handset Controls 17 Using the Displays 18 Base Station Standby Screen Example...
User Guide
Page 12
... Muting a Call 30 Putting a Call on Hold 31 Saving a Name/Number in the Phonebook 31 Base Station Phonebook 31 Handset Phonebooks 31 Inserting Pauses in a Phone Number 32 Saving a Caller ID or Redial Number in the Phonebook 33 Calling a Number from the Phonebook 33 Deleting Phonebook Entries 34 Editing Phonebook Entries...
... Muting a Call 30 Putting a Call on Hold 31 Saving a Name/Number in the Phonebook 31 Base Station Phonebook 31 Handset Phonebooks 31 Inserting Pauses in a Phone Number 32 Saving a Caller ID or Redial Number in the Phonebook 33 Calling a Number from the Phonebook 33 Deleting Phonebook Entries 34 Editing Phonebook Entries...
User Guide
Page 14
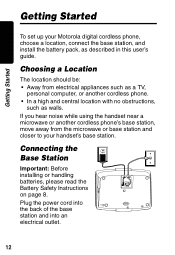
If you hear noise while using the handset near a microwave or another cordless phone's base station, move away from electrical appliances such as a TV, personal computer, or another cordless phone. • In a high and central location with no obstructions, such as described in this user's guide. ... outlet. 12 Choosing a Location The location should be: • Away from the microwave or base station and closer to your Motorola digital cordless phone, choose a location, connect the base station, and install the battery pack, as walls. Getting Started Getting Started To set up your...
If you hear noise while using the handset near a microwave or another cordless phone's base station, move away from electrical appliances such as a TV, personal computer, or another cordless phone. • In a high and central location with no obstructions, such as described in this user's guide. ... outlet. 12 Choosing a Location The location should be: • Away from the microwave or base station and closer to your Motorola digital cordless phone, choose a location, connect the base station, and install the battery pack, as walls. Getting Started Getting Started To set up your...
User Guide
Page 17
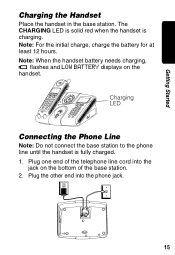
Getting Started Charging the Handset Place the handset in the base station. Charging LED Connecting the Phone Line Note: Do not connect the base station to the phone line until the handset is charging. Note: For the initial charge, charge the battery for at least 12 hours. Note: When the handset battery needs charging, l flashes and LOW BATTERY displays on the bottom of the base station. 2. Plug one end of the telephone line cord into the phone jack. 15 Plug the other end into the jack on the handset. The CHARGING LED is solid red when the handset is fully charged. 1.
Getting Started Charging the Handset Place the handset in the base station. Charging LED Connecting the Phone Line Note: Do not connect the base station to the phone line until the handset is charging. Note: For the initial charge, charge the battery for at least 12 hours. Note: When the handset battery needs charging, l flashes and LOW BATTERY displays on the bottom of the base station. 2. Plug one end of the telephone line cord into the phone jack. 15 Plug the other end into the jack on the handset. The CHARGING LED is solid red when the handset is fully charged. 1.
User Guide
Page 18
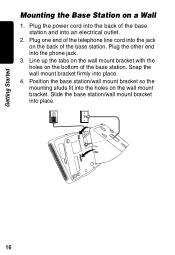
... holes on the back of the base station and into the back of the base station. Slide the base station/wall mount bracket into the phone jack. 3. Plug the other end into place. 16 Position the base station/wall mount bracket so the mounting studs fit into place. 4. Snap the wall...
... holes on the back of the base station and into the back of the base station. Slide the base station/wall mount bracket into the phone jack. 3. Plug the other end into place. 16 Position the base station/wall mount bracket so the mounting studs fit into place. 4. Snap the wall...
User Guide
Page 19
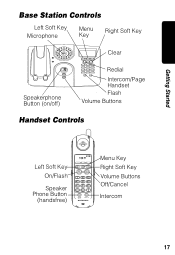
Getting Started Base Station Controls Left Soft Key Microphone Menu Key Right Soft Key Clear Speakerphone Button (on/off) Redial Intercom/Page Handset 031612o.eps Flash Volume Buttons Handset Controls Left Soft Key On/Flash Speaker Phone Button (handsfree) Menu Key Right Soft Key Volume Buttons Off/Cancel Intercom 17
Getting Started Base Station Controls Left Soft Key Microphone Menu Key Right Soft Key Clear Speakerphone Button (on/off) Redial Intercom/Page Handset 031612o.eps Flash Volume Buttons Handset Controls Left Soft Key On/Flash Speaker Phone Button (handsfree) Menu Key Right Soft Key Volume Buttons Off/Cancel Intercom 17
User Guide
Page 21
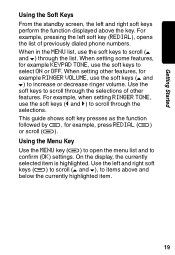
... setting other features. Using the Menu Key Use the MENU key (a) to open the menu list and to scroll through the selections of previously dialed phone numbers. This guide shows soft key presses as the function followed by a, for example KEYPAD TONE, use the soft keys to scroll through the selections...
... setting other features. Using the Menu Key Use the MENU key (a) to open the menu list and to scroll through the selections of previously dialed phone numbers. This guide shows soft key presses as the function followed by a, for example KEYPAD TONE, use the soft keys to scroll through the selections...
User Guide
Page 29
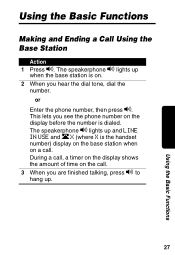
..., then press v. This lets you see the phone number on the call . During a call, a timer on the display shows the amount of time on the display before the number is on a call . 3 When ...
..., then press v. This lets you see the phone number on the call . During a call, a timer on the display shows the amount of time on the display before the number is on a call . 3 When ...

User Guide
Page 30
... Handset Action 1 Pick up to increase volume, or press down to hang up. 28 Using the Basic Functions or Enter the phone number, then press ON. This lets you see the phone number on the display before the number is on. 2 When you are finished talking, press OFF, or place the handset...
... Handset Action 1 Pick up to increase volume, or press down to hang up. 28 Using the Basic Functions or Enter the phone number, then press ON. This lets you see the phone number on the display before the number is on. 2 When you are finished talking, press OFF, or place the handset...
User Guide
Page 31
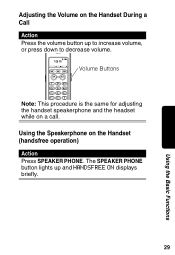
Adjusting the Volume on the Handset (handsfree operation) Action Press SPEAKER PHONE. Using the Speakerphone on the Handset During a Call Action Press the volume button up and HANDSFREE ON displays briefly. 29 Using the Basic Functions The SPEAKER PHONE button lights up to increase volume, or press down to decrease volume. Volume Buttons Note: This procedure is the same for adjusting the handset speakerphone and the headset while on a call.
Adjusting the Volume on the Handset (handsfree operation) Action Press SPEAKER PHONE. Using the Speakerphone on the Handset During a Call Action Press the volume button up and HANDSFREE ON displays briefly. 29 Using the Basic Functions The SPEAKER PHONE button lights up to increase volume, or press down to decrease volume. Volume Buttons Note: This procedure is the same for adjusting the handset speakerphone and the headset while on a call.
User Guide
Page 34
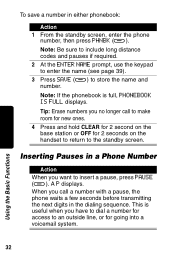
Inserting Pauses in a Phone Number Action When you have to dial a number for access to insert a pause, press PAUSE (a). Note: If the phonebook is useful when you want to ... return to store the name and number. When you no longer call a number with a pause, the phone waits a few seconds before transmitting the next digits in either phonebook: Action 1 From the standby screen, enter the phone number, then press PHNBK (a). Note: Be sure to include long distance codes and pauses if required. 2 At...
Inserting Pauses in a Phone Number Action When you have to dial a number for access to insert a pause, press PAUSE (a). Note: If the phonebook is useful when you want to ... return to store the name and number. When you no longer call a number with a pause, the phone waits a few seconds before transmitting the next digits in either phonebook: Action 1 From the standby screen, enter the phone number, then press PHNBK (a). Note: Be sure to include long distance codes and pauses if required. 2 At...
User Guide
Page 37
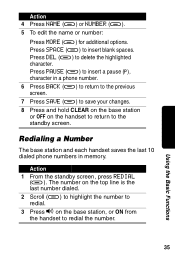
... (a). 5 To edit the name or number: Press MORE (a) for additional options. Redialing a Number The base station and each handset saves the last 10 dialed phone numbers in a phone number. 6 Press BACK (a) to return to the previous screen. 7 Press SAVE (a) to save your changes. 8 Press and hold CLEAR on the base station or...
... (a). 5 To edit the name or number: Press MORE (a) for additional options. Redialing a Number The base station and each handset saves the last 10 dialed phone numbers in a phone number. 6 Press BACK (a) to return to the previous screen. 7 Press SAVE (a) to save your changes. 8 Press and hold CLEAR on the base station or...
User Guide
Page 38
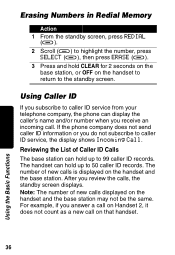
If the phone company does not send caller ID information or you review the calls, the standby screen displays. The number of new calls is displayed on the ... handset and the base station may not be the same. Using Caller ID If you subscribe to caller ID service from your telephone company, the phone can hold up to caller ID service, the display shows Incoming Call. The handset can display the caller's name and/or number when you answer...
If the phone company does not send caller ID information or you review the calls, the standby screen displays. The number of new calls is displayed on the ... handset and the base station may not be the same. Using Caller ID If you subscribe to caller ID service from your telephone company, the phone can hold up to caller ID service, the display shows Incoming Call. The handset can display the caller's name and/or number when you answer...
User Guide
Page 41
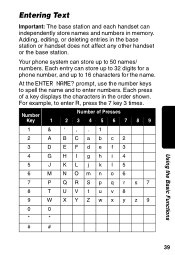
.... At the ENTER NAME? prompt, use the number keys to spell the name and to enter R, press the 7 key 3 times. Your phone system can store up to 32 digits for a phone number, and up to 16 characters for the name. Adding, editing, or deleting entries in memory. Each entry can store up to...
.... At the ENTER NAME? prompt, use the number keys to spell the name and to enter R, press the 7 key 3 times. Your phone system can store up to 32 digits for a phone number, and up to 16 characters for the name. Adding, editing, or deleting entries in memory. Each entry can store up to...
User Guide
Page 43
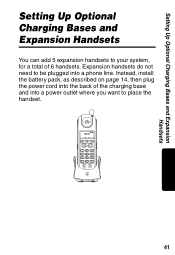
Instead, install the battery pack, as described on page 14, then plug the power cord into the back of 6 handsets. charge 41 Expansion handsets do not need to place the handset. Setting Up Optional Charging Bases and Expansion Handsets Setting Up Optional Charging Bases and Expansion Handsets You can add 5 expansion handsets to your system, for a total of the charging base and into a power outlet where you want to be plugged into a phone line.
Instead, install the battery pack, as described on page 14, then plug the power cord into the back of 6 handsets. charge 41 Expansion handsets do not need to place the handset. Setting Up Optional Charging Bases and Expansion Handsets Setting Up Optional Charging Bases and Expansion Handsets You can add 5 expansion handsets to your system, for a total of the charging base and into a power outlet where you want to be plugged into a phone line.
User Guide
Page 44
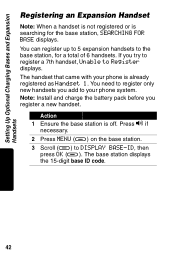
The handset that came with your phone system. You can register up to 5 expansion handsets to Register displays. Note: Install and charge the battery pack before ... Action 1 Ensure the base station is off. Press v if necessary. 2 Press MENU (a) on the base station. 3 Scroll (a) to your phone is already registered as Handset 1. You need to register only new handsets you add to DISPLAY BASE-ID, then press OK (a). Setting Up Optional ... registered or is searching for a total of 6 handsets. If you register a new handset. The base station displays the 15-digit base ID code. 42
The handset that came with your phone system. You can register up to 5 expansion handsets to Register displays. Note: Install and charge the battery pack before ... Action 1 Ensure the base station is off. Press v if necessary. 2 Press MENU (a) on the base station. 3 Scroll (a) to your phone is already registered as Handset 1. You need to register only new handsets you add to DISPLAY BASE-ID, then press OK (a). Setting Up Optional ... registered or is searching for a total of 6 handsets. If you register a new handset. The base station displays the 15-digit base ID code. 42


