Specs
Page 2
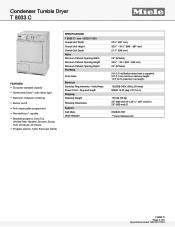
... capacity Honeycomb Drum™ with interior light Electronic moisture monitoring Buzzer on/off Anti-creasing after program end RemoteVision™ capable Standard programs: Extra Dry, Wrinkle-Free, Woolens, Smooth, Sturdy, Fluff, 20 minute, 30 minute Program options: Turbo, Full Load, Gentle SPECIFICATIONS T 8033 C - Volts/Amps Power Cord - Plug and length Shipping Shipping Weight Shipping Dimensions Support Call Miele Miele...
... capacity Honeycomb Drum™ with interior light Electronic moisture monitoring Buzzer on/off Anti-creasing after program end RemoteVision™ capable Standard programs: Extra Dry, Wrinkle-Free, Woolens, Smooth, Sturdy, Fluff, 20 minute, 30 minute Program options: Turbo, Full Load, Gentle SPECIFICATIONS T 8033 C - Volts/Amps Power Cord - Plug and length Shipping Shipping Weight Shipping Dimensions Support Call Miele Miele...
Product Manual
Page 2
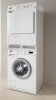
... 12 Child lock 13 Dryer care 14 Cleaning the lint filter 14 Cleaning the exterior and the control panel 15 Cleaning the drum 15 Emptying the condensed water container 16 Cleaning the condenser 17 Quick Guide 19 Dryer Care 19 Changing the light bulb 19 Frequently asked questions 20 After sales service 22 Installation instructions 23 IMPORTANT SAFETY INSTRUCTIONS 24 Washer / Dryer Stack 25 Electrical connection 26 Installation 27 Installation site 28 Installation beneath a counter 29 Installation tips 30 Level the dryer 30 Caring for...
... 12 Child lock 13 Dryer care 14 Cleaning the lint filter 14 Cleaning the exterior and the control panel 15 Cleaning the drum 15 Emptying the condensed water container 16 Cleaning the condenser 17 Quick Guide 19 Dryer Care 19 Changing the light bulb 19 Frequently asked questions 20 After sales service 22 Installation instructions 23 IMPORTANT SAFETY INSTRUCTIONS 24 Washer / Dryer Stack 25 Electrical connection 26 Installation 27 Installation site 28 Installation beneath a counter 29 Installation tips 30 Level the dryer 30 Caring for...
Product Manual
Page 3
... to persons when using your dryer. If these operating instructions. Repairs to grease, oils, or other deposits (such as lotions or cosmetics) in these items have not been washed. - When washing heavily soiled items ensure that could catch fire. 3 items with the controls. ~ Do not repair or replace any part of the appliance or attempt any servicing unless specifically recommended in...
... to persons when using your dryer. If these operating instructions. Repairs to grease, oils, or other deposits (such as lotions or cosmetics) in these items have not been washed. - When washing heavily soiled items ensure that could catch fire. 3 items with the controls. ~ Do not repair or replace any part of the appliance or attempt any servicing unless specifically recommended in...

Product Manual
Page 4
... it will not fit the outlet, have a proper outlet installed by a qualified electrician. Improper connection of the equipment-grounding conductor can result in a risk of electric shock. SAVE THESE INSTRUCTIONS 4 Contact a qualified electrician if you are not too hot to handle ~ Clean the lint filter before or after each stage of the program selected, including the cooling down phase. In the...
... it will not fit the outlet, have a proper outlet installed by a qualified electrician. Improper connection of the equipment-grounding conductor can result in a risk of electric shock. SAVE THESE INSTRUCTIONS 4 Contact a qualified electrician if you are not too hot to handle ~ Clean the lint filter before or after each stage of the program selected, including the cooling down phase. In the...

Product Manual
Page 5
... door is opened. Control panel a e- c "Dryness" button For selecting the dryness level of the drying program. g "Start/Stop" button Starts and stops a program. h "Door" button Opens the door when the program has finished. i "On/Off" button Turns power to save energy. f "FAULT" indicators An illuminated indicator will sound at the end of the program. d "Status" display Shows the current cycle of the finished laundry. Flashes during program selection and lights...
... door is opened. Control panel a e- c "Dryness" button For selecting the dryness level of the drying program. g "Start/Stop" button Starts and stops a program. h "Door" button Opens the door when the program has finished. i "On/Off" button Turns power to save energy. f "FAULT" indicators An illuminated indicator will sound at the end of the program. d "Status" display Shows the current cycle of the finished laundry. Flashes during program selection and lights...

Product Manual
Page 6
... "Installation Instructions". ^ Before using for the first time. Permanent Press (cottons, blends and synthetics) Sturdy - Cottons and Permanent Press blends Wrinkle-free - Pure linen and down filled items - Permanent Press: select the Hand Iron dryness level and reduce the load size for special drying instructions. All fabric types 6 Before drying, check fabric care labels for best drying results - Close zippers and tie up fabric belts and...
... "Installation Instructions". ^ Before using for the first time. Permanent Press (cottons, blends and synthetics) Sturdy - Cottons and Permanent Press blends Wrinkle-free - Pure linen and down filled items - Permanent Press: select the Hand Iron dryness level and reduce the load size for special drying instructions. All fabric types 6 Before drying, check fabric care labels for best drying results - Close zippers and tie up fabric belts and...

Product Manual
Page 7
... softener when washing laundry. button until the desired program indicator lights. Using the dryer 1. Fabric softener sheet may clog the filters and cause the dryer to open the door. ^ Load the laundry loosely into the drum. ^ Make sure the lint filters are in the closed door. 7 Turn on the dryer and load the laundry ^ Press the "On/Off" button to turn on the dryer. ^ Press the "Door" button to overheat. ^ Press the...
... softener when washing laundry. button until the desired program indicator lights. Using the dryer 1. Fabric softener sheet may clog the filters and cause the dryer to open the door. ^ Load the laundry loosely into the drum. ^ Make sure the lint filters are in the closed door. 7 Turn on the dryer and load the laundry ^ Press the "On/Off" button to turn on the dryer. ^ Press the "Door" button to overheat. ^ Press the...

Product Manual
Page 11
... program starts, the current cycle of a program and the buzzer will sound if it was selected. See "Frequently asked questions" for details. ^ Press the "Door" button. ^ Open the door. ^ Remove the laundry. ^ Check that the drum is empty. ^ Clean the lint filter after each use (see "Dryer care"). ^ Close the door. ^ Press the "On/Off" button to turn off the dryer. ^ Empty the condensed water container weekly (if not connected to...
... program starts, the current cycle of a program and the buzzer will sound if it was selected. See "Frequently asked questions" for details. ^ Press the "Door" button. ^ Open the door. ^ Remove the laundry. ^ Check that the drum is empty. ^ Clean the lint filter after each use (see "Dryer care"). ^ Close the door. ^ Press the "On/Off" button to turn off the dryer. ^ Empty the condensed water container weekly (if not connected to...

Product Manual
Page 12
... the rear of burns due to high temperatures in the "Normal" and "Wrinkle-free" programs). ^ Press and release the "Start/Stop" button to stop the drying program. Using the dryer Canceling or changing a program ^ Press and release the "Start/Stop" button to start the new program. button. ^ Select any desired options. ^ Select a dryness level (available in the drum. ^ Add or remove items. ^ Close the door. ^ Turn the dryer back...
... the rear of burns due to high temperatures in the "Normal" and "Wrinkle-free" programs). ^ Press and release the "Start/Stop" button to stop the drying program. Using the dryer Canceling or changing a program ^ Press and release the "Start/Stop" button to start the new program. button. ^ Select any desired options. ^ Select a dryness level (available in the drum. ^ Add or remove items. ^ Close the door. ^ Turn the dryer back...

Product Manual
Page 15
... the dryer operation. ^ The stainless steel surfaces of electric shock, disconnect the dryer from the power supply by turning the knob at the filter top. ^ Rinse all lint filters with hot water and dry thoroughly. ^ The exterior and the control panel can be rinsed with a soft cloth. 15 They will damage the surface. ^ Take the door lint filters out by shutting off the power main, tripping the circuit breaker or unplugging the power cord...
... the dryer operation. ^ The stainless steel surfaces of electric shock, disconnect the dryer from the power supply by turning the knob at the filter top. ^ Rinse all lint filters with hot water and dry thoroughly. ^ The exterior and the control panel can be rinsed with a soft cloth. 15 They will damage the surface. ^ Take the door lint filters out by shutting off the power main, tripping the circuit breaker or unplugging the power cord...

Product Manual
Page 17
... condenser door lock down and remove the door up and out of electric shock, disconnect the dryer from the power supply by shutting off the power main, tripping the circuit breaker or unplugging the power cord before performing maintenance. ^ Clean the condenser every 6 months and when the "Filter/Vent" indicator lights. Clean approximately every 100 uses when the dryer is located on the lower left corner of the dryer. ^ Turn the condenser lock up. ^ Open the access panel...
... condenser door lock down and remove the door up and out of electric shock, disconnect the dryer from the power supply by shutting off the power main, tripping the circuit breaker or unplugging the power cord before performing maintenance. ^ Clean the condenser every 6 months and when the "Filter/Vent" indicator lights. Clean approximately every 100 uses when the dryer is located on the lower left corner of the dryer. ^ Turn the condenser lock up. ^ Open the access panel...

Product Manual
Page 20
... clothes to open the door. ^ Load the laundry into the drum. Make sure that laundry will not be selected or deselected with a firm swing - Quick Guide 1.Turn on the dryer. ^ Press the "Door" button to tumble freely. ^ Press the e or - Select a program ^ Press the "On/Off" button to turn on the dryer and load the laundry 2. button until the desired program indicator lights. 3. Select a drying option (if needed...
... clothes to open the door. ^ Load the laundry into the drum. Make sure that laundry will not be selected or deselected with a firm swing - Quick Guide 1.Turn on the dryer. ^ Press the "Door" button to tumble freely. ^ Press the e or - Select a program ^ Press the "On/Off" button to turn on the dryer and load the laundry 2. button until the desired program indicator lights. 3. Select a drying option (if needed...

Product Manual
Page 23
... bulb cover is securely closed to prevent a short circuit or penetrating moisture. ^ Restore power. ^ Slide a screwdriver with a wide head underneath the side edge of the drum opening. ^ Replace the light bulb with a temperature proof bulb, available from the power supply by shutting off the power main, tripping the circuit breaker or unplugging the power cord before performing maintenance. ^ Open the door. Dryer Care Changing the light bulb ,To reduce the risk of electric shock, disconnect the dryer from Miele...
... bulb cover is securely closed to prevent a short circuit or penetrating moisture. ^ Restore power. ^ Slide a screwdriver with a wide head underneath the side edge of the drum opening. ^ Replace the light bulb with a temperature proof bulb, available from the power supply by shutting off the power main, tripping the circuit breaker or unplugging the power cord before performing maintenance. ^ Open the door. Dryer Care Changing the light bulb ,To reduce the risk of electric shock, disconnect the dryer from Miele...

Product Manual
Page 24
... bulb may be started? What if the "Child Lock" indicator flashes after turning the dryer on . Deactivate the child lock. Load laundry into the dryer. Single items should be dried with "Sturdy" or a timed program and dry items in this dryer. The door is empty. See "Child Lock." Do not use fabric softener sheets in the "Fluff" program. 20 How do I prevent static cling? Make sure the dryer is activated. reset the circuit breaker...
... bulb may be started? What if the "Child Lock" indicator flashes after turning the dryer on . Deactivate the child lock. Load laundry into the dryer. Single items should be dried with "Sturdy" or a timed program and dry items in this dryer. The door is empty. See "Child Lock." Do not use fabric softener sheets in the "Fluff" program. 20 How do I prevent static cling? Make sure the dryer is activated. reset the circuit breaker...

Product Manual
Page 25
... clogged with the dryer's Select a timed program to increase the dryer. drying. See "Dryer care". The lint filters are clogged. The air vent below the door is condensed moisture from the laundry. 21 Open a window or door to increase airflow. Possible fault The load contained too many dissimilar items (size and fabric.) What if water has collected around the drum opening? What if the program runs too long or stops? "Dryer care").
... clogged with the dryer's Select a timed program to increase the dryer. drying. See "Dryer care". The lint filters are clogged. The air vent below the door is condensed moisture from the laundry. 21 Open a window or door to increase airflow. Possible fault The load contained too many dissimilar items (size and fabric.) What if water has collected around the drum opening? What if the program runs too long or stops? "Dryer care").
Product Manual
Page 26
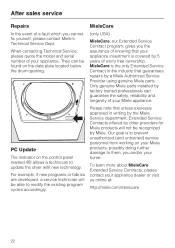
... us online at: http://miele.com/mielecare 22 After sales service Repairs MieleCare In the event of your appliance. When contacting Technical Service, please quote the model and serial number of a fault which you the assurance of knowing that guarantees repairs by a Miele Authorized Service Provider using genuine Miele parts. PC Update The indicator on the data plate located below the drum opening. (only USA) MieleCare, our Extended Service Contract...
... us online at: http://miele.com/mielecare 22 After sales service Repairs MieleCare In the event of your appliance. When contacting Technical Service, please quote the model and serial number of a fault which you the assurance of knowing that guarantees repairs by a Miele Authorized Service Provider using genuine Miele parts. PC Update The indicator on the data plate located below the drum opening. (only USA) MieleCare, our Extended Service Contract...
Product Manual
Page 28
... manufacturer's instructions and local codes. ~ Repair and maintenance work should be dangerous and could be performed by a qualified installer or service agency, in accordance with the appliance! ships) must be performed by a Miele authorized service technician. In the event of malfunction or breakdown, grounding will not fit the outlet, have a proper outlet installed by providing a path of electric shock. The plug must be plugged into...
... manufacturer's instructions and local codes. ~ Repair and maintenance work should be dangerous and could be performed by a qualified installer or service agency, in accordance with the appliance! ships) must be performed by a Miele authorized service technician. In the event of malfunction or breakdown, grounding will not fit the outlet, have a proper outlet installed by providing a path of electric shock. The plug must be plugged into...
Product Manual
Page 30
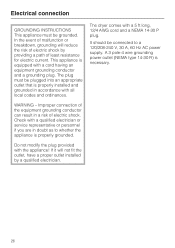
... is equipped with a 5 ft long, 12/4 AWG cord and a NEMA 14-30 P plug. The dryer comes with a cord having an equipment grounding conductor and a grounding plug. A 3 pole-4 wire grounding power outlet (NEMA type 14-30 R) is properly grounded. If it will reduce the risk of electric shock. Electrical connection GROUNDING INSTRUCTIONS This appliance must be plugged into an appropriate outlet that is properly installed and grounded in doubt...
... is equipped with a 5 ft long, 12/4 AWG cord and a NEMA 14-30 P plug. The dryer comes with a cord having an equipment grounding conductor and a grounding plug. A 3 pole-4 wire grounding power outlet (NEMA type 14-30 R) is properly grounded. If it will reduce the risk of electric shock. Electrical connection GROUNDING INSTRUCTIONS This appliance must be plugged into an appropriate outlet that is properly installed and grounded in doubt...
Product Manual
Page 33
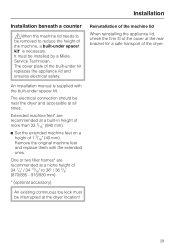
... rear bracket for a safe transport of the machine, a built-under kit replaces the appliance lid and ensures electrical safety. The electrical connection should be installed by a Miele Service Technician. An installation manual is necessary. It must be interrupted at the dryer location! Extended machine feet* are recommended at a niche height of 34 1/4" / 34 13/16" to reduce the height of the dryer. 29 The cover...
... rear bracket for a safe transport of the machine, a built-under kit replaces the appliance lid and ensures electrical safety. The electrical connection should be installed by a Miele Service Technician. An installation manual is necessary. It must be interrupted at the dryer location! Extended machine feet* are recommended at a niche height of 34 1/4" / 34 13/16" to reduce the height of the dryer. 29 The cover...
Product Manual
Page 40
... IS SUBJECT TO CHANGE. Miele, Inc. U.S.A. PLEASE REFER TO OUR WEBSITE TO OBTAIN THE MOST CURRENT PRODUCT SPECIFICATIONS, TECHNICAL & WARRANTY INFORMATION. Please have the model and serial number of your appliance available before contacting Technical Service. National Headquarters 9 Independence Way Princeton, NJ 08540 Phone: 800-843-7231 609-419-9898 Fax: 609-419-4298 www.mieleusa.com Technical Service & Support Nationwide Phone: 800...
... IS SUBJECT TO CHANGE. Miele, Inc. U.S.A. PLEASE REFER TO OUR WEBSITE TO OBTAIN THE MOST CURRENT PRODUCT SPECIFICATIONS, TECHNICAL & WARRANTY INFORMATION. Please have the model and serial number of your appliance available before contacting Technical Service. National Headquarters 9 Independence Way Princeton, NJ 08540 Phone: 800-843-7231 609-419-9898 Fax: 609-419-4298 www.mieleusa.com Technical Service & Support Nationwide Phone: 800...

