
T8000 Tumble Dryers
Page 7
.... SPECIFICATION SHEETS 08262011 Custom Front Panel Width: Thickness: Height: 23 3/8" for all cases Miele Decor Laundry unit With this installation, drill the following pattern in the front panel. Control Panel Miele Decor Laundry 3 7/8" C 16 3/4" C To center lines Note: To insure access to... all holes to 1/8" 25" in all machines up to 3/4" Up to 25" With this version, the existing front panel is removed and replaced by the custom cabinet maker. Notch Pattern For this version, a thin white frame will be exposed after installation Version 2 - Panel Information Integrated...
.... SPECIFICATION SHEETS 08262011 Custom Front Panel Width: Thickness: Height: 23 3/8" for all cases Miele Decor Laundry unit With this installation, drill the following pattern in the front panel. Control Panel Miele Decor Laundry 3 7/8" C 16 3/4" C To center lines Note: To insure access to... all holes to 1/8" 25" in all machines up to 3/4" Up to 25" With this version, the existing front panel is removed and replaced by the custom cabinet maker. Notch Pattern For this version, a thin white frame will be exposed after installation Version 2 - Panel Information Integrated...

Operating and installation manual
Page 3
... persons when using the appliance. ~ Do not allow children to play on or in the appliance. items treated with the controls. ~ Do not repair or replace any part of fire, electric shock, or injury to electrical appliances should only be dried in your appliance, follow basic precautions, including the following textiles...
... persons when using the appliance. ~ Do not allow children to play on or in the appliance. items treated with the controls. ~ Do not repair or replace any part of fire, electric shock, or injury to electrical appliances should only be dried in your appliance, follow basic precautions, including the following textiles...

Operating and installation manual
Page 17
... cover and press it firmly until it clicks into place. ,Make sure the bulb cover is located along the upper rim of the drum opening. ^ Replace the light bulb with a wide head underneath the side edge of electric shock, disconnect the dryer from...
... cover and press it firmly until it clicks into place. ,Make sure the bulb cover is located along the upper rim of the drum opening. ^ Replace the light bulb with a wide head underneath the side edge of electric shock, disconnect the dryer from...
Operating and installation manual
Page 32
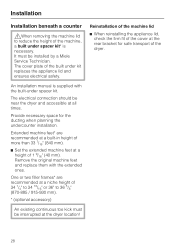
...(840 mm). ^ Set the extended machine feet at a height of 1 9/16" (40 mm). The electrical connection should be installed by a Miele Service Technician. The cover plate of the built under spacer kit. Installation Installation beneath a counter ,When removing the machine lid to 36 5/8" (870...accessible at the rear bracket for the ducting when planning the undercounter installation. Remove the original machine feet and replace them with the built-under kit replaces the appliance lid and ensures electrical safety. Extended machine feet* are recommended at a niche height of 34 ...
...(840 mm). ^ Set the extended machine feet at a height of 1 9/16" (40 mm). The electrical connection should be installed by a Miele Service Technician. The cover plate of the built under spacer kit. Installation Installation beneath a counter ,When removing the machine lid to 36 5/8" (870...accessible at the rear bracket for the ducting when planning the undercounter installation. Remove the original machine feet and replace them with the built-under kit replaces the appliance lid and ensures electrical safety. Extended machine feet* are recommended at a niche height of 34 ...