Operating and Installation manual
Page 4
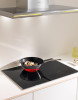
... before installation or use . Caution: Do not store items of suffocation! 4 Danger of interest to children in use to reach these operating instructions in this manual. IMPORTANT SAFETY INSTRUCTIONS WARNING- Children climbing on any future user. Keep children away from the appliance. ~ Keep all uniform safety codes and regulations.
... before installation or use . Caution: Do not store items of suffocation! 4 Danger of interest to children in use to reach these operating instructions in this manual. IMPORTANT SAFETY INSTRUCTIONS WARNING- Children climbing on any future user. Keep children away from the appliance. ~ Keep all uniform safety codes and regulations.
Operating and Installation manual
Page 26
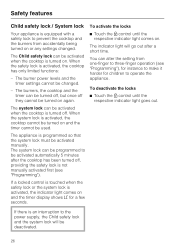
... be turned on and the timer display shows LC for children to be activated automatically 5 minutes after a short time. The system lock can be activated manually. When the safety lock is an interruption to the power supply, the Child safety lock and the system lock will go out after the cooktop.... 26 The indicator light will be changed . You can alter the setting from accidentally being turned on or any settings changed . - The appliance is not manually activated first (see "Programming"), for instance to make it harder for a few seconds.
... be turned on and the timer display shows LC for children to be activated automatically 5 minutes after a short time. The system lock can be activated manually. When the safety lock is an interruption to the power supply, the Child safety lock and the system lock will go out after the cooktop.... 26 The indicator light will be changed . You can alter the setting from accidentally being turned on or any settings changed . - The appliance is not manually activated first (see "Programming"), for instance to make it harder for a few seconds.

Operating and Installation manual
Page 32
... S 3 Loud, 10 seconds S 0 One-finger lock using $ S1 Three-finger lock by touching $ and level "0" of the two right-hand burners S 0 Only manual activation of the system lock S 1 Manual and automatic activation of the System lock * Programs / settings not shown here have no allocation. ** The factory default settings are shown in bold...
... S 3 Loud, 10 seconds S 0 One-finger lock using $ S1 Three-finger lock by touching $ and level "0" of the two right-hand burners S 0 Only manual activation of the system lock S 1 Manual and automatic activation of the System lock * Programs / settings not shown here have no allocation. ** The factory default settings are shown in bold...

Operating and Installation manual
Page 35
... ".) Auto-heat is selected and activated. 35 There was a power failure during programming. Start cooking at the highest power level, then reduce the power level manually. The cookware conducts heat See "Selecting cookware". One or several of food are being heated. The residual heat indicators have lit up during operation, and...
... ".) Auto-heat is selected and activated. 35 There was a power failure during programming. Start cooking at the highest power level, then reduce the power level manually. The cookware conducts heat See "Selecting cookware". One or several of food are being heated. The residual heat indicators have lit up during operation, and...

Operating and Installation manual
Page 51
Repairs and service by either removing the fuse, shutting off the main power or manually "tripping" the circuit breaker. Before connecting the appliance to a grounded power supply. Installer: Please leave these instructions with the appliance. , WARNING: THIS APPLIANCE MUST BE .... Black wire: connect to L1 (hot) Red wire: connect to L2 (hot) Green wire: connect to GND (ground) KM 5840 208/240 V, 60 Hz, 40 A fuse rating KM 5860 280/240 V, 60 Hz, 50 A fuse rating KM 5880 208 V, 60 Hz, 60 A fuse rating 240 V, 60 Hz, 50 A fuse rating Be sure the power...
Repairs and service by either removing the fuse, shutting off the main power or manually "tripping" the circuit breaker. Before connecting the appliance to a grounded power supply. Installer: Please leave these instructions with the appliance. , WARNING: THIS APPLIANCE MUST BE .... Black wire: connect to L1 (hot) Red wire: connect to L2 (hot) Green wire: connect to GND (ground) KM 5840 208/240 V, 60 Hz, 40 A fuse rating KM 5860 280/240 V, 60 Hz, 50 A fuse rating KM 5880 208 V, 60 Hz, 60 A fuse rating 240 V, 60 Hz, 50 A fuse rating Be sure the power...