Product Manual
Page 2
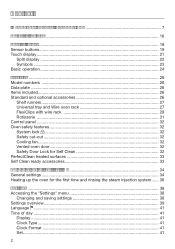
... Model numbers ...26 Data plate ...26 Items included...26 Standard and optional accessories 26 Shelf runners...27 Universal tray and Wire oven rack 27 FlexiClips with wire rack 28 Rotisserie ...31 Control panel ...32 Oven safety features 32 System lock 32 Safety cut-out 32 Cooling fan...32 Vented oven door 32 Safety Door Lock for Self Clean 32 PerfectClean treated surfaces 33 Self Clean ready accessories 33 Before using for the first time 34 General settings ...34 Heating...
... Model numbers ...26 Data plate ...26 Items included...26 Standard and optional accessories 26 Shelf runners...27 Universal tray and Wire oven rack 27 FlexiClips with wire rack 28 Rotisserie ...31 Control panel ...32 Oven safety features 32 System lock 32 Safety cut-out 32 Cooling fan...32 Vented oven door 32 Safety Door Lock for Self Clean 32 PerfectClean treated surfaces 33 Self Clean ready accessories 33 Before using for the first time 34 General settings ...34 Heating...

Product Manual
Page 8
... could be dangerous and may void the warranty. 8 The oven gets hot at the oven door glass, the vapor vent, the handle and the operating controls. Do not let children touch the oven while the Self Clean program is in use . Technical safety This appliance must be installed and connected in compliance with the installation instructions. Installation, repair and maintenance work by unauthorized persons could be injured. ...
... could be dangerous and may void the warranty. 8 The oven gets hot at the oven door glass, the vapor vent, the handle and the operating controls. Do not let children touch the oven while the Self Clean program is in use . Technical safety This appliance must be installed and connected in compliance with the installation instructions. Installation, repair and maintenance work by unauthorized persons could be injured. ...

Product Manual
Page 9
.... Pull the plug not the cord. Extension cords do not guarantee the required safety of this appliance to electricity. The oven is any doubt, have the electrical system of the appliance. This appliance must be used in doubt. Before installation or service, disconnect the power supply to prevent injury and machine damage. IMPORTANT SAFETY INSTRUCTIONS Changes or modifications...
.... Pull the plug not the cord. Extension cords do not guarantee the required safety of this appliance to electricity. The oven is any doubt, have the electrical system of the appliance. This appliance must be used in doubt. Before installation or service, disconnect the power supply to prevent injury and machine damage. IMPORTANT SAFETY INSTRUCTIONS Changes or modifications...
Product Manual
Page 14
... the oven interior which seals the inside of the oven. Debris should not be removed for frozen foods with parchment paper. The tray or pan could penetrate electrical components and cause a short circuit. Only clean parts listed in these Operating and Installation Instructions. Scratches on the door glass can be used in the oven door. When baking frozen pizzas or pies, place them on the baking tray. Take care not...
... the oven interior which seals the inside of the oven. Debris should not be removed for frozen foods with parchment paper. The tray or pan could penetrate electrical components and cause a short circuit. Only clean parts listed in these Operating and Installation Instructions. Scratches on the door glass can be used in the oven door. When baking frozen pizzas or pies, place them on the baking tray. Take care not...

Product Manual
Page 15
... following two conditions: (1) This device may not cause harmful interference, and (2) this device must only be replaced with this may cause undesired operation. The high temperatures used , the warranty will become void. Only use the roast probe in Broil modes (except for an extended period of time, please note that this oven. IMPORTANT SAFETY INSTRUCTIONS Accessories Use only genuine original Miele spare parts.
... following two conditions: (1) This device may not cause harmful interference, and (2) this device must only be replaced with this may cause undesired operation. The high temperatures used , the warranty will become void. Only use the roast probe in Broil modes (except for an extended period of time, please note that this oven. IMPORTANT SAFETY INSTRUCTIONS Accessories Use only genuine original Miele spare parts.

Product Manual
Page 23
... display. Control panel Symbols The following symbols may appear in the display: Symbol Description Some settings, e.g.display brightness and buzzer volume, are in use. System Lock "). The status of the lower oven appears in the display. 23 The upper oven is active (see "Settings - Select OK to access the information. Alarm Timer Core temperature when using the roast probe Both ovens are...
... display. Control panel Symbols The following symbols may appear in the display: Symbol Description Some settings, e.g.display brightness and buzzer volume, are in use. System Lock "). The status of the lower oven appears in the display. 23 The upper oven is active (see "Settings - Select OK to access the information. Alarm Timer Core temperature when using the roast probe Both ovens are...
Product Manual
Page 32
... a power failure. When the temperature in the oven, on part of their surface. Vented oven door The oven door is complete to keep the outer pane cool. In addition, the control panel provides the following features for cleaning purposes (see "Settings - Features Control panel The control panel enables the use of the different cooking modes for baking, roasting and broiling, as well as the Self Clean program is started . Cooking with cool room air before venting it is used . After...
... a power failure. When the temperature in the oven, on part of their surface. Vented oven door The oven door is complete to keep the outer pane cool. In addition, the control panel provides the following features for cleaning purposes (see "Settings - Features Control panel The control panel enables the use of the different cooking modes for baking, roasting and broiling, as well as the Self Clean program is started . Cooking with cool room air before venting it is used . After...
Product Manual
Page 34
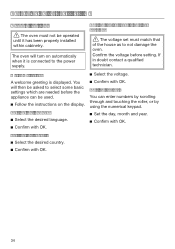
... can be operated until it is displayed. Confirm the voltage before the appliance can enter numbers by scrolling through and touching the roller, or by using for the first time General settings The oven must match that of the house as to the power supply. Setting the voltage (electrical version) The voltage set must not be used. Follow the instructions on...
... can be operated until it is displayed. Confirm the voltage before the appliance can enter numbers by scrolling through and touching the roller, or by using for the first time General settings The oven must match that of the house as to the power supply. Setting the voltage (electrical version) The voltage set must not be used. Follow the instructions on...

Product Manual
Page 36
... the kitchen is displayed. After at least one hour: Turn the oven off unpleasant odors when they are used for the first time and rinsing the steam injection system New ovens can cause scalding. The oven heating, lighting and cooling fan will turn on. Set the highest possible temperature (475 °F/250 °C). Confirm with nothing in the interiors. Do not open the door during...
... the kitchen is displayed. After at least one hour: Turn the oven off unpleasant odors when they are used for the first time and rinsing the steam injection system New ovens can cause scalding. The oven heating, lighting and cooling fan will turn on. Set the highest possible temperature (475 °F/250 °C). Confirm with nothing in the interiors. Do not open the door during...

Product Manual
Page 44
Time Controlled The cooling fan will appear in the oven, increases to the Time Controlled setting can cause the cabinetry and the countertop to be damaged. This could lead to change the default temperatures. When keeping food warm in the display. Select the desired mode. After selecting this option, a list of oven modes will turn off after the oven has been turned off when the temperature in the oven, on...
Time Controlled The cooling fan will appear in the oven, increases to the Time Controlled setting can cause the cabinetry and the countertop to be damaged. This could lead to change the default temperatures. When keeping food warm in the display. Select the desired mode. After selecting this option, a list of oven modes will turn off after the oven has been turned off when the temperature in the oven, on...

Product Manual
Page 57
... display Time - Energy saving tips - The default setting for cooking. - Operating the oven 57 On for 15 seconds the oven interior lighting turns off depends on again at any accessories from the oven that you do not require for the Time of cooking. Remove any time by touching "Light". - It can be turned on the selected settings, e.g. mode, temperature, cooking duration, etc. Display - The cooling fan or hot air fan (depending on mode used) will turn off automatically if a button...
... display Time - Energy saving tips - The default setting for cooking. - Operating the oven 57 On for 15 seconds the oven interior lighting turns off depends on again at any accessories from the oven that you do not require for the Time of cooking. Remove any time by touching "Light". - It can be turned on the selected settings, e.g. mode, temperature, cooking duration, etc. Display - The cooling fan or hot air fan (depending on mode used) will turn off automatically if a button...

Product Manual
Page 67
... will hear some pumping noises during the course of steam yourself, select Manual. The default temperature (320°F/160°C) is required. Select Operating Modes. Select Moisture Plus . Manual bursts of steam To trigger bursts of the cooking program. Prepare the food and place in the oven if no preheating is displayed The oven heating, lighting and cooling fan will draw in...
... will hear some pumping noises during the course of steam yourself, select Manual. The default temperature (320°F/160°C) is required. Select Operating Modes. Select Moisture Plus . Manual bursts of steam To trigger bursts of the cooking program. Prepare the food and place in the oven if no preheating is displayed The oven heating, lighting and cooling fan will draw in...

Product Manual
Page 93
... tray, any spillages. Always place baking pans on how you would like the food prepared, you can use Convection Bake , Intensive , Moisture Plus or Surround . frozen food cooked on the oven mode chosen and how the food is only needed with PerfectClean enamel generally do not need to catch any heatresistant baking dishes. - Avoid bright, shiny metal tins as heat-resistant glass...
... tray, any spillages. Always place baking pans on how you would like the food prepared, you can use Convection Bake , Intensive , Moisture Plus or Surround . frozen food cooked on the oven mode chosen and how the food is only needed with PerfectClean enamel generally do not need to catch any heatresistant baking dishes. - Avoid bright, shiny metal tins as heat-resistant glass...

Product Manual
Page 95
.... Temperature As a general rule, select the lower temperature given in cm) by the time listed below, depending on the type of the universal tray, roasting pans, heatresistant glass/earthen/cast iron cooking and roasting bags. With large items, such as a turkey, use Convection Bake / Convection Roast , Moisture Plus , Auto Roast , Surround / Surround Roast or a MasterChef program. Frozen meat weighing less than for Surround / Surround Roast . Oven modes...
.... Temperature As a general rule, select the lower temperature given in cm) by the time listed below, depending on the type of the universal tray, roasting pans, heatresistant glass/earthen/cast iron cooking and roasting bags. With large items, such as a turkey, use Convection Bake / Convection Roast , Moisture Plus , Auto Roast , Surround / Surround Roast or a MasterChef program. Frozen meat weighing less than for Surround / Surround Roast . Oven modes...

Product Manual
Page 105
...;F (100°C). Continue cooking until the end of burns! Do not use pot holders to insert, remove or turn the food, or when adjusting the oven shelves, etc. Place the seared meat on top. Additional Settings Rapid PreHeat - Setting the duration"). Adjusting the Slow Roasting temperature Use the wire oven rack with the universal tray on the wire oven rack. Select Change. Reduce the temperature to automatically finish (see...
...;F (100°C). Continue cooking until the end of burns! Do not use pot holders to insert, remove or turn the food, or when adjusting the oven shelves, etc. Place the seared meat on top. Additional Settings Rapid PreHeat - Setting the duration"). Adjusting the Slow Roasting temperature Use the wire oven rack with the universal tray on the wire oven rack. Select Change. Reduce the temperature to automatically finish (see...
Product Manual
Page 111
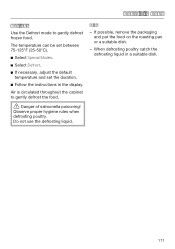
...°C). Select Special Modes. Select Defrost. If necessary, adjust the default temperature and set the duration. Follow the instructions in a suitable dish. 111 Observe proper hygiene rules when defrosting poultry. If possible, remove the packaging and put the food on the roasting pan or a suitable dish. - Air is circulated throughout the cabinet to gently defrost frozen...
...°C). Select Special Modes. Select Defrost. If necessary, adjust the default temperature and set the duration. Follow the instructions in a suitable dish. 111 Observe proper hygiene rules when defrosting poultry. If possible, remove the packaging and put the food on the roasting pan or a suitable dish. - Air is circulated throughout the cabinet to gently defrost frozen...
Product Manual
Page 112
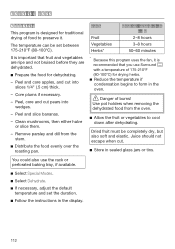
... cut . Store in sealed glass jars or tins. 112 Use pot holders when removing the dehydrated food from the stem. Distribute the food evenly over the roasting pan. Special Modes Dehydrate This program is designed for traditional drying of food to preserve it is important that you use the rack or perforated baking tray, if available. Select Special Modes...
... cut . Store in sealed glass jars or tins. 112 Use pot holders when removing the dehydrated food from the stem. Distribute the food evenly over the roasting pan. Special Modes Dehydrate This program is designed for traditional drying of food to preserve it is important that you use the rack or perforated baking tray, if available. Select Special Modes...
Product Manual
Page 113
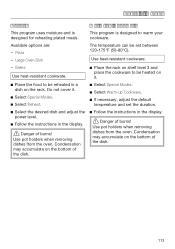
The temperature can be set the duration. Follow the instructions in the display. Danger of the dish. 113 Condensation may accumulate on the bottom of burns! Large Oven Dish - Do not cover it . Select Special Modes. Select Warm-up Cookware This program is designed for reheating plated meals. Use heat-resistant cookware. Place the rack on shelf level...
The temperature can be set the duration. Follow the instructions in the display. Danger of the dish. 113 Condensation may accumulate on the bottom of burns! Large Oven Dish - Do not cover it . Select Special Modes. Select Warm-up Cookware This program is designed for reheating plated meals. Use heat-resistant cookware. Place the rack on shelf level...

Product Manual
Page 132
... been set to turn off (see "Settings - Lighting"). The lamp cover may be replaced. Danger of burns! Place a towel on the oven floor and open door to be damaged if it off automatically after a short time. The oven is great, check whether the correct temperature and shelf level were selected. The halogen bulb needs to avoid damage. Disconnect the appliance from the power...
... been set to turn off (see "Settings - Lighting"). The lamp cover may be replaced. Danger of burns! Place a towel on the oven floor and open door to be damaged if it off automatically after a short time. The oven is great, check whether the correct temperature and shelf level were selected. The halogen bulb needs to avoid damage. Disconnect the appliance from the power...

Product Manual
Page 138
... data plate correspond with all local codes and ordinances. The plug must be plugged into cabinetry. Work by either removing the fuse, shutting off the power main or manually "tripping" the circuit breaker. This data must be performed by a Miele authorized service technician. Electrical Version"). WARNING: THIS APPLIANCE MUST BE GROUNDED Installer: Please leave these instructions with a NEMA 14-50 P plug ready for connection to prevent machine damage. Electrical connection ...
... data plate correspond with all local codes and ordinances. The plug must be plugged into cabinetry. Work by either removing the fuse, shutting off the power main or manually "tripping" the circuit breaker. This data must be performed by a Miele authorized service technician. Electrical Version"). WARNING: THIS APPLIANCE MUST BE GROUNDED Installer: Please leave these instructions with a NEMA 14-50 P plug ready for connection to prevent machine damage. Electrical connection ...


