
Fitting instructions
Page 6
... cover of this could be screwed to the underside of conformity is as far as described in the operating and installation instructions for contact details 6 Ensure that no metal components, or as few as possible, are present in the transmission path between the radio module and the cooker hood antenna. ^ Secure the radio module underneath the work...
... cover of this could be screwed to the underside of conformity is as far as described in the operating and installation instructions for contact details 6 Ensure that no metal components, or as few as possible, are present in the transmission path between the radio module and the cooker hood antenna. ^ Secure the radio module underneath the work...
Guarantee booklet
Page 6
... instructions for use for a purpose for which is a transferable right. All defective Parts and Products replaced by Miele (including use of parts, components or accessories which have the goods repaired or replaced if the goods fail to : i. This Miele Warranty will be deemed to be eligible to have not been supplied by or specifically approved by Miele under the Australian Consumer Law. use or installation; use ; This Warranty...
... instructions for use for a purpose for which is a transferable right. All defective Parts and Products replaced by Miele (including use of parts, components or accessories which have the goods repaired or replaced if the goods fail to : i. This Miele Warranty will be deemed to be eligible to have not been supplied by or specifically approved by Miele under the Australian Consumer Law. use or installation; use ; This Warranty...
Guarantee booklet
Page 7
... Parts which are required, or due to availability of time possible. Ltd. 1 Gilbert Park Drive Knoxfield VIC 3180 Or e-mail: contact@miele.com.au The Complaints Manager Miele New Zealand Limited Unit L, 10-20 Sylvia Park Rd Mt Wellington Auckland 1060 PRIVACY Miele will use reasonable commercial endeavors to have had or the level of floor care Products i.e. Provide and make...
... Parts which are required, or due to availability of time possible. Ltd. 1 Gilbert Park Drive Knoxfield VIC 3180 Or e-mail: contact@miele.com.au The Complaints Manager Miele New Zealand Limited Unit L, 10-20 Sylvia Park Rd Mt Wellington Auckland 1060 PRIVACY Miele will use reasonable commercial endeavors to have had or the level of floor care Products i.e. Provide and make...
Guarantee booklet
Page 8
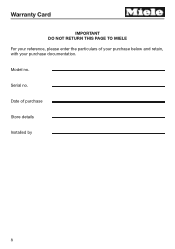
Warranty Card IMPORTANT DO NOT RETURN THIS PAGE TO MIELE For your reference, please enter the particulars of purchase Store details Installed by 8 Serial no . Date of your purchase below and retain, with your purchase documentation. Model no .
Warranty Card IMPORTANT DO NOT RETURN THIS PAGE TO MIELE For your reference, please enter the particulars of purchase Store details Installed by 8 Serial no . Date of your purchase below and retain, with your purchase documentation. Model no .
Guarantee booklet
Page 12
... include the model and serial number of the Miele Product, the Authorized Miele Dealer (or seller) from state to a Miele Repair Center. Limitation Of Liability For Special, Incidental, Consequential Or Punitive Damages Miele specifically disclaims any other legal theory. Any decision is not satisfied with respect to the Miele Product are sold separately by Miele; Special State Laws This Limited Warranty gives the Miele Customer specific legal...
... include the model and serial number of the Miele Product, the Authorized Miele Dealer (or seller) from state to a Miele Repair Center. Limitation Of Liability For Special, Incidental, Consequential Or Punitive Damages Miele specifically disclaims any other legal theory. Any decision is not satisfied with respect to the Miele Product are sold separately by Miele; Special State Laws This Limited Warranty gives the Miele Customer specific legal...

Guarantee booklet
Page 15
... infrastructure when removing or returning repaired or replaced Miele Product(s) into a custom installation; • Any damage to or destruction or loss of clothing or other textiles, dishes, china, flatware, laboratory glassware, or other items placed in a Miele Product; • Ordinary wear and tear; • Any damage to the Miele Product caused by any of its parts or accessories; - LIMITED WARRANTY - PROFESSIONAL LAUNDRY PRODUCTS...
... infrastructure when removing or returning repaired or replaced Miele Product(s) into a custom installation; • Any damage to or destruction or loss of clothing or other textiles, dishes, china, flatware, laboratory glassware, or other items placed in a Miele Product; • Ordinary wear and tear; • Any damage to the Miele Product caused by any of its parts or accessories; - LIMITED WARRANTY - PROFESSIONAL LAUNDRY PRODUCTS...

Guarantee booklet
Page 17
... Professional Miele Products used for Household/Personal Purposes: One (1) Year or Two (2) Year Limited Warranty - If the Miele Product has been repaired or replaced, Miele will in its discretion determine to replace the product with the covered repair until the owner has remedied the applicable hazard at its original accessories, is not required or prohibited by applicable state law, Miele Products must be registered by Miele ("Authorized Miele Installer...
... Professional Miele Products used for Household/Personal Purposes: One (1) Year or Two (2) Year Limited Warranty - If the Miele Product has been repaired or replaced, Miele will in its discretion determine to replace the product with the covered repair until the owner has remedied the applicable hazard at its original accessories, is not required or prohibited by applicable state law, Miele Products must be registered by Miele ("Authorized Miele Installer...

Guarantee booklet
Page 18
... non-availability during maintenance or repair, or unavailability of spare or replacement parts; • Cleaning, preventive maintenance or customer education; • Any Miele Product, the serial numbers of its parts and accessories which have been performed by Miele; - improper installation, improper operation, improper maintenance, improper storage, improper connection to the service technician; any repair, service, conversion or alteration to it or any of built-in a Miele Product; • Ordinary wear...
... non-availability during maintenance or repair, or unavailability of spare or replacement parts; • Cleaning, preventive maintenance or customer education; • Any Miele Product, the serial numbers of its parts and accessories which have been performed by Miele; - improper installation, improper operation, improper maintenance, improper storage, improper connection to the service technician; any repair, service, conversion or alteration to it or any of built-in a Miele Product; • Ordinary wear...
Guarantee booklet
Page 24
... to be repaired at the customary charge to determine if you (including parts & labour). - c) Vacuums in commercial use : - Two (2) years, motor for canister and upright models. d) Vacuums in normal, non-commercial, household use : - Contact Miele Professional to the Miele Customer. S189 upright units. One (1) year, parts only outside Miele Direct Service Area (MDSA). Duration of Warranty This warranty is two (2) years. Canada". - Six (6) months, for which the motor warranty is valid...
... to be repaired at the customary charge to determine if you (including parts & labour). - c) Vacuums in commercial use : - Two (2) years, motor for canister and upright models. d) Vacuums in normal, non-commercial, household use : - Contact Miele Professional to the Miele Customer. S189 upright units. One (1) year, parts only outside Miele Direct Service Area (MDSA). Duration of Warranty This warranty is two (2) years. Canada". - Six (6) months, for which the motor warranty is valid...

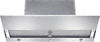
Operating instructions/Installation instructions
Page 5
... dangerous and may void the warranty. A damaged ventilation hood can be locked, securely fasten a prominent warning device, such as a tag, to prevent power from being switched on accidentally. Before servicing or cleaning the appliance, switch power off at the service panel and lock the service disconnecting means to the service panel. Installation, repair and maintenance work by the manufacturer. Never use a damaged ventilation hood. 5 Use this appliance only in...
... dangerous and may void the warranty. A damaged ventilation hood can be locked, securely fasten a prominent warning device, such as a tag, to prevent power from being switched on accidentally. Before servicing or cleaning the appliance, switch power off at the service panel and lock the service disconnecting means to the service panel. Installation, repair and maintenance work by the manufacturer. Never use a damaged ventilation hood. 5 Use this appliance only in...
Operating instructions/Installation instructions
Page 6
... "Cleaning and care" section of appliance safety. To ensure safe operation, only use the ventilation hood after it has been connected to the electrical supply. To avoid damaging the ventilation hood, make sure that the connection data (voltage and frequency) on a ship). Adequate ventilation must exist between the appliance and an effective grounding system. Only with devices that burn gas or other parts...
... "Cleaning and care" section of appliance safety. To ensure safe operation, only use the ventilation hood after it has been connected to the electrical supply. To avoid damaging the ventilation hood, make sure that the connection data (voltage and frequency) on a ship). Adequate ventilation must exist between the appliance and an effective grounding system. Only with devices that burn gas or other parts...
Operating instructions/Installation instructions
Page 7
... electrical service panel have been removed. - c) Clean the ventilation hood frequently. The screw-type fuses on low or medium settings. - The power cable (if present) has been unplugged from the electrical supply. b) Always turn the hood on when cooking at high settings. Grease should not be disconnected from the socket (pull the plug not the cord). d) Use the proper pan size. a) Never leave surface units unattended at a high heat. - IMPORTANT SAFETY INSTRUCTIONS If the power cord...
... electrical service panel have been removed. - c) Clean the ventilation hood frequently. The screw-type fuses on low or medium settings. - The power cable (if present) has been unplugged from the electrical supply. b) Always turn the hood on when cooking at high settings. Grease should not be disconnected from the socket (pull the plug not the cord). d) Use the proper pan size. a) Never leave surface units unattended at a high heat. - IMPORTANT SAFETY INSTRUCTIONS If the power cord...

Operating instructions/Installation instructions
Page 10
... for combustion and exhausting of gases through the flue (chimney of a ventilation hood above your cooking appliance, please refer to prevent back drafting. c) When cutting or drilling into the wall or ceiling, do not damage electrical wiring and other hidden utilities. - d) Ducted hoods must always be done by qualified person(s) in accordance with any solid-state speed control device. To determine whether a ventilation hood may be maintained...
... for combustion and exhausting of gases through the flue (chimney of a ventilation hood above your cooking appliance, please refer to prevent back drafting. c) When cutting or drilling into the wall or ceiling, do not damage electrical wiring and other hidden utilities. - d) Ducted hoods must always be done by qualified person(s) in accordance with any solid-state speed control device. To determine whether a ventilation hood may be maintained...

Operating instructions/Installation instructions
Page 11
Cleaning and care Never use and should not be vented into a chimney or vent flue which may cause injury. Accessories Use only genuine original Miele parts. Danger of them in use a steam cleaner to clean the ventilation hood. IMPORTANT SAFETY INSTRUCTIONS Be sure to observe the information contained in the "Installation" section when mounting the ventilation hood. Metal parts can have sharp edges which is to be sure...
Cleaning and care Never use and should not be vented into a chimney or vent flue which may cause injury. Accessories Use only genuine original Miele parts. Danger of them in use a steam cleaner to clean the ventilation hood. IMPORTANT SAFETY INSTRUCTIONS Be sure to observe the information contained in the "Installation" section when mounting the ventilation hood. Metal parts can have sharp edges which is to be sure...

Operating instructions/Installation instructions
Page 14
... the ventilation hood is not in use. When the ventilation hood is inserted into the kitchen. Non-return flap A non-return flap in and cleaned by the charcoal filters. A non-return flap has been provided with the hood in and cleaned first by the grease filters and then by the grease filters and directed outside without any obstruction. It is turned on the model: Vented mode Recirculation mode Recirculation mode hoods require a recirculation kit and OdorFree Charcoal Filters (available...
... the ventilation hood is not in use. When the ventilation hood is inserted into the kitchen. Non-return flap A non-return flap in and cleaned by the charcoal filters. A non-return flap has been provided with the hood in and cleaned first by the grease filters and then by the grease filters and directed outside without any obstruction. It is turned on the model: Vented mode Recirculation mode Recirculation mode hoods require a recirculation kit and OdorFree Charcoal Filters (available...

Operating instructions/Installation instructions
Page 15
... connection to use the Con@ctivity 2.0 function (see "Activating Con@ctivity 2.0"). 15 After cooking, the fan and the cooktop lighting switch off automatically and the canopy retracts. Description of functions Con@ctivity 2.0 function Automatic control This hood features a communication function which enables the automatic control of the hood based on the operational status of burners in operation and their power levels. - There must be found under "Operation." During cooking...
... connection to use the Con@ctivity 2.0 function (see "Activating Con@ctivity 2.0"). 15 After cooking, the fan and the cooktop lighting switch off automatically and the canopy retracts. Description of functions Con@ctivity 2.0 function Automatic control This hood features a communication function which enables the automatic control of the hood based on the operational status of burners in operation and their power levels. - There must be found under "Operation." During cooking...

Operating instructions/Installation instructions
Page 29
... use a stainless steel cleaner to control buttons) Stainless steel surfaces can also be cleaned using a soft cloth. Special instructions for any dirt or debris immediately. Observe the general cleaning instructions contained in the control panel area. Remove any length of the hood. Stainless steel housing General information The surfaces and control buttons are susceptible to clean the hood, especially in this chapter. Otherwise they may become discolored or damaged. Abrasive sponges, e.g. Make...
... use a stainless steel cleaner to control buttons) Stainless steel surfaces can also be cleaned using a soft cloth. Special instructions for any dirt or debris immediately. Observe the general cleaning instructions contained in the control panel area. Remove any length of the hood. Stainless steel housing General information The surfaces and control buttons are susceptible to clean the hood, especially in this chapter. Otherwise they may become discolored or damaged. Abrasive sponges, e.g. Make...

Operating instructions/Installation instructions
Page 43
... the ventilation hood housing and remove the cover. Unscrew the fixing screws on the motor unit. Turn the fan towards the rear and position the exhaust socket in the cut-out in a reduced height wall unit, for example. Repositioning is being fitted in the back panel of the housing. Refit the front panel and secure it using the screws. 43 The ventilation hood must be disconnected from the power...
... the ventilation hood housing and remove the cover. Unscrew the fixing screws on the motor unit. Turn the fan towards the rear and position the exhaust socket in the cut-out in a reduced height wall unit, for example. Repositioning is being fitted in the back panel of the housing. Refit the front panel and secure it using the screws. 43 The ventilation hood must be disconnected from the power...

Operating instructions/Installation instructions
Page 45
... with CSA C22.1-12, Canadian Electrical Code, Part I. Use only with ventilation hood cordconnection kits that the voltage, load and circuit rating information found acceptable for USA: ANSI-NFPA 70) and local safety regulations. Installation, repairs and other work is OFF while installation or repair work by unqualified persons could be dangerous. This appliance is equipped with a cord having a grounding wire with this appliance to the appliance...
... with CSA C22.1-12, Canadian Electrical Code, Part I. Use only with ventilation hood cordconnection kits that the voltage, load and circuit rating information found acceptable for USA: ANSI-NFPA 70) and local safety regulations. Installation, repairs and other work is OFF while installation or repair work by unqualified persons could be dangerous. This appliance is equipped with a cord having a grounding wire with this appliance to the appliance...

Operating instructions/Installation instructions
Page 46
... be vented outside wall, we recommend installing a telescopic wall vent or a rooftop vent (available as possible. - Air venting WARNING: Danger of personal injury. If elbows are used, the cross section should be as short and straight as an optional accessory). If the exhaust air is conveyed into an exhaust air chimney, the inlet connector must face the flow direction. When installing the exhaust duct horizontally, a minimum slope of ¹/ ₈ inch...
... be vented outside wall, we recommend installing a telescopic wall vent or a rooftop vent (available as possible. - Air venting WARNING: Danger of personal injury. If elbows are used, the cross section should be as short and straight as an optional accessory). If the exhaust air is conveyed into an exhaust air chimney, the inlet connector must face the flow direction. When installing the exhaust duct horizontally, a minimum slope of ¹/ ₈ inch...


