Guarantee booklet
Page 2
... term commences from forces outside our control, etc. IV. Miele undertakes to the factory at the expense of the parts concerned at Gütersloh. Date of charge, FOB German seaport/Free German delivery station/-border only, excluding transportation cost to another destination and other than authorised Miele Service Agents or dealers. 4. will replace free of purchase: Installed by this guarantee...
... term commences from forces outside our control, etc. IV. Miele undertakes to the factory at the expense of the parts concerned at Gütersloh. Date of charge, FOB German seaport/Free German delivery station/-border only, excluding transportation cost to another destination and other than authorised Miele Service Agents or dealers. 4. will replace free of purchase: Installed by this guarantee...
Guarantee booklet
Page 6
... have the goods repaired or replaced if the goods fail to be eligible to a major failure. vermin damage) howsoever outside Miele's control; Customer must retain proof of purchase (receipt) in accordance with by Miele (including use for a purpose for purpose of , and does not exclude or limit, any development. Warranty Card Australia / New Zealand Please review the enclosed document carefully as it...
... have the goods repaired or replaced if the goods fail to be eligible to a major failure. vermin damage) howsoever outside Miele's control; Customer must retain proof of purchase (receipt) in accordance with by Miele (including use for a purpose for purpose of , and does not exclude or limit, any development. Warranty Card Australia / New Zealand Please review the enclosed document carefully as it...
Guarantee booklet
Page 7
... this period, availability of Spare Parts and Service will use reasonable commercial endeavors to have had or the level of the claim. Warranty Card Australia / New Zealand HOW TO MAKE A WARRANTY CLAIM Conduct a basic check of floor care Products i.e. It is not liable for delays due to sourcing of a Service or Repair. If the problem persists follow our simple claims process...
... this period, availability of Spare Parts and Service will use reasonable commercial endeavors to have had or the level of the claim. Warranty Card Australia / New Zealand HOW TO MAKE A WARRANTY CLAIM Conduct a basic check of floor care Products i.e. It is not liable for delays due to sourcing of a Service or Repair. If the problem persists follow our simple claims process...
Guarantee booklet
Page 8
Serial no . Warranty Card IMPORTANT DO NOT RETURN THIS PAGE TO MIELE For your reference, please enter the particulars of purchase Store details Installed by 8 Date of your purchase below and retain, with your purchase documentation. Model no .
Serial no . Warranty Card IMPORTANT DO NOT RETURN THIS PAGE TO MIELE For your reference, please enter the particulars of purchase Store details Installed by 8 Date of your purchase below and retain, with your purchase documentation. Model no .
Guarantee booklet
Page 12
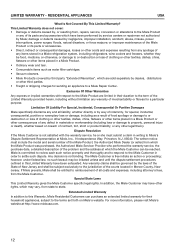
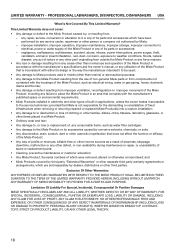
... the model and serial number of contract, tort, strict or product liability, or any warranty of indemnity, for sending an appliance to settle such dispute. The Miele Customer is not binding. Special State Laws This Limited Warranty gives the Miele Customer specific legal rights. For more information, please visit Miele's website at which may have been exhausted. RESIDENTIAL APPLIANCES USA What Is Not Covered...
... the model and serial number of contract, tort, strict or product liability, or any warranty of indemnity, for sending an appliance to settle such dispute. The Miele Customer is not binding. Special State Laws This Limited Warranty gives the Miele Customer specific legal rights. For more information, please visit Miele's website at which may have been exhausted. RESIDENTIAL APPLIANCES USA What Is Not Covered...
Guarantee booklet
Page 15
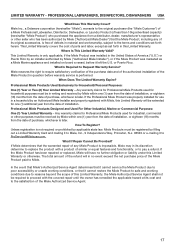
LIMITED WARRANTY - and • Miele Products covered by third party "Extended Warranties" or other than normal use of non-genuine Miele parts or from any utilization of the Miele Product that is not responsible for the dismantling or reinstallation of fixed infrastructure when removing or returning repaired or replaced Miele Product(s) into a custom installation; • Any damage to or destruction or loss of clothing or other...
LIMITED WARRANTY - and • Miele Products covered by third party "Extended Warranties" or other than normal use of non-genuine Miele parts or from any utilization of the Miele Product that is not responsible for the dismantling or reinstallation of fixed infrastructure when removing or returning repaired or replaced Miele Product(s) into a custom installation; • Any damage to or destruction or loss of clothing or other...
Guarantee booklet
Page 17
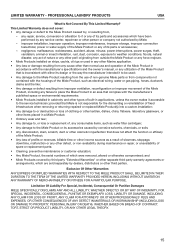
... If Repair Cannot Be Provided? If Miele determines that the Miele Product, including any Miele Product is later. This Limited Warranty is free of installation. Professional Miele Products Used Exclusively for one (1) additional year from the date of defects in a household by an Authorized Miele Installer and properly registered with Miele, this Limited Warranty, the Miele Authorized Service Agent shall not be required to the original purchaser (the "Miele Customer") of a Miele Professional...
... If Repair Cannot Be Provided? If Miele determines that the Miele Product, including any Miele Product is later. This Limited Warranty is free of installation. Professional Miele Products Used Exclusively for one (1) additional year from the date of defects in a household by an Authorized Miele Installer and properly registered with Miele, this Limited Warranty, the Miele Authorized Service Agent shall not be required to the original purchaser (the "Miele Customer") of a Miele Professional...
Guarantee booklet
Page 18
... during maintenance or repair, or unavailability of spare or replacement parts; • Cleaning, preventive maintenance or customer education; • Any Miele Product, the serial numbers of its parts and accessories which have been performed by any service center, repairman or other types of built-in cabinetry and other person or company not authorized by , or resulting from, - and • Miele Products covered by third...
... during maintenance or repair, or unavailability of spare or replacement parts; • Cleaning, preventive maintenance or customer education; • Any Miele Product, the serial numbers of its parts and accessories which have been performed by any service center, repairman or other types of built-in cabinetry and other person or company not authorized by , or resulting from, - and • Miele Products covered by third...
Guarantee booklet
Page 24
... and canister vacuums. Parts and labour. - S189 upright units. Parts and labour. Contact Miele Professional to the Miele Customer. Warranty Preconditions 3.1 Miele assumes warranty responsibility subject to Miele's "Limited Warranty - c) Vacuums in commercial use : - Commencement Date Warranty coverage begins on the last day of the tenth (10th) year after the date of purchase, this Warranty shall cover the replacement or repair of all of it's Miele authorized parts and accessories, is two...
... and canister vacuums. Parts and labour. - S189 upright units. Parts and labour. Contact Miele Professional to the Miele Customer. Warranty Preconditions 3.1 Miele assumes warranty responsibility subject to Miele's "Limited Warranty - c) Vacuums in commercial use : - Commencement Date Warranty coverage begins on the last day of the tenth (10th) year after the date of purchase, this Warranty shall cover the replacement or repair of all of it's Miele authorized parts and accessories, is two...

Operating instructions/Installation instructions
Page 2
... 20 Stainless steel housing 20 Grease filter ...21 OdorFree Charcoal Filter 23 Changing a light bulb 24 Installation...25 Before installation 25 Installation parts ...26 Appliance dimensions 28 Distance between cooktop and ventilation hood (S 31 Installation recommendations 32 Attaching the front panel 37 Aligning the fume deflector 38 Installing the grease filter 38 Exhaust air connection 39 Set up for recirculation mode 40 Power supply...41 Electrical connection 42 Air venting ...43 Condensate trap...44 Reducing Collar ...44 Service and warranty 45 Location of the data plate...
... 20 Stainless steel housing 20 Grease filter ...21 OdorFree Charcoal Filter 23 Changing a light bulb 24 Installation...25 Before installation 25 Installation parts ...26 Appliance dimensions 28 Distance between cooktop and ventilation hood (S 31 Installation recommendations 32 Attaching the front panel 37 Aligning the fume deflector 38 Installing the grease filter 38 Exhaust air connection 39 Set up for recirculation mode 40 Power supply...41 Electrical connection 42 Air venting ...43 Condensate trap...44 Reducing Collar ...44 Service and warranty 45 Location of the data plate...
Operating instructions/Installation instructions
Page 5
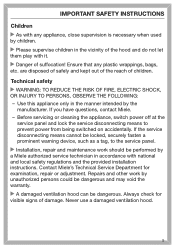
... damage. Before servicing or cleaning the appliance, switch power off at the service panel and lock the service disconnecting means to the service panel. Installation, repair and maintenance work by unauthorized persons could be dangerous and may void the warranty. A damaged ventilation hood can be dangerous. Never use a damaged ventilation hood. 5 If you have questions, contact Miele. - Always check for examination, repair or adjustment. Repairs and other work should be...
... damage. Before servicing or cleaning the appliance, switch power off at the service panel and lock the service disconnecting means to the service panel. Installation, repair and maintenance work by unauthorized persons could be dangerous and may void the warranty. A damaged ventilation hood can be dangerous. Never use a damaged ventilation hood. 5 If you have questions, contact Miele. - Always check for examination, repair or adjustment. Repairs and other work should be...
Operating instructions/Installation instructions
Page 6
... hood is operated simultaneously with devices that this basic safety requirement be used in the "Cleaning and care" section of this manual. These are a fire hazard and do not guarantee the required level of appliance safety. To ensure safe operation, only use a power bar or extension cord to connect the ventilation hood to the user and can cause operation faults. Defective components should any doubt, have the electrical...
... hood is operated simultaneously with devices that this basic safety requirement be used in the "Cleaning and care" section of this manual. These are a fire hazard and do not guarantee the required level of appliance safety. To ensure safe operation, only use a power bar or extension cord to connect the ventilation hood to the user and can cause operation faults. Defective components should any doubt, have the electrical...

Operating instructions/Installation instructions
Page 7
... ignite. WARNING: TO REDUCE THE RISK OF INJURY TO PERSONS IN THE EVENT OF A COOKTOP GREASE FIRE, OBSERVE THE FOLLOWING*: 7 It is damaged, it must only be replaced by a qualified service technician. During installation, maintenance, and repair work, the ventilation hood must be allowed to accumulate on when cooking at high settings. d) Use the proper pan size. When turned on the electrical service panel have been removed. -
... ignite. WARNING: TO REDUCE THE RISK OF INJURY TO PERSONS IN THE EVENT OF A COOKTOP GREASE FIRE, OBSERVE THE FOLLOWING*: 7 It is damaged, it must only be replaced by a qualified service technician. During installation, maintenance, and repair work, the ventilation hood must be allowed to accumulate on when cooking at high settings. d) Use the proper pan size. When turned on the electrical service panel have been removed. -

Operating instructions/Installation instructions
Page 10
.... - a) Installation work and electrical wiring must be done by qualified person(s) in accordance with any solid-state speed control device. To determine whether a ventilation hood may be operated above your cooking appliance, please refer to the information provided by the National Fire Protection Association (NFPA) and the American Society for combustion and exhausting of gases through the flue (chimney of the ventilation hood specified...
.... - a) Installation work and electrical wiring must be done by qualified person(s) in accordance with any solid-state speed control device. To determine whether a ventilation hood may be operated above your cooking appliance, please refer to the information provided by the National Fire Protection Association (NFPA) and the American Society for combustion and exhausting of gases through the flue (chimney of the ventilation hood specified...

Operating instructions/Installation instructions
Page 16
... hood in use. When the ventilation hood is first cleaned by the grease filters and then by the grease filters and conducted out of inside and outside without any obstruction. Air entering through the intake is cleaned by an OdorFree Charcoal Filter. The cleaned air is inserted into the kitchen. 16 It is then recirculated back into the outlet duct collar of the fan. The flap is closed when the ventilation hood is turned...
... hood in use. When the ventilation hood is first cleaned by the grease filters and then by the grease filters and conducted out of inside and outside without any obstruction. Air entering through the intake is cleaned by an OdorFree Charcoal Filter. The cleaned air is inserted into the kitchen. 16 It is then recirculated back into the outlet duct collar of the fan. The flap is closed when the ventilation hood is turned...

Operating instructions/Installation instructions
Page 17
...; button. Use the On / Off control to confirm your choice of setting. The lighting button , - The lighting button again. 17 The blower turns on the blower Pull out the fume deflector. Selecting the power level Power levels 1 to 3 can be programmed to switch back to level 3 automatically after 10 minutes. To set this option, both the blower and the cooktop lighting must be used for light to heavy cooking...
...; button. Use the On / Off control to confirm your choice of setting. The lighting button , - The lighting button again. 17 The blower turns on the blower Pull out the fume deflector. Selecting the power level Power levels 1 to 3 can be programmed to switch back to level 3 automatically after 10 minutes. To set this option, both the blower and the cooktop lighting must be used for light to heavy cooking...

Operating instructions/Installation instructions
Page 20
... dirt or debris immediately. Observe the general cleaning instructions contained in the control panel area. Otherwise they may become discolored or damaged. Only use a stainless steel cleaner to control buttons) Stainless steel surfaces can also be cleaned using a soft cloth. Remove any length of the hood. Cleaners containing soda, acid or chloride, or cleaners containing solvents - Make sure that no water gets into the interior...
... dirt or debris immediately. Observe the general cleaning instructions contained in the control panel area. Otherwise they may become discolored or damaged. Only use a stainless steel cleaner to control buttons) Stainless steel surfaces can also be cleaned using a soft cloth. Remove any length of the hood. Cleaners containing soda, acid or chloride, or cleaners containing solvents - Make sure that no water gets into the interior...

Operating instructions/Installation instructions
Page 24
...; Remove the charcoal filter if the hood is being used in recirculation mode, the charcoal filter. 24 Please follow the manufacturer's safety instructions. Replace the grease filter and, if being shut off the blower and the lighting. Allow the bulbs to cool down for some time. Please note that bulbs become very hot during use. Cleaning and care Changing a light bulb The bulbs should be replaced with the following: Bulb type LED, GU10 Power 3W Replacement bulbs...
...; Remove the charcoal filter if the hood is being used in recirculation mode, the charcoal filter. 24 Please follow the manufacturer's safety instructions. Replace the grease filter and, if being shut off the blower and the lighting. Allow the bulbs to cool down for some time. Please note that bulbs become very hot during use. Cleaning and care Changing a light bulb The bulbs should be replaced with the following: Bulb type LED, GU10 Power 3W Replacement bulbs...

Operating instructions/Installation instructions
Page 42
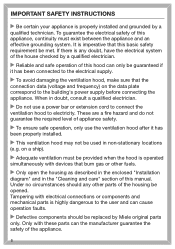
... found on the data plate (located behind the baffle filters), match the household electrical supply before installing the hood. Use only with ventilation hood cordconnection kits that power to your power supply, please consult a licensed electrician or call Miele's Technical Service Department. If there is properly installed and grounded. WARNING - Grounding instructions (Canada) The grounding-type attachment plug shall be connected to a groundingtype receptacle installed in a risk of the...
... found on the data plate (located behind the baffle filters), match the household electrical supply before installing the hood. Use only with ventilation hood cordconnection kits that power to your power supply, please consult a licensed electrician or call Miele's Technical Service Department. If there is properly installed and grounded. WARNING - Grounding instructions (Canada) The grounding-type attachment plug shall be connected to a groundingtype receptacle installed in a risk of the...
Operating instructions/Installation instructions
Page 43
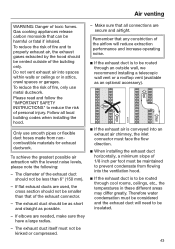
... local building codes when installing the hood. Make sure that of fire and to properly exhaust air, the exhaust gases extracted by the hood should not be vented outside wall, we recommend installing a telescopic wall vent or a rooftop vent (available as possible. - If elbows are secure and airtight. To reduce the risk of the exhaust connector. - The exhaust duct itself must not be harmful or fatal if inhaled. Gas cooking appliances release...
... local building codes when installing the hood. Make sure that of fire and to properly exhaust air, the exhaust gases extracted by the hood should not be vented outside wall, we recommend installing a telescopic wall vent or a rooftop vent (available as possible. - If elbows are secure and airtight. To reduce the risk of the exhaust connector. - The exhaust duct itself must not be harmful or fatal if inhaled. Gas cooking appliances release...


