

Product Manual
Page 1
en - US M.-Nr. 07 346 400 Operating and Installation Instructions Ceramic Combiset CS 1112 CS 1122 To prevent accidents and appliance damage, read these instructions before installation or use.
en - US M.-Nr. 07 346 400 Operating and Installation Instructions Ceramic Combiset CS 1112 CS 1122 To prevent accidents and appliance damage, read these instructions before installation or use.
Product Manual
Page 2
... 1112 7 CS 1122 8 Before using for the first time 9 Clean the combiset 9 How the burners work 10 Use 11 Turning a burner On/Off 11 Turning on the second ring on a Variable/Extended burner 11 Residual Heat Indicator ...
... 1112 7 CS 1122 8 Before using for the first time 9 Clean the combiset 9 How the burners work 10 Use 11 Turning a burner On/Off 11 Turning on the second ring on a Variable/Extended burner 11 Residual Heat Indicator ...
Product Manual
Page 3
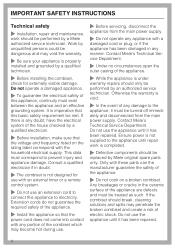
IMPORTANT SAFETY INSTRUCTIONS WARNING- When using your gas appliance follow basic precautions, including the following: ~ Only use the combiset for residential cooking, and for the purposes described in hotels, motels, Bed & Breakfasts or similar residential environments. ~ This ... Persons who lack physical, sensory or mental abilities, or experience with the appliance should not be dangerous. Danger of the appliance. This gas combiset conforms to children in use . 3 Children climbing on any future user. Caution: Do not store items of children. Other uses are not...
IMPORTANT SAFETY INSTRUCTIONS WARNING- When using your gas appliance follow basic precautions, including the following: ~ Only use the combiset for residential cooking, and for the purposes described in hotels, motels, Bed & Breakfasts or similar residential environments. ~ This ... Persons who lack physical, sensory or mental abilities, or experience with the appliance should not be dangerous. Danger of the appliance. This gas combiset conforms to children in use . 3 Children climbing on any future user. Caution: Do not store items of children. Other uses are not...
Product Manual
Page 4
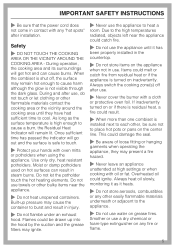
.... Otherwise the warranty is imperative that the voltage and frequency listed on a broken combiset. If the combiset should only be performed by a qualified technician. ~ Before installing the combiset, check for use with any damage to prevent injury and appliance damage. Contact Miele's Technical Service Department. ~ Under no circumstances open the outer casing of electric...
.... Otherwise the warranty is imperative that the voltage and frequency listed on a broken combiset. If the combiset should only be performed by a qualified technician. ~ Before installing the combiset, check for use with any damage to prevent injury and appliance damage. Contact Miele's Technical Service Department. ~ Under no circumstances open the outer casing of electric...
Product Manual
Page 5
When the combiset is not visible through the dark glass. Do not use . Items could catch fire. ~ Do not use the appliance until they may ignite. ~ Never use ... hazard. ~ Never leave an appliance unattended at high settings or when cooking with a cloth or protective oven foil. This could result. ~ When more than one combiset is turned on the center line. During and after use , do not touch or let clothing or other easily flammable materials underneath or adjacent to...
When the combiset is not visible through the dark glass. Do not use . Items could catch fire. ~ Do not use the appliance until they may ignite. ~ Never use ... hazard. ~ Never leave an appliance unattended at high settings or when cooking with a cloth or protective oven foil. This could result. ~ When more than one combiset is turned on the center line. During and after use , do not touch or let clothing or other easily flammable materials underneath or adjacent to...

Product Manual
Page 6
...Even lightweight objects may occur. ~ Any spills should be careful to reduce the risk of burns, ignition of the cable could scratch the combiset permanently. The proper size pot or pan will expose a portion of plastic or foil to cover the heating element. Never heat an empty ...pan unless the pan manufacturer states that you can cause scratches. ~ When wiping spills on a hot combiset with pronounced edges or ridges on the ceramic surface of electric shock! ~ Be careful not to cool before cleaning. Steam could penetrate electrical ...
...Even lightweight objects may occur. ~ Any spills should be careful to reduce the risk of burns, ignition of the cable could scratch the combiset permanently. The proper size pot or pan will expose a portion of plastic or foil to cover the heating element. Never heat an empty ...pan unless the pan manufacturer states that you can cause scratches. ~ When wiping spills on a hot combiset with pronounced edges or ridges on the ceramic surface of electric shock! ~ Be careful not to cool before cleaning. Steam could penetrate electrical ...

Product Manual
Page 7
CS 1112 Description of the combiset a Variable burner : C 4" or 7" (100 mm or 180 mm) Power: 700 W or 1800 W b Standard burner : C 5 11/16" (145 mm) Power: 1200 W c Burner indicators d Display Control knobs for the burners: f Standard burner (front) g Variable burner (rear) Indicators k On/Off indicator l Symbol for the outer-ring of the variable burner m "Residual Heat" indicator 7
CS 1112 Description of the combiset a Variable burner : C 4" or 7" (100 mm or 180 mm) Power: 700 W or 1800 W b Standard burner : C 5 11/16" (145 mm) Power: 1200 W c Burner indicators d Display Control knobs for the burners: f Standard burner (front) g Variable burner (rear) Indicators k On/Off indicator l Symbol for the outer-ring of the variable burner m "Residual Heat" indicator 7

Product Manual
Page 8
Description of the combiset CS 1122 a Extended burner C 7" or 7" x 10 7/16" (180 mm or 180 mm x 265 mm) Power: 1500 W / 2400 W b Standard burner C 5 11/16" (145 mm) Power: 1200 W c Burner indicators d Display Control knobs for the burners: f Standard burner (front) g Extended burner (rear) Indicators k On/Off indicator l Extended burner indicator m "Residual Heat" indicator 8
Description of the combiset CS 1122 a Extended burner C 7" or 7" x 10 7/16" (180 mm or 180 mm x 265 mm) Power: 1500 W / 2400 W b Standard burner C 5 11/16" (145 mm) Power: 1200 W c Burner indicators d Display Control knobs for the burners: f Standard burner (front) g Extended burner (rear) Indicators k On/Off indicator l Extended burner indicator m "Residual Heat" indicator 8

Product Manual
Page 9
Do not use liquid dish soap to clean the combiset, this may give off a slight odor the first time the appliance is heated. Metal components of the appliance have a protective coating which may cause permanent blue discolorations. 9 The smell will dissipate after a short time and does not indicate a faulty connection or appliance defect. Before using for the first time Clean the combiset ^ Remove any protective coverings or stickers. ^ Before using for the first time, clean the appliance with a damp cloth and dry with a soft cloth.
Do not use liquid dish soap to clean the combiset, this may give off a slight odor the first time the appliance is heated. Metal components of the appliance have a protective coating which may cause permanent blue discolorations. 9 The smell will dissipate after a short time and does not indicate a faulty connection or appliance defect. Before using for the first time Clean the combiset ^ Remove any protective coverings or stickers. ^ Before using for the first time, clean the appliance with a damp cloth and dry with a soft cloth.
Product Manual
Page 10
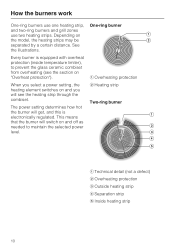
... two-ring burners and grill zones use two heating strips. Depending on and off as needed to prevent the glass ceramic combiset from overheating (see the heating strip through the combiset. Every burner is electronically regulated. The power setting determines how hot the burner will switch on the model, the heating strips...
... two-ring burners and grill zones use two heating strips. Depending on and off as needed to prevent the glass ceramic combiset from overheating (see the heating strip through the combiset. Every burner is electronically regulated. The power setting determines how hot the burner will switch on the model, the heating strips...

Product Manual
Page 12
Do not touch the burner or rest any objects on the combiset when the residual heat indicator is on , the On/Off indicator will turn off , the On/Off indicator goes out. Danger of burns! 12 Use Residual Heat Indicator When a cooking zone is switched on . The residual heat indicator will light followed by the residual heat indicator. When the cooking zone is switched off once the cooking zone is safe to the touch.
Do not touch the burner or rest any objects on the combiset when the residual heat indicator is on , the On/Off indicator will turn off , the On/Off indicator goes out. Danger of burns! 12 Use Residual Heat Indicator When a cooking zone is switched on . The residual heat indicator will light followed by the residual heat indicator. When the cooking zone is switched off once the cooking zone is safe to the touch.

Product Manual
Page 15
..., the better the cookware, the better the performance. - This helps keep pots and pans closed while cooking. Make sure the combiset and pot bottoms are pulled across the ceramic surface. Small or light scratches will not cook well. - The residual heat will also... work adequately. The cooking surface The ceramic combiset is scratch resistant, not scratch proof. Certain items, particularly sugar grains or crystallized liquids such as possible. - Pans with thick, flat...
..., the better the cookware, the better the performance. - This helps keep pots and pans closed while cooking. Make sure the combiset and pot bottoms are pulled across the ceramic surface. Small or light scratches will not cook well. - The residual heat will also... work adequately. The cooking surface The ceramic combiset is scratch resistant, not scratch proof. Certain items, particularly sugar grains or crystallized liquids such as possible. - Pans with thick, flat...

Product Manual
Page 16
These lines can be used because they have poor heat transfer and may scratch the combiset surface. 16 Cast iron, glass or stoneware should not be removed using a non-abrasive ceramic combiset cleaner or a shielded scraper blade. Be sure to remove and may leave a residue on the combiset in the form of the combiset. Selecting cookware Copper bottom and aluminum pans may mar the appearance of metallic lines. This is allowed to melt it becomes harder to clean the combiset after each use. Let the combiset cool before cleaning. Each time this residue is normal.
These lines can be used because they have poor heat transfer and may scratch the combiset surface. 16 Cast iron, glass or stoneware should not be removed using a non-abrasive ceramic combiset cleaner or a shielded scraper blade. Be sure to remove and may leave a residue on the combiset in the form of the combiset. Selecting cookware Copper bottom and aluminum pans may mar the appearance of metallic lines. This is allowed to melt it becomes harder to clean the combiset after each use. Let the combiset cool before cleaning. Each time this residue is normal.

Product Manual
Page 17
... use liquid dish soap to the surface. Be sure that no cleaner residue remains on the ceramic surface by carefully wiping the combiset with a damp cloth. Do not use abrasive cleaners, caustic (oven) cleaners, dishwasher detergent, scouring pads, steel wool or ... before they become difficult to clean this appliance. Pressurized steam could penetrate electrical components and cause a short circuit. They may damage the combiset or produce toxic fumes when heated. Follow the manufacturer's instructions. After cleaning dry the ceramic surface with a ceramic cleaner. When using...
... use liquid dish soap to the surface. Be sure that no cleaner residue remains on the ceramic surface by carefully wiping the combiset with a damp cloth. Do not use abrasive cleaners, caustic (oven) cleaners, dishwasher detergent, scouring pads, steel wool or ... before they become difficult to clean this appliance. Pressurized steam could penetrate electrical components and cause a short circuit. They may damage the combiset or produce toxic fumes when heated. Follow the manufacturer's instructions. After cleaning dry the ceramic surface with a ceramic cleaner. When using...
Product Manual
Page 18
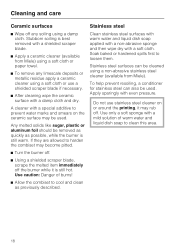
...spills first to cool and clean as possible, while the burner is best removed with a mild solution of burns! ^ Allow the combiset to loosen them. Cleaning and care Ceramic surfaces ^ Wipe off . If they are allowed to prevent water marks and smears on or...if necessary. ^ After cleaning wipe the ceramic surface with a special additive to harden the combiset may be used . Use only a soft sponge with a shielded scraper blade. ^ Apply a ceramic cleaner (available from Miele). To help prevent resoiling, a conditioner for stainless steel can be removed as quickly as ...
...spills first to cool and clean as possible, while the burner is best removed with a mild solution of burns! ^ Allow the combiset to loosen them. Cleaning and care Ceramic surfaces ^ Wipe off . If they are allowed to prevent water marks and smears on or...if necessary. ^ After cleaning wipe the ceramic surface with a special additive to harden the combiset may be used . Use only a soft sponge with a shielded scraper blade. ^ Apply a ceramic cleaner (available from Miele). To help prevent resoiling, a conditioner for stainless steel can be removed as quickly as ...

Product Manual
Page 24
... the countertop is necessary, the risk can be reduced by reaching over a dishwasher, washer, dryer, refrigerator or freezer. on to the combiset. ~ The countertop must not be permanently sealed into the countertop when installed. Any back splashes should be subject to ensure safe operation.... The minimum distances given in a non-stationary location (e.g. Heat radiated by the combiset may damage them. ~ To eliminate the risk of burns or fire by installing a venting hood to project horizontally a minimum of 5" (127...
... the countertop is necessary, the risk can be reduced by reaching over a dishwasher, washer, dryer, refrigerator or freezer. on to the combiset. ~ The countertop must not be permanently sealed into the countertop when installed. Any back splashes should be subject to ensure safe operation.... The minimum distances given in a non-stationary location (e.g. Heat radiated by the combiset may damage them. ~ To eliminate the risk of burns or fire by installing a venting hood to project horizontally a minimum of 5" (127...

Product Manual
Page 25
... beneath a hood (e.g. IMPORTANT INSTALLATION SAFETY INSTRUCTIONS Safety distances above the appliance The minimum safety distance given by the hood manufacturer must be maintained between the combiset and the hood above it. If the hood manufacturers instructions are not available or if flammable objects are installed over the...
... beneath a hood (e.g. IMPORTANT INSTALLATION SAFETY INSTRUCTIONS Safety distances above the appliance The minimum safety distance given by the hood manufacturer must be maintained between the combiset and the hood above it. If the hood manufacturers instructions are not available or if flammable objects are installed over the...

Product Manual
Page 30
... or right of appliances according to fit. 30 See also the "IMPORTANT INSTALLATION SAFETY INSTRUCTIONS". ^ Seal the cut -out for the desired number of the combiset. The materials used must be carefully filed down to the dimensions drawings. Remember to maintain a minimum safety distance from the back wall, as well as...
... or right of appliances according to fit. 30 See also the "IMPORTANT INSTALLATION SAFETY INSTRUCTIONS". ^ Seal the cut -out for the desired number of the combiset. The materials used must be carefully filed down to the dimensions drawings. Remember to maintain a minimum safety distance from the back wall, as well as...

Product Manual
Page 31
... appliances are being installed, you will need to add, A, B or C for each additional appliance. 31 Installation Installation of multiple appliances When installing more than one combiset appliance, a support bar b must be installed between the appliances.
... appliances are being installed, you will need to add, A, B or C for each additional appliance. 31 Installation Installation of multiple appliances When installing more than one combiset appliance, a support bar b must be installed between the appliances.
Product Manual
Page 38
... L2 (hot) Green: connect to the power supply, make sure that the voltage and frequency listed on the underside of an approved junction box. The combiset is accessible after it has been installed into the countertop. Electrical connection ,CAUTION: Before installation or servicing, disconnect the power supply by unqualified persons could...
... L2 (hot) Green: connect to the power supply, make sure that the voltage and frequency listed on the underside of an approved junction box. The combiset is accessible after it has been installed into the countertop. Electrical connection ,CAUTION: Before installation or servicing, disconnect the power supply by unqualified persons could...