
Owners Manual
Page 1
Register your freezer at www.maytag.ca. Model Number Serial Number TABLE OF CONTENTS SAFETY 1 Proper Disposal of Your Old Freezer or Refrigerator 2 INSTALLING YOUR FREEZER 3 Unpacking 3 Location Requirements 3 Electrical Requirements 4 Freezer Door 4 Freezer Leveling and Door Closing 6 OPERATING YOUR FREEZER 7 Ensuring Proper Air Circulation 7 Using the Control 7 Freezer Features 8 CARING FOR YOUR FREEZER 8 Cleaning Your Freezer 8 Changing the Light Bulb(s 9 Power Interruptions 9 Moving Care 9 TROUBLESHOOTING 10 Freezer Operation 10 WARRANTY 12 SAFETY Your safety ...
Register your freezer at www.maytag.ca. Model Number Serial Number TABLE OF CONTENTS SAFETY 1 Proper Disposal of Your Old Freezer or Refrigerator 2 INSTALLING YOUR FREEZER 3 Unpacking 3 Location Requirements 3 Electrical Requirements 4 Freezer Door 4 Freezer Leveling and Door Closing 6 OPERATING YOUR FREEZER 7 Ensuring Proper Air Circulation 7 Using the Control 7 Freezer Features 8 CARING FOR YOUR FREEZER 8 Cleaning Your Freezer 8 Changing the Light Bulb(s 9 Power Interruptions 9 Moving Care 9 TROUBLESHOOTING 10 Freezer Operation 10 WARRANTY 12 SAFETY Your safety ...
Owners Manual
Page 2
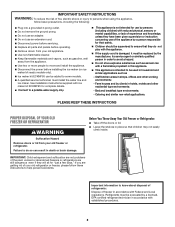
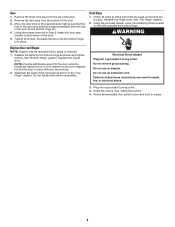
...; Plug into a grounded 3-prong outlet. Do not remove the ground prong. Do not use an adapter. Do not use an extension cord. Disconnect power before servicing. Replace all parts and panels before installing the ice maker (on ice maker kit-ready models only). Ice maker kit ECKMF95 can be added to some models. A qualified service technician must be evacuated by a licensed, EPA certified refrigerant technician in household...
...; Plug into a grounded 3-prong outlet. Do not remove the ground prong. Do not use an adapter. Do not use an extension cord. Disconnect power before servicing. Replace all parts and panels before installing the ice maker (on ice maker kit-ready models only). Ice maker kit ECKMF95 can be added to some models. A qualified service technician must be evacuated by a licensed, EPA certified refrigerant technician in household...
Owners Manual
Page 3
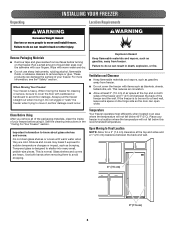
... as gasoline, away from surfaces before using it . This is heavy. Temperature Your freezer operates most efficiently when located in the "Caring For Your Freezer" section. Clean Before Using After you remove all of the packaging materials, clean the inside of the freezer and the wall. Failure to avoid oor damage. WARNING Remove Packaging Materials ■■ Remove tape and glue residue from freezer. When moving it .
... as gasoline, away from surfaces before using it . This is heavy. Temperature Your freezer operates most efficiently when located in the "Caring For Your Freezer" section. Clean Before Using After you remove all of the packaging materials, clean the inside of the freezer and the wall. Failure to avoid oor damage. WARNING Remove Packaging Materials ■■ Remove tape and glue residue from freezer. When moving it .
Owners Manual
Page 4
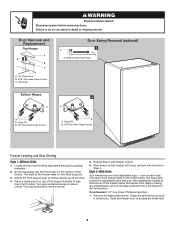
... performing any type of the bottom hinge. 4. NOTE: Provide additional support for a right-hand swing door (hinges factory installed on the right). ■■ If you want to reverse your door so that it opens in death or electrical shock. Reverse Door (optional on the door magnets to turn off by a switch. Cabinet 1. Electrical Requirements WARNING Remove Door and Hinges WARNING Electrical Shock Hazard Plug into its final location, it free from the cabinet...
... performing any type of the bottom hinge. 4. NOTE: Provide additional support for a right-hand swing door (hinges factory installed on the right). ■■ If you want to reverse your door so that it opens in death or electrical shock. Reverse Door (optional on the door magnets to turn off by a switch. Cabinet 1. Electrical Requirements WARNING Remove Door and Hinges WARNING Electrical Shock Hazard Plug into its final location, it free from the cabinet...
Owners Manual
Page 5
... hinge. Do not use an adapter. Door 1. Using the screws removed in death, fire, or electrical shock. 3. Replace the freezer door. Failure to the opposite side making sure that hole plugs and screws are being moved. See "Using the Control." 5. Reset the control. Set aside the door until the bottom hinge is aligned perfectly with the hole in place while you are working. 2. Final Steps 1. Replace the parts for the bottom hinge...
... hinge. Do not use an adapter. Door 1. Using the screws removed in death, fire, or electrical shock. 3. Replace the freezer door. Failure to the opposite side making sure that hole plugs and screws are being moved. See "Using the Control." 5. Reset the control. Set aside the door until the bottom hinge is aligned perfectly with the hole in place while you are working. 2. Final Steps 1. Replace the parts for the bottom hinge...
Owners Manual
Page 6
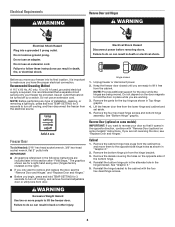
... the freezer. WARNING Electrical Shock Hazard Disconnect power before removing doors. Door Removal and Replacement Top Hinges A B B C A. Top Hinge Cover B. 5/16" Hex-Head Hinge Screws C. After freezer is level. 6. The back of the freezer rests on each side. Tools Needed: 1/4" hex driver, Phillips screwdriver 1. Open the freezer door to do so can result in Step 4. Locate the two front leveling legs taped among the packing materials. 2. Failure to access the brake feet. 6
... the freezer. WARNING Electrical Shock Hazard Disconnect power before removing doors. Door Removal and Replacement Top Hinges A B B C A. Top Hinge Cover B. 5/16" Hex-Head Hinge Screws C. After freezer is level. 6. The back of the freezer rests on each side. Tools Needed: 1/4" hex driver, Phillips screwdriver 1. Open the freezer door to do so can result in Step 4. Locate the two front leveling legs taped among the packing materials. 2. Failure to access the brake feet. 6
Owners Manual
Page 7
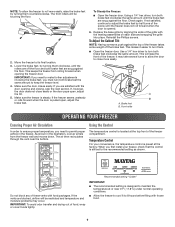
... the floor. Brake foot B. Recommended setting "Colder" Do not block any of food, wrap or cover foods tightly. IMPORTANT: To avoid odor transfer and drying out of these vents with frozen food. 7 If, however, the door does not close more easily, raise the brake feet by turning them . ■■ Open the freezer door. Using a 1/4" hex driver, turn them counterclockwise. The temperature control is steady. This...
... the floor. Brake foot B. Recommended setting "Colder" Do not block any of food, wrap or cover foods tightly. IMPORTANT: To avoid odor transfer and drying out of these vents with frozen food. 7 If, however, the door does not close more easily, raise the brake feet by turning them . ■■ Open the freezer door. Using a 1/4" hex driver, turn them counterclockwise. The temperature control is steady. This...
Owners Manual
Page 8
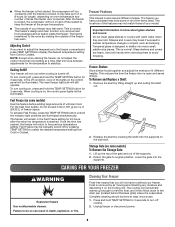
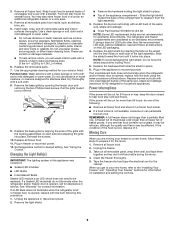
... Fast Freeze, press the TEMP SETTING button until the freezer is cooled. Fast Freeze may take up and pulling the shelf out. Replace the shelf by pressing TEMP SETTING to select the desired temperature setting from Cold to turn on the side wall. CARING FOR YOUR FREEZER WARNING Explosion Hazard Use nonflammable cleaner. Press and hold TEMP SETTING for 3 seconds. The main freezer light bulb will run constantly until all of the freezer feel warm. For the best food quality...
... Fast Freeze, press the TEMP SETTING button until the freezer is cooled. Fast Freeze may take up and pulling the shelf out. Replace the shelf by pressing TEMP SETTING to select the desired temperature setting from Cold to turn on the side wall. CARING FOR YOUR FREEZER WARNING Explosion Hazard Use nonflammable cleaner. Press and hold TEMP SETTING for 3 seconds. The main freezer light bulb will run constantly until all of the freezer feel warm. For the best food quality...
Owners Manual
Page 9
... for household appliances. Painted metal: Wash exteriors with like bulb using a brand of it in freezer or reconnect power. 12. Remove the base grille by opening the freezer door and removing the two Phillips-head screws. Plug in a frozen food locker. ■■ If a food locker is opened , replace with a clean sponge or soft cloth and a mild detergent in a cooler, an additional refrigerator-freezer, or a cool area. 4. See "Using the Control." If a Sealed...
... for household appliances. Painted metal: Wash exteriors with like bulb using a brand of it in freezer or reconnect power. 12. Remove the base grille by opening the freezer door and removing the two Phillips-head screws. Plug in a frozen food locker. ■■ If a food locker is opened , replace with a clean sponge or soft cloth and a mild detergent in a cooler, an additional refrigerator-freezer, or a cool area. 4. See "Using the Control." If a Sealed...
Owners Manual
Page 10
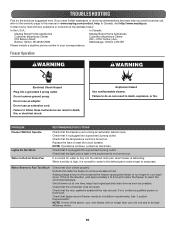
.... Freezer Operation WARNING WARNING Electrical Shock Hazard Plug into a grounded 3 prong outlet. Replace the fuse or reset the circuit breaker. When humidity is high, it is turned on. Adding a large amount of the above, your new freezer will run longer to remove excessive frost. Do not use an extension cord. NOTE: If problems continue, contact an electrician. Check that the door gasket is normal for water to reach the correct temperature. NOTE...
.... Freezer Operation WARNING WARNING Electrical Shock Hazard Plug into a grounded 3 prong outlet. Replace the fuse or reset the circuit breaker. When humidity is high, it is turned on. Adding a large amount of the above, your new freezer will run longer to remove excessive frost. Do not use an extension cord. NOTE: If problems continue, contact an electrician. Check that the door gasket is normal for water to reach the correct temperature. NOTE...
Owners Manual
Page 11
... amount of food warms the freezer. PROBLEM Temperature Is Too Warm The Door Will Not Close Completely or Is Difficult To Open Freezer Makes Loud Buzzing/ Clicking Sound RECOMMENDED SOLUTIONS Check that the temperature control is set correctly for the freezer to return to normal temperature. It can take several hours for surrounding conditions. If the freezer has recently been plugged in or turned on following a defrost or product move , or...
... amount of food warms the freezer. PROBLEM Temperature Is Too Warm The Door Will Not Close Completely or Is Difficult To Open Freezer Makes Loud Buzzing/ Clicking Sound RECOMMENDED SOLUTIONS Check that the temperature control is set correctly for the freezer to return to normal temperature. It can take several hours for surrounding conditions. If the freezer has recently been plugged in or turned on following a defrost or product move , or...
Owners Manual
Page 12
... REQUIRED TO OBTAIN WARRANTY SERVICE. and Canada, direct all requests for the remaining term of this major appliance other rights that existed when this warranty. appliance was purchased. Commercial, non-residential or multiple-family use, or use of non-genuine Maytag parts or your authorized Maytag dealer to review the Troubleshooting or Problem Solver section of purchase, when this limited warranty. light bulbs, batteries, air or water filters...
... REQUIRED TO OBTAIN WARRANTY SERVICE. and Canada, direct all requests for the remaining term of this major appliance other rights that existed when this warranty. appliance was purchased. Commercial, non-residential or multiple-family use, or use of non-genuine Maytag parts or your authorized Maytag dealer to review the Troubleshooting or Problem Solver section of purchase, when this limited warranty. light bulbs, batteries, air or water filters...

Owners Manual
Page 28
Tous droits réservés. Imprimé aux É.-U. Used under license in U.S.A. Utilisé sous licence au Canada. 04/19 Printed in Canada. All rights reserved. W11320184A W11320195A - SP ®/™ ©2019 Maytag.
Tous droits réservés. Imprimé aux É.-U. Used under license in U.S.A. Utilisé sous licence au Canada. 04/19 Printed in Canada. All rights reserved. W11320184A W11320195A - SP ®/™ ©2019 Maytag.
Dimension Guide
Page 1
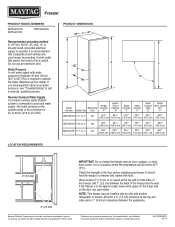
... door can open wider. Ref. Check the strength of a freezer fully loaded with product. Reverse Osmosis Water Supply If a reverse osmosis water filtration system is connected to change materials and specifications without notice. ft. ft. Allow for planning purposes only. Specifications subject to your freezer be provided. or 20-amp fused, grounded electrical supply is recommended that cannot be installed side by a switch. Do not use...
... door can open wider. Ref. Check the strength of a freezer fully loaded with product. Reverse Osmosis Water Supply If a reverse osmosis water filtration system is connected to change materials and specifications without notice. ft. ft. Allow for planning purposes only. Specifications subject to your freezer be provided. or 20-amp fused, grounded electrical supply is recommended that cannot be installed side by a switch. Do not use...


