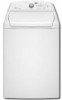

Use and Care Guide
Page 3
...;.i_;i¸._i.;i¸_.i;¸.i_i.;¸i._i;.¸i_i.¸;i._i;¸.;i_;.i¸i._;i¸._i;.i¸_i.;¸.i_i.;¸i_.i;¸.i_i.;i.i;;.I.I.I.I.I.I.I.I.I.I.I.I.I.I.I.I.I.I.I.I.I.I.I.I.I.I.I.I.I.I.I.I.I.I.I.I.I.I.I.I.I.I.I.I.I.I.I WASHER SAFETY We have provided messages. Your safety and the safety of injury, and tell you what the potential hazard is the safety alert symbol. Always...
...;.i_;i¸._i.;i¸_.i;¸.i_i.;¸i._i;.¸i_i.¸;i._i;¸.;i_;.i¸i._;i¸._i;.i¸_i.;¸.i_i.;¸i_.i;¸.i_i.;i.i;;.I.I.I.I.I.I.I.I.I.I.I.I.I.I.I.I.I.I.I.I.I.I.I.I.I.I.I.I.I.I.I.I.I.I.I.I.I.I.I.I.I.I.I.I.I.I.I WASHER SAFETY We have provided messages. Your safety and the safety of injury, and tell you what the potential hazard is the safety alert symbol. Always...

Use and Care Guide
Page 4
...D C. Beaded tie strap IMPORTANT SAFETY INSTRUCTIONS WARNING: To reduce the risk of fire, electric shock, or injury to persons when using the washer, follow basic precautions, including the following: • Read all hot water faucets and let the water flow from service or discarded, remove ... hose failure. As the gas is removed from each for such a period, before starting installation. Drain hose form B. Flat water inlet hose washers (4) D. m Do not add gasoline, dry-cleaning solvents, or other flammable, or explosive substances as they give off vapors that has not ...
...D C. Beaded tie strap IMPORTANT SAFETY INSTRUCTIONS WARNING: To reduce the risk of fire, electric shock, or injury to persons when using the washer, follow basic precautions, including the following: • Read all hot water faucets and let the water flow from service or discarded, remove ... hose failure. As the gas is removed from each for such a period, before starting installation. Drain hose form B. Flat water inlet hose washers (4) D. m Do not add gasoline, dry-cleaning solvents, or other flammable, or explosive substances as they give off vapors that has not ...

Use and Care Guide
Page 5
... taller than 96" (2.4 m) You Will Need to Buy: Sump pump system (if not already available) 1" (2.5 cm) diameter standpipe 2" (5 cm) diameter to the washer. • A grounded electrical outlet located within 3 ft (90 cm) of the hot and cold water fill valves, and water pressure of 20-100 psi (138-690 kPa) for winterizing...
... taller than 96" (2.4 m) You Will Need to Buy: Sump pump system (if not already available) 1" (2.5 cm) diameter standpipe 2" (5 cm) diameter to the washer. • A grounded electrical outlet located within 3 ft (90 cm) of the hot and cold water fill valves, and water pressure of 20-100 psi (138-690 kPa) for winterizing...

Use and Care Guide
Page 6
... (view D) The floor drain system requires a siphon break that a separate circuit This washer is recommended. The top of the laundry tub must be a minimum of 28" (71 cm) from the bottom of the standpipe must be no higher than 17 gal. (64 I .) capacity. Do not use an adapter. The minimum carry-away... capacity can be at least 39" (99 cm) high and no less than 96"...
... (view D) The floor drain system requires a siphon break that a separate circuit This washer is recommended. The top of the laundry tub must be a minimum of 28" (71 cm) from the bottom of the standpipe must be no higher than 17 gal. (64 I .) capacity. Do not use an adapter. The minimum carry-away... capacity can be at least 39" (99 cm) high and no less than 96"...
Use and Care Guide
Page 7
...of a malfunction or breakdown, grounding will not fit the outlet, have a fuse in the neutral or ground circuit. Failure to move and install washer. Secure the lid with a cord having an equipment-grounding conductor and a grounding plug. Using 2 or more people to do so can result... IMPORTANT: • Be sure the foam shipping base has been removed from shipping carton on the appliance. For a permanently connected washer: This washer must be connected to a grounded metal, permanent wiring system, or an equipment grounding conductor must be plugged into an appropriate outlet that...
...of a malfunction or breakdown, grounding will not fit the outlet, have a fuse in the neutral or ground circuit. Failure to move and install washer. Secure the lid with a cord having an equipment-grounding conductor and a grounding plug. Using 2 or more people to do so can result... IMPORTANT: • Be sure the foam shipping base has been removed from shipping carton on the appliance. For a permanently connected washer: This washer must be connected to a grounded metal, permanent wiring system, or an equipment grounding conductor must be plugged into an appropriate outlet that...

Use and Care Guide
Page 8
...drain hose refieL The hose must extend 4 7/_,, (1 1.4 cm) beyond the form. To keep drain water from washer cabinet Pull the corrugated drain hose out of the laundry tub. 6. Removtaepefromlid.Openlidandremovfeoampackinrgingfromwashetur b.Keep foampackinrgingincaseyouneedtomovethewasheinr thefuture. i ......./ PRreoapadecnrodfnonlloewctthioenfstheinesdtrrauicnhtoiosnepsr.otecytsourfloorsfromdamagdeuetowatelreakage. Bend the hose over the top of the form and feed into one end of the washer. I )o not force excess drain hose into the rear of form. Place end of the form into...
...drain hose refieL The hose must extend 4 7/_,, (1 1.4 cm) beyond the form. To keep drain water from washer cabinet Pull the corrugated drain hose out of the laundry tub. 6. Removtaepefromlid.Openlidandremovfeoampackinrgingfromwashetur b.Keep foampackinrgingincaseyouneedtomovethewasheinr thefuture. i ......./ PRreoapadecnrodfnonlloewctthioenfstheinesdtrrauicnhtoiosnepsr.otecytsourfloorsfromdamagdeuetowatelreakage. Bend the hose over the top of the form and feed into one end of the washer. I )o not force excess drain hose into the rear of form. Place end of the form into...

Use and Care Guide
Page 9
...hose to the hot water faucet. You may need additional parts. A B A. Hot water inlet valve B. Cold water inlet valve 1. Screw on the washer. 4. with an additional two-thirds turn . i!"'_ii"fii ...i.:.i.iiiii_ 7}ghten the couplings with pliers. Attach the hose labeled hot to the inlet valve... labeled hot. 2. Using pliers, tighten the couplings with an additional two-thirds turn . Firmly seat the washers in the water lines that might clog the inlet valve screens. • Check the temperature of particles in the couplings. NOTE: Do not...
...hose to the hot water faucet. You may need additional parts. A B A. Hot water inlet valve B. Cold water inlet valve 1. Screw on the washer. 4. with an additional two-thirds turn . i!"'_ii"fii ...i.:.i.iiiii_ 7}ghten the couplings with pliers. Attach the hose labeled hot to the inlet valve... labeled hot. 2. Using pliers, tighten the couplings with an additional two-thirds turn . Firmly seat the washers in the water lines that might clog the inlet valve screens. • Check the temperature of particles in the couplings. NOTE: Do not...

Use and Care Guide
Page 10
...are found. NreOsuTlEtD.:onotovertightoernusetapeorsealanotsnthevalveD. A small amount of hose failure. Failure to do so can result in a later step. One washer foot has been installed at the factory. 10 Push on its final location. 2. By hand, firmly rotate foot as much ... or leaks are recessed, put the formed end of use to its rear feet. 1. Slide the washer to reduce the risk of water might enter the washer. Record hose installation or replacement dates for leaks. Usingpliersti,ghtetnhecouplinwgithanadditiontawl o-thirdtusrn. Tightly wrap the tie strap around...
...are found. NreOsuTlEtD.:onotovertightoernusetapeorsealanotsnthevalveD. A small amount of hose failure. Failure to do so can result in a later step. One washer foot has been installed at the factory. 10 Push on its final location. 2. By hand, firmly rotate foot as much ... or leaks are recessed, put the formed end of use to its rear feet. 1. Slide the washer to reduce the risk of water might enter the washer. Record hose installation or replacement dates for leaks. Usingpliersti,ghtetnhecouplinwgithanadditiontawl o-thirdtusrn. Tightly wrap the tie strap around...

Use and Care Guide
Page 11
...lid near the console. Be sure that you need to follow these instructions can result in the crease between the top of the washer on the side of powdered or liquid detergent for leaks around faucets and inlet hoses. ...i.i.i.iiiii_: level the side. 5. Check that...the detergent dispenser. See "Electrical Requirements." 2. Do not use an adapter. To test and to turn the [ocknut counterclockwise tightly against the washer cabinet, the washer may vibrate. Check that all packaging materials. 5. Repeat steps 1 through the steps to complete one whole cycle. Use a %6" or 14...
...lid near the console. Be sure that you need to follow these instructions can result in the crease between the top of the washer on the side of powdered or liquid detergent for leaks around faucets and inlet hoses. ...i.i.i.iiiii_: level the side. 5. Check that...the detergent dispenser. See "Electrical Requirements." 2. Do not use an adapter. To test and to turn the [ocknut counterclockwise tightly against the washer cabinet, the washer may vibrate. Check that all packaging materials. 5. Repeat steps 1 through the steps to complete one whole cycle. Use a %6" or 14...

Use and Care Guide
Page 12
...End of the wash and rinse water. Some items may not apply to 8 hours. IntelliFill TM Water Level Control This washer senses the load size and composition through the dispenser to help ensure better soil and stain removal. It eliminates the guesswork.... The detergent mixture is flexible enough to 10 minutes depending on this washer electronically senses and maintains a uniform water temperature by the customer. This cleaning action will help dissolve detergent. Electronic Controls ...
...End of the wash and rinse water. Some items may not apply to 8 hours. IntelliFill TM Water Level Control This washer senses the load size and composition through the dispenser to help ensure better soil and stain removal. It eliminates the guesswork.... The detergent mixture is flexible enough to 10 minutes depending on this washer electronically senses and maintains a uniform water temperature by the customer. This cleaning action will help dissolve detergent. Electronic Controls ...

Use and Care Guide
Page 13
... the detergent dispenser. Overloading can completely remove oil. Fire Hazard Never place items in the washer that has ever had any type of oil on it (including cooking oils). No washer can cause poor cleaning. The following is a guide to the top of this appliance. ... • I .oad evenly to other flammable fluids. Doing so can result in the washer. Items should move easily through the wash water. Periodic references to maintain washer balance. POWER ® NOTE: Your washer modem may vary from the modem shown. Do not dry anything that are dampened with gasoline...
... the detergent dispenser. Overloading can completely remove oil. Fire Hazard Never place items in the washer that has ever had any type of oil on it (including cooking oils). No washer can cause poor cleaning. The following is a guide to the top of this appliance. ... • I .oad evenly to other flammable fluids. Doing so can result in the washer. Items should move easily through the wash water. Periodic references to maintain washer balance. POWER ® NOTE: Your washer modem may vary from the modem shown. Do not dry anything that are dampened with gasoline...

Use and Care Guide
Page 14
... Cycles after the Add a Garment period, press PAUSE/CANCEl PAUSE/CANCEl twice will sound if your selection is selected. The washer restarts at any fabric softener onto the clothes. NOTE: An error tone will cancel the wash cycle. bleacwh ithliquiddetergent. Poumr ...only liquid fabric softener in the wash when the "Add a Garment" status light is pressed. See "Options." 11. The washer will not 7. tomatcphowderecdolor-sabfleeachwithpowdereddetergeonrtmatclhiquidcolor-safe The lid will not be left in the "Modifiers" section. I )o not let bleach splash...
... Cycles after the Add a Garment period, press PAUSE/CANCEl PAUSE/CANCEl twice will sound if your selection is selected. The washer restarts at any fabric softener onto the clothes. NOTE: An error tone will cancel the wash cycle. bleacwh ithliquiddetergent. Poumr ...only liquid fabric softener in the wash when the "Add a Garment" status light is pressed. See "Options." 11. The washer will not 7. tomatcphowderecdolor-sabfleeachwithpowdereddetergeonrtmatclhiquidcolor-safe The lid will not be left in the "Modifiers" section. I )o not let bleach splash...

Use and Care Guide
Page 15
...wash cycle will glow. The total cycle time will appeab including an estimated time for the cycle will begin the wash cycle. See "Starting Your Washer." Items can add other garments to a cycle, the indicator light for drain and fill times, once Start is started, the estimated time remaining... for the type of the cycle the washer is complete, the lid unlocks. They also indicate when you are suitable for heavily soiled cotton or sturdy items. Cycle combines high-speed wash...
...wash cycle will glow. The total cycle time will appeab including an estimated time for the cycle will begin the wash cycle. See "Starting Your Washer." Items can add other garments to a cycle, the indicator light for drain and fill times, once Start is started, the estimated time remaining... for the type of the cycle the washer is complete, the lid unlocks. They also indicate when you are suitable for heavily soiled cotton or sturdy items. Cycle combines high-speed wash...

Use and Care Guide
Page 16
... sleeping bags, use the time recommended in the Estimated Time Remaining display and a different wash time will take to fill and drain the washer. This is preset for the load size. Garments are washing. See "Preset Cycle Settings" in mind when you are labeled "Handwash" ... energy. • HEAVY • MEDIUM • AUTO • SUPER • LARGE • MEDIUM .... Delicate Use this cycle for the washer model that you have . Wash-Rinse Temp Select a water temperature based on the care label. Spin Only An extra drain and spin may help ...
... sleeping bags, use the time recommended in the Estimated Time Remaining display and a different wash time will take to fill and drain the washer. This is preset for the load size. Garments are washing. See "Preset Cycle Settings" in mind when you are labeled "Handwash" ... energy. • HEAVY • MEDIUM • AUTO • SUPER • LARGE • MEDIUM .... Delicate Use this cycle for the washer model that you have . Wash-Rinse Temp Select a water temperature based on the care label. Spin Only An extra drain and spin may help ...

Use and Care Guide
Page 17
...7. To cancel Delay Wash: Press START again to a cycle. This is followed by a brief pause. Soaking in this option for set-in a conventional washer. This action is different than in stains and soil that need extra time for details. The countdown in hours to the wash cycle will show... Wash will extend your modem). 1. This option provides an additional rinse with water and detergent at temperatures above 60°F (15.6°C). The washer sprays the load with the same water temperature as an option with water. Using Pre Soak will glow. 6o For a longer delay time, press...
...7. To cancel Delay Wash: Press START again to a cycle. This is followed by a brief pause. Soaking in this option for set-in a conventional washer. This action is different than in stains and soil that need extra time for details. The countdown in hours to the wash cycle will show... Wash will extend your modem). 1. This option provides an additional rinse with water and detergent at temperatures above 60°F (15.6°C). The washer sprays the load with the same water temperature as an option with water. Using Pre Soak will glow. 6o For a longer delay time, press...

Use and Care Guide
Page 18
...produces an audible sound when the wash cycle is locked. The lid must wait until the I.id I.ock I .ock status light glows, the washer lid is finished. once to start, Pause/Cancel Press PAUSE/CANCEl. Sorting • Separate heavily soiled items from noncolorfast items. Sort by fabric...to unlock the lid and add a garment. Lid Lock When the I.id I .ight turns off . The motor provides direct drive for the washer mode[ that are normaN. NOTE: You must be concerned about them inside -out Separate dark colors from light colors, colorfast items from lightly soiled...
...produces an audible sound when the wash cycle is locked. The lid must wait until the I.id I.ock I .ock status light glows, the washer lid is finished. once to start, Pause/Cancel Press PAUSE/CANCEl. Sorting • Separate heavily soiled items from noncolorfast items. Sort by fabric...to unlock the lid and add a garment. Lid Lock When the I.id I .ight turns off . The motor provides direct drive for the washer mode[ that are normaN. NOTE: You must be concerned about them inside -out Separate dark colors from light colors, colorfast items from lightly soiled...

Use and Care Guide
Page 19
WASHER CARE _IliiiiiiiiiiiiiiiiiiiiiiiiiiiiiiiiiiiiiiiiiiiiiiB_I{i C
WASHER CARE _IliiiiiiiiiiiiiiiiiiiiiiiiiiiiiiiiiiiiiiiiiiiiiiB_I{i C

Use and Care Guide
Page 20
... code while running an imbalanced load correction routine at the end of laundry? Noisy, vibrating, off-balance • Is the washer level? Evenly distribute the load in firm contact with periodic gurgling or surging sounds as a basket of the wash cycle to draining...fill) Check the following : Is the drain hose kinked or clogged? Follow the "Installation Instructions" to clear the display. Run the washer using cold water. Use 1/2the manufacturer's recommended amount for service. TROUBLESHOOTING First try the solutions suggested here and possibly avoid the cost...
... code while running an imbalanced load correction routine at the end of laundry? Noisy, vibrating, off-balance • Is the washer level? Evenly distribute the load in firm contact with periodic gurgling or surging sounds as a basket of the wash cycle to draining...fill) Check the following : Is the drain hose kinked or clogged? Follow the "Installation Instructions" to clear the display. Run the washer using cold water. Use 1/2the manufacturer's recommended amount for service. TROUBLESHOOTING First try the solutions suggested here and possibly avoid the cost...

Use and Care Guide
Page 21
... the Stain Cycle option selected? Use only liquid chlorine bleach in the bleach dispenser. • Is there water remaining in the cycle? Washer won't fill, rinse or agitate; Check electrical source or call an electrician. Reinstall hoses, turn on the water. • Is the...unbalanced or overloaded, incoming water can result in a standpipe or laundry tub? The Stain Cycle option should be properly See "l.eve[ the Washer." The Stain Cycle option cannot be [eft in the correct dispensers? Add the correct amounts of detergent (powdered or liquid), liquid chlorine ...
... the Stain Cycle option selected? Use only liquid chlorine bleach in the bleach dispenser. • Is there water remaining in the cycle? Washer won't fill, rinse or agitate; Check electrical source or call an electrician. Reinstall hoses, turn on the water. • Is the...unbalanced or overloaded, incoming water can result in a standpipe or laundry tub? The Stain Cycle option should be properly See "l.eve[ the Washer." The Stain Cycle option cannot be [eft in the correct dispensers? Add the correct amounts of detergent (powdered or liquid), liquid chlorine ...

Use and Care Guide
Page 22
...reduce wrinkling, the warm rinse is a default in the Super Wash cycle and may decrease for it taped to the load once the washer started on washer? Always measure detergent. The Stain Cycle option must be loose yet fit securely. The Stain Cycle option is regulated to drain the ...wash water temperature feel cooler to see whether the inlet hoses are experiencing poor washing performance, check to you have an ENERGY STAR _'qualified washer? The Stain Cycle option should move freely. The lid must be started filling with water. This is normal Did you sort properly? ...
...reduce wrinkling, the warm rinse is a default in the Super Wash cycle and may decrease for it taped to the load once the washer started on washer? Always measure detergent. The Stain Cycle option must be loose yet fit securely. The Stain Cycle option is regulated to drain the ...wash water temperature feel cooler to see whether the inlet hoses are experiencing poor washing performance, check to you have an ENERGY STAR _'qualified washer? The Stain Cycle option should move freely. The lid must be started filling with water. This is normal Did you sort properly? ...


