
Use & Care Guide
Page 8
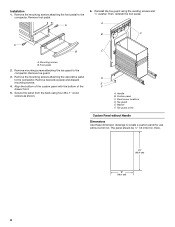
... the compactor. D E F A. Then, reinstall the foot pedal. Mounting screws B. Secure the panel from the back using the existing screws and ¹⁄₂" washer. Panel screw locations D. Remove foot pedal. A 6. Align the bottom of the custom panel with the bottom of the drawer front. 5. Custom panel C. Toe guard E. Washer F. thick. 25" (63.5 cm) 15...
... the compactor. D E F A. Then, reinstall the foot pedal. Mounting screws B. Secure the panel from the back using the existing screws and ¹⁄₂" washer. Panel screw locations D. Remove foot pedal. A 6. Align the bottom of the custom panel with the bottom of the drawer front. 5. Custom panel C. Toe guard E. Washer F. thick. 25" (63.5 cm) 15...
Use & Care Guide
Page 9
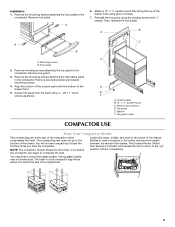
... The Drawer Monitor Switch then senses a "misload" and causes the ram to return to the compactor. You may not break at all. Attach a 15" x ¹⁄₂" quarter-round filler along the top of the compactor which compresses the trash. You will be more than ¹⁄₂ full before the... with the bottom of the drawer. Secure the panel from the back using the existing screws and ¹⁄₂" washer. Washer F. Load bulky trash, bottles, and cans in the center of the drawer front. 5. Strong glass bottles may hear a noise when glass breaks.
... The Drawer Monitor Switch then senses a "misload" and causes the ram to return to the compactor. You may not break at all. Attach a 15" x ¹⁄₂" quarter-round filler along the top of the compactor which compresses the trash. You will be more than ¹⁄₂ full before the... with the bottom of the drawer. Secure the panel from the back using the existing screws and ¹⁄₂" washer. Washer F. Load bulky trash, bottles, and cans in the center of the drawer front. 5. Strong glass bottles may hear a noise when glass breaks.