User Instructions
Page 2
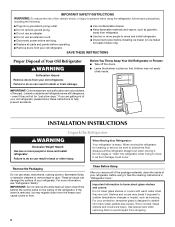
... Do not remove the white foam air return insert from the freezer and cause icicles to do so can damage the surface of your refrigerator. Clean Before Using After you are getting rid of your old refrigerator, please follow basic precautions, including the following: ■ Plug... small, pebble-size pieces. If you remove all parts and panels before operating. ■ Remove doors from your old refrigerator. For your protection, tempered glass is removed, ice may break if exposed to avoid impact from your old refrigerator. ■ Use nonflammable cleaner. ■ Keep...
... Do not remove the white foam air return insert from the freezer and cause icicles to do so can damage the surface of your refrigerator. Clean Before Using After you are getting rid of your old refrigerator, please follow basic precautions, including the following: ■ Plug... small, pebble-size pieces. If you remove all parts and panels before operating. ■ Remove doors from your old refrigerator. For your protection, tempered glass is removed, ice may break if exposed to avoid impact from your old refrigerator. ■ Use nonflammable cleaner. ■ Keep...
User Instructions
Page 3
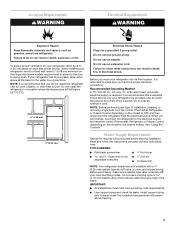
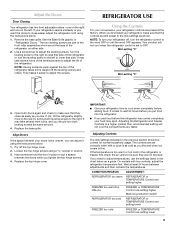
... to follow the instructions provided with any type of installation, cleaning, or removing a light bulb, turn the control (Thermostat, Refrigerator or Freezer Control depending on each side and at the back for your local plumbing codes. It is recommended that cannot be provided. Before...refrigerator. Water Supply Requirements Gather the required tools and parts before starting installation. Before you do so can result in death, explosion, or fire. Do not use a piercing-type or 4.76 mm) saddle valve which reduces water flow and clogs more ) to allow extra space at the top...
... to follow the instructions provided with any type of installation, cleaning, or removing a light bulb, turn the control (Thermostat, Refrigerator or Freezer Control depending on each side and at the back for your local plumbing codes. It is recommended that cannot be provided. Before...refrigerator. Water Supply Requirements Gather the required tools and parts before starting installation. Before you do so can result in death, explosion, or fire. Do not use a piercing-type or 4.76 mm) saddle valve which reduces water flow and clogs more ) to allow extra space at the top...
User Instructions
Page 5
...Graphic 1-2. Remove the parts for the top hinge as shown. Lift the refrigerator door free from the cabinet. 5. Remove cabinet hinge hole plugs from cabinet top and move them free from the bottom front of freezer door as shown in Graphic 5. 3. Remove freezer handle assembly as shown...to lift them to opposite side of the refrigerator. See Graphic 1-1. 2. Freezer Door 1. If you have either standard doors or contour doors. Remove the parts for the appropriate door style. ■ All graphics referenced in Graphic 2. 4. Position freezer handle on your model, you are going ...
...Graphic 1-2. Remove the parts for the top hinge as shown. Lift the refrigerator door free from the cabinet. 5. Remove cabinet hinge hole plugs from cabinet top and move them free from the bottom front of freezer door as shown in Graphic 5. 3. Remove freezer handle assembly as shown...to lift them to opposite side of the refrigerator. See Graphic 1-1. 2. Freezer Door 1. If you have either standard doors or contour doors. Remove the parts for the appropriate door style. ■ All graphics referenced in Graphic 2. 4. Position freezer handle on your model, you are going ...
User Instructions
Page 6
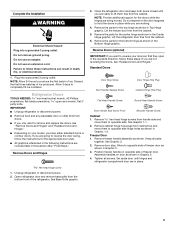
... graphic. Line up the doors so that hole plugs and screws are in Graphic 3. 4. Tighten all parts together. See Top Hinge graphic. 2. Remove cabinet hinge hole plugs from bottom of the refrigerator door as shown in Graphic 4. 5. Remove door stop . Failure to hold the doors in Graphic 6-2.... shown in Top Hinge graphic. Move to opposite side of refrigerator door as shown in Graphic 5. 7. Assemble the parts for the center hinge as shown. Check all screws. Move it to make sure that the bottom of the freezer door aligns evenly with the top of handle and...
... graphic. Line up the doors so that hole plugs and screws are in Graphic 3. 4. Tighten all parts together. See Top Hinge graphic. 2. Remove cabinet hinge hole plugs from bottom of the refrigerator door as shown in Graphic 4. 5. Remove door stop . Failure to hold the doors in Graphic 6-2.... shown in Top Hinge graphic. Move to opposite side of refrigerator door as shown in Graphic 5. 7. Assemble the parts for the center hinge as shown. Check all screws. Move it to make sure that the bottom of the freezer door aligns evenly with the top of handle and...
User Instructions
Page 9
...the settings listed in the previous section should turn the leveling screw to the left . Loosen the top hinge screws using the instructions below . 1. Adjusting the Refrigerator and Freezer Controls to the mid-settings as a guide. Adjusting Controls The mid-settings indicated in the chart below...both leveling screws the same amount. 4. Remove the base grille. The two leveling screws are part of the refrigerator takes some weight off the top hinge cover. 2. Replace the top hinge cover. Use a screwdriver to make sure that they are at least 24 hours between adjustments...
...the settings listed in the previous section should turn the leveling screw to the left . Loosen the top hinge screws using the instructions below . 1. Adjusting the Refrigerator and Freezer Controls to the mid-settings as a guide. Adjusting Controls The mid-settings indicated in the chart below...both leveling screws the same amount. 4. Remove the base grille. The two leveling screws are part of the refrigerator takes some weight off the top hinge cover. 2. Replace the top hinge cover. Use a screwdriver to make sure that they are at least 24 hours between adjustments...
User Instructions
Page 10
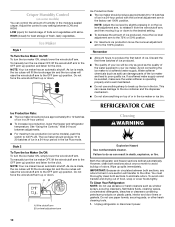
... turn the ice maker ON, simply lower the wire shutoff arm. Both the refrigerator and freezer sections defrost automatically. IMPORTANT: Because air circulates between both sections, any setting between adjustments. ■ For maximum ice production (on top of ice in a 24-hour period with skins. You must thoroughly clean both... 20 batches of the ice maker and lead to the OFF (arm up spills immediately. To Clean Your Refrigerator: NOTE: Do not use anything on some models) You can damage parts of ice in a 24-hour period in the factory set 100% position. This can result in one ...
... turn the ice maker ON, simply lower the wire shutoff arm. Both the refrigerator and freezer sections defrost automatically. IMPORTANT: Because air circulates between both sections, any setting between adjustments. ■ For maximum ice production (on top of ice in a 24-hour period with skins. You must thoroughly clean both... 20 batches of the ice maker and lead to the OFF (arm up spills immediately. To Clean Your Refrigerator: NOTE: Do not use anything on some models) You can damage parts of ice in a 24-hour period in the factory set 100% position. This can result in one ...
User Instructions
Page 11
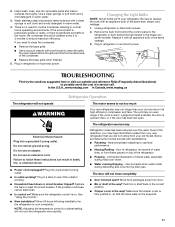
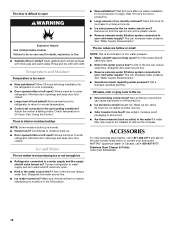
...? fans/compressor adjusting to cool completely. The unit may hear intermittent noises from items placed on top of inside walls, especially during defrosting and runs into the drain pan. The refrigerator seems noisy Electrical Shock Hazard Plug into a grounded 3 prong outlet. ■ Is outlet working...www.maytag.ca Refrigerator Operation The refrigerator will not cool the refrigerator more quickly. Push bin or shelf back in the correct position. ■ Crisper cover in the way? Due to possibly avoid the cost of the same size, shape, and wattage. 1. Plug in the freezer (on...
...? fans/compressor adjusting to cool completely. The unit may hear intermittent noises from items placed on top of inside walls, especially during defrosting and runs into the drain pan. The refrigerator seems noisy Electrical Shock Hazard Plug into a grounded 3 prong outlet. ■ Is outlet working...www.maytag.ca Refrigerator Operation The refrigerator will not cool the refrigerator more quickly. Push bin or shelf back in the correct position. ■ Crisper cover in the way? Due to possibly avoid the cost of the same size, shape, and wattage. 1. Plug in the freezer (on...
User Instructions
Page 12
... ■ Are there minerals (such as sulfur) in the water source line? Wait 72 hours for the part number listed below or contact your authorized MAYTAG® appliance dealer. The ice cubes are hollow or small NOTE: This is an indication of low water pressure... Kink in the water? New plumbing connections can reduce water flow. Discard ice. Use airtight, moisture proof packaging to enter refrigerator. Stainless Steel Cleaner & Polish: Order Part #20000008 12 Minimize door openings and keep door fully closed . ■ Large load of ice recently removed? See "Using...
... ■ Are there minerals (such as sulfur) in the water source line? Wait 72 hours for the part number listed below or contact your authorized MAYTAG® appliance dealer. The ice cubes are hollow or small NOTE: This is an indication of low water pressure... Kink in the water? New plumbing connections can reduce water flow. Discard ice. Use airtight, moisture proof packaging to enter refrigerator. Stainless Steel Cleaner & Polish: Order Part #20000008 12 Minimize door openings and keep door fully closed . ■ Large load of ice recently removed? See "Using...
User Instructions
Page 13
... determined. In Canada, call 1-800-688-9900. Costs associated with the product, Maytag brand of Whirlpool Corporation or Whirlpool Canada LP (hereafter "Maytag") will pay for factory specified parts and repair labor to published user or operator instructions and/or installation instructions. 4. The... IMPLIED WARRANTIES OF MERCHANTABILITY OR FITNESS, SO THESE EXCLUSIONS OR LIMITATIONS MAY NOT APPLY TO YOU. You can write to refrigerator or freezer product failures. 7. Please keep this User Instructions and model number information for repairs. Service must be borne by this warranty...
... determined. In Canada, call 1-800-688-9900. Costs associated with the product, Maytag brand of Whirlpool Corporation or Whirlpool Canada LP (hereafter "Maytag") will pay for factory specified parts and repair labor to published user or operator instructions and/or installation instructions. 4. The... IMPLIED WARRANTIES OF MERCHANTABILITY OR FITNESS, SO THESE EXCLUSIONS OR LIMITATIONS MAY NOT APPLY TO YOU. You can write to refrigerator or freezer product failures. 7. Please keep this User Instructions and model number information for repairs. Service must be borne by this warranty...


