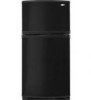

Use and Care Guide
Page 1
...22 INSTRUCTIONS D'INSTALLATION 28 UTILISATION DU RleFRIGleRATEUR 35 REFRIGERATOR CARE 10 TROUBLESHOOTING 11 WARRANTY 13 CUIDADO DE SU REFRIGERADOR 23 SOLUCION DE PROBLEMAS 24 GARANTIA 26 ENTRETIEN DU RleFRIGleRATEUR 37 DlePANNAGE 38 GARANTIE 40 Assistance If you ever need it. Call us at www.maytag....com. You must provide proof of the refrigerator compartment. Additional help you obtain assistance or service if you need to help is available. Keep this...
...22 INSTRUCTIONS D'INSTALLATION 28 UTILISATION DU RleFRIGleRATEUR 35 REFRIGERATOR CARE 10 TROUBLESHOOTING 11 WARRANTY 13 CUIDADO DE SU REFRIGERADOR 23 SOLUCION DE PROBLEMAS 24 GARANTIA 26 ENTRETIEN DU RleFRIGleRATEUR 37 DlePANNAGE 38 GARANTIE 40 Assistance If you ever need it. Call us at www.maytag....com. You must provide proof of the refrigerator compartment. Additional help you obtain assistance or service if you need to help is available. Keep this...
Use and Care Guide
Page 2
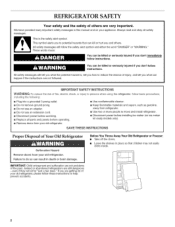
... on ice maker kit ready models only). SAVETHESEJNSTRUCTmONS Proper Disposal of fire, electric shock, or injury to help prevent accidents. Junked or abandoned refrigerators are not followed. All safety messages will sit for "just a few days." You can be killed or seriously injured if you don't ...the word "DANGER" or "WARNING." Always read and obey all parts and panels before operating. This is , tell you how to move and install refrigerator. m Do not use an adapter. m Do not use an extension cord. m Use two or more people to reduce the chance of others ....
... on ice maker kit ready models only). SAVETHESEJNSTRUCTmONS Proper Disposal of fire, electric shock, or injury to help prevent accidents. Junked or abandoned refrigerators are not followed. All safety messages will sit for "just a few days." You can be killed or seriously injured if you don't ...the word "DANGER" or "WARNING." Always read and obey all parts and panels before operating. This is , tell you how to move and install refrigerator. m Do not use an adapter. m Do not use an extension cord. m Use two or more people to reduce the chance of others ....
Use and Care Guide
Page 3
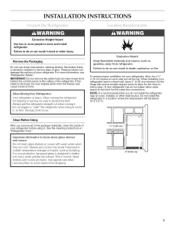
INSTALLATION INSTRUCTIONS i_iii _iii_i_?;:!_!i_i:i_it
INSTALLATION INSTRUCTIONS i_iii _iii_i_?;:!_!i_i:i_it
Use and Care Guide
Page 4
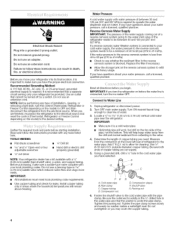
... A. Compression sleeve F. Tighten the packing nut. Water Pressure A cold water supply with any type of refrigerator to Water Line 1. Read all directions before starting installation. Add 7 ft (2.1 m) to operate the water dispenser and ice maker. A ..........B........ Compression nut E. or 20-amp ...Grounding Method A 115 Volt, 60 Hz., AC only 15- Read and follow the instructions provided with water pressure of the refrigerator needs to follow these }nstructions can resumt }n death, fire, or electrical shock. It is recommended that the washer is blocked...
... A. Compression sleeve F. Tighten the packing nut. Water Pressure A cold water supply with any type of refrigerator to Water Line 1. Read all directions before starting installation. Add 7 ft (2.1 m) to operate the water dispenser and ice maker. A ..........B........ Compression nut E. or 20-amp ...Grounding Method A 115 Volt, 60 Hz., AC only 15- Read and follow the instructions provided with water pressure of the refrigerator needs to follow these }nstructions can resumt }n death, fire, or electrical shock. It is recommended that the washer is blocked...

Use and Care Guide
Page 5
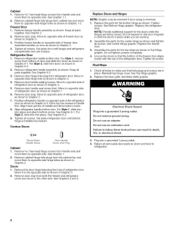
.... Failure to produce the first batch of ice produced. Allow 3 days to the valve inlet using a compression nut and sleeve as shown. Unplug refrigerator or disconnect power. 2. Remove the parts for the bottom hinge as shown in the 1/4"(6.35 mm) water line at the valve) or nuts that... you have either tube connection. Remove Doors and Hinges A. Discard the first three batches of ice. 7. This will help avoid damage to the refrigerator as shown in the Bottom Hinge graphic. Tighten any adjustable door or utility bins from the cabinet. Copper tubing C. The ice maker is equipped ...
.... Failure to produce the first batch of ice produced. Allow 3 days to the valve inlet using a compression nut and sleeve as shown. Unplug refrigerator or disconnect power. 2. Remove the parts for the bottom hinge as shown in the 1/4"(6.35 mm) water line at the valve) or nuts that... you have either tube connection. Remove Doors and Hinges A. Discard the first three batches of ice. 7. This will help avoid damage to the refrigerator as shown in the Bottom Hinge graphic. Tighten any adjustable door or utility bins from the cabinet. Copper tubing C. The ice maker is equipped ...
Use and Care Guide
Page 6
...to opposite side hinge holes as shown in Graphic 6-2. 2. For Style 2, slide trim down as shown in place. Move to refrigerator. Position refrigerator handle on product. For Style 2, slide trim into place and attach bottom screw. Tighten all removable door parts to doors and.... Align lower portion of freezer door. See Graphic 6-2. 9. Contour Doors Round-Hend Handle Screw Door Handle Screw Hole Plug Cabinet 1. Replace the refrigerator door. See Graphics 4 and 5. See Bottom Hinge graphic. i Final Steps 1. See Base Grille graphic. Reinstall top hinge cover. Move to ...
...to opposite side hinge holes as shown in Graphic 6-2. 2. For Style 2, slide trim down as shown in place. Move to refrigerator. Position refrigerator handle on product. For Style 2, slide trim into place and attach bottom screw. Tighten all removable door parts to doors and.... Align lower portion of freezer door. See Graphic 6-2. 9. Contour Doors Round-Hend Handle Screw Door Handle Screw Hole Plug Cabinet 1. Replace the refrigerator door. See Graphics 4 and 5. See Bottom Hinge graphic. i Final Steps 1. See Base Grille graphic. Reinstall top hinge cover. Move to ...
Use and Care Guide
Page 9
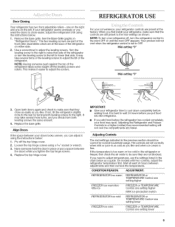
...by turning both doors again and check to OFR Mid-setting "3" OFF 5 1 COL_ES @ 3 3. Align Doors If the space between your refrigerator seems unsteady or you need to close as easily as a guide. Pry off the leveling screws and rollers. Loosen the top hinge screws ...temperatures, use the settings listed in the previous section should turn the leveling screw to the left . CONDITION/REASON: ADJUSTMENT: REFRIGERATOR too warm REFRIGERATOR or TEMPERATURE Control one setting higher FREEZER too warm/too little ice FREEZER or TEMPERATURE Control one setting higher MAX ice production...
...by turning both doors again and check to OFR Mid-setting "3" OFF 5 1 COL_ES @ 3 3. Align Doors If the space between your refrigerator seems unsteady or you need to close as easily as a guide. Pry off the leveling screws and rollers. Loosen the top hinge screws ...temperatures, use the settings listed in the previous section should turn the leveling screw to the left . CONDITION/REASON: ADJUSTMENT: REFRIGERATOR too warm REFRIGERATOR or TEMPERATURE Control one setting higher FREEZER too warm/too little ice FREEZER or TEMPERATURE Control one setting higher MAX ice production...

Use and Care Guide
Page 10
...maker to 12 batches of ice in a 24-hour period in a 24-hour period. • To increase ice production, lower the freezer and refrigerator temperature. The ice maker should produce approximately 8 to 12 batches of ice in one section will be avoided, make sure the water softener is operating... ice in the moisture-sealed crisper. You must thoroughly clean both sections about once a month to avoid buildup of humidity in the bin. Unplug refrigerator or disconnect power. 2. Do not force the wire shutoff arm up ) position and listen for best storage of or in the factory set 100...
...maker to 12 batches of ice in a 24-hour period in a 24-hour period. • To increase ice production, lower the freezer and refrigerator temperature. The ice maker should produce approximately 8 to 12 batches of ice in one section will be avoided, make sure the water softener is operating... ice in the moisture-sealed crisper. You must thoroughly clean both sections about once a month to avoid buildup of humidity in the bin. Unplug refrigerator or disconnect power. 2. Do not force the wire shutoff arm up ) position and listen for best storage of or in the factory set 100...

Use and Care Guide
Page 11
... the solutions suggested here first in warm water. 4. Allow 24 hours following installation for routine condenser cleaning in the refrigerator or from your new refrigerator that the back rests on some normal sounds with an appliance bulb of the same wattage. 3. Below are listed some...Do not remove ground prong. Plug into the drain pan. • Creaking/Cracking - If the problem continues, call . The refrigerator seems noisy Refrigerator noise has been reduced over the years. Wash stainless steel and painted metal exteriors with an appliance bulb of the same size, ...
... the solutions suggested here first in warm water. 4. Allow 24 hours following installation for routine condenser cleaning in the refrigerator or from your new refrigerator that the back rests on some normal sounds with an appliance bulb of the same wattage. 3. Below are listed some...Do not remove ground prong. Plug into the drain pan. • Creaking/Cracking - If the problem continues, call . The refrigerator seems noisy Refrigerator noise has been reduced over the years. Wash stainless steel and painted metal exteriors with an appliance bulb of the same size, ...

Use and Care Guide
Page 12
...normal temperature. • Controls set correctly for full ice production. • Large amount of food added? Allow several hours for refrigerator to return to your cold water supply? Check temperature in the ice • New plumbing connections? There is interior moisture buildup... NOTE: Some moisture buildup is not producing ice or not enough ice • Refrigerator connected to moisture buildup. • Door(s} opened often or left open E×plosion Hazard Use nonflammable cleaner. Contributes to a water...
...normal temperature. • Controls set correctly for full ice production. • Large amount of food added? Allow several hours for refrigerator to return to your cold water supply? Check temperature in the ice • New plumbing connections? There is interior moisture buildup... NOTE: Some moisture buildup is not producing ice or not enough ice • Refrigerator connected to moisture buildup. • Door(s} opened often or left open E×plosion Hazard Use nonflammable cleaner. Contributes to a water...
Use and Care Guide
Page 13
... service in accordance with published installation instructions. 11. In Canada, call 1-800-688-9900. Repairs when your authorized Maytag dealer to refrigerator or freezer product failures. 6. Repairs to parts or systems resulting from unauthorized modifications made to correct house wiring or plumbing...or repair labor costs for Factory Specified Parts and repair labor to correct defects in accordance with the product, Maytag Corporation or Maytag Limited (hereafter "Maytag") will pay for units operated outside the United States or Canada. 7. The removal and reinstallation of your...
... service in accordance with published installation instructions. 11. In Canada, call 1-800-688-9900. Repairs when your authorized Maytag dealer to refrigerator or freezer product failures. 6. Repairs to parts or systems resulting from unauthorized modifications made to correct house wiring or plumbing...or repair labor costs for Factory Specified Parts and repair labor to correct defects in accordance with the product, Maytag Corporation or Maytag Limited (hereafter "Maytag") will pay for units operated outside the United States or Canada. 7. The removal and reinstallation of your...


