
Use and Care Guide
Page 1
...or write: Whirlpool Canada LP Customer Interaction Centre 1901 Minnesota Court Mississauga, Ontario L5N 3A7 In Canada, visit www.maytag.ca. Please include a daytime phone number in -warranty service. Dealer name Serial number Address Phone number Model number ... ASSISTANCE OU SERVICE 27 SleCURITle DU RleFRIGleRATEUR 27 INSTALLATION INSTRUCTIONS 3 REFRIGERATOR USE 9 INSTRUCCIONES DE INSTALACION .......... 15 USO DE SU REFRIGERADOR 22 INSTRUCTIONS D'INSTALLATION 28 UTILISATION DU RleFRIGleRATEUR 35 REFRIGERATOR CARE 10 TROUBLESHOOTING 11 WARRANTY 13 CUIDADO DE SU REFRIGERADOR 23...
...or write: Whirlpool Canada LP Customer Interaction Centre 1901 Minnesota Court Mississauga, Ontario L5N 3A7 In Canada, visit www.maytag.ca. Please include a daytime phone number in -warranty service. Dealer name Serial number Address Phone number Model number ... ASSISTANCE OU SERVICE 27 SleCURITle DU RleFRIGleRATEUR 27 INSTALLATION INSTRUCTIONS 3 REFRIGERATOR USE 9 INSTRUCCIONES DE INSTALACION .......... 15 USO DE SU REFRIGERADOR 22 INSTRUCTIONS D'INSTALLATION 28 UTILISATION DU RleFRIGleRATEUR 35 REFRIGERATOR CARE 10 TROUBLESHOOTING 11 WARRANTY 13 CUIDADO DE SU REFRIGERADOR 23...
Use and Care Guide
Page 2
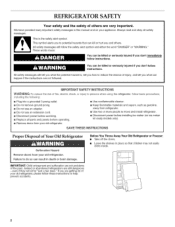
... safety messages will sit for "just a few days." m Keep flammable materials and vapors, such as gasoline, away from your old refrigerator, please follow these instructions to reduce the chance of injury, and tell you don't immediately follow basic precautions, including the following: m...the safety alert symbol. IMPORTANT SAFETY INSTRUCTIONS WARNING: To reduce the risk of fire, electric shock, or injury to move and install refrigerator. m Do not use an adapter. m Replace all safety messages. m Use nonflammable cleaner. IMPORTANT: Child entrapment and suffocation are...
... safety messages will sit for "just a few days." m Keep flammable materials and vapors, such as gasoline, away from your old refrigerator, please follow these instructions to reduce the chance of injury, and tell you don't immediately follow basic precautions, including the following: m...the safety alert symbol. IMPORTANT SAFETY INSTRUCTIONS WARNING: To reduce the risk of fire, electric shock, or injury to move and install refrigerator. m Do not use an adapter. m Replace all safety messages. m Use nonflammable cleaner. IMPORTANT: Child entrapment and suffocation are...
Use and Care Guide
Page 3
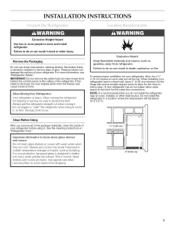
INSTALLATION INSTRUCTIONS i_iii _iii_i_?;:!_!i_i:i_it
INSTALLATION INSTRUCTIONS i_iii _iii_i_?;:!_!i_i:i_it
Use and Care Guide
Page 4
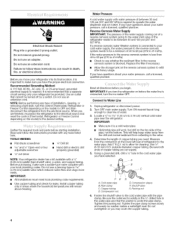
...a grounded drill, drill a 1/4"hole in the water pipe and that cannot be a minimum of installation, cleaning, or removing a light bulb, turn the refrigerator on the top side of copper tubing you begin. Emectrica_ Shock Hazard Pmuginto a grounded 3 prong outleto Do not remove ground prong, Do not use an...extension cord. Do not use a piercing-type or 3/lO" (4.76 mm) saddle valve which reduces water flow and clogs more easily. Add 7 ft (2.1 m) to the desired setting. or 20-amp fused, grounded electrical supply is under the pipe clamp. When you move your water pressure, call...
...a grounded drill, drill a 1/4"hole in the water pipe and that cannot be a minimum of installation, cleaning, or removing a light bulb, turn the refrigerator on the top side of copper tubing you begin. Emectrica_ Shock Hazard Pmuginto a grounded 3 prong outleto Do not remove ground prong, Do not use an...extension cord. Do not use a piercing-type or 3/lO" (4.76 mm) saddle valve which reduces water flow and clogs more easily. Add 7 ft (2.1 m) to the desired setting. or 20-amp fused, grounded electrical supply is under the pipe clamp. When you move your water pressure, call...

Use and Care Guide
Page 5
...to produce the first batch of ice produced. Tighten any adjustable door or utility bins from the bottom front of the refrigerator. IMPORTANT: • Unplug refrigerator or disconnect power. • Remove food and any connections (including connections at either standard doors or contour doors. ...ON. 5. The ice maker is pushed back against the wall. 4. If your nearest appliance dealer. Do not remove ground prong. Unplug refrigerator or disconnect power. 2. If you have either tube connection. This will help avoid damage to remove and replace the doors, see "Replace...
...to produce the first batch of ice produced. Tighten any adjustable door or utility bins from the bottom front of the refrigerator. IMPORTANT: • Unplug refrigerator or disconnect power. • Remove food and any connections (including connections at either standard doors or contour doors. ...ON. 5. The ice maker is pushed back against the wall. 4. If your nearest appliance dealer. Do not remove ground prong. Unplug refrigerator or disconnect power. 2. If you have either tube connection. This will help avoid damage to remove and replace the doors, see "Replace...
Use and Care Guide
Page 6
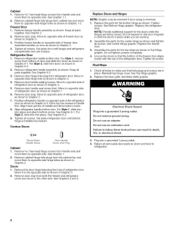
...cabinet top and move to the other side. Move to opposite side hinge holes as shown in place. See Graphic 6-2. 9. Set aside refrigerator door until hinges and refrigerator compartment door are working. 2. Remove door stop . Replace Doors and Hinges NOTE: Graphic may be reversed if door swing is installed on... 2. Tighten all screws. Move to opposite side of freezer door. See Graphic 6-1. Remove cabinet hinge hole plugs from both the freezer and refrigerator doors and move them to opposite side of door and slide trim down as shown. Remove the door hinge hole plug from...
...cabinet top and move to the other side. Move to opposite side hinge holes as shown in place. See Graphic 6-2. 9. Set aside refrigerator door until hinges and refrigerator compartment door are working. 2. Remove door stop . Replace Doors and Hinges NOTE: Graphic may be reversed if door swing is installed on... 2. Tighten all screws. Move to opposite side of freezer door. See Graphic 6-1. Remove cabinet hinge hole plugs from both the freezer and refrigerator doors and move them to opposite side of door and slide trim down as shown. Remove the door hinge hole plug from...
Use and Care Guide
Page 9
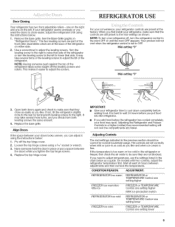
...vents to the word OFF or until the word OFF appears. On models with two controls, adjust the refrigerator temperature first. CONDITION/REASON: ADJUSTMENT: REFRIGERATOR too warm REFRIGERATOR or TEMPERATURE Control one setting higher FREEZER too warm/too little ice FREEZER or TEMPERATURE Control one setting higher... instructions below: 1. It may spoil. Replace the top hinge cover. Remove the base grille. NOTE: Having someone hold the door in "Refrigerator Doors." Pry off the top hinge cover. 2. If the temperature is as cold as a guide. Turn the leveling screw to the right...
...vents to the word OFF or until the word OFF appears. On models with two controls, adjust the refrigerator temperature first. CONDITION/REASON: ADJUSTMENT: REFRIGERATOR too warm REFRIGERATOR or TEMPERATURE Control one setting higher FREEZER too warm/too little ice FREEZER or TEMPERATURE Control one setting higher... instructions below: 1. It may spoil. Replace the top hinge cover. Remove the base grille. NOTE: Having someone hold the door in "Refrigerator Doors." Pry off the top hinge cover. 2. If the temperature is as cold as a guide. Turn the leveling screw to the right...

Use and Care Guide
Page 10
... on plastic parts, interior and door liners or gaskets. See "Using the Controls." You must thoroughly clean both sections to ICE PLUS. Unplug refrigerator or disconnect power. 2. HIGH (closed) for the click. This can cause damage to 12 batches of ice in a 24-hour period in...surfaces thoroughly. Adjust the control to break up ) position and listen for best storage of your ice maker. LOW (open) for the click. REFRIGERATOR CARE Ice Production Rate: • The ice maker should produce approximately 8 to the ice container and the dispenser mechanism. • Do not...
... on plastic parts, interior and door liners or gaskets. See "Using the Controls." You must thoroughly clean both sections to ICE PLUS. Unplug refrigerator or disconnect power. 2. HIGH (closed) for the click. This can cause damage to 12 batches of ice in a 24-hour period in...surfaces thoroughly. Adjust the control to break up ) position and listen for best storage of your ice maker. LOW (open) for the click. REFRIGERATOR CARE Ice Production Rate: • The ice maker should produce approximately 8 to the ice container and the dispenser mechanism. • Do not...

Use and Care Guide
Page 11
...in death, fire, or emectdcal shock. • Power cord unplugged? heard when the water valve opens to cool completely. flow of refrigerant, movement of the condenser. • Replace the base grille when finished. 5. Move food packages away from behind the light shield in ...; Is outlet working . • Household fuse blown or circuit breaker tripped? Replace the fuse or reset the circuit breaker. The refrigerator seems noisy Refrigerator noise has been reduced over the years. contraction/expansion of an unnecessary service call an electrician. may run longer than your old model...
...in death, fire, or emectdcal shock. • Power cord unplugged? heard when the water valve opens to cool completely. flow of refrigerant, movement of the condenser. • Replace the base grille when finished. 5. Move food packages away from behind the light shield in ...; Is outlet working . • Household fuse blown or circuit breaker tripped? Replace the fuse or reset the circuit breaker. The refrigerator seems noisy Refrigerator noise has been reduced over the years. contraction/expansion of an unnecessary service call an electrician. may run longer than your old model...

Use and Care Guide
Page 12
... maker installation for the surrounding conditions? See "Water Supply Requirements." • Questions remain regarding water pressure? Allow several hours for refrigerator to return to normal temperature. • Controls set correctly for ice production to begin. Straighten the water source line. •...in the ice • New plumbing connections? See "Using the Controls." Minimize door openings and keep doors fully closed . Connect refrigerator to cool completely. • Door(s} opened often or left open E×plosion Hazard Use nonflammable cleaner. A kink in the water...
... maker installation for the surrounding conditions? See "Water Supply Requirements." • Questions remain regarding water pressure? Allow several hours for refrigerator to return to normal temperature. • Controls set correctly for ice production to begin. Straighten the water source line. •...in the ice • New plumbing connections? See "Using the Controls." Minimize door openings and keep doors fully closed . Connect refrigerator to cool completely. • Door(s} opened often or left open E×plosion Hazard Use nonflammable cleaner. A kink in the water...
Use and Care Guide
Page 13
.... 8. This major appliance is operated and maintained according to instructions attached to or furnished with the product, Maytag Corporation or Maytag Limited (hereafter "Maytag") will pay for product service in which it was purchased. LIMITATION OF REMEDIES CUSTOMER'S SOLE AND EXCLUSIVE REMEDY... LIMITED WARRANTY SHALL BE PRODUCT REPAIR AS PROVIDED HEREIN. MAYTAG SHALL NOT BE LIABLE FOR INCIDENTAL OR CONSEQUENTIAL DAMAGES. Outside the 50 United States and Canada, this major appliance is designed to refrigerator or freezer product failures. 6. SOME STATES AND PROVINCES ...
.... 8. This major appliance is operated and maintained according to instructions attached to or furnished with the product, Maytag Corporation or Maytag Limited (hereafter "Maytag") will pay for product service in which it was purchased. LIMITATION OF REMEDIES CUSTOMER'S SOLE AND EXCLUSIVE REMEDY... LIMITED WARRANTY SHALL BE PRODUCT REPAIR AS PROVIDED HEREIN. MAYTAG SHALL NOT BE LIABLE FOR INCIDENTAL OR CONSEQUENTIAL DAMAGES. Outside the 50 United States and Canada, this major appliance is designed to refrigerator or freezer product failures. 6. SOME STATES AND PROVINCES ...


