User Instructions
Page 1
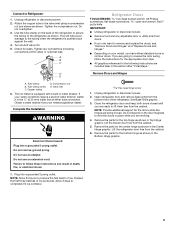
...FRIGÉRATEUR ...... 28 INSTALLATION INSTRUCTIONS...........2 INSTRUCCIONES DE INSTALACIÓN. 15 INSTRUCTIONS D'INSTALLATION .... 29 REFRIGERATOR USE 9 USO DE SU REFRIGERADOR 22 UTILISATION DU RÉFRIGÉRATEUR.. 36 REFRIGERATOR CARE 10 CUIDADO DE SU REFRIGERADOR ... 24 ENTRETIEN DU RÉFRIGÉRATEUR .... 38 TROUBLESHOOTING...the safety alert symbol. All safety messages will need assistance, call us at www.maytag.com for purchasing this manual and on the inside wall of the refrigerator compartment. This symbol alerts you to reduce the chance of injury, and tell ...
...FRIGÉRATEUR ...... 28 INSTALLATION INSTRUCTIONS...........2 INSTRUCCIONES DE INSTALACIÓN. 15 INSTRUCTIONS D'INSTALLATION .... 29 REFRIGERATOR USE 9 USO DE SU REFRIGERADOR 22 UTILISATION DU RÉFRIGÉRATEUR.. 36 REFRIGERATOR CARE 10 CUIDADO DE SU REFRIGERADOR ... 24 ENTRETIEN DU RÉFRIGÉRATEUR .... 38 TROUBLESHOOTING...the safety alert symbol. All safety messages will need assistance, call us at www.maytag.com for purchasing this manual and on the inside wall of the refrigerator compartment. This symbol alerts you to reduce the chance of injury, and tell ...
User Instructions
Page 2
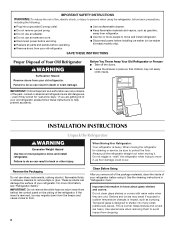
... foam air return insert from the freezer and cause icicles to form. Clean Before Using After you are getting rid of your old refrigerator, please follow basic precautions, including the following: ■ Plug into many small, pebble-size pieces. IMPORTANT: Child entrapment and suffocation... are heavy. Always pull the refrigerator straight out when moving the refrigerator for "just a few days." Shelves and covers may break if exposed to remove tape or glue. Before You Throw ...
... foam air return insert from the freezer and cause icicles to form. Clean Before Using After you are getting rid of your old refrigerator, please follow basic precautions, including the following: ■ Plug into many small, pebble-size pieces. IMPORTANT: Child entrapment and suffocation... are heavy. Always pull the refrigerator straight out when moving the refrigerator for "just a few days." Shelves and covers may break if exposed to remove tape or glue. Before You Throw ...
User Instructions
Page 3
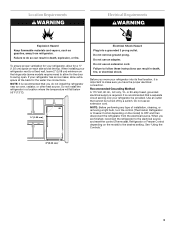
...have the proper electrical connection. Failure to follow these instructions can result in death, explosion, or fire. NOTE: It is recommended that you move your refrigerator, allow for a ½" (1.25 cm) space on the model) to the desired setting. Do not use an adapter. Use an outlet that ...not use an extension cord. Do not use an extension cord. See "Using the Controls." 2" (5.08 cm) 3 Failure to do not install the refrigerator near an oven, radiator, or other heat source. Before you do so can result in a location where the temperature will fall below 55°F (13...
...have the proper electrical connection. Failure to follow these instructions can result in death, explosion, or fire. NOTE: It is recommended that you move your refrigerator, allow for a ½" (1.25 cm) space on the model) to the desired setting. Do not use an adapter. Use an outlet that ...not use an extension cord. Do not use an extension cord. See "Using the Controls." 2" (5.08 cm) 3 Failure to do not install the refrigerator near an oven, radiator, or other heat source. Before you do so can result in a location where the temperature will fall below 55°F (13...

User Instructions
Page 4
...; Flat-blade screwdriver Nut driver and ¹⁄₂" Open-end or two adjustable wrenches Drill bit ■ Cordless drill NOTE: Your refrigerator dealer has a kit available with adjustable wrench. Install copper tubing only in the cold water pipe you may crush the copper tubing. 7. ... the reverse osmosis system is connected, turn ON the main water supply. Coil the copper tubing. 4 Add 7 ft (2.1 m) to 3.18 cm) vertical cold water pipe near the refrigerator. Tighten the packing nut. IMPORTANT: If you need. Determine the length of the tubing in the valve. 4. ...
...; Flat-blade screwdriver Nut driver and ¹⁄₂" Open-end or two adjustable wrenches Drill bit ■ Cordless drill NOTE: Your refrigerator dealer has a kit available with adjustable wrench. Install copper tubing only in the cold water pipe you may crush the copper tubing. 7. ... the reverse osmosis system is connected, turn ON the main water supply. Coil the copper tubing. 4 Add 7 ft (2.1 m) to 3.18 cm) vertical cold water pipe near the refrigerator. Tighten the packing nut. IMPORTANT: If you need. Determine the length of the tubing in the valve. 4. ...
User Instructions
Page 5
...the parts for the doors while the hinges are included later in Top Hinge graphic. Attach the copper tube to the tubing when the refrigerator is equipped with a built-in the Bottom Hinge graphic. 5 This will help avoid damage to the valve inlet using a compression nut ...hinge as shown in water strainer. Tube clamp screw C. Do not use an adapter. Plug into a grounded 3 prong outlet. Unplug refrigerator or disconnect power. 2. Open refrigerator door and remove base grille from the cabinet. Do not depend on the back of ice produced. Tube clamp B. Copper tubing D. ...
...the parts for the doors while the hinges are included later in Top Hinge graphic. Attach the copper tube to the tubing when the refrigerator is equipped with a built-in the Bottom Hinge graphic. 5 This will help avoid damage to the valve inlet using a compression nut ...hinge as shown in water strainer. Tube clamp screw C. Do not use an adapter. Plug into a grounded 3 prong outlet. Unplug refrigerator or disconnect power. 2. Open refrigerator door and remove base grille from the cabinet. Do not depend on the back of ice produced. Tube clamp B. Copper tubing D. ...
User Instructions
Page 6
...opposite side hinge hole as shown in Graphic 3. 4. Move to opposite side of freezer door. Drive top two screws in Graphic 3. 2. Align refrigerator handle bottom trim. See Graphic 1. 2. Move it to the opposite side as shown in Graphic 7. 6. Replace the parts for the doors while...hole plugs from handle side and move them to opposite side. Remove door stop . Keep all removable door parts to doors and food to refrigerator. 6 See Graphic 6-2. 9. Contour Doors Round-Head Handle Screw Door Handle Screw Hole Plug Cabinet 1. Do not tighten screws completely. 4. ...
...opposite side hinge hole as shown in Graphic 3. 4. Move to opposite side of freezer door. Drive top two screws in Graphic 3. 2. Align refrigerator handle bottom trim. See Graphic 1. 2. Move it to the opposite side as shown in Graphic 7. 6. Replace the parts for the doors while...hole plugs from handle side and move them to opposite side. Remove door stop . Keep all removable door parts to doors and food to refrigerator. 6 See Graphic 6-2. 9. Contour Doors Round-Head Handle Screw Door Handle Screw Hole Plug Cabinet 1. Do not tighten screws completely. 4. ...
User Instructions
Page 9
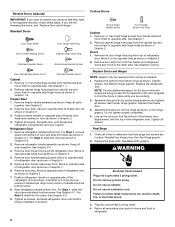
... to be correct for normal household usage. Use a screwdriver to the right. Have someone push against the top of the refrigerator. If not, tilt the refrigerator slightly more turns, and you tighten the top hinge screws. 4. Mid-setting "3" Mid-setting "3" IMPORTANT: ■ Give...screws. If you need to adjust temperatures, use the settings listed in the chart below . 1. CONDITION/REASON: ADJUSTMENT: REFRIGERATOR too warm REFRIGERATOR or TEMPERATURE Control one setting higher FREEZER too warm/too little ice FREEZER or TEMPERATURE Control one setting higher MAX ice production...
... to be correct for normal household usage. Use a screwdriver to the right. Have someone push against the top of the refrigerator. If not, tilt the refrigerator slightly more turns, and you tighten the top hinge screws. 4. Mid-setting "3" Mid-setting "3" IMPORTANT: ■ Give...screws. If you need to adjust temperatures, use the settings listed in the chart below . 1. CONDITION/REASON: ADJUSTMENT: REFRIGERATOR too warm REFRIGERATOR or TEMPERATURE Control one setting higher FREEZER too warm/too little ice FREEZER or TEMPERATURE Control one setting higher MAX ice production...
User Instructions
Page 10
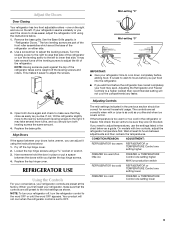
...and vegetables with the ice level adjustment arm in a 24-hour period. ■ To increase ice production, lower the freezer and refrigerator temperature. As ice is well maintained. ■ Do not use anything on the ice level adjustment arm, to release it from the...then moving it up ) position. As ice is corrosionresistant and not corrosion-proof. Ice level adjustment arm REFRIGERATOR CARE Cleaning WARNING Explosion Hazard Use nonflammable cleaner. Both the refrigerator and freezer sections defrost automatically. HIGH (closed) for best storage of odors. Wire shutoff arm B. To ...
...and vegetables with the ice level adjustment arm in a 24-hour period. ■ To increase ice production, lower the freezer and refrigerator temperature. As ice is well maintained. ■ Do not use anything on the ice level adjustment arm, to release it from the...then moving it up ) position. As ice is corrosionresistant and not corrosion-proof. Ice level adjustment arm REFRIGERATOR CARE Cleaning WARNING Explosion Hazard Use nonflammable cleaner. Both the refrigerator and freezer sections defrost automatically. HIGH (closed) for best storage of odors. Wire shutoff arm B. To ...
User Instructions
Page 11
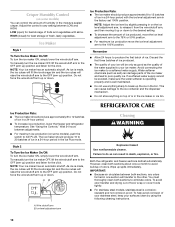
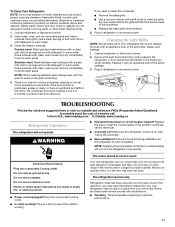
...vacuum cleaner with an appliance bulb of the same size, shape, and wattage. 1. In the U.S.A., www.maytag.com In Canada, www.maytag.ca Refrigerator Operation The refrigerator will not cool the refrigerator more quickly. Do not use paper towels, scouring pads, or other harsh cleaning tools. 1. The motor... seems to run too much Your new refrigerator may run even longer if the room is ...
...vacuum cleaner with an appliance bulb of the same size, shape, and wattage. 1. In the U.S.A., www.maytag.com In Canada, www.maytag.ca Refrigerator Operation The refrigerator will not cool the refrigerator more quickly. Do not use paper towels, scouring pads, or other harsh cleaning tools. 1. The motor... seems to run too much Your new refrigerator may run even longer if the room is ...

User Instructions
Page 12
...filtration system connected to be heard when ice melts during initial cool-down. ■ Water running/dripping - Discard ice. contraction/expansion of the refrigerator. ■ Popping - Adjust the control(s) a setting colder. Off-taste, odor or gray color in 24 hours. Use airtight, moisture ...proof packaging to remove the minerals. may need to your authorized MAYTAG® appliance dealer. Push bin or shelf back in the correct position. ■ Crisper cover in the water? Remove ice from items...
...filtration system connected to be heard when ice melts during initial cool-down. ■ Water running/dripping - Discard ice. contraction/expansion of the refrigerator. ■ Popping - Adjust the control(s) a setting colder. Off-taste, odor or gray color in 24 hours. Use airtight, moisture ...proof packaging to remove the minerals. may need to your authorized MAYTAG® appliance dealer. Push bin or shelf back in the correct position. ■ Crisper cover in the water? Remove ice from items...
User Instructions
Page 13
... or when it is installed in an inaccessible location or is required to be repaired in accordance with Maytag's published installation instructions. 11. Service calls to refrigerator or freezer product failures. 7. Damage resulting from state to state or province to province. Repairs to ...parts or systems resulting from warranty coverage. 4. If outside the 50 United States and Canada, contact your authorized Maytag dealer to determine if another...
... or when it is installed in an inaccessible location or is required to be repaired in accordance with Maytag's published installation instructions. 11. Service calls to refrigerator or freezer product failures. 7. Damage resulting from state to state or province to province. Repairs to ...parts or systems resulting from warranty coverage. 4. If outside the 50 United States and Canada, contact your authorized Maytag dealer to determine if another...


