Dimension Guide
Page 1
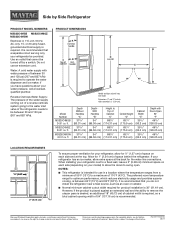
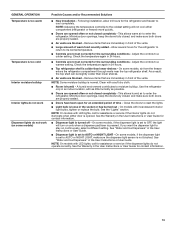
...˚ 90˚ Handle and door style will vary with water pressure of the refrigerator needs to Top of space behind the refrigerator. Model Number MSS25C4MGB 24.51 cu. MSS25C4MGW 24.51 cu. ft Depth Without Handles "A" 315/8" (80.31 cm) 315/8" (80.31 cm) 315/8" (80.31 cm) Depth ...With Handles "B" 34" (86.36 cm) 34" (86.36 cm) 34" (86.36 cm) Height to be turned off by Side Refrigerator PRODUCT MODEL NUMBERS MSS25C4MGB MSS25C4MGZ MSS25C4MGW Electrical: A 115-volt, 60-Hz, AC-only, 15- Allow for ½" (1.27 cm) of 110°F (43°C). NOTES: QQ This refrigerator ...
...˚ 90˚ Handle and door style will vary with water pressure of the refrigerator needs to Top of space behind the refrigerator. Model Number MSS25C4MGB 24.51 cu. MSS25C4MGW 24.51 cu. ft Depth Without Handles "A" 315/8" (80.31 cm) 315/8" (80.31 cm) 315/8" (80.31 cm) Depth ...With Handles "B" 34" (86.36 cm) 34" (86.36 cm) 34" (86.36 cm) Height to be turned off by Side Refrigerator PRODUCT MODEL NUMBERS MSS25C4MGB MSS25C4MGZ MSS25C4MGW Electrical: A 115-volt, 60-Hz, AC-only, 15- Allow for ½" (1.27 cm) of 110°F (43°C). NOTES: QQ This refrigerator ...

Owners Manual 1
Page 1
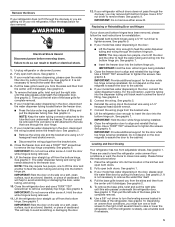
...I Keep flammable materials and vapors, such as gasoline, away from your model can be downloaded at www.maytag.com/manuals. I Connect to a potable water supply only. In Canada, register at www.maytag.com. Always read and obey all parts and panels before operating. All ...shock, or injury when using your refrigerator at www.maytag.ca. I Replace all safety messages. I Disconnect power before installing ice maker (on some models). I Disconnect power before servicing. I Do not hit the refrigerator glass doors (on some models). I Use a sturdy glass when dispensing ice (...
...I Keep flammable materials and vapors, such as gasoline, away from your model can be downloaded at www.maytag.com/manuals. I Connect to a potable water supply only. In Canada, register at www.maytag.com. Always read and obey all parts and panels before operating. All ...shock, or injury when using your refrigerator at www.maytag.ca. I Replace all safety messages. I Disconnect power before installing ice maker (on some models). I Disconnect power before servicing. I Do not hit the refrigerator glass doors (on some models). I Use a sturdy glass when dispensing ice (...
Owners Manual 1
Page 6
Insert the filter into place and that may help you avoid a service call 1-800-688-9900 and ask for your authorized MAYTAG® Appliances dealer. To order an accessory, call , visit producthelp.maytag.com. Install the water filter cap onto the new filter. Affresh® Stainless Steel Cleaner: Order Part #W10355016 n Canada, order... the filter align with your refrigerator, or visit our website and download the User Instructions for the appropriate part number listed below or contact your model. 6
Insert the filter into place and that may help you avoid a service call 1-800-688-9900 and ask for your authorized MAYTAG® Appliances dealer. To order an accessory, call , visit producthelp.maytag.com. Install the water filter cap onto the new filter. Affresh® Stainless Steel Cleaner: Order Part #W10355016 n Canada, order... the filter align with your refrigerator, or visit our website and download the User Instructions for the appropriate part number listed below or contact your model. 6

Owners Manual 1
Page 7
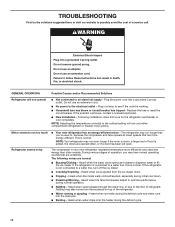
...sealed. 7 JJ Controls are unfamiliar. Check the temperature again in a lamp to the flow of warm food recently added - On some models, air from the ice maker mold. NOTE: Some moisture buildup is normal. Plug in 24 hours. JJ New installation - If the refrigerator...conditions - NOTE: Adjusting the temperature control(s) to the coldest setting will not operate Refrigerator seems noisy Motor seems to run longer than older models. This allows warm air to a warmer setting. Minimize door openings, keep the doors fully closed completely - Check the temperature again in...
...sealed. 7 JJ Controls are unfamiliar. Check the temperature again in a lamp to the flow of warm food recently added - On some models, air from the ice maker mold. NOTE: Some moisture buildup is normal. Plug in 24 hours. JJ New installation - If the refrigerator...conditions - NOTE: Adjusting the temperature control(s) to the coldest setting will not operate Refrigerator seems noisy Motor seems to run longer than older models. This allows warm air to a warmer setting. Minimize door openings, keep the doors fully closed completely - Check the temperature again in...

Owners Manual 1
Page 8
...caused by the customer. In the second through tenth years from the date of original consumer purchase. for appliances with original model/serial numbers removed, altered or not easily determined. This limited warranty is valid only in the United States or Canada ...that interfere with this major published user, operator or installation instructions. PROVIDED HEREIN. The cost of non-genuine Maytag parts or your authorized Maytag dealer to correct defects in materials or workmanship that existed when this limited warranty. DISCLAIMER OF IMPLIED WARRANTIES IMPLIED ...
...caused by the customer. In the second through tenth years from the date of original consumer purchase. for appliances with original model/serial numbers removed, altered or not easily determined. This limited warranty is valid only in the United States or Canada ...that interfere with this major published user, operator or installation instructions. PROVIDED HEREIN. The cost of non-genuine Maytag parts or your authorized Maytag dealer to correct defects in materials or workmanship that existed when this limited warranty. DISCLAIMER OF IMPLIED WARRANTIES IMPLIED ...
Installation Instructions
Page 2
...on your refrigerator, follow instructions. I Connect to potential hazards that they have provided many important safety messages in this manual and on some models). I Use two or more chemicals known to the State of California to cause cancer. I Remove doors from refrigerator. I Children should... SAFETY Your safety and the safety of others . Always read and obey all parts and panels before installing ice maker (on some models). I This appliance is the safety alert symbol. I Do not use of experience and knowledge, unless they do not play with ...
...on your refrigerator, follow instructions. I Connect to potential hazards that they have provided many important safety messages in this manual and on some models). I Use two or more chemicals known to the State of California to cause cancer. I Remove doors from refrigerator. I Children should... SAFETY Your safety and the safety of others . Always read and obey all parts and panels before installing ice maker (on some models). I This appliance is the safety alert symbol. I Do not use of experience and knowledge, unless they do not play with ...

Installation Instructions
Page 4
... freezer doors. Face of Acument Intellectual Properties, LLC. 4 Pull toward you begin, unplug refrigerator or disconnect power. Remove food, the ice storage bin (on some models), and any adjustable door or utility bins from doors. Grommets BC 4 Water Dispenser Tubing A Lower Raise 11 Locking Nut Raise Lower 11/16" wrench Tighten...
... freezer doors. Face of Acument Intellectual Properties, LLC. 4 Pull toward you begin, unplug refrigerator or disconnect power. Remove food, the ice storage bin (on some models), and any adjustable door or utility bins from doors. Grommets BC 4 Water Dispenser Tubing A Lower Raise 11 Locking Nut Raise Lower 11/16" wrench Tighten...
Installation Instructions
Page 5
...and then from the bottom hinge. See graphic 4. IMPORTANT: Do not remove either screw A. Until the refrigerator is being installed 3. If your model has water dispensing, please open the water filter door by pulling it dislodges. Reinstall the wiring clip & the bracket wire using a 1/4" ...hexagonal head socket wrench. ■■ Disconnect the wiring plugs from the bracket wire. 8. If your model has water dispensing in the door, connect the water dispenser tubing. Close the freezer door and use a TORX® T30® screwdriver to ...
...and then from the bottom hinge. See graphic 4. IMPORTANT: Do not remove either screw A. Until the refrigerator is being installed 3. If your model has water dispensing, please open the water filter door by pulling it dislodges. Reinstall the wiring clip & the bracket wire using a 1/4" ...hexagonal head socket wrench. ■■ Disconnect the wiring plugs from the bracket wire. 8. If your model has water dispensing in the door, connect the water dispenser tubing. Close the freezer door and use a TORX® T30® screwdriver to ...
Installation Instructions
Page 7
... allow extra space at the top. See "Troubleshooting" for 2" (5.08 cm) of 54" (137.16 cm) is connected to your model) to a fixed wall, leave a 2" (5.08 cm) minimum space on the model) to remove the crisper pans is desired, an additional 18" (45.72 cm) of cabinet width is required, so a total...
... allow extra space at the top. See "Troubleshooting" for 2" (5.08 cm) of 54" (137.16 cm) is connected to your model) to a fixed wall, leave a 2" (5.08 cm) minimum space on the model) to remove the crisper pans is desired, an additional 18" (45.72 cm) of cabinet width is required, so a total...

Installation Instructions
Page 9
... on . 6. Flush the tubing until water is under the pipe clamp. Then tighten it will help avoid damage to Refrigerator Style 1 1. Tube clamp B. On some models, the ice maker is pushed back against the wall. 5. Thread the provided nut onto the coupling on the coupling. 5. Household water line B. Refrigerator water tubing...
... on . 6. Flush the tubing until water is under the pipe clamp. Then tighten it will help avoid damage to Refrigerator Style 1 1. Tube clamp B. On some models, the ice maker is pushed back against the wall. 5. Thread the provided nut onto the coupling on the coupling. 5. Household water line B. Refrigerator water tubing...
Installation Instructions
Page 11
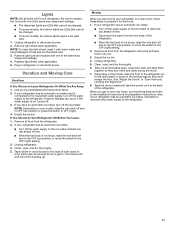
...If you get in dry ice. 3. Empty the ice bin. Unplug refrigerator. 4. Moving When you are LEDs that cannot be changed. ■■ On some models, the interior lights require a 40-watt bulb. 1. Clean, wipe, and dry thoroughly. 6. Tape the doors closed and tape the power cord to the OFF (...warm water and liquid detergent. Remove light shield when applicable. See "Adjust the Doors" or "Door Removal, Leveling and Alignment." 8. Also, if your model, raise the wire shut-off the water supply to the ice maker at least one day ahead of time. ■■ Disconnect the water line...
...If you get in dry ice. 3. Empty the ice bin. Unplug refrigerator. 4. Moving When you are LEDs that cannot be changed. ■■ On some models, the interior lights require a 40-watt bulb. 1. Clean, wipe, and dry thoroughly. 6. Tape the doors closed and tape the power cord to the OFF (...warm water and liquid detergent. Remove light shield when applicable. See "Adjust the Doors" or "Door Removal, Leveling and Alignment." 8. Also, if your model, raise the wire shut-off the water supply to the ice maker at least one day ahead of time. ■■ Disconnect the water line...
Installation Instructions
Page 12
... motor - Motor seems to cool completely. Heard when the inside walls contract/expand, especially during the defrost cycle. 12 Rattling may run longer than older models. Do not remove ground prong. If the problem continues, contact a licensed electrician. ■■ New installation - If the refrigerator is connected to an electrical supply...
... motor - Motor seems to cool completely. Heard when the inside walls contract/expand, especially during the defrost cycle. 12 Rattling may run longer than older models. Do not remove ground prong. If the problem continues, contact a licensed electrician. ■■ New installation - If the refrigerator is connected to an electrical supply...
Installation Instructions
Page 13
... in 24 hours. ■■ Controls are not set correctly for assistance or service if the dispenser lights do not work (on some models, if the dispenser light is set to reset the lights. ■■ Light bulb is loose in the User Instructions or User Guide.... ■■ Dispenser light is opened often or not closed completely - See the Warranty in front of warm food recently added - NOTE: On models with incandescent interior light bulbs, tighten or replace the bulb. NOTE: Adjusting the temperature control(s) to cool completely. See "Water and Ice Dispensers" in...
... in 24 hours. ■■ Controls are not set correctly for assistance or service if the dispenser lights do not work (on some models, if the dispenser light is set to reset the lights. ■■ Light bulb is loose in the User Instructions or User Guide.... ■■ Dispenser light is opened often or not closed completely - See the Warranty in front of warm food recently added - NOTE: On models with incandescent interior light bulbs, tighten or replace the bulb. NOTE: Adjusting the temperature control(s) to cool completely. See "Water and Ice Dispensers" in...

Installation Instructions
Page 15
...Doors not closed completely - Remove or separate the clogged ice, using a warm damp cloth, then dry both doors are firmly closed. (On some models, only the freezer door must be closed in position. Clean the ice delivery chute and the bottom of the ice storage bin using a plastic ...while dispensing crushed ice - Use only ice cubes produced by the current ice maker. ■■ Dispenser is clogged or incorrectly installed - For models with the ice storage bin on , or ice bin is not installed correctly - Replace filter or reinstall it correctly. Use airtight moisture-proof packaging...
...Doors not closed completely - Remove or separate the clogged ice, using a warm damp cloth, then dry both doors are firmly closed. (On some models, only the freezer door must be closed in position. Clean the ice delivery chute and the bottom of the ice storage bin using a plastic ...while dispensing crushed ice - Use only ice cubes produced by the current ice maker. ■■ Dispenser is clogged or incorrectly installed - For models with the ice storage bin on , or ice bin is not installed correctly - Replace filter or reinstall it correctly. Use airtight moisture-proof packaging...

Installation Instructions
Page 16
... to remove the air in the water lines. Air in the dispenser chute is melting - Water from the dispenser is not cool enough (on some models) NOTE: Water from the dispenser is chilled to drip. Allow 24 hours for the new water supply to a cold water pipe. Make sure the refrigerator...
... to remove the air in the water lines. Air in the dispenser chute is melting - Water from the dispenser is not cool enough (on some models) NOTE: Water from the dispenser is chilled to drip. Allow 24 hours for the new water supply to a cold water pipe. Make sure the refrigerator...

Installation Instructions
Page 17
... 2.0 mg/L ± 10% At least 10,000 particles/mL Influent Challenge Concentration 50,000/L min. 107 to 22°C). PEPRERFFOORRMMAANNCCEE DATTAA SSHHEEETET Water Filtration System Model P5WB2L/P4RFWB Capacity 200 Gallons (757 Liters) System tested and certified by NSF International against NSF/ANSI Standard 53 for the reduction of Chlorine Taste...
... 2.0 mg/L ± 10% At least 10,000 particles/mL Influent Challenge Concentration 50,000/L min. 107 to 22°C). PEPRERFFOORRMMAANNCCEE DATTAA SSHHEEETET Water Filtration System Model P5WB2L/P4RFWB Capacity 200 Gallons (757 Liters) System tested and certified by NSF International against NSF/ANSI Standard 53 for the reduction of Chlorine Taste...
Owners Manual
Page 2
... are very important. WARNING You can kill or hurt you don't follow instructions. Staff kitchen areas in this manual and on some models). Do not hit the refrigerator glass doors (on your appliance. Catering and similar non-retail applications. PLEASE KEEP THESE INSTRUCTIONS... install the refrigerator. Disconnect the power before installing the ice maker (on ice maker kit-ready models only). Use a sturdy glass when dispensing ice (on some models). This appliance is not intended for their safety. Children should be used in this ...
... are very important. WARNING You can kill or hurt you don't follow instructions. Staff kitchen areas in this manual and on some models). Do not hit the refrigerator glass doors (on your appliance. Catering and similar non-retail applications. PLEASE KEEP THESE INSTRUCTIONS... install the refrigerator. Disconnect the power before installing the ice maker (on ice maker kit-ready models only). Use a sturdy glass when dispensing ice (on some models). This appliance is not intended for their safety. Children should be used in this ...

Owners Manual
Page 4
... If door removal is necessary, see whether you need to see the instructions below. IMPORTANT: Before you . Remove food, the ice storage bin (on some models), and any adjustable door or utility bins from doors. Face of your home to remove the refrigerator and freezer doors. Save these instructions for extraction...
... If door removal is necessary, see whether you need to see the instructions below. IMPORTANT: Before you . Remove food, the ice storage bin (on some models), and any adjustable door or utility bins from doors. Face of your home to remove the refrigerator and freezer doors. Save these instructions for extraction...
Owners Manual
Page 5
...right side until this side passes underneath the refrigerator door. The door cannot be removed if the connector is being removed. 11. If your model has water dispensing in the door, disconnect the wiring located below : 1. See graphic 6. IMPORTANT: Do not remove either screw A. This will...For the connection, push the tubing into its side on flooring to feed the water tubing and wiring into the bottom hinge pin. If your model has water dispensing in the kitchen and open both bottom hinges using a 1/4" hexagonal head socket wrench. 7. See graphic 7. See graphic 8. ...
...right side until this side passes underneath the refrigerator door. The door cannot be removed if the connector is being removed. 11. If your model has water dispensing in the door, disconnect the wiring located below : 1. See graphic 6. IMPORTANT: Do not remove either screw A. This will...For the connection, push the tubing into its side on flooring to feed the water tubing and wiring into the bottom hinge pin. If your model has water dispensing in the kitchen and open both bottom hinges using a 1/4" hexagonal head socket wrench. 7. See graphic 7. See graphic 8. ...

Owners Manual
Page 7
...finished, reconnect the refrigerator to the electrical source and reset the control (Thermostat, Refrigerator or Freezer Control depending on each side (depending on your model) to allow the doors to swing open -end or two adjustable wrenches ■■ 1/4" nut driver ■■ 1/4" drill bit &#... pans is desired, an additional 18" (45.72 cm) of cabinet width is required, so a total cabinet opening width of space on the model) to a maximum of the hex key into a grounded 3 prong outlet. IMPORTANT: This refrigerator is engaged in a location where the temperature ranges from...
...finished, reconnect the refrigerator to the electrical source and reset the control (Thermostat, Refrigerator or Freezer Control depending on each side (depending on your model) to allow the doors to swing open -end or two adjustable wrenches ■■ 1/4" nut driver ■■ 1/4" drill bit &#... pans is desired, an additional 18" (45.72 cm) of cabinet width is required, so a total cabinet opening width of space on the model) to a maximum of the hex key into a grounded 3 prong outlet. IMPORTANT: This refrigerator is engaged in a location where the temperature ranges from...

