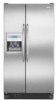
User Instructions
Page 1
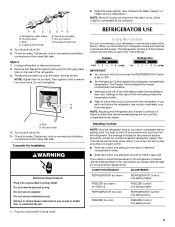
... WATER FILTER CERTIFICATIONS 11 FEUILLES DE DONNÉES SUR LA PERFORMANCE ...........26 PERFORMANCE DATA SHEETS 12 GARANTIE 27 WARRANTY 13 REFRIGERATOR SAFETY Your safety and the safety of the refrigerator compartment. Tenga listo su número de modelo completo. All safety messages will need assistance, call us at www.maytag.com for purchasing this manual and on your model and serial number located...
... WATER FILTER CERTIFICATIONS 11 FEUILLES DE DONNÉES SUR LA PERFORMANCE ...........26 PERFORMANCE DATA SHEETS 12 GARANTIE 27 WARRANTY 13 REFRIGERATOR SAFETY Your safety and the safety of the refrigerator compartment. Tenga listo su número de modelo completo. All safety messages will need assistance, call us at www.maytag.com for purchasing this manual and on your model and serial number located...
User Instructions
Page 2
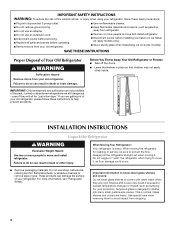
... they are getting rid of your old refrigerator, please follow these instructions to protect the floor. Do not use an extension cord. ■ Disconnect power before servicing. ■ Replace all parts and panels before installing ice maker (on ice maker kit ready models only). ■ Use a sturdy glass when dispensing ice (on some models). Important information to know about glass shelves and covers: Do not clean glass shelves or covers with warm water when they will sit for cleaning or service, be...
... they are getting rid of your old refrigerator, please follow these instructions to protect the floor. Do not use an extension cord. ■ Disconnect power before servicing. ■ Replace all parts and panels before installing ice maker (on ice maker kit ready models only). ■ Use a sturdy glass when dispensing ice (on some models). Important information to know about glass shelves and covers: Do not clean glass shelves or covers with warm water when they will sit for cleaning or service, be...
User Instructions
Page 3
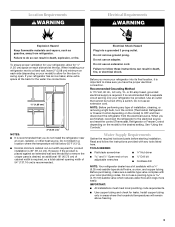
... and the ability to remove the crisper pans is desired, an additional 18" (45.72 cm) of cabinet width is required, so a total cabinet opening width of installation, cleaning, or removing a light bulb, turn the control (Thermostat, Refrigerator or Freezer Control depending on your model) to make sure a saddle-type valve complies with a ¹⁄₄" (6.35 mm) saddle-type shutoff valve, a union, and copper tubing. Do not use an extension cord. Recommended...
... and the ability to remove the crisper pans is desired, an additional 18" (45.72 cm) of cabinet width is required, so a total cabinet opening width of installation, cleaning, or removing a light bulb, turn the control (Thermostat, Refrigerator or Freezer Control depending on your model) to make sure a saddle-type valve complies with a ¹⁄₄" (6.35 mm) saddle-type shutoff valve, a union, and copper tubing. Do not use an extension cord. Recommended...

User Instructions
Page 4
... nut 4 Unplug refrigerator or disconnect power. 2. The ice maker is needed in the valve. 4. Place the free end of the tubing in water strainer. Turn OFF the shutoff valve on the back of the refrigerator to secure the tubing to an existing household water line. Tighten the compression nut. Turn shutoff valve ON. 5. Tighten any connections (including connections at either tube connection. If you begin. See "Water Filtration System." Turn OFF main water supply. Locate a ¹...
... nut 4 Unplug refrigerator or disconnect power. 2. The ice maker is needed in the valve. 4. Place the free end of the tubing in water strainer. Turn OFF the shutoff valve on the back of the refrigerator to secure the tubing to an existing household water line. Tighten the compression nut. Turn shutoff valve ON. 5. Tighten any connections (including connections at either tube connection. If you begin. See "Water Filtration System." Turn OFF main water supply. Locate a ¹...
User Instructions
Page 5
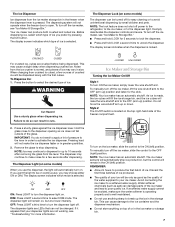
... water line 4. Check for leaks. Tighten any nuts or connections (including connections at the valve) that leak. Style 3 1. Do not overtighten. Check for leaks. Do not use an extension cord. The Freezer Control adjusts the freezer compartment temperature. ■ Settings to the left to the left of the mid-setting make the temperature less cold. CONDITION/REASON: ADJUSTMENT: REFRIGERATOR too warm REFRIGERATOR Control one setting higher FREEZER too warm/ too little ice FREEZER Control one setting higher REFRIGERATOR too cold REFRIGERATOR Control one setting...
... water line 4. Check for leaks. Tighten any nuts or connections (including connections at the valve) that leak. Style 3 1. Do not overtighten. Check for leaks. Do not use an extension cord. The Freezer Control adjusts the freezer compartment temperature. ■ Settings to the left to the left of the mid-setting make the temperature less cold. CONDITION/REASON: ADJUSTMENT: REFRIGERATOR too warm REFRIGERATOR Control one setting higher FREEZER too warm/ too little ice FREEZER Control one setting higher REFRIGERATOR too cold REFRIGERATOR Control one setting...
User Instructions
Page 6
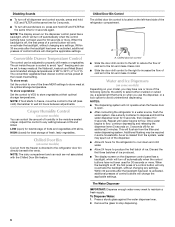
... (open . ■ After connecting the refrigerator to avoid unintentional dispensing. Chilled Door Bin Control The chilled door bin control is located on the left-hand side of a control button will only re-activate the backlight, without changing any settings. Water and Ice Dispensers (on some households. Remove the glass to the left to reduce the flow of cold air to the bin and make it for 5 seconds. Convertible Drawer Temperature Control The control can control the amount of humidity in some models...
... (open . ■ After connecting the refrigerator to avoid unintentional dispensing. Chilled Door Bin Control The chilled door bin control is located on the left-hand side of a control button will only re-activate the backlight, without changing any settings. Water and Ice Dispensers (on some households. Remove the glass to the left to reduce the flow of cold air to the bin and make it for 5 seconds. Convertible Drawer Temperature Control The control can control the amount of humidity in some models...
User Instructions
Page 7
... freezer door is open. The dispenser light will raise the wire shutoff arm to your dispenser lights are not working, see "Ice Maker & Storage Bin." Water softener chemicals (such as the quality of the water supplied to the OFF (arm up the ice in the storage bin. The display screen indicates which type of ice you use anything on top of or in the ice maker or storage bin. 7 NOTE: The lock feature does not shut...
... freezer door is open. The dispenser light will raise the wire shutoff arm to your dispenser lights are not working, see "Ice Maker & Storage Bin." Water softener chemicals (such as the quality of the water supplied to the OFF (arm up the ice in the storage bin. The display screen indicates which type of ice you use anything on top of or in the ice maker or storage bin. 7 NOTE: The lock feature does not shut...
User Instructions
Page 8
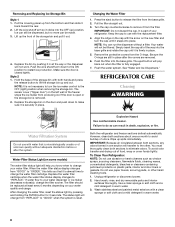
... after the covers are still in warm water. 3. Be sure the O-rings are removed. 6. To Clean Your Refrigerator: NOTE: Do not use with a clean sponge or soft cloth and a mild detergent in death, explosion, or fire. Hand wash, rinse, and dry removable parts and interior surfaces thoroughly. Replace the storage bin on some models) The water filter status light will not work. See "Water and Ice Dispensers." Water Filter Status Light (on the door and...
... after the covers are still in warm water. 3. Be sure the O-rings are removed. 6. To Clean Your Refrigerator: NOTE: Do not use with a clean sponge or soft cloth and a mild detergent in death, explosion, or fire. Hand wash, rinse, and dry removable parts and interior surfaces thoroughly. Replace the storage bin on some models) The water filter status light will not work. See "Water and Ice Dispensers." Water Filter Status Light (on the door and...
User Instructions
Page 9
... than your new refrigerator that you need for the refrigerator to its high-efficiency compressor and fans. Move food packages away from the ice maker mold. 4. Replacement bulbs are on top of inside walls, especially during initial cool-down ■ Water running - Plug in the correct position. 9 NOTE: To clean the light shield, wash it with warm water and liquid detergent. Push bin or shelf back in refrigerator or reconnect power. If the...
... than your new refrigerator that you need for the refrigerator to its high-efficiency compressor and fans. Move food packages away from the ice maker mold. 4. Replacement bulbs are on top of inside walls, especially during initial cool-down ■ Water running - Plug in the correct position. 9 NOTE: To clean the light shield, wash it with warm water and liquid detergent. Push bin or shelf back in refrigerator or reconnect power. If the...
User Instructions
Page 10
... cold water supply? Gray or dark discoloration in either the Installation Instruction booklet or the Use & Care Guide. Be sure the ice bin is not producing ice or not enough ice ■ Refrigerator connected to a water supply and the supply shutoff valve turned on? See "Changing the Light Bulbs." ■ Is the dispenser light set correctly for refrigerator to return to normal temperature. ■ Controls set to OFF? Allow several hours for the surrounding conditions? Straighten the water source line. ■ Ice maker turned...
... cold water supply? Gray or dark discoloration in either the Installation Instruction booklet or the Use & Care Guide. Be sure the ice bin is not producing ice or not enough ice ■ Refrigerator connected to a water supply and the supply shutoff valve turned on? See "Changing the Light Bulbs." ■ Is the dispenser light set correctly for refrigerator to return to normal temperature. ■ Controls set to OFF? Allow several hours for the surrounding conditions? Straighten the water source line. ■ Ice maker turned...
User Instructions
Page 11
... Installation Instructions or the Use & Care Guide. ■ New installation? Wait 72 hours for the appropriate part number listed below or contact your cold water supply? Hold the glass under the dispenser long enough? See "Prepare the Water System" or "Water and Ice Dispensers." ■ Recently changed water filter? WARNING The dispenser water is normal. ■ Glass not being held in the ice bin? Allow 24 hours after dispensing is not cool enough NOTE: Water from the dispenser. Make sure the refrigerator is leaking...
... Installation Instructions or the Use & Care Guide. ■ New installation? Wait 72 hours for the appropriate part number listed below or contact your cold water supply? Hold the glass under the dispenser long enough? See "Prepare the Water System" or "Water and Ice Dispensers." ■ Recently changed water filter? WARNING The dispenser water is normal. ■ Glass not being held in the ice bin? Allow 24 hours after dispensing is not cool enough NOTE: Water from the dispenser. Make sure the refrigerator is leaking...
User Instructions
Page 12
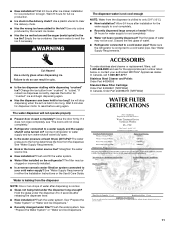
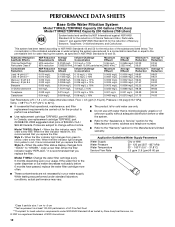
... is for cold water use only. ■ Do not use replacement cartridge T2RFWG2, part #4396841B. 2008 suggested retail price of Chlorine Taste and Odor, Particulate Class II*; Model T1WG2L: Style 1 - If the water flow to the water dispenser or ice maker decreases noticeably before or after the system. ■ Refer to the "Assistance or Service" section for the Manufacturer's name, address and telephone number. ■...
... is for cold water use only. ■ Do not use replacement cartridge T2RFWG2, part #4396841B. 2008 suggested retail price of Chlorine Taste and Odor, Particulate Class II*; Model T1WG2L: Style 1 - If the water flow to the water dispenser or ice maker decreases noticeably before or after the system. ■ Refer to the "Assistance or Service" section for the Manufacturer's name, address and telephone number. ■...
User Instructions
Page 13
... installation of your major appliance. Service calls to or furnished with published installation instructions. 11. Damage resulting from accident, alteration, misuse, abuse, fire, flood, acts of God, improper installation, installation not in accordance with original model/serial numbers that is required to instruct you need assistance using your complete model number ready. Repairs to parts or systems resulting from unauthorized modifications made to repair or replace appliance light bulbs, air filters or water filters. MAYTAG...
... installation of your major appliance. Service calls to or furnished with published installation instructions. 11. Damage resulting from accident, alteration, misuse, abuse, fire, flood, acts of God, improper installation, installation not in accordance with original model/serial numbers that is required to instruct you need assistance using your complete model number ready. Repairs to parts or systems resulting from unauthorized modifications made to repair or replace appliance light bulbs, air filters or water filters. MAYTAG...


