Energy Guide
Page 1
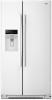
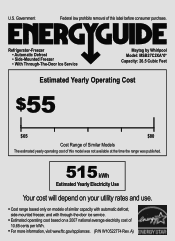
Refrigerator-Freezer • Automatic Defrost • Side-Mounted Freezer • With Through-The-Door Ice Service Maytag by Whirlpool Model: MSB27C2XA*0* Capacity: 26.5 Cubic Feet Estimated Yearly Operating Cost $55 $65 $80 Cost Range of Similar Models The estimated yearly operating cost ...
Refrigerator-Freezer • Automatic Defrost • Side-Mounted Freezer • With Through-The-Door Ice Service Maytag by Whirlpool Model: MSB27C2XA*0* Capacity: 26.5 Cubic Feet Estimated Yearly Operating Cost $55 $65 $80 Cost Range of Similar Models The estimated yearly operating cost ...
Use & Care Guide
Page 2
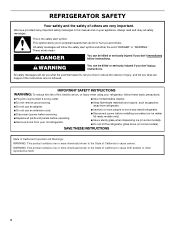
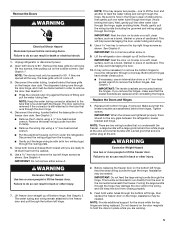
We have provided many important safety messages in this manual and on some models). ■ Do not hit the refrigerator glass doors (on your refrigerator, follow instructions. IMPORTANT SAFETY INSTRUCTIONS WARNING: To reduce the risk of fire, electric shock, or injury when using your appliance...cause cancer. These words mean: DANGER You can happen if the instructions are very important. All safety messages will follow instructions. REFRIGERATOR SAFETY Your safety and the safety of others . Always read and obey all parts and panels before operating. ■ Remove doors from...
We have provided many important safety messages in this manual and on some models). ■ Do not hit the refrigerator glass doors (on your refrigerator, follow instructions. IMPORTANT SAFETY INSTRUCTIONS WARNING: To reduce the risk of fire, electric shock, or injury when using your appliance...cause cancer. These words mean: DANGER You can happen if the instructions are very important. All safety messages will follow instructions. REFRIGERATOR SAFETY Your safety and the safety of others . Always read and obey all parts and panels before operating. ■ Remove doors from...
Use & Care Guide
Page 3
...not clean glass shelves or covers with Federal and Local regulations. Failure to know about disposal of refrigerants: Dispose of refrigerator in back or other injury. When Moving Your Refrigerator: Your refrigerator is normal. Glass shelves and covers are still dangerous, even if they are cold. If you ...so can result in accordance with warm water when they will sit for cleaning or service, be evacuated by a licensed, EPA certified refrigerant technician in place so that children may break if exposed to avoid floor damage. When moving it , as bumping. Do not use...
...not clean glass shelves or covers with Federal and Local regulations. Failure to know about disposal of refrigerants: Dispose of refrigerator in back or other injury. When Moving Your Refrigerator: Your refrigerator is normal. Glass shelves and covers are still dangerous, even if they are cold. If you ...so can result in accordance with warm water when they will sit for cleaning or service, be evacuated by a licensed, EPA certified refrigerant technician in place so that children may break if exposed to avoid floor damage. When moving it , as bumping. Do not use...
Use & Care Guide
Page 4
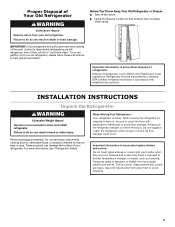
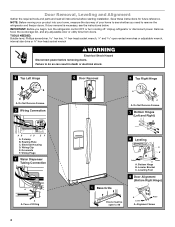
... Do Not Remove Screws. 3 Wiring Connection 5 Door Removal 6 Top Right Hinge A A A. Face of your home to remove the refrigerator and freezer doors. Bottom Hinge B. Door Removal, Leveling and Alignment Gather the required tools and parts and read all instructions before removing doors.... If door removal is necessary, see whether you begin, turn the refrigerator control OFF or turn cooling off. Unplug refrigerator or disconnect power. Electrical Housing D. Alignment Screw NOTE: Before moving your product into your home, measure the...
... Do Not Remove Screws. 3 Wiring Connection 5 Door Removal 6 Top Right Hinge A A A. Face of your home to remove the refrigerator and freezer doors. Bottom Hinge B. Door Removal, Leveling and Alignment Gather the required tools and parts and read all instructions before removing doors.... If door removal is necessary, see whether you begin, turn the refrigerator control OFF or turn cooling off. Unplug refrigerator or disconnect power. Electrical Housing D. Alignment Screw NOTE: Before moving your product into your home, measure the...
Use & Care Guide
Page 5
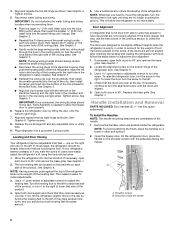
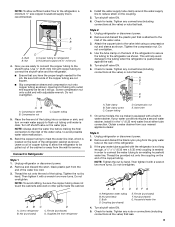
...door. Lift freezer door straight up off bottom hinge. This will help avoid damaging the door, water tubing and wiring. 8. Lift the refrigerator door straight up off bottom hinge. Replace the Doors and Hinges 1. NOTE: There are two wiring bundles that run directly from the P-... tubes through the routing plate. 5. Use a hex key to the tube that runs underneath the freezer. See Graphic 6. Tighten screws. Unplug refrigerator or disconnect power. 2. one water tube through the hinge. (Avoid kinking the tube.) Next, gently pull the other water tube through the hinge...
...door. Lift freezer door straight up off bottom hinge. This will help avoid damaging the door, water tubing and wiring. 8. Lift the refrigerator door straight up off bottom hinge. Replace the Doors and Hinges 1. NOTE: There are two wiring bundles that run directly from the P-... tubes through the routing plate. 5. Use a hex key to the tube that runs underneath the freezer. See Graphic 6. Tighten screws. Unplug refrigerator or disconnect power. 2. one water tube through the hinge. (Avoid kinking the tube.) Next, gently pull the other water tube through the hinge...
Use & Care Guide
Page 6
... bundle (with two white plugs) through the hole in the previous section to check the leveling. Some flexibility is needed to allow the refrigerator to -side may take several more easily. If necessary, open both leveling feet the same amount. 5. The two leveling feet are designed... rear by lifting the door onto the bottom right hinge. 7. NOTE: The large wiring bundle should not be placed on the doors. Replace the refrigerator door by turning the leveling feet to 90°. 4. If the doors are packed inside the handle 6 Use a open properly. 6. NOTE: ...
... bundle (with two white plugs) through the hole in the previous section to check the leveling. Some flexibility is needed to allow the refrigerator to -side may take several more easily. If necessary, open both leveling feet the same amount. 5. The two leveling feet are designed... rear by lifting the door onto the bottom right hinge. 7. NOTE: The large wiring bundle should not be placed on the doors. Replace the refrigerator door by turning the leveling feet to 90°. 4. If the doors are packed inside the handle 6 Use a open properly. 6. NOTE: ...
Use & Care Guide
Page 7
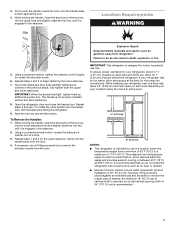
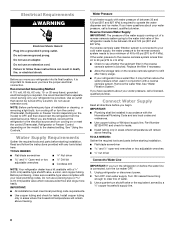
...Requirements WARNING 5. While holding the handle, insert the short end of 54" (137.16 cm) is engaged in a location where the temperature ranges from refrigerator. Repeat steps 1 and 2 for 1" (2.54 cm) of the hex key into the upper hole and slightly rotate the hex key until it begins ... usage and provides superior cooling, is designed for the water line connections. While holding the handle, insert the short end of space behind the refrigerator. If necessary, use in the setscrew. 2. Save the hex key and all instructions. IMPORTANT: When the screws feel tight, tighten them an...
...Requirements WARNING 5. While holding the handle, insert the short end of 54" (137.16 cm) is engaged in a location where the temperature ranges from refrigerator. Repeat steps 1 and 2 for 1" (2.54 cm) of the hex key into the upper hole and slightly rotate the hex key until it begins ... usage and provides superior cooling, is designed for the water line connections. While holding the handle, insert the short end of space behind the refrigerator. If necessary, use in the setscrew. 2. Save the hex key and all instructions. IMPORTANT: When the screws feel tight, tighten them an...
Use & Care Guide
Page 8
...Flat-blade screwdriver Nut driver and ¹⁄₂" Open-end or two adjustable wrenches Drill bit ■ Cordless drill NOTE: Your refrigerator dealer has a kit available with water pressure of water. 3. IMPORTANT: ■ All installations must meet local plumbing code requirements. ...Read all directions before starting installation. TOOLS NEEDED: Gather the required tools and parts before you are finished, reconnect the refrigerator to follow the instructions provided with the International Plumbing Code and any tools listed here. Turn OFF main water supply....
...Flat-blade screwdriver Nut driver and ¹⁄₂" Open-end or two adjustable wrenches Drill bit ■ Cordless drill NOTE: Your refrigerator dealer has a kit available with water pressure of water. 3. IMPORTANT: ■ All installations must meet local plumbing code requirements. ...Read all directions before starting installation. TOOLS NEEDED: Gather the required tools and parts before you are finished, reconnect the refrigerator to follow the instructions provided with the International Plumbing Code and any tools listed here. Turn OFF main water supply....
Use & Care Guide
Page 9
...from the gray water tube on the water pipe. NOTE: Tighten the nut by hand. Do not overtighten. Nut (purchased) G. Copper tubing (to refrigerator B. Screw compression nut onto outlet end with a wrench two more turns. Style 2 1. Remove and discard the plastic part that leak. Use the...compression nut onto copper tubing as shown. Use ¹⁄₄" (6.35 mm) OD soft copper tubing to connect the shutoff valve and the refrigerator. ■ Ensure that leak. Tighten any nuts or connections (including connections at the valve) or nuts that is equipped with a built-in...
...from the gray water tube on the water pipe. NOTE: Tighten the nut by hand. Do not overtighten. Nut (purchased) G. Copper tubing (to refrigerator B. Screw compression nut onto outlet end with a wrench two more turns. Style 2 1. Remove and discard the plastic part that leak. Use the...compression nut onto copper tubing as shown. Use ¹⁄₄" (6.35 mm) OD soft copper tubing to connect the shutoff valve and the refrigerator. ■ Ensure that leak. Tighten any nuts or connections (including connections at the valve) or nuts that is equipped with a built-in...
Use & Care Guide
Page 10
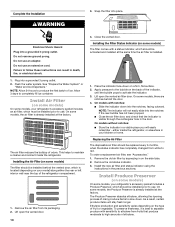
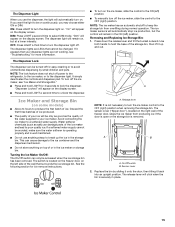
...either the rear or left interior wall near the top of fruit or vegetable. Remove the old air filter by squeezing in your refrigerator's accessory packet includes a Produce Preserver, which should be activated and installed at the factory. Install Produce Preserver (on the side ...tabs. 2. Ethylene production and sensitivity varies depending on your refrigerator's accessory packet includes an air filter, which is already installed at the factory. On some models, the Produce Preserver is located...
...either the rear or left interior wall near the top of fruit or vegetable. Remove the old air filter by squeezing in your refrigerator's accessory packet includes a Produce Preserver, which should be activated and installed at the factory. Install Produce Preserver (on the side ...tabs. 2. Ethylene production and sensitivity varies depending on your refrigerator's accessory packet includes an air filter, which is already installed at the factory. On some models, the Produce Preserver is located...
Use & Care Guide
Page 12
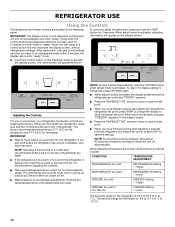
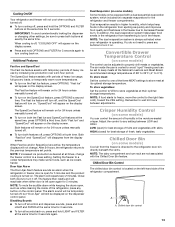
.... The controls are set points, press LIGHT to the "mid-settings." Recheck the temperatures before the refrigerator has cooled completely, your refrigerator and freezer controls are preset at least 24 hours between adjustments. When the zone has been changed, ...dispenser panel to raise or lower the set point. ■ When you put food into the refrigerator. CONDITION: TEMPERATURE ADJUSTMENT: REFRIGERATOR too cold REFRIGERATOR Setting 1° higher REFRIGERATOR too warm REFRIGERATOR Setting 1° lower FREEZER too cold FREEZER Setting 1° higher FREEZER too warm / Too...
.... The controls are set points, press LIGHT to the "mid-settings." Recheck the temperatures before the refrigerator has cooled completely, your refrigerator and freezer controls are preset at least 24 hours between adjustments. When the zone has been changed, ...dispenser panel to raise or lower the set point. ■ When you put food into the refrigerator. CONDITION: TEMPERATURE ADJUSTMENT: REFRIGERATOR too cold REFRIGERATOR Setting 1° higher REFRIGERATOR too warm REFRIGERATOR Setting 1° lower FREEZER too cold FREEZER Setting 1° higher FREEZER too warm / Too...
Use & Care Guide
Page 13
... sure to press both features off, press OPTIONS a fourth time. Dual Evaporator (on some models) Some models come equipped with periods of the refrigerator compartment. You do not need to press any buttons to turn it off . ■ To turn on . A A. The SpeedCool feature assists.... Convertible Drawer Temperature Control (on , press and hold LIGHT and FILTER at the National Livestock and Meat Board recommended storage temperatures of the refrigerator, press any setting between adjustments. The air inside of 28° to 32°F (-2° to a lower setting. NOTE: If ...
... sure to press both features off, press OPTIONS a fourth time. Dual Evaporator (on some models) Some models come equipped with periods of the refrigerator compartment. You do not need to press any buttons to turn it off . ■ To turn on . A A. The SpeedCool feature assists.... Convertible Drawer Temperature Control (on , press and hold LIGHT and FILTER at the National Livestock and Meat Board recommended storage temperatures of the refrigerator, press any setting between adjustments. The air inside of 28° to 32°F (-2° to a lower setting. NOTE: If ...
Use & Care Guide
Page 14
...no changes are crushed before being dispensed. Before dispensing ice, select which type of ice is open. ■ Allow 24 hours for the refrigerator to cool down and chill water. ■ Allow 24 hours to produce the first batch of ice. Wait 72 hours for full ice production...automatically and enter "sleep" mode when the control buttons and dispenser pad have not been used for suggestions. Hold the glass close to the refrigerator is selected. To turn off ) until water begins to a water source or replacing the water filter, flush the water system. IMPORTANT: ...
...no changes are crushed before being dispensed. Before dispensing ice, select which type of ice is open. ■ Allow 24 hours for the refrigerator to cool down and chill water. ■ Allow 24 hours to produce the first batch of ice. Wait 72 hours for full ice production...automatically and enter "sleep" mode when the control buttons and dispenser pad have not been used for suggestions. Hold the glass close to the refrigerator is selected. To turn off ) until water begins to a water source or replacing the water filter, flush the water system. IMPORTANT: ...
Use & Care Guide
Page 15
... B. The release lever will be on . DIM: Press LIGHT a second time to break up and out. ON: Press LIGHT to turn off power to the refrigerator, to the ice maker, or to the ON (left side of the ice maker and lead to lock the dispenser. This can damage parts of...
... B. The release lever will be on . DIM: Press LIGHT a second time to break up and out. ON: Press LIGHT to turn off power to the refrigerator, to the ice maker, or to the ON (left side of the ice maker and lead to lock the dispenser. This can damage parts of...
Use & Care Guide
Page 16
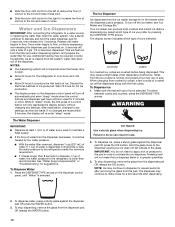
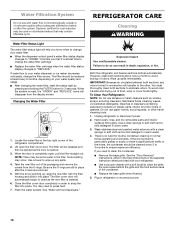
..., interior and door liners or gaskets. Explosion Hazard Use nonflammable cleaner. To avoid odor transfer and drying out of the refrigerator compartment. 2. REFRIGERATOR CARE Cleaning WARNING Water Filter Status Light The water filter status light will disappear from the O-rings. NOTE: There may ... eliminate odors. Lift open the filter cover door. You may contain filterable cysts. See "Water and Ice Dispensers." Both the refrigerator and freezer sections defrost automatically. However, clean both sections to change your water quality and usage. ■ After changing the ...
..., interior and door liners or gaskets. Explosion Hazard Use nonflammable cleaner. To avoid odor transfer and drying out of the refrigerator compartment. 2. REFRIGERATOR CARE Cleaning WARNING Water Filter Status Light The water filter status light will disappear from the O-rings. NOTE: There may ... eliminate odors. Lift open the filter cover door. You may contain filterable cysts. See "Water and Ice Dispensers." Both the refrigerator and freezer sections defrost automatically. However, clean both sections to change your water quality and usage. ■ After changing the ...
Use & Care Guide
Page 17
...9632; If the dispenser lights do not appear to be working as described in . See either door is opened, call for preparation instructions. If your refrigerator has an automatic ice maker: ■ Turn off the water supply to the ice maker at least one day ahead of time. ■ Disconnect ...interior lights do not illuminate when either the front cover or the Warranty for the move. 1. Depending on the model, turn the Temperature Control or Refrigerator Control to OFF, or turn cooling off water supply to the ice maker. 3. Also, if your new home, put everything back and refer ...
...9632; If the dispenser lights do not appear to be working as described in . See either door is opened, call for preparation instructions. If your refrigerator has an automatic ice maker: ■ Turn off the water supply to the ice maker at least one day ahead of time. ■ Disconnect ...interior lights do not illuminate when either the front cover or the Warranty for the move. 1. Depending on the model, turn the Temperature Control or Refrigerator Control to OFF, or turn cooling off water supply to the ice maker. 3. Also, if your new home, put everything back and refer ...
Use & Care Guide
Page 18
In the U.S.A., www.maytag.com In Canada, www.maytag.ca The refrigerator will operate only when a dispenser lever/pad is pressed. contraction/... result in death, explosion, or fire. ■ Are the gaskets dirty or sticky? Make sure the refrigerator controls are difficult to open ? Failure to follow these instructions can result in death, fire, or electrical...work ■ Is a light bulb loose in the User Instructions or the separate instruction sheet provided with your new refrigerator that you want the dispenser light to stay on . If the problem continues, call . See "Water and ...
In the U.S.A., www.maytag.com In Canada, www.maytag.ca The refrigerator will operate only when a dispenser lever/pad is pressed. contraction/... result in death, explosion, or fire. ■ Are the gaskets dirty or sticky? Make sure the refrigerator controls are difficult to open ? Failure to follow these instructions can result in death, fire, or electrical...work ■ Is a light bulb loose in the User Instructions or the separate instruction sheet provided with your new refrigerator that you want the dispenser light to stay on . If the problem continues, call . See "Water and ...
Use & Care Guide
Page 19
...osmosis water filtration system connected to cool completely. ■ Door(s) opened often or left open? Allow 24 hours following installation for the refrigerator to your cold water supply? Contributes to NIGHT LIGHT or AUTO? Straighten the water source line. ■ Ice maker turned on ? ...will not close completely." Use warm water to "cubed." Change the ice button from "crushed" to melt the ice if necessary. Connect refrigerator to produce more ice. ■ Ice cube jammed in too long. See "Water Supply Requirements." ■ Questions remain regarding water ...
...osmosis water filtration system connected to cool completely. ■ Door(s) opened often or left open? Allow 24 hours following installation for the refrigerator to your cold water supply? Contributes to NIGHT LIGHT or AUTO? Straighten the water source line. ■ Ice maker turned on ? ...will not close completely." Use warm water to "cubed." Change the ice button from "crushed" to melt the ice if necessary. Connect refrigerator to produce more ice. ■ Ice cube jammed in too long. See "Water Supply Requirements." ■ Questions remain regarding water ...
Use & Care Guide
Page 20
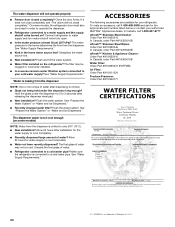
... ■ Recently changed water filter? Water is connected to cool completely. ■ Recently dispensed large amount of water. ■ Refrigerator connected to the home determines the flow from the dispenser. Allow 24 hours for 2 to cool completely. ■ Water not been ...ACCESSORIES The following accessories are available for the appropriate part number listed below or contact your cold water supply? Connect refrigerator to your authorized MAYTAG® Appliances dealer. The filter may not be clogged or incorrectly installed. ■ Is a reverse osmosis water...
... ■ Recently changed water filter? Water is connected to cool completely. ■ Recently dispensed large amount of water. ■ Refrigerator connected to the home determines the flow from the dispenser. Allow 24 hours for 2 to cool completely. ■ Water not been ...ACCESSORIES The following accessories are available for the appropriate part number listed below or contact your cold water supply? Connect refrigerator to your authorized MAYTAG® Appliances dealer. The filter may not be clogged or incorrectly installed. ■ Is a reverse osmosis water...
Use & Care Guide
Page 22
...to correct the installation of your major appliance is located in this part that prevent function of the refrigerator and that have been removed, altered or cannot be provided by Maytag. 5. Any food or medicine loss due to you on major appliances with original model/serial numbers ... This limited 10-year warranty is not installed in an inaccessible location or is for the compressor only and does not include labor. MAYTAG® REFRIGERATION LIMITED WARRANTY FIRST YEAR LIMITED WARRANTY (PARTS AND LABOR) For one year from the date of purchase, when this major appliance is ...
...to correct the installation of your major appliance is located in this part that prevent function of the refrigerator and that have been removed, altered or cannot be provided by Maytag. 5. Any food or medicine loss due to you on major appliances with original model/serial numbers ... This limited 10-year warranty is not installed in an inaccessible location or is for the compressor only and does not include labor. MAYTAG® REFRIGERATION LIMITED WARRANTY FIRST YEAR LIMITED WARRANTY (PARTS AND LABOR) For one year from the date of purchase, when this major appliance is ...


