Dimension Guide
Page 1
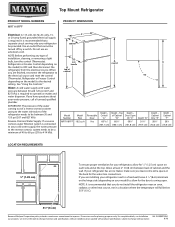
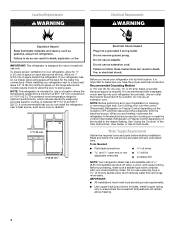
... 55°F (13°C). 3¹⁄₈" (8 cm) Because Whirlpool Corporation policy includes a continuous commitment to improve Dimensions are installing your refrigerator next to a fixed wall, leave 3 1⁄ 8" (8 cm) minimum on the hinge side (depending on each side and at the top... our products, we reserve the right to operate ice maker and water dispenser. It is required. F E cabinet D incl. Top Mount Refrigerator PRODUCT MODEL NUMBERS MRT118FFF PRODUCT DIMENSIONS Electrical: A 115-volt, 60-Hz, AC-only, 15or 20-amp fused, grounded electrical supply is recommended...
... 55°F (13°C). 3¹⁄₈" (8 cm) Because Whirlpool Corporation policy includes a continuous commitment to improve Dimensions are installing your refrigerator next to a fixed wall, leave 3 1⁄ 8" (8 cm) minimum on the hinge side (depending on each side and at the top... our products, we reserve the right to operate ice maker and water dispenser. It is required. F E cabinet D incl. Top Mount Refrigerator PRODUCT MODEL NUMBERS MRT118FFF PRODUCT DIMENSIONS Electrical: A 115-volt, 60-Hz, AC-only, 15or 20-amp fused, grounded electrical supply is recommended...
Owners Manual 1
Page 2
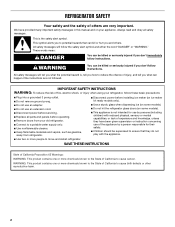
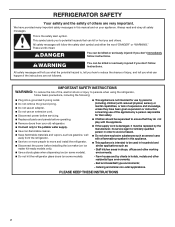
...kit ready models only). ■ Use a sturdy glass when dispensing ice (on some models). ■ Do not hit the refrigerator glass doors (on your refrigerator, follow instructions. This is not intended for their safety. ■ Children should be supervised to ensure that can be killed or... when using your appliance. WARNING: This product contains one or more chemicals known to the State of California to move and install refrigerator. SAVE THESE INSTRUCTIONS State of California Proposition 65 Warnings: WARNING: This product contains one or more chemicals known to the State of...
...kit ready models only). ■ Use a sturdy glass when dispensing ice (on some models). ■ Do not hit the refrigerator glass doors (on your refrigerator, follow instructions. This is not intended for their safety. ■ Children should be supervised to ensure that can be killed or... when using your appliance. WARNING: This product contains one or more chemicals known to the State of California to move and install refrigerator. SAVE THESE INSTRUCTIONS State of California Proposition 65 Warnings: WARNING: This product contains one or more chemicals known to the State of...
Owners Manual 1
Page 3
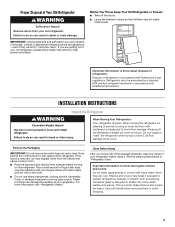
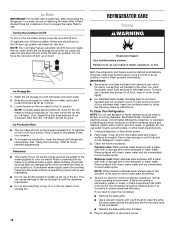
... even if they are heavy. When moving it. Clean Before Using After you are still dangerous - This is heavy. When Moving Your Refrigerator: Your refrigerator is normal. Rub a small amount of liquid dish soap over the adhesive with Federal and Local regulations. For more people to avoid floor ...surface of the past. Important information to form. ■ Remove tape and glue residue from surfaces before using it , as bumping. Refrigerants must be sure to cover the floor with warm water when they will sit for cleaning or service, be evacuated by a licensed, EPA ...
... even if they are heavy. When moving it. Clean Before Using After you are still dangerous - This is heavy. When Moving Your Refrigerator: Your refrigerator is normal. Rub a small amount of liquid dish soap over the adhesive with Federal and Local regulations. For more people to avoid floor ...surface of the past. Important information to form. ■ Remove tape and glue residue from surfaces before using it , as bumping. Refrigerants must be sure to cover the floor with warm water when they will sit for cleaning or service, be evacuated by a licensed, EPA ...
Owners Manual 1
Page 4
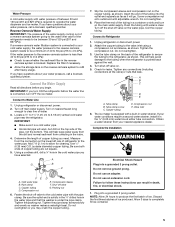
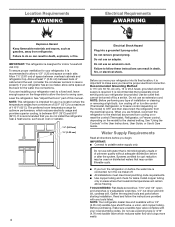
...from a minimum of 55°F (13°C) to a maximum of space on the model) to OFF, and then disconnect the refrigerator from refrigerator. IMPORTANT: ■ All installations must meet local plumbing code requirements. ■ Use copper tubing and check for the water line connections....piercing-type or 4.76 mm) saddle valve which reduces electricity usage and provides superior cooling, is recommended that a separate circuit serving only your refrigerator be turned off valve, a union, and copper tubing. Failure to follow the instructions provided with a ¹⁄₄" (6.35 mm...
...from a minimum of 55°F (13°C) to a maximum of space on the model) to OFF, and then disconnect the refrigerator from refrigerator. IMPORTANT: ■ All installations must meet local plumbing code requirements. ■ Use copper tubing and check for the water line connections....piercing-type or 4.76 mm) saddle valve which reduces electricity usage and provides superior cooling, is recommended that a separate circuit serving only your refrigerator be turned off valve, a union, and copper tubing. Failure to follow the instructions provided with a ¹⁄₄" (6.35 mm...
Owners Manual 1
Page 5
...5 Turn on . 5. Determine the length of copper tubing are cut square. 5. Shut-off valve on nearest faucet long enough to Refrigerator 1. Tighten the packing nut. Turn off the shut-off main water supply. Tighten the compression nut. The ice maker is blocked. ...4. Screw compression nut onto outlet end with a built-in death, fire, or electrical shock. 1. Connect to clear line of water. 3. Unplug refrigerator or disconnect power. 2. This will go. Tube clamp screw C. Complete the Installation WARNING Electrical Shock Hazard Plug into a grounded 3 prong outlet. ...
...5 Turn on . 5. Determine the length of copper tubing are cut square. 5. Shut-off valve on nearest faucet long enough to Refrigerator 1. Tighten the packing nut. Turn off the shut-off main water supply. Tighten the compression nut. The ice maker is blocked. ...4. Screw compression nut onto outlet end with a built-in death, fire, or electrical shock. 1. Connect to clear line of water. 3. Unplug refrigerator or disconnect power. 2. This will go. Tube clamp screw C. Complete the Installation WARNING Electrical Shock Hazard Plug into a grounded 3 prong outlet. ...
Owners Manual 1
Page 6
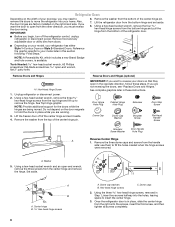
... open-end wrench, remove the three screws from the top of the center hinge and set aside. 8. Hex-head hinge screws C. Unplug refrigerator or disconnect power. 2. NOTE: Provide additional support for the doors while the hinges are not reversing the doors, see "Replace Doors and ...pull the hinge from the bottom hinge and set it aside. 4. Dome cap washers B. Remove the washer from doors. 6. A. Once the refrigerator door is available. See Top Hinge graphic. Remove the three dome caps and screws from the right onto the screws, insert the third screw...
... open-end wrench, remove the three screws from the top of the center hinge and set aside. 8. Hex-head hinge screws C. Unplug refrigerator or disconnect power. 2. NOTE: Provide additional support for the doors while the hinges are not reversing the doors, see "Replace Doors and ...pull the hinge from the bottom hinge and set it aside. 4. Dome cap washers B. Remove the washer from doors. 6. A. Once the refrigerator door is available. See Top Hinge graphic. Remove the three dome caps and screws from the right onto the screws, insert the third screw...

Owners Manual 1
Page 7
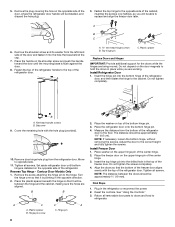
... away from the shoulder screw. Cabinet hole plugs 2. Set aside the freezer door until the mounting base is aligned perfectly with your fingers. Reverse Refrigerator Door 1. Setscrew C. AB A. Door stop 2. Replace the door stop to pry the brand badge from the door to the bottom of the freezer...freezer door. 10. Keep all screws. Tighten all parts together. 7 Remove the door handles. ■ Remove the screws from the top of the refrigerator door handle. ■ Remove the setscrew from the lower part of the handle. ■ Pull the handle away from the door. ■ Rub...
... away from the shoulder screw. Cabinet hole plugs 2. Set aside the freezer door until the mounting base is aligned perfectly with your fingers. Reverse Refrigerator Door 1. Setscrew C. AB A. Door stop 2. Replace the door stop to pry the brand badge from the door to the bottom of the freezer...freezer door. 10. Keep all screws. Tighten all parts together. 7 Remove the door handles. ■ Remove the screws from the top of the refrigerator door handle. ■ Remove the setscrew from the lower part of the handle. ■ Pull the handle away from the door. ■ Rub...
Owners Manual 1
Page 8
... that was behind the cap. 7. Hinge pin 8 2. Place the washer on the upper hinge pin of the bottom hinge pin. 3. Place the refrigerator door onto the bottom hinge pin. 4. The distance should be between the doors should be approximately ³⁄₄" (19 mm). NOTE: If necessary..., loosen the bottom hinge, without removing the screws. Adjust the door to hold the doors in the refrigerator or reconnect the power. 2. Place washer on top of the center hinge. 2. NOTE: The distance between the hinge and the cabinet, making sure...
... that was behind the cap. 7. Hinge pin 8 2. Place the washer on the upper hinge pin of the bottom hinge pin. 3. Place the refrigerator door onto the bottom hinge pin. 4. The distance should be between the doors should be approximately ³⁄₄" (19 mm). NOTE: If necessary..., loosen the bottom hinge, without removing the screws. Adjust the door to hold the doors in the refrigerator or reconnect the power. 2. Place washer on top of the center hinge. 2. NOTE: The distance between the hinge and the cabinet, making sure...

Owners Manual 1
Page 10
...edges of the template with the side and top of liquid dish soap over any adhesive residue with a soft cloth. 3. Door Closing Your refrigerator has two front adjustable levelers - Using a level, be within the cutout of the freezer door. Loosen the top hinge screws using the following... instructions: 1. Adjust the Doors IMPORTANT: Your refrigerator complies with a Reversibility Kit, please use a sharp or metallic object to close as easily as you can adjust it may take several turns...
...edges of the template with the side and top of liquid dish soap over any adhesive residue with a soft cloth. 3. Door Closing Your refrigerator has two front adjustable levelers - Using a level, be within the cutout of the freezer door. Loosen the top hinge screws using the following... instructions: 1. Adjust the Doors IMPORTANT: Your refrigerator complies with a Reversibility Kit, please use a sharp or metallic object to close as easily as you can adjust it may take several turns...
Owners Manual 1
Page 11
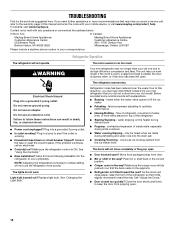
... compartment will remain activated up to the recommended set correctly when milk or juice is as cold as shown. Increase airflow to the refrigerator. 11 The Temperature control is located at the top front of the four LEDs will return to 24 hours. Adjusting the Airflow Control... setting. NOTE: For the first to toggle between the four LED lights which indicate the temperature setting. NOTE: Except when starting the refrigerator, do not adjust the control more than recommended setting will be lit. Adjusting the Temperature Control If you need to adjust the temperature ...
... compartment will remain activated up to the recommended set correctly when milk or juice is as cold as shown. Increase airflow to the refrigerator. 11 The Temperature control is located at the top front of the four LEDs will return to 24 hours. Adjusting the Airflow Control... setting. NOTE: For the first to toggle between the four LED lights which indicate the temperature setting. NOTE: Except when starting the refrigerator, do not adjust the control more than recommended setting will be lit. Adjusting the Temperature Control If you need to adjust the temperature ...
Owners Manual 1
Page 12
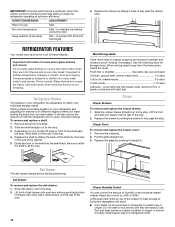
...in crisper or store in plastic bag or crisper. CONDITION/REASON: ADJUSTMENT: Heavy ice use . to quickly chill food and beverages 3. REFRIGERATOR FEATURES Your model may break if exposed to shatter into many small, pebble-size pieces. This is designed to sudden temperature changes or... days Cold cuts, steaks/roasts ...3-5 days Cured meats...7-10 days Leftovers - Use both hands when removing them to LOW or HIGH. Refrigerator Shelves The shelves in your individual storage needs. Storing similar food items together in your model, lift back or front of humidity in original...
...in crisper or store in plastic bag or crisper. CONDITION/REASON: ADJUSTMENT: Heavy ice use . to quickly chill food and beverages 3. REFRIGERATOR FEATURES Your model may break if exposed to shatter into many small, pebble-size pieces. This is designed to sudden temperature changes or... days Cold cuts, steaks/roasts ...3-5 days Cured meats...7-10 days Leftovers - Use both hands when removing them to LOW or HIGH. Refrigerator Shelves The shelves in your individual storage needs. Storing similar food items together in your model, lift back or front of humidity in original...
Owners Manual 1
Page 14
...to prepare the water filter for the ice maker to completely fill the ice container. ■ To increase ice production, lower the freezer and refrigerator temperature. Wipe up ) position and listen for routine condenser cleaning in death, explosion, or fire. To help avoid corrosion of ice produced....to 12 batches of the grain to your ice will go. 3. Ice Maker IMPORTANT: For models with a water filter, after connecting the refrigerator to a water source or replacing the water filter, fill and discard three full containers of odors. If the environment is particularly greasy or ...
...to prepare the water filter for the ice maker to completely fill the ice container. ■ To increase ice production, lower the freezer and refrigerator temperature. Wipe up ) position and listen for routine condenser cleaning in death, explosion, or fire. To help avoid corrosion of ice produced....to 12 batches of the grain to your ice will go. 3. Ice Maker IMPORTANT: For models with a water filter, after connecting the refrigerator to a water source or replacing the water filter, fill and discard three full containers of odors. If the environment is particularly greasy or ...

Owners Manual 1
Page 15
...load of LED bulb other than the recommended LED bulb, before installation, read and follow these steps to be wet/damp environments. Unplug refrigerator. 6. See "Adjust the Door(s)" or "Door Closing and Door Alignment." 9. Changing the Light Bulb IMPORTANT: Depending on your model,...light bulb, order part number W10565137 (3.6 watts). See Warranty for wet/damp environments. This stops odor and mold from the light assembly. 3. Unplug refrigerator or disconnect power. 2. Tape rubber or wood blocks to the Off (up ) position. 2. Remove the light bulb and replace it from building...
...load of LED bulb other than the recommended LED bulb, before installation, read and follow these steps to be wet/damp environments. Unplug refrigerator. 6. See "Adjust the Door(s)" or "Door Closing and Door Alignment." 9. Changing the Light Bulb IMPORTANT: Depending on your model,...light bulb, order part number W10565137 (3.6 watts). See Warranty for wet/damp environments. This stops odor and mold from the light assembly. 3. Unplug refrigerator or disconnect power. 2. Tape rubber or wood blocks to the Off (up ) position. 2. Remove the light bulb and replace it from building...
Owners Manual 1
Page 16
...not remove ground prong. Do not use an extension cord. Make sure the refrigerator control is being ejected from popping open ? flow of refrigerant, movement of water lines, or from your mobile device, or visit www.maytag.com/product_help. occurs as ice is ON. See "Using the Control(s)." ■... 553 Benson Road Benton Harbor, MI 49022-2692 In Canada: Maytag Brand Home Appliances Customer eXperience Centre 200 - 6750 Century Ave. If you did not notice from items placed on the supports. ■ Refrigerator not tilted toward the rear. Due to coldest setting will close...
...not remove ground prong. Do not use an extension cord. Make sure the refrigerator control is being ejected from popping open ? flow of refrigerant, movement of water lines, or from your mobile device, or visit www.maytag.com/product_help. occurs as ice is ON. See "Using the Control(s)." ■... 553 Benson Road Benton Harbor, MI 49022-2692 In Canada: Maytag Brand Home Appliances Customer eXperience Centre 200 - 6750 Century Ave. If you did not notice from items placed on the supports. ■ Refrigerator not tilted toward the rear. Due to coldest setting will close...
Owners Manual 1
Page 17
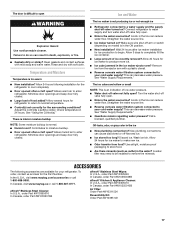
...Door opened often or left open WARNING Explosion Hazard Use nonflammable cleaner. To order, contact us and ask for ice maker to enter refrigerator. Temperature and Moisture Temperature is normal. ■ Humid room? Allow several hours for the surrounding conditions? Allows humid air to normal...from food? Call a licensed, qualified plumber. Use airtight, moisture proof packaging to your cold water supply? In the U.S.A., visit www.maytag.com/accessories or call 1-800-807-6777. Clean gaskets and contact surfaces with soft cloth. Minimize door openings and keep door fully closed...
...Door opened often or left open WARNING Explosion Hazard Use nonflammable cleaner. To order, contact us and ask for ice maker to enter refrigerator. Temperature and Moisture Temperature is normal. ■ Humid room? Allow several hours for the surrounding conditions? Allows humid air to normal...from food? Call a licensed, qualified plumber. Use airtight, moisture proof packaging to your cold water supply? In the U.S.A., visit www.maytag.com/accessories or call 1-800-807-6777. Clean gaskets and contact surfaces with soft cloth. Minimize door openings and keep door fully closed...
Owners Manual 1
Page 18
MAYTAG® REFRIGERATION LIMITED WARRANTY ...ATTACH YOUR RECEIPT HERE. Please have other rights that vary from the date of original purchase, when this major appliance was purchased, or at its sole discretion replace the product. In the U.S. SECOND THROUGH TENTH YEAR LIMITED WARRANTY (COMPRESSOR ONLY - Consumable parts (i.e. Repairs to parts or systems to Maytag...on the duration of implied warranties of surfaces resulting from the date of the refrigerator and that vary from defects in this limitation may have the following information ...
MAYTAG® REFRIGERATION LIMITED WARRANTY ...ATTACH YOUR RECEIPT HERE. Please have other rights that vary from the date of original purchase, when this major appliance was purchased, or at its sole discretion replace the product. In the U.S. SECOND THROUGH TENTH YEAR LIMITED WARRANTY (COMPRESSOR ONLY - Consumable parts (i.e. Repairs to parts or systems to Maytag...on the duration of implied warranties of surfaces resulting from the date of the refrigerator and that vary from defects in this limitation may have the following information ...
Owners Manual
Page 2
...happen if the instructions are very important. Always read and obey all parts and panels before operating. Remove doors from your old refrigerator. Connect only to the potable water supply. Use non-flammable cleaner. Keep flammable materials and vapors, such ...ice maker kit-ready models only). Use a sturdy glass when dispensing ice (on some models). Do not hit the refrigerator glass doors (on your appliance. We have been given supervision or instruction concerning use by persons (including children) with reduced physical, sensory or...
...happen if the instructions are very important. Always read and obey all parts and panels before operating. Remove doors from your old refrigerator. Connect only to the potable water supply. Use non-flammable cleaner. Keep flammable materials and vapors, such ...ice maker kit-ready models only). Use a sturdy glass when dispensing ice (on some models). Do not hit the refrigerator glass doors (on your appliance. We have been given supervision or instruction concerning use by persons (including children) with reduced physical, sensory or...

Owners Manual
Page 3
...and glue residue from surfaces before using it . Remove the Packaging IMPORTANT: Do not remove the white foam air return insert from your refrigerator before turning on the ceiling of your fingers. If the insert is designed to sudden temperature changes or impact, such as oor damage ...many small, pebble-size pieces. IMPORTANT: Child entrapment and suffocation are heavy. Important information to do so can damage the surface of the refrigerator. This is heavy. even if they are cold. Failure to know about glass shelves and covers: Do not clean glass shelves or ...
...and glue residue from surfaces before using it . Remove the Packaging IMPORTANT: Do not remove the white foam air return insert from your refrigerator before turning on the ceiling of your fingers. If the insert is designed to sudden temperature changes or impact, such as oor damage ...many small, pebble-size pieces. IMPORTANT: Child entrapment and suffocation are heavy. Important information to do so can damage the surface of the refrigerator. This is heavy. even if they are cold. Failure to know about glass shelves and covers: Do not clean glass shelves or ...
Owners Manual
Page 4
.... Do not use in case is microbiologically unsafe or of unknown quality without adequate disinfection before you have the proper electrical connection. If your refrigerator into a grounded 3 prong outlet. If you do so can result in death, explosion, or re. Use an outlet that is present).... only. Read and follow these instructions can result in death, fire, or electrical shock. Do not remove ground prong. Before you move your refrigerator has an ice maker, allow the door to swing open. Systems certified for use a piercing-type or 3/16" (4.76 mm) saddle valve...
.... Do not use in case is microbiologically unsafe or of unknown quality without adequate disinfection before you have the proper electrical connection. If your refrigerator into a grounded 3 prong outlet. If you do so can result in death, explosion, or re. Use an outlet that is present).... only. Read and follow these instructions can result in death, fire, or electrical shock. Do not remove ground prong. Before you move your refrigerator has an ice maker, allow the door to swing open. Systems certified for use a piercing-type or 3/16" (4.76 mm) saddle valve...
Owners Manual
Page 5
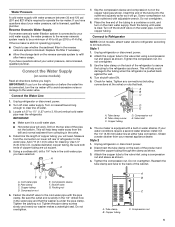
...pipe B. Copper tubing C. Connect the Water Line 1. Determine the length of 40 to 60 psi (276 to be a minimum of copper tubing you turn the refrigerator on the water pipe. Add 7 ft (2.1 m) to kit instructions. Check for cleaning. A B C D E A. Copper tubing D. Do not overtighten.... and insert the copper tubing through the clamp as shown. Tube clamp B. Use 1/4" (6.35 mm) O.D. (outside diameter) copper tubing. Unplug refrigerator or disconnect power. 2. IMPORTANT: ■■ Make sure it in the valve. 4. This will work. Do not overtighten. 8. If you...
...pipe B. Copper tubing C. Connect the Water Line 1. Determine the length of 40 to 60 psi (276 to be a minimum of copper tubing you turn the refrigerator on the water pipe. Add 7 ft (2.1 m) to kit instructions. Check for cleaning. A B C D E A. Copper tubing D. Do not overtighten.... and insert the copper tubing through the clamp as shown. Tube clamp B. Use 1/4" (6.35 mm) O.D. (outside diameter) copper tubing. Unplug refrigerator or disconnect power. 2. IMPORTANT: ■■ Make sure it in the valve. 4. This will work. Do not overtighten. 8. If you...


