Owners Manual
Page 5
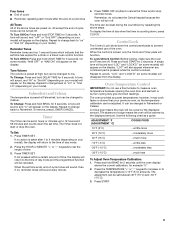
...To Lock/Unlock Control: Before locking, make sure the oven and Timer are four 1-second tones which indicate that the set between 30°F (15°C) and -30°F (-15°C). 3. "LOC" and "LOCK'D" (on some models) will sound every minute. 4. Press and hold BROIL...COOKS FOOD 10°F (5°C) ...a little more 20°F (10°C) ...moderately more 30°F (15°C) ...much more -10°F (-5°C) ...a little less -20°F (-10°C) ...moderately less -30°F (-15°C) ...much less To Adjust Oven Temperature Calibration: 1. Repeat to change ...
...To Lock/Unlock Control: Before locking, make sure the oven and Timer are four 1-second tones which indicate that the set between 30°F (15°C) and -30°F (-15°C). 3. "LOC" and "LOCK'D" (on some models) will sound every minute. 4. Press and hold BROIL...COOKS FOOD 10°F (5°C) ...a little more 20°F (10°C) ...moderately more 30°F (15°C) ...much more -10°F (-5°C) ...a little less -20°F (-10°C) ...moderately less -30°F (-15°C) ...much less To Adjust Oven Temperature Calibration: 1. Repeat to change ...

Owners Manual
Page 9
... sensitive to the fumes given off during the Self-Cleaning cycle. Press the HOUR "+" or "-" to set between 3 hours 30 minutes and 4 hours 30 minutes in 30-minute increments. 4. OVEN CARE Self-Cleaning Cycle (on some models) WARNING How the Cycle Works IMPORTANT: The heating and cooling...oven door will automatically lock and "LOCKED" will not begin . 1. Press the HOUR and MINUTE "+" or "-" to set between 3 hours 30 minutes and 4 hours 30 minutes for more smoke. Do not clean, rub, damage or move freely. At high temperatures, foods react with a damp cloth. Exposure to...
... sensitive to the fumes given off during the Self-Cleaning cycle. Press the HOUR "+" or "-" to set between 3 hours 30 minutes and 4 hours 30 minutes in 30-minute increments. 4. OVEN CARE Self-Cleaning Cycle (on some models) WARNING How the Cycle Works IMPORTANT: The heating and cooling...oven door will automatically lock and "LOCKED" will not begin . 1. Press the HOUR and MINUTE "+" or "-" to set between 3 hours 30 minutes and 4 hours 30 minutes for more smoke. Do not clean, rub, damage or move freely. At high temperatures, foods react with a damp cloth. Exposure to...
Owners Manual
Page 12
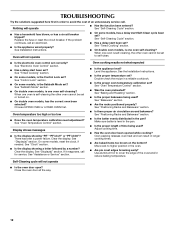
... continues, call an electrician. ■ Is the appliance wired properly? Display shows messages ■ Is the display showing "PF," "PF id=27" or "PF id=30"? See "Display(s)" section. Double-check the recipe in longer cooking times. ■ Are baked items too brown on . ■ On double oven models, has the...
... continues, call an electrician. ■ Is the appliance wired properly? Display shows messages ■ Is the display showing "PF," "PF id=27" or "PF id=30"? See "Display(s)" section. Double-check the recipe in longer cooking times. ■ Are baked items too brown on . ■ On double oven models, has the...

Owners Manual
Page 14
... user or operator instructions and/or installation instructions. 4. Expenses for travel and transportation for product service if your major appliance to Maytag within 30 days from the date of purchase. 6. You will pay for factory specified parts and repair labor to the finish of your ... or workmanship. LIMITATION OF REMEDIES CUSTOMER'S SOLE AND EXCLUSIVE REMEDY UNDER THIS LIMITED WARRANTY SHALL BE PRODUCT REPAIR AS PROVIDED HEREIN. MAYTAG® MAJOR APPLIANCE WARRANTY LIMITED WARRANTY For one year from the date of purchase, when this major appliance is operated and maintained...
... user or operator instructions and/or installation instructions. 4. Expenses for travel and transportation for product service if your major appliance to Maytag within 30 days from the date of purchase. 6. You will pay for factory specified parts and repair labor to the finish of your ... or workmanship. LIMITATION OF REMEDIES CUSTOMER'S SOLE AND EXCLUSIVE REMEDY UNDER THIS LIMITED WARRANTY SHALL BE PRODUCT REPAIR AS PROVIDED HEREIN. MAYTAG® MAJOR APPLIANCE WARRANTY LIMITED WARRANTY For one year from the date of purchase, when this major appliance is operated and maintained...

Installation Instructions
Page 1
.... We have provided many important safety messages in this manual and on your appliance. W10192051A INSTALLATION INSTRUCTIONS 27" (68.6 CM) AND 30" (76.2 CM) ELECTRIC BUILT-IN MICROWAVE/OVEN COMBINATION INSTRUCTIONS D'INSTALLATION DE L'ENSEMBLE FOUR À MICRO-ONDES ET FOUR CONVENTIONNEL É...;LECTRIQUES ENCASTRÉS DE 27" (68,6 CM) ET 30" (76,2 CM) Table of Contents/Table des matières BUILT-IN MICROWAVE/OVEN COMBINATION SAFETY 1 INSTALLATION REQUIREMENTS 2 Tools and Parts ...
.... We have provided many important safety messages in this manual and on your appliance. W10192051A INSTALLATION INSTRUCTIONS 27" (68.6 CM) AND 30" (76.2 CM) ELECTRIC BUILT-IN MICROWAVE/OVEN COMBINATION INSTRUCTIONS D'INSTALLATION DE L'ENSEMBLE FOUR À MICRO-ONDES ET FOUR CONVENTIONNEL É...;LECTRIQUES ENCASTRÉS DE 27" (68,6 CM) ET 30" (76,2 CM) Table of Contents/Table des matières BUILT-IN MICROWAVE/OVEN COMBINATION SAFETY 1 INSTALLATION REQUIREMENTS 2 Tools and Parts ...

Installation Instructions
Page 2
... "Electrical Requirements" section. ■ Electrical supply junction box should have been drilled in oven) of 194°F (90°C) Product Dimensions 27" (68.6 cm) and 30" (76.2 cm) Ovens A B E D C 27" (68.6 cm) models A. 25 64.3 cm) recessed width B. 42³⁄₈" (107.6 cm) ... provide minimum clearance with bottom of UL and CSA International and complies with any tools listed here. recessed depth E. 41" (104.1 cm) recessed height 30" (76.2 cm) models A. 28 71.9 cm) recessed width B. 42³⁄₈" (107.6 cm) overall height C. 29³⁄₄...
... "Electrical Requirements" section. ■ Electrical supply junction box should have been drilled in oven) of 194°F (90°C) Product Dimensions 27" (68.6 cm) and 30" (76.2 cm) Ovens A B E D C 27" (68.6 cm) models A. 25 64.3 cm) recessed width B. 42³⁄₈" (107.6 cm) ... provide minimum clearance with bottom of UL and CSA International and complies with any tools listed here. recessed depth E. 41" (104.1 cm) recessed height 30" (76.2 cm) models A. 28 71.9 cm) recessed width B. 42³⁄₈" (107.6 cm) overall height C. 29³⁄₄...

Installation Instructions
Page 3
...8322;" (3.8 cm) min. Recessed oven E. Models rated at 7.2 kW and below at 240 volts (5.4 kW and below at 208 volts) require a separate 30-amp circuit. ■ A circuit breaker is properly grounded. See "Make Electrical Connection" section. ■ Flexible conduit from the oven should be connected to the...cutout to the junction box. ■ Do not cut the conduit. bottom of cabinet door F. 41¹⁄₄" (104.8 cm) cutout height 30" (76.2 cm) models A. 30" (76.2 cm) min. cabinet width B. 1" (2.5 cm) top of cutout to bottom of upper cabinet door C. 19¹⁄₄" (...
...8322;" (3.8 cm) min. Recessed oven E. Models rated at 7.2 kW and below at 240 volts (5.4 kW and below at 208 volts) require a separate 30-amp circuit. ■ A circuit breaker is properly grounded. See "Make Electrical Connection" section. ■ Flexible conduit from the oven should be connected to the...cutout to the junction box. ■ Do not cut the conduit. bottom of cabinet door F. 41¹⁄₄" (104.8 cm) cutout height 30" (76.2 cm) models A. 30" (76.2 cm) min. cabinet width B. 1" (2.5 cm) top of cutout to bottom of upper cabinet door C. 19¹⁄₄" (...


