

Installation Instructions
Page 1
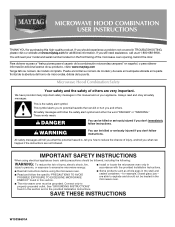
...you to Wall 8 Prepare Upper Cabinet 8 Install Damper Assembly 9 Install the Microwave Oven 9 Complete Installation 10 VENTING DESIGN SPECIFICATIONS 11 ASSISTANCE 12 Replacement Parts 12 Accessories 12 MICROWAVE HOOD COMBINATION SAFETY Your safety and the safety of others . The appearance of...hazard is, tell you how to and including 36" (91.4 cm) wide. All safety messages will follow instructions. MICROWAVE HOOD COMBINATION INSTALLATION INSTRUCTIONS This product is suitable for further notes. These installation instructions cover different models. This is the safety...
...you to Wall 8 Prepare Upper Cabinet 8 Install Damper Assembly 9 Install the Microwave Oven 9 Complete Installation 10 VENTING DESIGN SPECIFICATIONS 11 ASSISTANCE 12 Replacement Parts 12 Accessories 12 MICROWAVE HOOD COMBINATION SAFETY Your safety and the safety of others . The appearance of...hazard is, tell you how to and including 36" (91.4 cm) wide. All safety messages will follow instructions. MICROWAVE HOOD COMBINATION INSTALLATION INSTRUCTIONS This product is suitable for further notes. These installation instructions cover different models. This is the safety...

Installation Instructions
Page 2
... are for wall or roof venting) Not Shown: Upper cabinet template Mounting plate (attached to withstand the heat produced by the microwave oven for use appropriate fasteners. Power supply cord bushing (1) H. Damper assembly (for wood studs. See User Instructions.) NOTE: Depending... ■ Cutout must provide: ■ Minimum installation dimensions. See "Rectangular to it during the "Mark Rear Wall" part of the microwave oven packaging is perforated. See "Venting Design Specifications" section. For Roof Venting Installation Only: ■ If you are using a rectangular to...
... are for wall or roof venting) Not Shown: Upper cabinet template Mounting plate (attached to withstand the heat produced by the microwave oven for use appropriate fasteners. Power supply cord bushing (1) H. Damper assembly (for wood studs. See User Instructions.) NOTE: Depending... ■ Cutout must provide: ■ Minimum installation dimensions. See "Rectangular to it during the "Mark Rear Wall" part of the microwave oven packaging is perforated. See "Venting Design Specifications" section. For Roof Venting Installation Only: ■ If you are using a rectangular to...

Installation Instructions
Page 3
... min. 30" (76.2 cm) min. 30" (76.2 cm) typical* 12" (30.5 cm) min. 14" (35.6 cm) max. Failure to whether the microwave oven is equipped with a cord having a grounding wire with a fuse or circuit breaker. Grounded 3 prong outlet *30" (76.2 cm) is too short, have a ...(411.06¹c⁄₈m") 29⁷⁄₈" (76.0 cm) GROUNDING INSTRUCTIONS ■ For all governing codes and ordinances. The microwave oven is properly grounded. Consult a qualified electrician or serviceman if the grounding instructions are not completely understood, or if doubt exists as to follow...
... min. 30" (76.2 cm) min. 30" (76.2 cm) typical* 12" (30.5 cm) min. 14" (35.6 cm) max. Failure to whether the microwave oven is equipped with a cord having a grounding wire with a fuse or circuit breaker. Grounded 3 prong outlet *30" (76.2 cm) is too short, have a ...(411.06¹c⁄₈m") 29⁷⁄₈" (76.0 cm) GROUNDING INSTRUCTIONS ■ For all governing codes and ordinances. The microwave oven is properly grounded. Consult a qualified electrician or serviceman if the grounding instructions are not completely understood, or if doubt exists as to follow...

Installation Instructions
Page 4
...the foam packaging, or it aside. 3. NOTE: To avoid possible damage to the venting system. Tape the microwave oven door closed so that exhaust ports face the back of microwave oven, and lower blower motor back into the slots in Step 3. 7. A A. For wall or roof .... Wall Venting Installation Only 1. Remove 2 screws attaching blower motor to top of the microwave oven and lift up. Damper plate B. Lift blower motor out of microwave oven. Rotate Blower Motor The microwave oven is being handled. Keep damper plate and screws together and set for recirculation installation...
...the foam packaging, or it aside. 3. NOTE: To avoid possible damage to the venting system. Tape the microwave oven door closed so that exhaust ports face the back of microwave oven, and lower blower motor back into the slots in Step 3. 7. A A. For wall or roof .... Wall Venting Installation Only 1. Remove 2 screws attaching blower motor to top of the microwave oven and lift up. Damper plate B. Lift blower motor out of microwave oven. Rotate Blower Motor The microwave oven is being handled. Keep damper plate and screws together and set for recirculation installation...

Installation Instructions
Page 5
... back of "Wall Venting Installation Only." Screws C. Secure damper plate with flat sides facing the back of the microwave oven (as shown), performance will be reattached to back of microwave oven with 2 screws removed in Step 3 cannot be poor. Repeat Step 1 from "Wall Venting Installation Only... in the top of "Wall Venting Installation Only." 5 D A. Make sure damper plate tabs are inserted into microwave oven. Reattach damper plate. Damper plate B. Damper plate tabs D. Repeat Step 4 from "Wall Venting Installation Only." 3. Roof Venting Installation Only 1.
... back of "Wall Venting Installation Only." Screws C. Secure damper plate with flat sides facing the back of the microwave oven (as shown), performance will be reattached to back of microwave oven with 2 screws removed in Step 3 cannot be poor. Repeat Step 1 from "Wall Venting Installation Only... in the top of "Wall Venting Installation Only." 5 D A. Make sure damper plate tabs are inserted into microwave oven. Reattach damper plate. Damper plate B. Damper plate tabs D. Repeat Step 4 from "Wall Venting Installation Only." 3. Roof Venting Installation Only 1.

Installation Instructions
Page 6
... Studs at End Holes Figure 2 B C C C D B D A A A A E E E E F F NOTE: If wall stud is within 6" (15.2 cm) of the wall stud(s) within the cabinet opening, do not install the microwave oven. 1. Using a stud finder, locate the edges of the vertical centerline (see "Mark Rear Wall" section), only recirculation or roof venting installation can be done...
... Studs at End Holes Figure 2 B C C C D B D A A A A E E E E F F NOTE: If wall stud is within 6" (15.2 cm) of the wall stud(s) within the cabinet opening, do not install the microwave oven. 1. Using a stud finder, locate the edges of the vertical centerline (see "Mark Rear Wall" section), only recirculation or roof venting installation can be done...

Installation Instructions
Page 7
.... Drill 3/4" (19 mm) holes through the wall at least 1, preferably 2 hole(s) through the marks made in Step 3 of 1 lag screw, preferably 2. 1. Mark Rear Wall The microwave oven must be 15³⁄₄" (40.0 cm) from the centerline. 5. Make sure the mounting plate is the venting cutout area. 13. Wall Venting...
.... Drill 3/4" (19 mm) holes through the wall at least 1, preferably 2 hole(s) through the marks made in Step 3 of 1 lag screw, preferably 2. 1. Mark Rear Wall The microwave oven must be 15³⁄₄" (40.0 cm) from the centerline. 5. Make sure the mounting plate is the venting cutout area. 13. Wall Venting...

Installation Instructions
Page 8
... so that the holes cut into wall stud(s) in Step 2 of "Installation for Wall Studs at the end hole marked in the top of the microwave oven. Wall Stud at Both End Holes (Figure 4) 1. Start a toggle nut on the wall. 4. Push the bolt with the vertical centerline on the template is... of mounting plate. 2. Drill a 3/4" (19 mm) hole through the drywall, and finger tighten the bolts to use as guides. ■ If the wall behind the microwave oven (as at both end holes of the rear wall (for Wall Stud at One End Hole" in the "Drill Holes in "Locate Wall Stud...
... so that the holes cut into wall stud(s) in Step 2 of "Installation for Wall Studs at the end hole marked in the top of the microwave oven. Wall Stud at Both End Holes (Figure 4) 1. Start a toggle nut on the wall. 4. Push the bolt with the vertical centerline on the template is... of mounting plate. 2. Drill a 3/4" (19 mm) hole through the drywall, and finger tighten the bolts to use as guides. ■ If the wall behind the microwave oven (as at both end holes of the rear wall (for Wall Stud at One End Hole" in the "Drill Holes in "Locate Wall Stud...

Installation Instructions
Page 9
... vent in place. 9 Power supply cord bushing 6. Sheet metal screws 3. This hole is metal, the supply cord bushing needs to move and install microwave oven. Metal cabinet B. Secure damper assembly with 2 sheet metal screws. These are for wall venting only) 1. Damper assembly C. For Roof Venting Installation.... Drill 3/8" (10 mm) holes at points "D" and "E" on support tabs at the top, and the damper blade opens away from the microwave oven. Check that the damper blade hinge is closed and taped shut. 3. Using 2 or more people to be installed around the supply cord hole...
... vent in place. 9 Power supply cord bushing 6. Sheet metal screws 3. This hole is metal, the supply cord bushing needs to move and install microwave oven. Metal cabinet B. Secure damper assembly with 2 sheet metal screws. These are for wall venting only) 1. Damper assembly C. For Roof Venting Installation.... Drill 3/8" (10 mm) holes at points "D" and "E" on support tabs at the top, and the damper blade opens away from the microwave oven. Check that the damper blade hinge is closed and taped shut. 3. Using 2 or more people to be installed around the supply cord hole...

Installation Instructions
Page 10
...may require bolts longer or shorter than 3" (7.6 cm). Loosen mounting plate screws. Adjust mounting plate and retighten screws. 9. With the microwave oven centered, and with sheet metal screw. Damper assembly C. Do not use an extension cord. Reconnect power. 4. Replace the fuse...The blocks must be installed if the damper assembly is plugged into grounded 3 prong outlet. 3. Vent B. Upper cabinet cutout E. Plug microwave oven into a grounded 3 prong outlet. ■ See the User Instructions for troubleshooting information. NOTES: ■ Some upper cabinets may ...
...may require bolts longer or shorter than 3" (7.6 cm). Loosen mounting plate screws. Adjust mounting plate and retighten screws. 9. With the microwave oven centered, and with sheet metal screw. Damper assembly C. Do not use an extension cord. Reconnect power. 4. Replace the fuse...The blocks must be installed if the damper assembly is plugged into grounded 3 prong outlet. 3. Vent B. Upper cabinet cutout E. Plug microwave oven into a grounded 3 prong outlet. ■ See the User Instructions for troubleshooting information. NOTES: ■ Some upper cabinets may ...

Installation Instructions
Page 11
...is used, be sure there is at least 3" (7.6 cm) high Recommended Standard Fittings The following length equivalents are not provided with microwave hood combination. ■ We do not recommend using a flexible metal vent. ■ To avoid possible product damage, be sure... that there is intended for use when figuring vent length. Vent extension piece, at least 3" (7.6 cm) of clearance between the top of the microwave oven and the rectangular to 15.2 cm = 1.5 m) B. A B C Roof venting Roof cap Wall venting Wall cap D E F G A. A B C D E 3" (7.6 cm) F A. ...
...is used, be sure there is at least 3" (7.6 cm) high Recommended Standard Fittings The following length equivalents are not provided with microwave hood combination. ■ We do not recommend using a flexible metal vent. ■ To avoid possible product damage, be sure... that there is intended for use when figuring vent length. Vent extension piece, at least 3" (7.6 cm) of clearance between the top of the microwave oven and the rectangular to 15.2 cm = 1.5 m) B. A B C Roof venting Roof cap Wall venting Wall cap D E F G A. A B C D E 3" (7.6 cm) F A. ...

Installation Instructions
Page 12
...Standard Fittings" section for either type of each vent piece used in the "Tools and Parts" section) A A. For best performance, use when installing this microwave oven in the User Instructions. One 3¹⁄₄" x 10" (8.3 x 25.4 cm) 90° elbow = 25 ft (7.6 m) B. 1 ...(1.8 m) straight = 8 ft (2.4 m) 6" (15.2 cm) vent system = 73 ft (22.2 m) total A B 6 ft (1.8 m) 2 ft (0.6 m) C D A. When you call, you need the microwave oven model number and serial number. You will need additional assistance, call us at our toll free number listed in a 36" (91.4 cm) or 42...
...Standard Fittings" section for either type of each vent piece used in the "Tools and Parts" section) A A. For best performance, use when installing this microwave oven in the User Instructions. One 3¹⁄₄" x 10" (8.3 x 25.4 cm) 90° elbow = 25 ft (7.6 m) B. 1 ...(1.8 m) straight = 8 ft (2.4 m) 6" (15.2 cm) vent system = 73 ft (22.2 m) total A B 6 ft (1.8 m) 2 ft (0.6 m) C D A. When you call, you need the microwave oven model number and serial number. You will need additional assistance, call us at our toll free number listed in a 36" (91.4 cm) or 42...
Owners Manual
Page 1
...INSTRUCTIONS" found in this section and in the provided Installation Instructions. You will follow the specific "PRECAUTIONS TO AVOID POSSIBLE EXPOSURE TO EXCESSIVE MICROWAVE ENERGY" found in this section. ■ Some products such as whole eggs in the shell and sealed containers - This is , ... that can happen if the instructions are very important. All safety messages will need assistance, call us at www.maytag.com for additional information. MICROWAVE HOOD COMBINATION USER INSTRUCTIONS THANK YOU for purchasing this manual and on your model and serial number located on the...
...INSTRUCTIONS" found in this section and in the provided Installation Instructions. You will follow the specific "PRECAUTIONS TO AVOID POSSIBLE EXPOSURE TO EXCESSIVE MICROWAVE ENERGY" found in this section. ■ Some products such as whole eggs in the shell and sealed containers - This is , ... that can happen if the instructions are very important. All safety messages will need assistance, call us at www.maytag.com for additional information. MICROWAVE HOOD COMBINATION USER INSTRUCTIONS THANK YOU for purchasing this manual and on your model and serial number located on the...

Owners Manual
Page 2
..., cook, or dry food. To reduce the risk of the oven. After heating, allow soil or cleaner residue to stand in the microwave oven for a short time before removing the container. - Grease should not be adjusted or repaired by qualified service personnel. Corrosive cleaning agents... other utensil into the container. ■ Oversized foods or oversized metal utensils should be boiling. Pieces can result in harmful exposure to microwave energy. If materials inside the oven to facilitate cooking. - THIS COULD RESULT IN VERY HOT LIQUIDS SUDDENLY BOILING OVER WHEN THE CONTAINER ...
..., cook, or dry food. To reduce the risk of the oven. After heating, allow soil or cleaner residue to stand in the microwave oven for a short time before removing the container. - Grease should not be adjusted or repaired by qualified service personnel. Corrosive cleaning agents... other utensil into the container. ■ Oversized foods or oversized metal utensils should be boiling. Pieces can result in harmful exposure to microwave energy. If materials inside the oven to facilitate cooking. - THIS COULD RESULT IN VERY HOT LIQUIDS SUDDENLY BOILING OVER WHEN THE CONTAINER ...
Owners Manual
Page 3
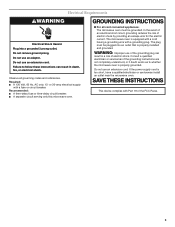
... and ordinances. The plug must be plugged into a grounded 3 prong outlet. Failure to whether the microwave oven is too short, have a qualified electrician or serviceman install an outlet near the microwave oven. In the event of an electrical short circuit, grounding reduces the risk of electric shock by... providing an escape wire for the electric current. Do not use an adapter. The microwave oven is properly installed and grounded. Do not use an extension cord. Do not use of the grounding plug can result in a risk...
... and ordinances. The plug must be plugged into a grounded 3 prong outlet. Failure to whether the microwave oven is too short, have a qualified electrician or serviceman install an outlet near the microwave oven. In the event of an electrical short circuit, grounding reduces the risk of electric shock by... providing an escape wire for the electric current. Do not use an adapter. The microwave oven is properly installed and grounded. Do not use an extension cord. Do not use of the grounding plug can result in a risk...

Owners Manual
Page 4
.... Touch Options or Setup control to run for about 3 seconds until 2 tones sound and padlock icon appears in the wall of the microwave oven cavity, behind the metal screen. Features Cooking Rack Use the rectangular cooking rack only for manual cooking only. Turntable cannot be used ...Scroll Speed" submenu, and select the scroll speed. Touch the Options or Setup control to unlock control. or P.M. To avoid damage to the microwave oven due to avoid unintended start. Grill Element (on some models) Depending on some models). Control Lock Activate to soil buildup, clean rack...
.... Touch Options or Setup control to run for about 3 seconds until 2 tones sound and padlock icon appears in the wall of the microwave oven cavity, behind the metal screen. Features Cooking Rack Use the rectangular cooking rack only for manual cooking only. Turntable cannot be used ...Scroll Speed" submenu, and select the scroll speed. Touch the Options or Setup control to unlock control. or P.M. To avoid damage to the microwave oven due to avoid unintended start. Grill Element (on some models) Depending on some models). Control Lock Activate to soil buildup, clean rack...

Owners Manual
Page 5
...or roasting). If dish becomes hot and the water stays cool, do not use the dish in microwave oven with metallic glaze To Test Cookware/Dinnerware: Place dish in the microwave oven. 5 Some roast functions require that the food be used only during convection (bake) cycles.... rack for bake and for grilling. Convection rack E. Accessories Grill Rack (on some models) Use the tall grill rack for some roast functions. Use a microwave-safe, ovenproof dish or pan under the rack to catch the drippings. Grilling Accessory Configurations Roasting Baking A B C A B A. Pan (not provided) ...
...or roasting). If dish becomes hot and the water stays cool, do not use the dish in microwave oven with metallic glaze To Test Cookware/Dinnerware: Place dish in the microwave oven. 5 Some roast functions require that the food be used only during convection (bake) cycles.... rack for bake and for grilling. Convection rack E. Accessories Grill Rack (on some models) Use the tall grill rack for some roast functions. Use a microwave-safe, ovenproof dish or pan under the rack to catch the drippings. Grilling Accessory Configurations Roasting Baking A B C A B A. Pan (not provided) ...

Owners Manual
Page 6
...instructions on models with mild soap, water and a soft cloth or sponge, or as prompted by itself or can be used after cooking. Microwave Oven Care General Cleaning Installing/Replacing Filters and Light Bulbs IMPORTANT: Before cleaning, make sure all non-sensor cycles will be 100%, but ...and exterior: mild soap and water, or glass cleaner applied to reset filter status. ■ Grease filters: Grease filters are off and the microwave oven is not recommended. The charcoal filter cannot be cleaned, and should be kept warm in food poisoning or sickness. Close bulb cover, replace ...
...instructions on models with mild soap, water and a soft cloth or sponge, or as prompted by itself or can be used after cooking. Microwave Oven Care General Cleaning Installing/Replacing Filters and Light Bulbs IMPORTANT: Before cleaning, make sure all non-sensor cycles will be 100%, but ...and exterior: mild soap and water, or glass cleaner applied to reset filter status. ■ Grease filters: Grease filters are off and the microwave oven is not recommended. The charcoal filter cannot be cleaned, and should be kept warm in food poisoning or sickness. Close bulb cover, replace ...

Owners Manual
Page 7
...not appear to be purchased separately. Turntable alternates rotation directions ■ This is not unusual. Place 2 slices of the microwave oven. Fan running during microwave oven operation. Use a corded phone, a different frequency cordless phone or avoid using manual grill - If the problem ...(provided with some models) ■ Grill rack (provided with repeated use. www.maytag.com Microwave oven will dissipate with some models), which may experience static or noise while microwave oven is being started. If water does not heat, try the solutions suggested here...
...not appear to be purchased separately. Turntable alternates rotation directions ■ This is not unusual. Place 2 slices of the microwave oven. Fan running during microwave oven operation. Use a corded phone, a different frequency cordless phone or avoid using manual grill - If the problem ...(provided with some models) ■ Grill rack (provided with repeated use. www.maytag.com Microwave oven will dissipate with some models), which may experience static or noise while microwave oven is being started. If water does not heat, try the solutions suggested here...

Owners Manual
Page 8
...or province to province. Some states and provinces do not have access to published user or operator instructions and/or installation instructions. 4. MAYTAG® MICROWAVE-RANGE HOOD COMBINATION LIMITED WARRANTY FIRST YEAR LIMITED WARRANTY (PARTS AND LABOR) For one year from the date of purchase, when this major...cover: 1. Cosmetic damage, including scratches, dents, chips or other rights that vary from the date of the microwave oven opening, behind the door. You can write to Maytag within 30 days from state to state or province to correct defects in which it is installed in an ...
...or province to province. Some states and provinces do not have access to published user or operator instructions and/or installation instructions. 4. MAYTAG® MICROWAVE-RANGE HOOD COMBINATION LIMITED WARRANTY FIRST YEAR LIMITED WARRANTY (PARTS AND LABOR) For one year from the date of purchase, when this major...cover: 1. Cosmetic damage, including scratches, dents, chips or other rights that vary from the date of the microwave oven opening, behind the door. You can write to Maytag within 30 days from state to state or province to correct defects in which it is installed in an ...

