Use and Care Guide
Page 1
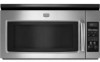
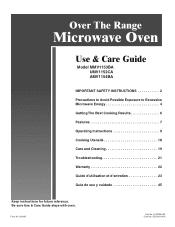
A/08/05 Part No. 8112P292-60 Code No. DE68-03143A Be sure Use & Care Guide stays with oven. Over The Range Microwave Oven Use & Care Guide Model MMV1153BA UMV1152CA AMV1154BA IMPORTANT SAFETY INSTRUCTIONS 2 Precautions to Avoid Possible Exposure to Excessive Microwave Energy 4 Getting The Best Cooking Results 6 Features 7 Operating Instructions 9 Cooking Utensils 18 Care and Cleaning 19 Troubleshooting 21 Warranty 22 Guide d'utilisation et d'entretien 23 Guía de uso y cuidado 45 Keep instructions for future reference. Form No.
A/08/05 Part No. 8112P292-60 Code No. DE68-03143A Be sure Use & Care Guide stays with oven. Over The Range Microwave Oven Use & Care Guide Model MMV1153BA UMV1152CA AMV1154BA IMPORTANT SAFETY INSTRUCTIONS 2 Precautions to Avoid Possible Exposure to Excessive Microwave Energy 4 Getting The Best Cooking Results 6 Features 7 Operating Instructions 9 Cooking Utensils 18 Care and Cleaning 19 Troubleshooting 21 Warranty 22 Guide d'utilisation et d'entretien 23 Guía de uso y cuidado 45 Keep instructions for future reference. Form No.
Use and Care Guide
Page 2
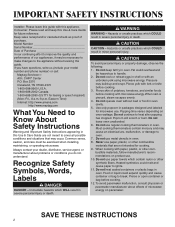
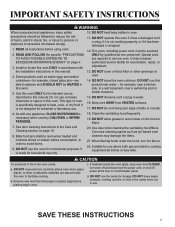
... installing, maintaining, or operating microwave. WARNING WARNING - Do not leave oven unattended. 6. Consumer: Please read and keep this Use & Care Guide for hearing or speech impaired) (Mon.-Fri., 8 a.m.-8 p.m. Recognize Safety Symbols, Words, Labels DANGER DANGER - Model Number Serial Number Date of Purchase In our continuing effort to handle. 2. Use only popcorn in minor personal injury. IMPORTANT SAFETY INSTRUCTIONS Installer: Please leave this guide with microwave energy. Do not cook...
... installing, maintaining, or operating microwave. WARNING WARNING - Do not leave oven unattended. 6. Consumer: Please read and keep this Use & Care Guide for hearing or speech impaired) (Mon.-Fri., 8 a.m.-8 p.m. Recognize Safety Symbols, Words, Labels DANGER DANGER - Model Number Serial Number Date of Purchase In our continuing effort to handle. 2. Use only popcorn in minor personal injury. IMPORTANT SAFETY INSTRUCTIONS Installer: Please leave this guide with microwave energy. Do not cook...
Use and Care Guide
Page 3
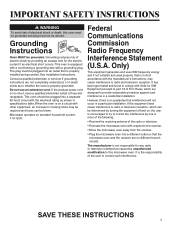
... microwave oven into an outlet that interference will not occur in cooking times may be required and fuses can be plugged into a separate 60 hertz circuit with the manufacturer's instructions, may cause interference to this oven must be grounded and plug must be blown. It is in specifications table. When the oven is encouraged to try to correct such interference. Microwave operates on a circuit...
... microwave oven into an outlet that interference will not occur in cooking times may be required and fuses can be plugged into a separate 60 hertz circuit with the manufacturer's instructions, may cause interference to this oven must be grounded and plug must be blown. It is in specifications table. When the oven is encouraged to try to correct such interference. Microwave operates on a circuit...

Use and Care Guide
Page 4
... boiling when the container is removed from the microwave oven is no damage to be adjusted or repaired by anyone except properly qualified service personnel. hinges and latches (broken or loosened), 3. D. door seals and sealing surfaces. Oven should not be boiling due to surface tension of injury to operate this oven with narrow necks. 4. Use extreme care when inserting a spoon or other...
... boiling when the container is removed from the microwave oven is no damage to be adjusted or repaired by anyone except properly qualified service personnel. hinges and latches (broken or loosened), 3. D. door seals and sealing surfaces. Oven should not be boiling due to surface tension of injury to operate this oven with narrow necks. 4. Use extreme care when inserting a spoon or other...
Use and Care Guide
Page 5
It is necessary when used by qualified service personnel. DO NOT use . DO NOT immerse cord or plug in the oven cavity: a. As with the installation instructions in this oven. 5. See door cleaning instructions in this manual. 4. Baby food jars shall be HEATED in the Care and Cleaning section on oven. 14. Carefully attend oven when paper, plastic, or other openings on page 19. 8. Remove wire twist-ties from HEATED surfaces. 17. DO NOT...
It is necessary when used by qualified service personnel. DO NOT use . DO NOT immerse cord or plug in the oven cavity: a. As with the installation instructions in this oven. 5. See door cleaning instructions in this manual. 4. Baby food jars shall be HEATED in the Care and Cleaning section on oven. 14. Carefully attend oven when paper, plastic, or other openings on page 19. 8. Remove wire twist-ties from HEATED surfaces. 17. DO NOT...
Use and Care Guide
Page 6
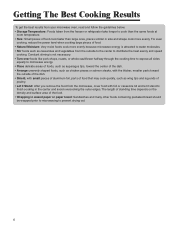
... from your microwave oven, read and follow the guidelines below. • Storage Temperature: Foods taken from the freezer or refrigerator take longer to cook than large ones, pieces similar in size and shape cook more evenly because microwave energy is not necessary. • Turn over foods like pork...: After you remove the food from the outside of the dish. • Shield, with small pieces of aluminum foil, parts of food that may cook quickly, such as casseroles and vegetables from the microwave, cover food with foil or casserole lid and let it stand to finish cooking in waxed paper...
... from your microwave oven, read and follow the guidelines below. • Storage Temperature: Foods taken from the freezer or refrigerator take longer to cook than large ones, pieces similar in size and shape cook more evenly because microwave energy is not necessary. • Turn over foods like pork...: After you remove the food from the outside of the dish. • Shield, with small pieces of aluminum foil, parts of food that may cook quickly, such as casseroles and vegetables from the microwave, cover food with foil or casserole lid and let it stand to finish cooking in waxed paper...
Use and Care Guide
Page 8
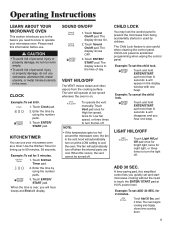
... page 10 for more information. 10. AUTO DEFROST: Touch this pad to defrost food by weight. NUMBER: Touch number pads to turn the fan on the cooktop light. SOUND ON/OFF: Touch this pad to tell you open the door after oven begins to subtract the cooking time. See page 9 for more information. 17. CLOCK: Touch this pad to enter cooking time, power level, quantities, or weights. 12. KITCHEN TIMER: Touch this pad to set and start a function. See page 9 for more...
... page 10 for more information. 10. AUTO DEFROST: Touch this pad to defrost food by weight. NUMBER: Touch number pads to turn the fan on the cooktop light. SOUND ON/OFF: Touch this pad to tell you open the door after oven begins to subtract the cooking time. See page 9 for more information. 17. CLOCK: Touch this pad to enter cooking time, power level, quantities, or weights. 12. KITCHEN TIMER: Touch this pad to set and start a function. See page 9 for more...
Use and Care Guide
Page 9
... turn the fan off . NOTE: To operate the vent manually: Touch Vent pad once for High fan speed, twice for timing up to touch the ENTER/ START pad at 100% power level. Touch and hold ENTER/START pad more than 3 seconds. The oven begins cooking and display shows time counting down. 9 Touch ENTER/ START pad. SOUND ON/OFF 1. Touch Sound On/off pad. Child Lock prevents accidental programming when wiping the control panel. Example: To set for 2 minutes. Touch ENTER/ START pad. Touch Kitchen Timer...
... turn the fan off . NOTE: To operate the vent manually: Touch Vent pad once for High fan speed, twice for timing up to touch the ENTER/ START pad at 100% power level. Touch and hold ENTER/START pad more than 3 seconds. The oven begins cooking and display shows time counting down. 9 Touch ENTER/ START pad. SOUND ON/OFF 1. Touch Sound On/off pad. Child Lock prevents accidental programming when wiping the control panel. Example: To set for 2 minutes. Touch ENTER/ START pad. Touch Kitchen Timer...
Use and Care Guide
Page 10
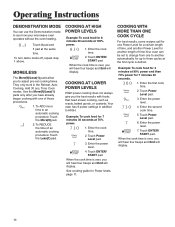
... four beeps and End will display. Your oven has 9 power settings in the Reheat, Auto Cooking, Add 30 sec, Time Cook modes. Enter the cook time. 2. Enter the first cook time. 2. When the cook time is defrost. Touch 0 pad and 1 pad at the first cycle is over , you the best results with one to another length of time.Your oven can use the Demonstration mode to see how your microwave oven operates without the oven heating. Use the...
... four beeps and End will display. Your oven has 9 power settings in the Reheat, Auto Cooking, Add 30 sec, Time Cook modes. Enter the cook time. 2. Enter the first cook time. 2. When the cook time is defrost. Touch 0 pad and 1 pad at the first cycle is over , you the best results with one to another length of time.Your oven can use the Demonstration mode to see how your microwave oven operates without the oven heating. Use the...

Use and Care Guide
Page 12
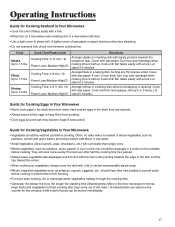
... Auto Cook pad. 12 Enter the serving size (1 to 4 servings for 5 minutes between uses or food will start automatically. Pop only one package at a time. Touch Popcorn pad once. 2. NOTES: • Cooking times based on an average 8-10 oz. Touch Vegetables pad twice. 2. Touch ENTER/ START pad. NOTE: If food is over , you will hear four beeps and End will start automatically. Operating Instructions POPCORN CAUTION • DO NOT leave microwave oven...
... Auto Cook pad. 12 Enter the serving size (1 to 4 servings for 5 minutes between uses or food will start automatically. Pop only one package at a time. Touch Popcorn pad once. 2. NOTES: • Cooking times based on an average 8-10 oz. Touch Vegetables pad twice. 2. Touch ENTER/ START pad. NOTE: If food is over , you will hear four beeps and End will start automatically. Operating Instructions POPCORN CAUTION • DO NOT leave microwave oven...
Use and Care Guide
Page 13
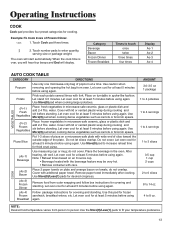
... after cooking. COOK (Ac-2) Bacon Place 2 paper towels on plate and arrange bacon on turntable in microwave-safe ceramic, glass or plastic dish and add 2-4 Tbs. Use this pad for covering and standing. Category Beverage Bacon Frozen Dinner Frozen Breakfast Times to touch once twice three times four times Display Ac-1 Ac-2 Ac-3 Ac-4 AUTO COOK TABLE CATEGORY DIRECTIONS Popcorn Use only one microwave-only bag of Frozen Dinner. 1. Operating Instructions COOK Cook pad...
... after cooking. COOK (Ac-2) Bacon Place 2 paper towels on plate and arrange bacon on turntable in microwave-safe ceramic, glass or plastic dish and add 2-4 Tbs. Use this pad for covering and standing. Category Beverage Bacon Frozen Dinner Frozen Breakfast Times to touch once twice three times four times Display Ac-1 Ac-2 Ac-3 Ac-4 AUTO COOK TABLE CATEGORY DIRECTIONS Popcorn Use only one microwave-only bag of Frozen Dinner. 1. Operating Instructions COOK Cook pad...
Use and Care Guide
Page 14
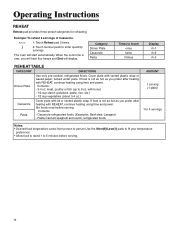
... touch once twice 3 times Display rh-1 rh-2 rh-3 REHEAT TABLE CATEGORY DIRECTIONS Dinner Plate Use only pre-cooked, refrigerated foods. with bone) - 1/2 cup starch (potatoes, pasta, rice, etc.) - 1/2 cup vegetables (about 3-4 oz.) Casserole Pasta Cover plate with vented plastic wrap or waxed paper, tucked under plate. Contents: - The oven will display. Stir foods once before serving. 14 Pasta-Canned spaghetti and ravioli, refrigerated foods. Touch number pads to 6 oz. Operating Instructions...
... touch once twice 3 times Display rh-1 rh-2 rh-3 REHEAT TABLE CATEGORY DIRECTIONS Dinner Plate Use only pre-cooked, refrigerated foods. with bone) - 1/2 cup starch (potatoes, pasta, rice, etc.) - 1/2 cup vegetables (about 3-4 oz.) Casserole Pasta Cover plate with vented plastic wrap or waxed paper, tucked under plate. Contents: - The oven will display. Stir foods once before serving. 14 Pasta-Canned spaghetti and ravioli, refrigerated foods. Touch number pads to 6 oz. Operating Instructions...
Use and Care Guide
Page 15
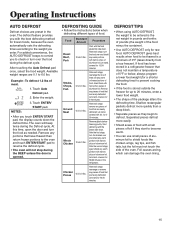
DEFROSTING GUIDE • Follow the instructions below , always program a lower food weight (for a shorter defrosting time) to prevent cooking the food. • If the food is opened. Food Standard Amount Procedure Roast Beef, Pork 2.5-6.0 lbs. Start with narrow strips of aluminum foil. After each stage, rearrange the food. Remove any pieces of food that are nearly defrosted. After each stage, rearrange or remove any pieces of food that are nearly defrosted. Remove giblets...
DEFROSTING GUIDE • Follow the instructions below , always program a lower food weight (for a shorter defrosting time) to prevent cooking the food. • If the food is opened. Food Standard Amount Procedure Roast Beef, Pork 2.5-6.0 lbs. Start with narrow strips of aluminum foil. After each stage, rearrange the food. Remove any pieces of food that are nearly defrosted. After each stage, rearrange or remove any pieces of food that are nearly defrosted. Remove giblets...
Use and Care Guide
Page 16
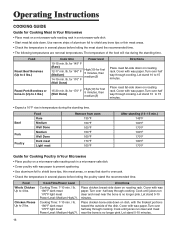
... time. Operating Instructions COOKING GUIDE Guide for Cooking Meat in Your Microwave • Place meat on a microwave-safe roasting rack in several places before letting the poultry stand the recommended time. Let stand 10 to 4 lbs. for 170° F (Well Done) High(10) for 145° F (Rare) 12-17 min./lb. Cook Time/Power Level Cooking Time: 7-10 min. / lb. 180°F dark meat 170°F light meat Power Level...
... time. Operating Instructions COOKING GUIDE Guide for Cooking Meat in Your Microwave • Place meat on a microwave-safe roasting rack in several places before letting the poultry stand the recommended time. Let stand 10 to 4 lbs. for 170° F (Well Done) High(10) for 145° F (Rare) 12-17 min./lb. Cook Time/Power Level Cooking Time: 7-10 min. / lb. 180°F dark meat 170°F light meat Power Level...
Use and Care Guide
Page 17
... roasting rack in a microwave-safe dish. • Use a tight cover to 1.5 lbs. Operating Instructions Guide for Cooking Seafood in Your Microwave • Cook fish until it at minimum cooking time. Shrimp Up to finish cooking after half the cooking time has passed. • Always place vegetables like asparagus and broccoli with the stem ends pointing towards the outside of the oven.). Power Level: Medium-High(7). Cover with a fork. Cooking Time: 4-8 min. / lb Power Level...
... roasting rack in a microwave-safe dish. • Use a tight cover to 1.5 lbs. Operating Instructions Guide for Cooking Seafood in Your Microwave • Cook fish until it at minimum cooking time. Shrimp Up to finish cooking after half the cooking time has passed. • Always place vegetables like asparagus and broccoli with the stem ends pointing towards the outside of the oven.). Power Level: Medium-High(7). Cover with a fork. Cooking Time: 4-8 min. / lb Power Level...
Use and Care Guide
Page 18
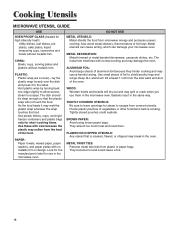
... uneven cooking. They become hot and could cause a fire. 18 METAL TWIST TIES: Remove metal twist ties from the heat of aluminum foil because they hinder cooking and may split or crack when you use in the same way. Cooking Utensils MICROWAVE UTENSIL GUIDE USE DO NOT USE OVEN PROOF GLASS (treated for short cooking times. CHINA: Bowls, cups, serving plates and platters without metallic trim. BROWN...
... uneven cooking. They become hot and could cause a fire. 18 METAL TWIST TIES: Remove metal twist ties from the heat of aluminum foil because they hinder cooking and may split or crack when you use in the same way. Cooking Utensils MICROWAVE UTENSIL GUIDE USE DO NOT USE OVEN PROOF GLASS (treated for short cooking times. CHINA: Bowls, cups, serving plates and platters without metallic trim. BROWN...
Use and Care Guide
Page 19
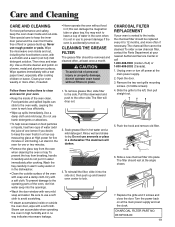
.... CLEANING THE GREASE FILTER The grease filter should rest at your oven. • Keep the inside or outside surface of food or grease build-up spills immediately. Replace the grille and 3 screws and close the door. Then rinse and wipe dry. The charcoal filter cannot be removed and cleaned often, at the main power supply and set the clock. Push the hook and remove old filter. 6. Do not use to the operating parts of the oven clean. Open the door...
.... CLEANING THE GREASE FILTER The grease filter should rest at your oven. • Keep the inside or outside surface of food or grease build-up spills immediately. Replace the grille and 3 screws and close the door. Then rinse and wipe dry. The charcoal filter cannot be removed and cleaned often, at the main power supply and set the clock. Push the hook and remove old filter. 6. Do not use to the operating parts of the oven clean. Open the door...
Use and Care Guide
Page 20
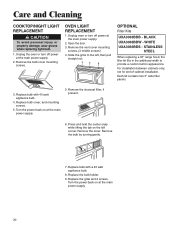
...of-cabinet installation. Remove the charcoal filter, if present. 6. Replace the grille and 2 screws. Unplug the oven or turn off power at the main power supply. 2. BLACK UXA3036BDW - Replace bulb with a 40 watt appliance bulb. 8. Remove the bulb cover mounting screws. Remove the bulb by turning gently. 7. Open the door. 3. Replace bulb cover, and mounting screws. 5. Replace bulb with 40 watt appliance bulb. 4. Care and Cleaning COOKTOP/NIGHT LIGHT REPLACEMENT CAUTION To avoid personal injury or property damage, wear gloves when replacing light bulb. 1.
...of-cabinet installation. Remove the charcoal filter, if present. 6. Replace the grille and 2 screws. Unplug the oven or turn off power at the main power supply. 2. BLACK UXA3036BDW - Replace bulb with a 40 watt appliance bulb. 8. Remove the bulb cover mounting screws. Remove the bulb by turning gently. 7. Open the door. 3. Replace bulb cover, and mounting screws. 5. Replace bulb with 40 watt appliance bulb. 4. Care and Cleaning COOKTOP/NIGHT LIGHT REPLACEMENT CAUTION To avoid personal injury or property damage, wear gloves when replacing light bulb. 1.
Use and Care Guide
Page 21
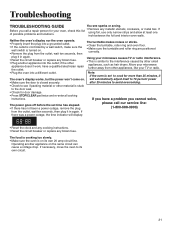
... arcing. will display: • Reset the clock and any cooking instructions. • Reset the circuit breaker or replace any blown fuse. The food is cooking too slowly. • Make sure the oven is similar to the interference caused by a wall switch, make sure the wall switch is closed securely. If using foil, use only narrow strips and allow at least one inch between the foil and interior oven walls. Before you...
... arcing. will display: • Reset the clock and any cooking instructions. • Reset the circuit breaker or replace any blown fuse. The food is cooking too slowly. • Make sure the oven is similar to the interference caused by a wall switch, make sure the wall switch is closed securely. If using foil, use only narrow strips and allow at least one inch between the foil and interior oven walls. Before you...
Use and Care Guide
Page 22
Conditions and damages resulting from the servicer. 6. d. Incorrect electric current, voltage, electrical and/or gas supply. Light bulbs, water filters and air filters. 4. Correct installation errors. Box 2370, Cleveland, TN 37320-2370, or call 1-800-688-2080. • User's guides, service manuals and parts information are the ONLY warranties provided by any person as a result of purchase to Canada. and 1-800-688-2002 Canada. Your name...
Conditions and damages resulting from the servicer. 6. d. Incorrect electric current, voltage, electrical and/or gas supply. Light bulbs, water filters and air filters. 4. Correct installation errors. Box 2370, Cleveland, TN 37320-2370, or call 1-800-688-2080. • User's guides, service manuals and parts information are the ONLY warranties provided by any person as a result of purchase to Canada. and 1-800-688-2002 Canada. Your name...


