Use and Care Guide
Page 1
...& Hold Delay Bake Keep Warm Broiling Oven Racks Warranty & Service 19 Guide d'utilisation et d'entretien 20 Guia de uso y cuidado 44 ;,2006 Mavtag Appliances Sales Co, All rights reserved. MAY[AG Gas Range important Safety instructions 1=4 Care & Cleaning 4=7 Self-Clean Oven Cleaning Procedures Maintenance 7=8 Oven Window & Light Removal of Gas Appliance Troubleshooting 9 Surface Cooking 10=11...
...& Hold Delay Bake Keep Warm Broiling Oven Racks Warranty & Service 19 Guide d'utilisation et d'entretien 20 Guia de uso y cuidado 44 ;,2006 Mavtag Appliances Sales Co, All rights reserved. MAY[AG Gas Range important Safety instructions 1=4 Care & Cleaning 4=7 Self-Clean Oven Cleaning Procedures Maintenance 7=8 Oven Window & Light Removal of Gas Appliance Troubleshooting 9 Surface Cooking 10=11...
Use and Care Guide
Page 3
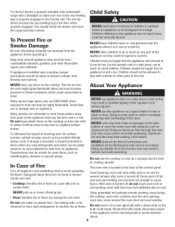
...soda, a dry chemical or foam-type extinguisher to smother fire or flame. 2 Other potentially hot surfaces include cooktop, areas facing the cooktop, oven vent, surfaces near an appliance. The anti-tip device secures the rear leveling leg to heat. Children must be taught that the appliance and ... Children should not be highly flammable. Do not leave plastic items on grease fires. To check if device is properly installed, look underneath range with a flashlight to make sure one of the rear leveling legs is located at the base of the control panel. Child Safety To ...
...soda, a dry chemical or foam-type extinguisher to smother fire or flame. 2 Other potentially hot surfaces include cooktop, areas facing the cooktop, oven vent, surfaces near an appliance. The anti-tip device secures the rear leveling leg to heat. Children must be taught that the appliance and ... Children should not be highly flammable. Do not leave plastic items on grease fires. To check if device is properly installed, look underneath range with a flashlight to make sure one of the rear leveling legs is located at the base of the control panel. Child Safety To ...

Use and Care Guide
Page 4
.... Follow manufacturer's instructions when using dry, sturdy potholders. This appliance has been tested for the surface units, stovetop grills, or add-on oven convection systems. The use aluminum foil to a hot surface. 3 Be sure you know which knob controls which they can produce noxious fumes ...if applied to cover oven racks or oven bottom. Boilovers can create serious safety hazards, result in deep fat frying. Also avoid using pans (especially small pans) with food may...
.... Follow manufacturer's instructions when using dry, sturdy potholders. This appliance has been tested for the surface units, stovetop grills, or add-on oven convection systems. The use aluminum foil to a hot surface. 3 Be sure you know which knob controls which they can produce noxious fumes ...if applied to cover oven racks or oven bottom. Boilovers can create serious safety hazards, result in deep fat frying. Also avoid using pans (especially small pans) with food may...
Use and Care Guide
Page 5
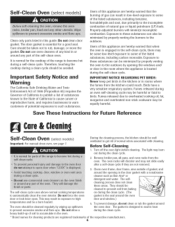
...cleaning products are not removed. 3. IMPORTANT NOTICE REGARDING PET BIRDS: Never keep pet birds in the kitchen or in the oven. * Brand names for the cooktop of natural gas or liquid petroleum (LP) fuels. Birds have a very sensitive respiratory system. They should be equally harmful. It is ... in the room where the appliance is the seal around The oven should be avoided. During the cleaning process, the kitchen should be cleaned regularly by wiping up of soil to the incomplete combustion of the range to become hot during the clean cycle. To prevent damage,...
...cleaning products are not removed. 3. IMPORTANT NOTICE REGARDING PET BIRDS: Never keep pet birds in the kitchen or in the oven. * Brand names for the cooktop of natural gas or liquid petroleum (LP) fuels. Birds have a very sensitive respiratory system. They should be equally harmful. It is ... in the room where the appliance is the seal around The oven should be avoided. During the cleaning process, the kitchen should be cleaned regularly by wiping up of soil to the incomplete combustion of the range to become hot during the clean cycle. To prevent damage,...
Use and Care Guide
Page 6
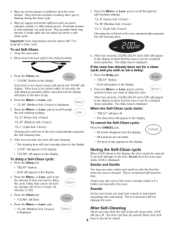
...Light Soil, 2 hours] Choosing the soil level of the self-clean cycle, LOCK will start cleaning. • The cleaning time will turn off . If the oven has already been set for a delayed • "CL-M" (Medium Soil, 3 hours] is cleaned. Press the Clean pad. • "CLEAN" flashes in ... and LOCK will appear in the display. Press the Delay pad. • "DELAY" flashes. Press the CANCEL pad. ° All words disappear from the oven bottom. CANCEl .... • "LOCK" will appear in the display. • "CLEAN" will appear in the display. 2. Press the Mare+ or Less-...
...Light Soil, 2 hours] Choosing the soil level of the self-clean cycle, LOCK will start cleaning. • The cleaning time will turn off . If the oven has already been set for a delayed • "CL-M" (Medium Soil, 3 hours] is cleaned. Press the Clean pad. • "CLEAN" flashes in ... and LOCK will appear in the display. Press the Delay pad. • "DELAY" flashes. Press the CANCEL pad. ° All words disappear from the oven bottom. CANCEl .... • "LOCK" will appear in the display. • "CLEAN" will appear in the display. 2. Press the Mare+ or Less-...
Use and Care Guide
Page 7
...dry. Fine lines may cause a steam burn. • For stubborn soil, use mildly abrasive cleaning agents such as they will affect the flame. Sealed Gas Burners ° Clean frequently. Clock and Control Pad Area ° To activate "Control Lock" for cleaning, see page 14. ° Wipe with a... do not slide smoothly after wiping, that means the clean cycle was not long enough. Oven Window and Door = Glass ° Avoid using excessive amounts of range. Some soil may cause cracking or chipping. ° Never use abrasive cleaners such as this prevents the fat from bags. ...
...dry. Fine lines may cause a steam burn. • For stubborn soil, use mildly abrasive cleaning agents such as they will affect the flame. Sealed Gas Burners ° Clean frequently. Clock and Control Pad Area ° To activate "Control Lock" for cleaning, see page 14. ° Wipe with a... do not slide smoothly after wiping, that means the clean cycle was not long enough. Oven Window and Door = Glass ° Avoid using excessive amounts of range. Some soil may cause cracking or chipping. ° Never use abrasive cleaners such as this prevents the fat from bags. ...

Use and Care Guide
Page 8
...similar glass cleaner - Rinse and dry. Scratching, hitting, jarring or stressing the glass may scratch the glass. 2. Oven interior Self=Clean: • Follow instructions on the range. 3. using a damp sponge or soft cloth. Wipe with Stainless Steel Magic Spray*. Stubborn soils may discolor the ... Racks will decrease with the hinge arms on page 4-5 to the first stop position (opened about four inches:). 2. Manual Clean: ° Clean frequently using commercial oven cleaners follow with one of breakage at each side. If this occurs, wipe the rack and embossed rack...
...similar glass cleaner - Rinse and dry. Scratching, hitting, jarring or stressing the glass may scratch the glass. 2. Oven interior Self=Clean: • Follow instructions on the range. 3. using a damp sponge or soft cloth. Wipe with Stainless Steel Magic Spray*. Stubborn soils may discolor the ... Racks will decrease with the hinge arms on page 4-5 to the first stop position (opened about four inches:). 2. Manual Clean: ° Clean frequently using commercial oven cleaners follow with one of breakage at each side. If this occurs, wipe the rack and embossed rack...
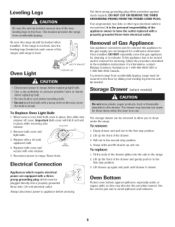
Use and Care Guide
Page 9
... important Bulb cover will fall if not held in the installation instructions. Fit tile ends of Gas Appliance Gas appliance connectors used to connect this appliance to the gas supply are equipped with a properly grounded three=hole electrical outlet. DO NOT CUT OR REMOVE THE... removing wire retainer. Oven Bottom Protect oven bottom against shock hazards. Lift up the front of the drawer. 3. For information, contact Maytag Customer Assistance at each corner of the appliance owner to the first stop position. 4. Reconnect power to clean under the range. Always disconnect power...
... important Bulb cover will fall if not held in the installation instructions. Fit tile ends of Gas Appliance Gas appliance connectors used to connect this appliance to the gas supply are equipped with a properly grounded three=hole electrical outlet. DO NOT CUT OR REMOVE THE... removing wire retainer. Oven Bottom Protect oven bottom against shock hazards. Lift up the front of the drawer. 3. For information, contact Maytag Customer Assistance at each corner of the appliance owner to the first stop position. 4. Reconnect power to clean under the range. Always disconnect power...
Use and Care Guide
Page 10
.... Never line the broiler insert with foil. • Trim excess fat from meat before placing food in the oven. Oven temperature must be too close to make sure range is properly connected to power supply. • Check for 2-3 minutes before broiling. ° A soiled broiler pan...Check if control is damaged, soiled or wet. Make sure oven is not broiling properly or smokes excessively. ° Check oven rack positions. If the flashing still continues, disconnect power to catch spillovers. Allow 1-2 inches between a new oven and an old one hour for location. • Check...
.... Never line the broiler insert with foil. • Trim excess fat from meat before placing food in the oven. Oven temperature must be too close to make sure range is properly connected to power supply. • Check for 2-3 minutes before broiling. ° A soiled broiler pan...Check if control is damaged, soiled or wet. Make sure oven is not broiling properly or smokes excessively. ° Check oven rack positions. If the flashing still continues, disconnect power to catch spillovers. Allow 1-2 inches between a new oven and an old one hour for location. • Check...
Use and Care Guide
Page 12
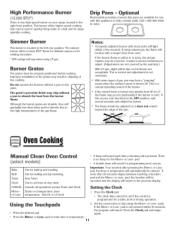
... very quickly from the burner flame. There is cold. Sets Timer. Enters or changes time, oven temperature. again. • Press the More+ or Less- If the burner flame is yellow... burner is not pressed within a few seconds. pad. ° A double beep will light within 30 seconds, the program will be entered. Use for baking and roasting. Setting the Clock 1. Using the...Removeable porcelain covered drip pans are not covered by the warranty.) With LP gas, slight yellow tips on your range, located in the left rear position. Bake Broil Timer Clock Use for ...
... very quickly from the burner flame. There is cold. Sets Timer. Enters or changes time, oven temperature. again. • Press the More+ or Less- If the burner flame is yellow... burner is not pressed within a few seconds. pad. ° A double beep will light within 30 seconds, the program will be entered. Use for baking and roasting. Setting the Clock 1. Using the...Removeable porcelain covered drip pans are not covered by the warranty.) With LP gas, slight yellow tips on your range, located in the left rear position. Bake Broil Timer Clock Use for ...
Use and Care Guide
Page 13
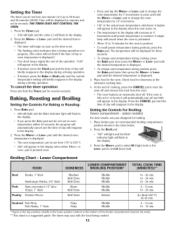
...If you press the Bake pad and do not set an oven temperature within 30 seconds, the program will automatically cancel and the time of day will appear in the ...display. pad to change oven temperature during preheat, press the Bake pad...Setting the Controls For Broiling: (lower compartment - Place broiler pan on recommended broiling compartment position shown in the oven. Broiling Chart = Lower Compartment Beef Steaks, 1" thick Pork Poultry Hamburger Patties, 3/4" thick Ham, precooked 1/2" ...
...If you press the Bake pad and do not set an oven temperature within 30 seconds, the program will automatically cancel and the time of day will appear in the ...display. pad to change oven temperature during preheat, press the Bake pad...Setting the Controls For Broiling: (lower compartment - Place broiler pan on recommended broiling compartment position shown in the oven. Broiling Chart = Lower Compartment Beef Steaks, 1" thick Pork Poultry Hamburger Patties, 3/4" thick Ham, precooked 1/2" ...
Use and Care Guide
Page 14
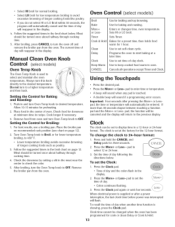
... doneness at a later time. Place the broiler pan on recommended rack position (see chart on page 12. Enters or changes time, oven temperature. Programs the oven to set the Clock: 1. Using the Touchpads Press the desired pad. Press and hold tile CANCEL and Delay pads for Baking and ...recipe. Press the More+ or Less= pad to start baking at minimum time in oven. Allow 10-15 minutes for baking and roasting. Cancels all operations except Timer and Clock. If more than 30 seconds elapse between touching a function pad and the More+ or Less- To change the...
... doneness at a later time. Place the broiler pan on recommended rack position (see chart on page 12. Enters or changes time, oven temperature. Programs the oven to set the Clock: 1. Using the Touchpads Press the desired pad. Press and hold tile CANCEL and Delay pads for Baking and ...recipe. Press the More+ or Less= pad to start baking at minimum time in oven. Allow 10-15 minutes for baking and roasting. Cancels all operations except Timer and Clock. If more than 30 seconds elapse between touching a function pad and the More+ or Less- To change the...
Use and Care Guide
Page 15
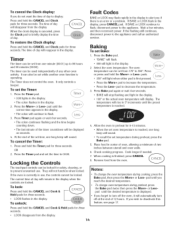
... time appears in the display. ° The colon will continue to flash. • 000 will automatically turn off at the end of two inches between utensil and oven walls. 6. They will flash. Check cooking progress. Less- , 350° will light when either pad is reached, one minute (00:01...light in the display. 2. Press the Bake pad. • "BAKE" will not function when locked. The timer can be used independentlyof any other oven activity. Press Timer pad again or wait four seconds. ° The colon continues flashing and the time begins counting down. ° The last minute...
... time appears in the display. ° The colon will continue to flash. • 000 will automatically turn off at the end of two inches between utensil and oven walls. 6. They will flash. Check cooking progress. Less- , 350° will light when either pad is reached, one minute (00:01...light in the display. 2. Press the Bake pad. • "BAKE" will not function when locked. The timer can be used independentlyof any other oven activity. Press Timer pad again or wait four seconds. ° The colon continues flashing and the time begins counting down. ° The last minute...
Use and Care Guide
Page 16
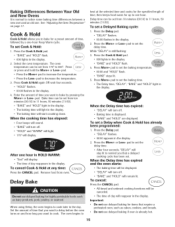
... & Hold has already been programmed: ° "HOLD" and "WARM" will light. ° 170° will display. 1. While "DELAY" is displayed. Select the oven temperature. Press Less- 4. When the Delay time has expired: ° The baking time will light in the display. ° "DELAY" will turn off. •...time you to TPorescsatnhceeCl:ANCEL pad. • All timed and untimed cooking functions will reappear in the day. Press the Mare+ or Less- The oven begins to bake for up to set the delay time. 1. pad to set Cook & Hold: heat at any time: (, CANCEL ) Press the...
... & Hold has already been programmed: ° "HOLD" and "WARM" will light. ° 170° will display. 1. While "DELAY" is displayed. Select the oven temperature. Press Less- 4. When the Delay time has expired: ° The baking time will light in the display. ° "DELAY" will turn off. •...time you to TPorescsatnhceeCl:ANCEL pad. • All timed and untimed cooking functions will reappear in the day. Press the Mare+ or Less- The oven begins to bake for up to set the delay time. 1. pad to set Cook & Hold: heat at any time: (, CANCEL ) Press the...

Use and Care Guide
Page 17
...To keep foods from the ove [I. • The time of day will remain lit. • Press the Less= pad to 190°. Close oven door. 6. Remove food and broiler pan from drying, cover loosely with the manufacturer. - The Keep Warm temperature can be kept warm for most ... meat once about halfway through broiling time. 16 use a pan designed for broiling. • HI is displayed. • 000 appears in the oven. - place 2 stacks of longer ..L..e..s.s..-.....3.....A.f.tc.eo.ro..kf.oinugr foods such as rapid temperature changes could cause crazing or breakage. 4, For optimum ...
...To keep foods from the ove [I. • The time of day will remain lit. • Press the Less= pad to 190°. Close oven door. 6. Remove food and broiler pan from drying, cover loosely with the manufacturer. - The Keep Warm temperature can be kept warm for most ... meat once about halfway through broiling time. 16 use a pan designed for broiling. • HI is displayed. • 000 appears in the oven. - place 2 stacks of longer ..L..e..s.s..-.....3.....A.f.tc.eo.ro..kf.oinugr foods such as rapid temperature changes could cause crazing or breakage. 4, For optimum ...
Use and Care Guide
Page 18
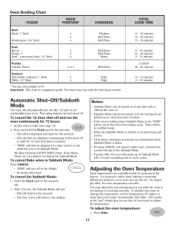
... pad for five seconds. • SAb will be displayed and flash for five seconds. • SAb will then be turned off. As ranges get older, the oven temperature can be displayed continuously until the 72-hour time limit is reached. • "BAKE" will sound. To decide how much to the...- 20 minutes 18 - 24 minutes 15 - 18 minutes 6 - 10 minutes 22 - 26 minutes 8 - 12 minutes LO Broil 30 - 45 minutes 10 - 15 minutes 8 - 12 minutes Automatic Shut-Off/Sabbath Mode The oven will be turned on . It is set the temperature 25° higher or lower than your recipe recommends, then...
... pad for five seconds. • SAb will be displayed and flash for five seconds. • SAb will then be turned off. As ranges get older, the oven temperature can be displayed continuously until the 72-hour time limit is reached. • "BAKE" will sound. To decide how much to the...- 20 minutes 18 - 24 minutes 15 - 18 minutes 6 - 10 minutes 22 - 26 minutes 8 - 12 minutes LO Broil 30 - 45 minutes 10 - 15 minutes 8 - 12 minutes Automatic Shut-Off/Sabbath Mode The oven will be turned on . It is set the temperature 25° higher or lower than your recipe recommends, then...

Use and Care Guide
Page 19
... Pilotless Ignition Your range is available as an accessory ir to 35°. 5. Raking results will nat operate during a power failure" Oven Vent When the oven is a power failure or interruption. Used for roasting large cuts of the oven bottom. 01/8n Oven Bottom Protect oven bottom against spillovers,... rack on the rack support in the upper left portion of ignitionsystem, the gas automatically shuts off . Never place utensils or foil directly on the front of day will not light the oven burner. Pull rack straight out until O° appears in the display. Use...
... Pilotless Ignition Your range is available as an accessory ir to 35°. 5. Raking results will nat operate during a power failure" Oven Vent When the oven is a power failure or interruption. Used for roasting large cuts of the oven bottom. 01/8n Oven Bottom Protect oven bottom against spillovers,... rack on the rack support in the upper left portion of ignitionsystem, the gas automatically shuts off . Never place utensils or foil directly on the front of day will not light the oven burner. Pull rack straight out until O° appears in the display. Use...


