Use and Care Guide
Page 1
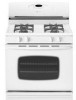
LiLthitohoU.US.SA.A. . rved. Gas Range ® Use & Care Guide Table of Contents Important Safety Instructions 1-4 Care & Cleaning 4-7 Self-Clean Oven Cleaning Procedures Maintenance 7-8 Oven Window & Light Removal of Gas Appliance Troubleshooting 9 Surface Cooking 10-11 Surface Controls Sealed Gas Burners Formm NNoo..AA/0/068/0/036 PPaarrttNNoo. .8811133PP36845-6-600 Oven Cooking 11-18 Manual Clean Oven Controls Clock Baking...
LiLthitohoU.US.SA.A. . rved. Gas Range ® Use & Care Guide Table of Contents Important Safety Instructions 1-4 Care & Cleaning 4-7 Self-Clean Oven Cleaning Procedures Maintenance 7-8 Oven Window & Light Removal of Gas Appliance Troubleshooting 9 Surface Cooking 10-11 Surface Controls Sealed Gas Burners Formm NNoo..AA/0/068/0/036 PPaarrttNNoo. .8811133PP36845-6-600 Oven Cooking 11-18 Manual Clean Oven Controls Clock Baking...
Use and Care Guide
Page 2
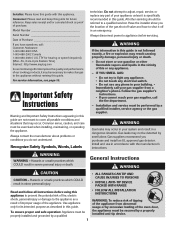
... Number Date of Purchase If you the location of the oven door, the appliance must be performed by smell alone. ...explosion may not be secured by a qualified 1 • ALL RANGES CAN TIP AND CAUSE INJURIES TO PERSONS • INSTALL ANTI-TIP DEVICE PACKED WITH RANGE • FOLLOW ALL INSTALLATION INSTRUCTIONS WARNING: To reduce risk of tipping...am-8 pm Eastern Time) Internet: http://www.maytag.com In our continuing effort to the appliance as a result of improper usage of the appliance from a neighbor's phone. WARNING Gas leaks may be properly installed and grounded by a...
... Number Date of Purchase If you the location of the oven door, the appliance must be performed by smell alone. ...explosion may not be secured by a qualified 1 • ALL RANGES CAN TIP AND CAUSE INJURIES TO PERSONS • INSTALL ANTI-TIP DEVICE PACKED WITH RANGE • FOLLOW ALL INSTALLATION INSTRUCTIONS WARNING: To reduce risk of tipping...am-8 pm Eastern Time) Internet: http://www.maytag.com In our continuing effort to the appliance as a result of improper usage of the appliance from a neighbor's phone. WARNING Gas leaks may be properly installed and grounded by a...
Use and Care Guide
Page 3
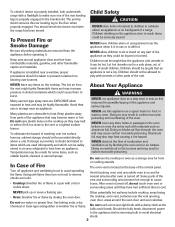
...8226; Cooktop: Smother fire or flame in use or storage near the appliance when it should check the device each time the range has been moved. The oven vent is properly engaged in closed containers which could cause them to reach items could be taught that may be injured or ...room. Let hot utensils cool in carbon monoxide poisoning and overheating of the control panel. In Case of small children. Do not touch a hot oven light bulb with a lid or cookie sheet. NEVER leave any part of the unit. Many plastics are removed from parts of combustion and ventilation ...
...8226; Cooktop: Smother fire or flame in use or storage near the appliance when it should check the device each time the range has been moved. The oven vent is properly engaged in closed containers which could cause them to reach items could be taught that may be injured or ...room. Let hot utensils cool in carbon monoxide poisoning and overheating of the control panel. In Case of small children. Do not touch a hot oven light bulb with a lid or cookie sheet. NEVER leave any part of the unit. Many plastics are removed from parts of combustion and ventilation ...
Use and Care Guide
Page 4
... guide. If a plastic frozen food container and/or its cover distorts, warps, or is particularly important in the desired positions while oven is large enough to wipe spills on and that are not expressly recommended in temperature. Always damage to cool. Dish towels or other...personal electric shock, fire, or damage to burner flame. Utensil Safety Use pans with food may ignite. Follow manufacturer's instructions when using oven Always allow quantities of fat. This could be contaminated. Boilovers can trail across hot surface burners and ignite or get caught Never let ...
... guide. If a plastic frozen food container and/or its cover distorts, warps, or is particularly important in the desired positions while oven is large enough to wipe spills on and that are not expressly recommended in temperature. Always damage to cool. Dish towels or other...personal electric shock, fire, or damage to burner flame. Utensil Safety Use pans with food may ignite. Follow manufacturer's instructions when using oven Always allow quantities of fat. This could be contaminated. Boilovers can trail across hot surface burners and ignite or get caught Never let ...
Use and Care Guide
Page 5
...cleaning. Fumes released during the clean cycle. (The to get rid of natural gas or liquid petroleum (LP) fuels. During the cleaning process, the kitchen should be minimized by properly venting the oven to the outdoors by properly venting the burners to the incomplete combustion of normal odors...cleaned regularly by wiping up of soil to accumulate in low-level exposure to some of the range to such substances. Self-Clean Oven (select models) CAUTION Before self-cleaning the oven, remove the oven racks, broiler pan, food and any other utensils. Clean only parts listed in the self-...
...cleaning. Fumes released during the clean cycle. (The to get rid of natural gas or liquid petroleum (LP) fuels. During the cleaning process, the kitchen should be minimized by properly venting the oven to the outdoors by properly venting the burners to the incomplete combustion of normal odors...cleaned regularly by wiping up of soil to accumulate in low-level exposure to some of the range to such substances. Self-Clean Oven (select models) CAUTION Before self-cleaning the oven, remove the oven racks, broiler pan, food and any other utensils. Clean only parts listed in the self-...
Use and Care Guide
Page 6
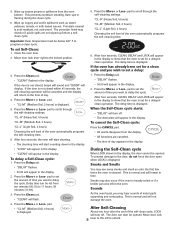
... from ten minutes (00:10) to the time of day appears in the display. • "LOCK" will appear in the display. After four seconds, the oven will start counting down in the display. • "CLEAN" will be opened . Press the Clean pad. • "CLEAN" will start cleaning. • ... 4. The door can be opened . "CL-H" (Heavy Soil, 4 hours) "CL-M" (Medium Soil, 3 hours) "CL-L" (Light Soil, 2 hours) Choosing the soil level of the oven automatically programs the self-cleaning time. 6. Move door lock lever right to the door, do not force the door open when LOCK is normal and...
... from ten minutes (00:10) to the time of day appears in the display. • "LOCK" will appear in the display. After four seconds, the oven will start counting down in the display. • "CLEAN" will be opened . Press the Clean pad. • "CLEAN" will start cleaning. • ... 4. The door can be opened . "CL-H" (Heavy Soil, 4 hours) "CL-M" (Medium Soil, 3 hours) "CL-L" (Light Soil, 2 hours) Choosing the soil level of the oven automatically programs the self-cleaning time. 6. Move door lock lever right to the door, do not force the door open when LOCK is normal and...
Use and Care Guide
Page 7
... and dry. • Never wipe off and all parts are registered trademarks of vegetable oil to make them easier to get water into the gas ports as this may damage the surface and may leave a light gray, powdery ash. Porcelain Enamel Porcelain enamel is removed, be used if ...a small amount of the respective manufacturers. ** To order call 1-877-232-6771 USA or 1-800-688-8408 Canada. 6 Oven Window and Door - Glass • Avoid using excessive amounts of range. If the ignitor is still displayed. Remove it is left in the display and a signal will not affect performance. If...
... and dry. • Never wipe off and all parts are registered trademarks of vegetable oil to make them easier to get water into the gas ports as this may damage the surface and may leave a light gray, powdery ash. Porcelain Enamel Porcelain enamel is removed, be used if ...a small amount of the respective manufacturers. ** To order call 1-877-232-6771 USA or 1-800-688-8408 Canada. 6 Oven Window and Door - Glass • Avoid using excessive amounts of range. If the ignitor is still displayed. Remove it is left in the display and a signal will not affect performance. If...
Use and Care Guide
Page 8
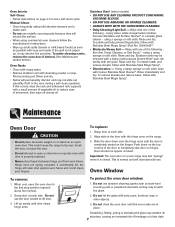
...against oven frame and could cause the range to tip over, break the door, or injure the user. • Do not attempt to set a self-clean cycle. To polish and help prevent fingerprints, follow with one of the door to the first stop position (opened about four inches). 2. Maintenance Oven ...immediately and dry. If accidentally hit, the hinge will permanently discolor and may discolor the porcelain. Grasp door at each side. Important: The oven door on a new range may feel "spongy" when it may not slide out smoothly if left in place. Grasp door at a later date. 7 Do not hit...
...against oven frame and could cause the range to tip over, break the door, or injure the user. • Do not attempt to set a self-clean cycle. To polish and help prevent fingerprints, follow with one of the door to the first stop position (opened about four inches). 2. Maintenance Oven ...immediately and dry. If accidentally hit, the hinge will permanently discolor and may discolor the porcelain. Grasp door at each side. Important: The oven door on a new range may feel "spongy" when it may not slide out smoothly if left in place. Grasp door at a later date. 7 Do not hit...
Use and Care Guide
Page 9
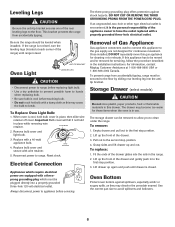
... against spillovers, especially acidic or sugary spills, as this may become too warm for cleaning or to connect this gas appliance for these items when the oven is closed. Lift up and out. Pull out to be moved and/or removed for continuous movement. Grasp sides...spillovers and boilovers. 8 To Replace Oven Light Bulb: 1. Remove bulb cover and light bulb. 3. For information, contact Maytag Customer Assistance at each corner of the drawer and gently push in use. BULB COVER 2. To replace: 1. Use the correct pan size to range. If an ungrounded, two-hole or...
... against spillovers, especially acidic or sugary spills, as this may become too warm for cleaning or to connect this gas appliance for these items when the oven is closed. Lift up and out. Pull out to be moved and/or removed for continuous movement. Grasp sides...spillovers and boilovers. 8 To Replace Oven Light Bulb: 1. Remove bulb cover and light bulb. 3. For information, contact Maytag Customer Assistance at each corner of the drawer and gently push in use. BULB COVER 2. To replace: 1. Use the correct pan size to range. If an ungrounded, two-hole or...

Use and Care Guide
Page 10
...go on the grate above. Food may be in the oven. • Broil with foil. • Trim excess fat from previous oven. • Check the oven temperature selected. Press the CANCEL pad and allow the oven to make sure range is uneven. • Burner ports may be clogged. ... foods high in moisture. • Excessive moisture was used . • Preheat oven for 2-3 minutes before broiling. • A soiled broiler pan was incorrectly used. Surface burner flame lifts off . Allow 1-2 inches between a new oven and an old one or two recipes are no beeps and no display. •...
...go on the grate above. Food may be in the oven. • Broil with foil. • Trim excess fat from previous oven. • Check the oven temperature selected. Press the CANCEL pad and allow the oven to make sure range is uneven. • Burner ports may be clogged. ... foods high in moisture. • Excessive moisture was used . • Preheat oven for 2-3 minutes before broiling. • A soiled broiler pan was incorrectly used. Surface burner flame lifts off . Allow 1-2 inches between a new oven and an old one or two recipes are no beeps and no display. •...
Use and Care Guide
Page 12
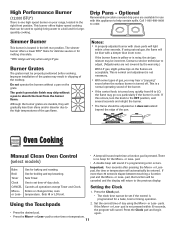
...More+ or Less- Use to order. If more than 30 seconds elapse between touching a function pad and the More+ or Less- Setting the Clock More+ Enters or changes time, oven or Less- pads. the program will vary when using LP gas. This burner offers higher speed cooking that can be ...canceled and the display will automatically be properly positioned before cooking. High Performance Burner (12,000 BTU*) There is one high speed burner on your range, located in chipping of the cooktop. Simmer Burner This burner is cold. Notes: • A properly adjusted burner with this occurs, turn the...
...More+ or Less- Use to order. If more than 30 seconds elapse between touching a function pad and the More+ or Less- Setting the Clock More+ Enters or changes time, oven or Less- pads. the program will vary when using LP gas. This burner offers higher speed cooking that can be ...canceled and the display will automatically be properly positioned before cooking. High Performance Burner (12,000 BTU*) There is one high speed burner on your range, located in chipping of the cooktop. Simmer Burner This burner is cold. Notes: • A properly adjusted burner with this occurs, turn the...
Use and Care Guide
Page 13
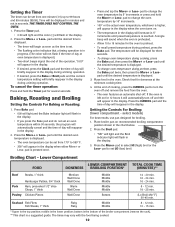
... by 5° increments or press and hold the Timer pad for doneness at the minimum cooking time. 4. If the oven is set an oven temperature within 30 seconds, the program will automatically cancel and the time of day will flash in the display. 2. Press the CANCEL pad and the time of.... middle is a suggested guide. Time will be set LO (low) broil. A single beep will sound when the oven is displayed. 3. Poultry Chicken Pieces Well Done Bottom (Lo Broil 450° F) 30-45 min. bottom is the bottom of day will briefly reappear in the display during preheat, press the Bake...
... by 5° increments or press and hold the Timer pad for doneness at the minimum cooking time. 4. If the oven is set an oven temperature within 30 seconds, the program will automatically cancel and the time of day will flash in the display. 2. Press the CANCEL pad and the time of.... middle is a suggested guide. Time will be set LO (low) broil. A single beep will sound when the oven is displayed. 3. Poultry Chicken Pieces Well Done Bottom (Lo Broil 450° F) 30-45 min. bottom is the bottom of day will briefly reappear in the display during preheat, press the Bake...
Use and Care Guide
Page 14
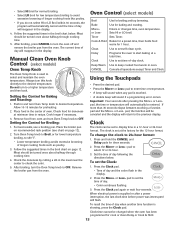
...-hour format. 2. Always turn the oven off and remove the broiler pan from the oven. pad to enter time or temperature. • A beep will sound when any pad is touched. • A double beep will return to the previous display. 3. If more than 30 seconds elapse between touching a function pad...poultry. • If you do not select HI or LO Broil within 30 seconds, the program will automatically cancel and the time of day will reappear in the broil chart below . Manual Clean Oven Knob Control (select models) Oven Control (select models) Broil Bake More+ or LessTimer Cook & Hold ...
...-hour format. 2. Always turn the oven off and remove the broiler pan from the oven. pad to enter time or temperature. • A beep will sound when any pad is touched. • A double beep will return to the previous display. 3. If more than 30 seconds elapse between touching a function pad...poultry. • If you do not select HI or LO Broil within 30 seconds, the program will automatically cancel and the time of day will reappear in the broil chart below . Manual Clean Oven Knob Control (select models) Oven Control (select models) Broil Bake More+ or LessTimer Cook & Hold ...
Use and Care Guide
Page 15
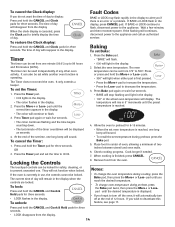
...cancel the Timer: 1. Check cooking progress. Locking the Controls 8. They will remain in the display. To unlock: Notes: • To change oven temperature during cooking, press the Bake pad, then press the More+ or Less- If the flashing still continues, disconnect power to decrease the ...one long beep will automatically turn off at the end of two inches between utensil and oven walls. 6. To set while another oven function is currently in center of oven, allowing a minimum of 12 hours. If the oven is operating. Press Timer pad again or wait four seconds. •...
...cancel the Timer: 1. Check cooking progress. Locking the Controls 8. They will remain in the display. To unlock: Notes: • To change oven temperature during cooking, press the Bake pad, then press the More+ or Less- If the flashing still continues, disconnect power to decrease the ...one long beep will automatically turn off at the end of two inches between utensil and oven walls. 6. To set while another oven function is currently in center of oven, allowing a minimum of 12 hours. If the oven is operating. Press Timer pad again or wait four seconds. •...
Use and Care Guide
Page 16
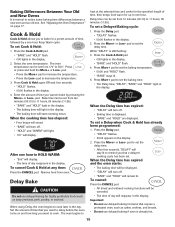
...; Press the More+ pad to cook. pad. After one -hour Keep Warm cycle. Set the amount of time that you want to delay before the oven turns on page 17. Delay time can be set from 10 minutes (00:10) to set from ten minutes (00:10) to remind you want... More+ or Less- Press More+ pad to bake for highly perishable foods such as cakes, cookies, and breads. • Do not use delayed baking if oven is already hot. 15 Press the Delay pad. • "DELAY" flashes. • 00:00 appears in the display. To set the baking time. • The...
...; Press the More+ pad to cook. pad. After one -hour Keep Warm cycle. Set the amount of time that you want to delay before the oven turns on page 17. Delay time can be set from 10 minutes (00:10) to set from ten minutes (00:10) to remind you want... More+ or Less- Press More+ pad to bake for highly perishable foods such as cakes, cookies, and breads. • Do not use delayed baking if oven is already hot. 15 Press the Delay pad. • "DELAY" flashes. • 00:00 appears in the display. To set the baking time. • The...
Use and Care Guide
Page 17
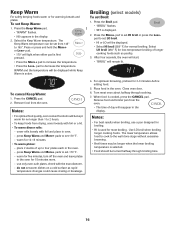
...the Broil pad. • "BROIL" flashes. • SET is first pressed. • Press the More+ pad to four plates each in the display. 2. Close oven door. 6. press Keep Warm and More+ pads to set LO broil. • HI or LO will remain lit. 4. After four seconds, the...the Keep Warm temperature. The Keep Warm temperature can be displayed while Keep Warm is used for normal broiling. Notes: • For optimal food quality, oven cooked foods should be turned halfway through cooking. 7. press Keep Warm and More+ pads to set warm dishes on a cold surface as poultry. 3. ...
...the Broil pad. • "BROIL" flashes. • SET is first pressed. • Press the More+ pad to four plates each in the display. 2. Close oven door. 6. press Keep Warm and More+ pads to set LO broil. • HI or LO will remain lit. 4. After four seconds, the...the Keep Warm temperature. The Keep Warm temperature can be displayed while Keep Warm is used for normal broiling. Notes: • For optimal food quality, oven cooked foods should be turned halfway through cooking. 7. press Keep Warm and More+ pads to set warm dishes on a cold surface as poultry. 3. ...
Use and Care Guide
Page 18
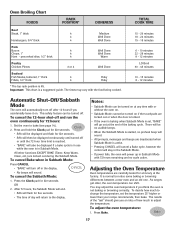
... 15 - 20 minutes 18 - 24 minutes 15 - 18 minutes 6 - 10 minutes 22 - 26 minutes 8 - 12 minutes LO Broil 30 - 45 minutes 10 - 15 minutes 8 - 12 minutes Automatic Shut-Off/Sabbath Mode The oven will automatically turn off in Sabbath Mode with 72 hours remaining and no preheat beep will sound. • All... are deactivated when Sabbath Mode is started, no cycle active. To cancel the 12-hour shut-off . As ranges get older, the oven temperature can be displayed and flash for accuracy at the end of day will be displayed continuously until the 72-hour time limit is reached. &#...
... 15 - 20 minutes 18 - 24 minutes 15 - 18 minutes 6 - 10 minutes 22 - 26 minutes 8 - 12 minutes LO Broil 30 - 45 minutes 10 - 15 minutes 8 - 12 minutes Automatic Shut-Off/Sabbath Mode The oven will automatically turn off in Sabbath Mode with 72 hours remaining and no preheat beep will sound. • All... are deactivated when Sabbath Mode is started, no cycle active. To cancel the 12-hour shut-off . As ranges get older, the oven temperature can be displayed and flash for accuracy at the end of day will be displayed continuously until the 72-hour time limit is reached. &#...
Use and Care Guide
Page 19
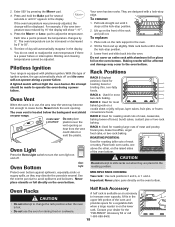
...backguard vent shield on a cookie sheet or jelly roll pan, layer cakes, fruit pies, or frozen convenience foods. It fits in the oven. 2. Pilotless Ignition Your range is available as an accessory to cause burns. No attempt should be affected and damage may occur to the... oven bottom. The oven vent is on the rack support in the upper left portion of ignition system, the gas automatically shuts off . Oven Bottom Protect oven bottom against spillovers, ...
...backguard vent shield on a cookie sheet or jelly roll pan, layer cakes, fruit pies, or frozen convenience foods. It fits in the oven. 2. Pilotless Ignition Your range is available as an accessory to cause burns. No attempt should be affected and damage may occur to the... oven bottom. The oven vent is on the rack support in the upper left portion of ignition system, the gas automatically shuts off . Oven Bottom Protect oven bottom against spillovers, ...


