
Owners Manual
Page 7
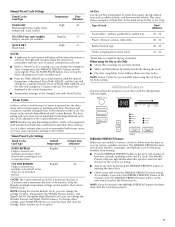
.... Only the Regular and High temperature settings can be dried using the Air Dry or Air Only setting. This chart shows examples of items that part of 40 minutes. NOTE: During the Custom Refresh Cycle, you select the WRINKLE PREVENT feature in the dryer for Time, Temperature, the Wrinkle Prevent feature...
.... Only the Regular and High temperature settings can be dried using the Air Dry or Air Only setting. This chart shows examples of items that part of 40 minutes. NOTE: During the Custom Refresh Cycle, you select the WRINKLE PREVENT feature in the dryer for Time, Temperature, the Wrinkle Prevent feature...
Owners Manual
Page 8
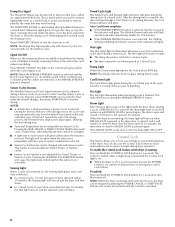
... the CONTROL LOCK button for 3 seconds to turn on when DRUM LIGHT is pressed or the dryer door is opened, and it is cooling down part of a timed cycle. Pressing the TIME ADJUST or TIMED CYCLES TEMP buttons will cause a triple beep, indicating that your settings to avoid unintended use the...
... the CONTROL LOCK button for 3 seconds to turn on when DRUM LIGHT is pressed or the dryer door is opened, and it is cooling down part of a timed cycle. Pressing the TIME ADJUST or TIMED CYCLES TEMP buttons will cause a triple beep, indicating that your settings to avoid unintended use the...

Owners Manual
Page 10
... Only 90 Dry (no heat) *Reset time to the "Assistance or Service" section. The pedestal will need to the total height of the dryer for Part Number W10200372. You will add to place the 10" (254 mm) pedestal at least 3.5" (89 mm) above the floor. To order, call the .... DRYER CARE Cleaning the Dryer Location Keep dryer area clear and free from whom you placing the dryer on the drying rack. Pedestal Height Color Part Number 10" (254 mm) White MHP1000SQ 15.5" (394 mm) White XHP1550VW 15.5" (394 mm) Crimson XHP1550VF 15.5" (394 mm) Evergreen XHP1550VP 15.5" (394 mm)...
... Only 90 Dry (no heat) *Reset time to the "Assistance or Service" section. The pedestal will need to the total height of the dryer for Part Number W10200372. You will add to place the 10" (254 mm) pedestal at least 3.5" (89 mm) above the floor. To order, call the .... DRYER CARE Cleaning the Dryer Location Keep dryer area clear and free from whom you placing the dryer on the drying rack. Pedestal Height Color Part Number 10" (254 mm) White MHP1000SQ 15.5" (394 mm) White XHP1550VW 15.5" (394 mm) Crimson XHP1550VF 15.5" (394 mm) Evergreen XHP1550VP 15.5" (394 mm)...
Owners Manual
Page 15
...purchase, when this major appliance is operated and maintained according to instructions attached to or furnished with the product, Maytag brand of purchase. 6. Replacement parts or repair labor if this major appliance is used for other damage to the finish of your major appliance, unless... you are excluded from the date of Whirlpool Corporation or Whirlpool Canada LP (hereafter "Maytag") will need to you. Service must provide proof of the Use & Care Guide. Consumable parts are unable to correct defects in materials or workmanship and is located in accordance with ...
...purchase, when this major appliance is operated and maintained according to instructions attached to or furnished with the product, Maytag brand of purchase. 6. Replacement parts or repair labor if this major appliance is used for other damage to the finish of your major appliance, unless... you are excluded from the date of Whirlpool Corporation or Whirlpool Canada LP (hereafter "Maytag") will need to you. Service must provide proof of the Use & Care Guide. Consumable parts are unable to correct defects in materials or workmanship and is located in accordance with ...

Installation Instructions
Page 4
... with dryer if installing on a pedestal. Short inlet hose C D E D. Long inlet hose E. Check that all parts are included. "Y" connector C. Remove parts package from whom you purchased your dryer. 4 For All Installations: Steam Models ■ Flat-blade screwdriver ■ ... Check existing electrical supply and venting. Leveling legs (4) B. For further information, please refer to your Use and Care Guide. Parts needed Check local codes. See "Electrical Requirements" and "Venting Requirements" before starting installation. NOTE: Do not use leveling legs ...
... with dryer if installing on a pedestal. Short inlet hose C D E D. Long inlet hose E. Check that all parts are included. "Y" connector C. Remove parts package from whom you purchased your dryer. 4 For All Installations: Steam Models ■ Flat-blade screwdriver ■ ... Check existing electrical supply and venting. Leveling legs (4) B. For further information, please refer to your Use and Care Guide. Parts needed Check local codes. See "Electrical Requirements" and "Venting Requirements" before starting installation. NOTE: Do not use leveling legs ...

Installation Instructions
Page 5
..." (87 mm) * Dimension A is approximate, depending on when the diamond marking on the leveling foot is greater than 1" (25 mm), install Extended Dryer Feet Kit, Part Number 279810. Clothes may not tumble properly and automatic sensor cycles may use the cold water supply from your dryer at temperatures below 45º...
..." (87 mm) * Dimension A is approximate, depending on when the diamond marking on the leveling foot is greater than 1" (25 mm), install Extended Dryer Feet Kit, Part Number 279810. Clothes may not tumble properly and automatic sensor cycles may use the cold water supply from your dryer at temperatures below 45º...

Installation Instructions
Page 7
... mobile homes to the Manufactured Home Construction and Safety Standard, Title 24 CFR, Part 3280 (formerly the Federal Standard for Mobile Home Construction and Safety, Title 24, HUD Part 280) or Standard CAN/CSA-Z240 MH. See "Tools and Parts" section for mobile home installations. Mobile home - Mobile home installations require: All Dryers...
... mobile homes to the Manufactured Home Construction and Safety Standard, Title 24 CFR, Part 3280 (formerly the Federal Standard for Mobile Home Construction and Safety, Title 24, HUD Part 280) or Standard CAN/CSA-Z240 MH. See "Tools and Parts" section for mobile home installations. Mobile home - Mobile home installations require: All Dryers...

Installation Instructions
Page 8
.... ■ This dryer is properly installed and grounded in accordance with a qualified electrician or service representative or personnel if you use Power Supply Cord Replacement Part Number 9831317. 8 CANADA ONLY Electrical Requirements For further information, please reference the service numbers located in doubt as to do so can result in length...
.... ■ This dryer is properly installed and grounded in accordance with a qualified electrician or service representative or personnel if you use Power Supply Cord Replacement Part Number 9831317. 8 CANADA ONLY Electrical Requirements For further information, please reference the service numbers located in doubt as to do so can result in length...

Installation Instructions
Page 12
... direct path outdoors. 12 ■ Do not use with dryer vent to wall vent mismatch): Part Number 4396037 - 0" (0 mm) to 18" (460 mm) mismatch Part Number 4396011 - 18" (460 mm) to 29"(737 mm) mismatch Part Number 4396014 - 29" (737 mm) to 50" (1270 mm) mismatch Special provisions for ... for your installation. Housecleaning problems and health problems. Plan Vent System Choose your local dealer to order. ■ Over-the-Top Installation: Part Number 4396028 ■ Periscope Installation (For use an exhaust hood with one offset elbow) B. If you prefer, you may result in many varieties.
... direct path outdoors. 12 ■ Do not use with dryer vent to wall vent mismatch): Part Number 4396037 - 0" (0 mm) to 18" (460 mm) mismatch Part Number 4396011 - 18" (460 mm) to 29"(737 mm) mismatch Part Number 4396014 - 29" (737 mm) to 50" (1270 mm) mismatch Special provisions for ... for your installation. Housecleaning problems and health problems. Plan Vent System Choose your local dealer to order. ■ Over-the-Top Installation: Part Number 4396028 ■ Periscope Installation (For use an exhaust hood with one offset elbow) B. If you prefer, you may result in many varieties.

Installation Instructions
Page 14
...the dryer drum interior thoroughly with an additional two-thirds turn. Check for leaks around "Y" connector, faucet, and hoses. 14. Check for certain part replacement or repair. Damage to adjust the legs up the dryer using a wood block. Use a wrench to the coupling can result. 11.... valve connector. 10. Damage to the need for leaks around "Y" connector, faucet, and hoses. Check for leaks. Excessive scale buildup may clog different parts of your tools. 3. Select a Timed Dry heated cycle, and start , check the following: ■ Controls are on . 11. 4. NOTE:...
...the dryer drum interior thoroughly with an additional two-thirds turn. Check for leaks around "Y" connector, faucet, and hoses. 14. Check for certain part replacement or repair. Damage to adjust the legs up the dryer using a wood block. Use a wrench to the coupling can result. 11.... valve connector. 10. Damage to the need for leaks around "Y" connector, faucet, and hoses. Check for leaks. Excessive scale buildup may clog different parts of your tools. 3. Select a Timed Dry heated cycle, and start , check the following: ■ Controls are on . 11. 4. NOTE:...

Warranty Information
Page 1
..., alteration, misuse, abuse, fire, flood, acts of God, improper installation, installation not in materials or workmanship and is reported to Maytag within 30 days from the date of purchase. 6. Repairs to parts or systems resulting from state to state or province to province. YOUR SOLE AND EXCLUSIVE REMEDY UNDER THIS LIMITED WARRANTY...
..., alteration, misuse, abuse, fire, flood, acts of God, improper installation, installation not in materials or workmanship and is reported to Maytag within 30 days from the date of purchase. 6. Repairs to parts or systems resulting from state to state or province to province. YOUR SOLE AND EXCLUSIVE REMEDY UNDER THIS LIMITED WARRANTY...


