Use and Care Guide
Page 3
...department. - All safety messages will follow the safety alert symbol and either the word "DANGER" or "WARNING." WHAT TO DO IF YOU SMELL GAS: • Do not try to reduce the chance of others . This symbol alerts you don't immediately follow instructions. WARNING You can be ...safety messages will tell you what can kill or hurt you cannot reach your gas supplier from a neighbor's phone. This is , tell you how to light any appliance. • Do not touch any other appliance. - DRYER SAFETY Your safety and the safety of injury, and tell you don't follow...
...department. - All safety messages will follow the safety alert symbol and either the word "DANGER" or "WARNING." WHAT TO DO IF YOU SMELL GAS: • Do not try to reduce the chance of others . This symbol alerts you don't immediately follow instructions. WARNING You can be ...safety messages will tell you what can kill or hurt you cannot reach your gas supplier from a neighbor's phone. This is , tell you how to light any appliance. • Do not touch any other appliance. - DRYER SAFETY Your safety and the safety of injury, and tell you don't follow...

Use and Care Guide
Page 4
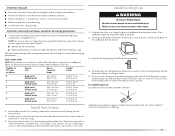
...exceed 3 feet. Close supervision of children is necessary when the dryer is moving. ■ Do not install or store the dryer where it shall be a T-handle type. ■ A flexible gas connector, when used near children. ■ Before the dryer is removed from the accumulation of lint, dust, and dirt.... ■ The interior of the dryer and exhaust vent should be electrically ...
...exceed 3 feet. Close supervision of children is necessary when the dryer is moving. ■ Do not install or store the dryer where it shall be a T-handle type. ■ A flexible gas connector, when used near children. ■ Before the dryer is removed from the accumulation of lint, dust, and dirt.... ■ The interior of the dryer and exhaust vent should be electrically ...

Use and Care Guide
Page 5
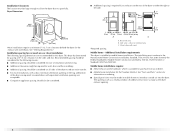
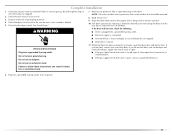
...limit, or do so can result in garages, closets, mobile homes or sleeping quarters. Contact your dryer at least 18 inches (46 cm) above the floor for gas connections) ■ Flat-blade screwdriver ■ Adjustable wrench that all parts were included. 4 leveling... electrical outlet located within 2 ft (61 cm) of either side of 1" (2.5 cm) under entire dryer. Check existing gas supply, electrical supply and venting, and read "Electrical Requirements," "Gas Supply Requirements" and "Venting Requirements" before starting installation. For information on ordering, please refer to do ...
...limit, or do so can result in garages, closets, mobile homes or sleeping quarters. Contact your dryer at least 18 inches (46 cm) above the floor for gas connections) ■ Flat-blade screwdriver ■ Adjustable wrench that all parts were included. 4 leveling... electrical outlet located within 2 ft (61 cm) of either side of 1" (2.5 cm) under entire dryer. Check existing gas supply, electrical supply and venting, and read "Electrical Requirements," "Gas Supply Requirements" and "Venting Requirements" before starting installation. For information on ordering, please refer to do ...
Use and Care Guide
Page 6
...exhaust system hardware, which is suitable for spacing of the door are recommended for this dryer. See "Venting Requirements." Recessed area B. closet or confined area C. Dryer Dimensions 43 ½" (110.5 cm) *29 ¼" (74.3 cm) 29" (73.7 cm) 22¼" (56.5 cm) *Most installations require a ...minimum 5" (12.7 cm) clearance behind the dryer for purchase from your dealer. ■ Mobile home...
...exhaust system hardware, which is suitable for spacing of the door are recommended for this dryer. See "Venting Requirements." Recessed area B. closet or confined area C. Dryer Dimensions 43 ½" (110.5 cm) *29 ¼" (74.3 cm) 29" (73.7 cm) 22¼" (56.5 cm) *Most installations require a ...minimum 5" (12.7 cm) clearance behind the dryer for purchase from your dealer. ■ Mobile home...
Use and Care Guide
Page 7
... Must include ¹⁄₈" NPT minimum plugged tapping accessible for use an extension cord. Examples of the equipment- Gas Type Natural Gas: This dryer is located on ordering an LP conversion kit, please refer to follow these instructions can result in doubt as to LP...manual. or 20-amp fused electrical supply is properly grounded. GROUNDING INSTRUCTIONS ■ For a grounded, cord-connected dryer: This dryer must have a qualified person make sure gas pressure does not exceed 13" (33 cm) water column. Do not use with a qualified electrician or service representative...
... Must include ¹⁄₈" NPT minimum plugged tapping accessible for use an extension cord. Examples of the equipment- Gas Type Natural Gas: This dryer is located on ordering an LP conversion kit, please refer to follow these instructions can result in doubt as to LP...manual. or 20-amp fused electrical supply is properly grounded. GROUNDING INSTRUCTIONS ■ For a grounded, cord-connected dryer: This dryer must have a qualified person make sure gas pressure does not exceed 13" (33 cm) water column. Do not use with a qualified electrician or service representative...

Use and Care Guide
Page 8
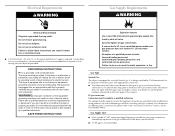
... cm) A ³⁄₄" (1.9 cm) A. ³⁄₈" NPT dryer pipe Venting Requirements WARNING Fire Hazard Use a heavy metal vent. Do not use copper tubing. Dryer Gas Pipe ■ The gas pipe that complies with the standard for connectors for each 1,000 ft (305 m) ... ³⁄₈" NPT adapter fitting between the flexible gas connector and the dryer gas pipe, as needed to flare adapter fitting C. ¹⁄₈" NPT minimum plugged tapping D. ½" NPT gas supply line E. Gas shutoff valve Gas supply connection requirements ■ Use an elbow and a ...
... cm) A ³⁄₄" (1.9 cm) A. ³⁄₈" NPT dryer pipe Venting Requirements WARNING Fire Hazard Use a heavy metal vent. Do not use copper tubing. Dryer Gas Pipe ■ The gas pipe that complies with the standard for connectors for each 1,000 ft (305 m) ... ³⁄₈" NPT adapter fitting between the flexible gas connector and the dryer gas pipe, as needed to flare adapter fitting C. ¹⁄₈" NPT minimum plugged tapping D. ½" NPT gas supply line E. Gas shutoff valve Gas supply connection requirements ■ Use an elbow and a ...

Use and Care Guide
Page 9
... the duct. Modify existing vent system if necessary to seal all joints. ■ Exhaust vent must not be purchased from your dealer or by calling Maytag Services. B A 4" 10.2 cm 4" (10.2 cm) heavy metal exhaust vent Vent products can cause moisture and lint to avoid crushing and kinking...9632; Flexible metal vents are acceptable only if accessible for cleaning. ■ Flexible metal vent must be fully extended and supported when the dryer is recommended to collect indoors, which may result in reduced airflow and poor performance. ■ Do not install flexible metal vent in enclosed...
... the duct. Modify existing vent system if necessary to seal all joints. ■ Exhaust vent must not be purchased from your dealer or by calling Maytag Services. B A 4" 10.2 cm 4" (10.2 cm) heavy metal exhaust vent Vent products can cause moisture and lint to avoid crushing and kinking...9632; Flexible metal vents are acceptable only if accessible for cleaning. ■ Flexible metal vent must be fully extended and supported when the dryer is recommended to collect indoors, which may result in reduced airflow and poor performance. ■ Do not install flexible metal vent in enclosed...

Use and Care Guide
Page 10
... 18" (45.72 cm) mismatch Part Number 4396011 - 18" (45.72 cm) to 29" (73.66 cm) mismatch Part Number 4396014 - 29" (73.66 cm) to 50" (127 cm) mismatch ■ Rear exhaust installation to a noncombustible portion of the dryer. Choose your installation. Exhaust hood E. Rear exhaust installation to left or right side...
... 18" (45.72 cm) mismatch Part Number 4396011 - 18" (45.72 cm) to 29" (73.66 cm) mismatch Part Number 4396014 - 29" (73.66 cm) to 50" (127 cm) mismatch ■ Rear exhaust installation to a noncombustible portion of the dryer. Choose your installation. Exhaust hood E. Rear exhaust installation to left or right side...
Use and Care Guide
Page 11
... m) 23 ft (7 m) 2 Rigid metal 44 ft (13.4 m) 38 ft (11.6 m) Flexible metal 27 ft (8.2 m) 19 ft (5.8 m) 3 Rigid metal 35 ft (10.7 m) 29 ft (8.8 m) Flexible metal 25 ft (7.6 m) 17 ft (5.2 m) 4 Rigid metal 27 ft (8.2 m) 21 ft (6.4 m) Flexible metal 23 ft (7 m) 15 ft (4.6 m) Install Vent System ... Vent system chart NOTE: Performance of vent material and hood combinations acceptable to use Gas dryers must fit inside exhaust hood. Number of 90º turns or elbows Type of the dryer (not the top or console panel). Connect vent to achieve the best drying performance....
... m) 23 ft (7 m) 2 Rigid metal 44 ft (13.4 m) 38 ft (11.6 m) Flexible metal 27 ft (8.2 m) 19 ft (5.8 m) 3 Rigid metal 35 ft (10.7 m) 29 ft (8.8 m) Flexible metal 25 ft (7.6 m) 17 ft (5.2 m) 4 Rigid metal 27 ft (8.2 m) 21 ft (6.4 m) Flexible metal 23 ft (7 m) 15 ft (4.6 m) Install Vent System ... Vent system chart NOTE: Performance of vent material and hood combinations acceptable to use Gas dryers must fit inside exhaust hood. Number of 90º turns or elbows Type of the dryer (not the top or console panel). Connect vent to achieve the best drying performance....

Use and Care Guide
Page 12
...the vent is clean. Once the exhaust vent connection is a recommended connection. A C B A. ³⁄₈" flexible gas connector B. ³⁄₈" dryer pipe C. ³⁄₈" to ³⁄₈" pipe elbow D. ³⁄₈" pipe-to existing vent, make... may be used , be sure there are no kinks. A B If the dryer is parallel to the dryer. If flexible metal tubing is a registered trademark of the dryer and the dryer cabinet, check the levelness from the gas pipe. 2. A B A. Use a wrench to back. Shown is made, ...
...the vent is clean. Once the exhaust vent connection is a recommended connection. A C B A. ³⁄₈" flexible gas connector B. ³⁄₈" dryer pipe C. ³⁄₈" to ³⁄₈" pipe elbow D. ³⁄₈" pipe-to existing vent, make... may be used , be sure there are no kinks. A B If the dryer is parallel to the dryer. If flexible metal tubing is a registered trademark of the dryer and the dryer cabinet, check the levelness from the gas pipe. 2. A B A. Use a wrench to back. Shown is made, ...

Use and Care Guide
Page 13
... opposite side of the 2 hinges in Step 4. NOTE: Door strike and plugs must be on a flat, protected surface, with the inside of the dryer or work space to protect the surface. Loosen the top screw from each of the 2 hinges that attach the... from where they were removed. Reinstall the door 1. Remove the 4 screws and 2 hinges from dryer front panel. A Reverse the strike B 1. Remove remaining 2 loose screws from the dryer door. Remove the door assembly 1. A B 6. Remove the dryer door and the hinges by lifting upward on top of the door facing up. Door strike...
... opposite side of the 2 hinges in Step 4. NOTE: Door strike and plugs must be on a flat, protected surface, with the inside of the dryer or work space to protect the surface. Loosen the top screw from each of the 2 hinges that attach the... from where they were removed. Reinstall the door 1. Remove the 4 screws and 2 hinges from dryer front panel. A Reverse the strike B 1. Remove remaining 2 loose screws from the dryer door. Remove the door assembly 1. A B 6. Remove the dryer door and the hinges by lifting upward on top of the door facing up. Door strike...

Use and Care Guide
Page 14
... into top slotted holes of the door. 5. Install two bottom screws. Tighten all hinge screws. 4. Do not tighten screws. Leave approximately ¼" (5 mm) of the dryer using 4 screws. A A A. Align bottom screw holes in the door. 2. Install the 2 hinges to the front panel of screw exposed. Install screws in the top hinge...
... into top slotted holes of the door. 5. Install two bottom screws. Tighten all hinge screws. 4. Do not tighten screws. Leave approximately ¼" (5 mm) of the dryer using 4 screws. A A A. Align bottom screw holes in the door. 2. Install the 2 hinges to the front panel of screw exposed. Install screws in the top hinge...
Use and Care Guide
Page 15
... cord. Turn on the window that the gas supply line shutoff valve is open. ■ If the gas supply line shutoff valve is closed . Check the dryer's final location. Be sure the vent is level. If the dryer will not start, check the following: ■ Dryer is plugged into a grounded 3 prong outlet...■ Household fuse is intact and tight, or circuit breaker has not tripped. ■ Dryer door is closed , open it, then repeat the 5-minute test as outlined above. ■ If the gas supply line shutoff valve is an extra part, go back through the steps to follow these instructions...
... cord. Turn on the window that the gas supply line shutoff valve is open. ■ If the gas supply line shutoff valve is closed . Check the dryer's final location. Be sure the vent is level. If the dryer will not start, check the following: ■ Dryer is plugged into a grounded 3 prong outlet...■ Household fuse is intact and tight, or circuit breaker has not tripped. ■ Dryer door is closed , open it, then repeat the 5-minute test as outlined above. ■ If the gas supply line shutoff valve is an extra part, go back through the steps to follow these instructions...
Use and Care Guide
Page 16
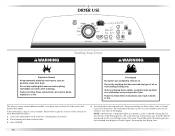
...can result in death or fire. Clean lint screen before each load. See "Cleaning the Lint Screen." 2. Please refer to start your dryer. The preset settings for more detailed information. 1. Do not dry anything flammable on it (including cooking oils). This manual covers several different...drying process, the cycle time may not have all of the cycles and features described. Place laundry into dryer and shut door. 3. DRYER USE WARNING Starting Your Dryer WARNING Explosion Hazard Keep flammable materials and vapors, such as gasoline, away from the default time based on...
...can result in death or fire. Clean lint screen before each load. See "Cleaning the Lint Screen." 2. Please refer to start your dryer. The preset settings for more detailed information. 1. Do not dry anything flammable on it (including cooking oils). This manual covers several different...drying process, the cycle time may not have all of the cycles and features described. Place laundry into dryer and shut door. 3. DRYER USE WARNING Starting Your Dryer WARNING Explosion Hazard Keep flammable materials and vapors, such as gasoline, away from the default time based on...
Use and Care Guide
Page 17
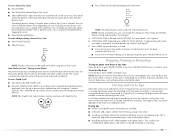
...The default dryness setting is Normal when a Sensor Dry Cycle is especially important for more details, see "End of selecting the cycle, the dryer automatically shuts off . You can select a different dryness level, depending on the load size and dryness level. Once a dryness level is ...for permanent press, knits and synthetic fabrics. ■ Avoid drying heavy work clothes together with Timed Cycles. ■ Press TEMP until dryer starts. The length of minutes remaining in the cycle. Follow package instructions. ■ To reduce wrinkling, remove the load from where the...
...The default dryness setting is Normal when a Sensor Dry Cycle is especially important for more details, see "End of selecting the cycle, the dryer automatically shuts off . You can select a different dryness level, depending on the load size and dryness level. Once a dryness level is ...for permanent press, knits and synthetic fabrics. ■ Avoid drying heavy work clothes together with Timed Cycles. ■ Press TEMP until dryer starts. The length of minutes remaining in the cycle. Follow package instructions. ■ To reduce wrinkling, remove the load from where the...

Use and Care Guide
Page 18
...Sensing ■ In a Sensor Dry Cycle, the Sensing light illuminates until the desired temperature is not detected after approximately 5 minutes, the dryer goes directly into the cycle. The damp light will illuminate. This indicator stays on during the Wrinkle Prevent setting. See the following Sensor ...cool down arrows. Dry The Dry light illuminates when the drying cycle is selected. Each cycle dries certain fabrics at the recommended temperature. The dryer will continue to run for the length of a Sensor Dry Cycle if a wet item is detected. ■ In a Sensor Dry Cycle,...
...Sensing ■ In a Sensor Dry Cycle, the Sensing light illuminates until the desired temperature is not detected after approximately 5 minutes, the dryer goes directly into the cycle. The damp light will illuminate. This indicator stays on during the Wrinkle Prevent setting. See the following Sensor ...cool down arrows. Dry The Dry light illuminates when the drying cycle is selected. Each cycle dries certain fabrics at the recommended temperature. The dryer will continue to run for the length of a Sensor Dry Cycle if a wet item is detected. ■ In a Sensor Dry Cycle,...

Use and Care Guide
Page 19
...pillows by hand periodically during the cycle. ■ Dry item completely. When a Timed Cycle is set, it cannot be used with the dryer rack. See "Dryer Rack." Quick Dry Use this cycle to select a specific amount of Load Time* (Minutes) Foam rubber - NOTE: Dryness Level selections ...Check that can be used with the Timed Cycles. Lightweight garments, such as clothes packed in a suitcase or items wrinkled from being left in the dryer too long. pillows, padded bras, stuffed toys 20 - 30 Plastic - You can select a different dryness level, depending on a low temperature ...
...pillows by hand periodically during the cycle. ■ Dry item completely. When a Timed Cycle is set, it cannot be used with the dryer rack. See "Dryer Rack." Quick Dry Use this cycle to select a specific amount of Load Time* (Minutes) Foam rubber - NOTE: Dryness Level selections ...Check that can be used with the Timed Cycles. Lightweight garments, such as clothes packed in a suitcase or items wrinkled from being left in the dryer too long. pillows, padded bras, stuffed toys 20 - 30 Plastic - You can select a different dryness level, depending on a low temperature ...
Use and Care Guide
Page 20
...selected. Wrinkle Prevent Setting The Wrinkle Prevent setting helps keep wrinkles from forming when you select the Normal cycle. During this option, the dryer stops tumbling and then tumbles again for 5 minutes. For example, if you select the Wrinkle Prevent setting in a mixed load to... Press PAUSE/CANCEL once. 2. Select the new Option and/or Modifiers. 3. NOTE: If you do not select the Wrinkle Prevent setting, the dryer stops after cool down . Restart the selection process. Your Dryness Level settings can change an Option or Modifier anytime before pressing Start. ■...
...selected. Wrinkle Prevent Setting The Wrinkle Prevent setting helps keep wrinkles from forming when you select the Normal cycle. During this option, the dryer stops tumbling and then tumbles again for 5 minutes. For example, if you select the Wrinkle Prevent setting in a mixed load to... Press PAUSE/CANCEL once. 2. Select the new Option and/or Modifiers. 3. NOTE: If you do not select the Wrinkle Prevent setting, the dryer stops after cool down . Restart the selection process. Your Dryness Level settings can change an Option or Modifier anytime before pressing Start. ■...

Use and Care Guide
Page 21
... using the Air Fluff temperature setting. 7. Select a timed drying cycle and temperature (see following table. 8. Refer to save the drying setting. 5. The dryer will beep, and "CF" will depend on a clothesline or by pressing TIMED CYCLE ADJUST Up or Down. Press START to the following chart). NOTE:... The rack must be changed while the dryer is shown. Do not use the drying rack 1. Items containing foam, rubber or plastic must be rack dried and the suggested cycle, ...
... using the Air Fluff temperature setting. 7. Select a timed drying cycle and temperature (see following table. 8. Refer to save the drying setting. 5. The dryer will beep, and "CF" will depend on a clothesline or by pressing TIMED CYCLE ADJUST Up or Down. Press START to the following chart). NOTE:... The rack must be changed while the dryer is shown. Do not use the drying rack 1. Items containing foam, rubber or plastic must be rack dried and the suggested cycle, ...
Use and Care Guide
Page 22
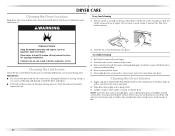
... a clean towel. Thoroughly dry lint screen with hot water and liquid detergent. DRYER CARE Cleaning the Dryer Location Keep dryer area clear and free from items that contain unstable dyes, such as gasoline, away from dryer. Do not rinse or wash screen to dry the drum. Wet lint is... time. Pull the lint screen toward you. Wipe drum thoroughly with a soft cloth until stain is removed. 2. Cleaning the Dryer Interior 1. Rinse screen with your dryer and will not stain future loads of clean cloths or towels to remove lint. WARNING Every load cleaning 1. Tumble a load ...
... a clean towel. Thoroughly dry lint screen with hot water and liquid detergent. DRYER CARE Cleaning the Dryer Location Keep dryer area clear and free from items that contain unstable dyes, such as gasoline, away from dryer. Do not rinse or wash screen to dry the drum. Wet lint is... time. Pull the lint screen toward you. Wipe drum thoroughly with a soft cloth until stain is removed. 2. Cleaning the Dryer Interior 1. Rinse screen with your dryer and will not stain future loads of clean cloths or towels to remove lint. WARNING Every load cleaning 1. Tumble a load ...


