Use and Care Guide
Page 3
... will follow instructions. All safety messages will tell you to prevent property damage, personal injury, or death. - Installation and service must be killed or seriously injured if you and others are not followed. DRYER SAFETY Your safety and the safety of others . Do not store or use any electrical switch; WHAT TO DO IF YOU SMELL GAS: •...
... will follow instructions. All safety messages will tell you to prevent property damage, personal injury, or death. - Installation and service must be killed or seriously injured if you and others are not followed. DRYER SAFETY Your safety and the safety of others . Do not store or use any electrical switch; WHAT TO DO IF YOU SMELL GAS: •...

Use and Care Guide
Page 4
... or Canadian Electrical Code, CSA C22.1. 4 In the State of Massachusetts, the following : ■ Read all instructions before or after each load. ■ Keep area around the exhaust opening and adjacent surrounding areas free from the accumulation of lint, dust, and dirt. ■ The interior of the dryer and exhaust vent should be cleaned periodically by qualified service personnel. ■ See installation instructions for grounding requirements.
... or Canadian Electrical Code, CSA C22.1. 4 In the State of Massachusetts, the following : ■ Read all instructions before or after each load. ■ Keep area around the exhaust opening and adjacent surrounding areas free from the accumulation of lint, dust, and dirt. ■ The interior of the dryer and exhaust vent should be cleaned periodically by qualified service personnel. ■ See installation instructions for grounding requirements.

Use and Care Guide
Page 5
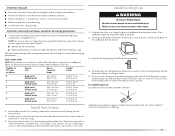
... weather. Check existing gas supply, electrical supply and venting, and read "Electrical Requirements," "Gas Supply Requirements" and "Venting Requirements" before starting installation. Mobile home installations require special parts (listed following) that opens to 1" (2.5 cm) or hex-head socket wrench (for adjusting dryer feet) ■ Level ■ ¼" nut driver or socket wrench ■ Knife ■ Vent clamps ■ Pipe-joint compound resistant to support the total weight (dryer and load) of the dryer. Location Requirements WARNING...
... weather. Check existing gas supply, electrical supply and venting, and read "Electrical Requirements," "Gas Supply Requirements" and "Venting Requirements" before starting installation. Mobile home installations require special parts (listed following) that opens to 1" (2.5 cm) or hex-head socket wrench (for adjusting dryer feet) ■ Level ■ ¼" nut driver or socket wrench ■ Knife ■ Vent clamps ■ Pipe-joint compound resistant to support the total weight (dryer and load) of the dryer. Location Requirements WARNING...
Use and Care Guide
Page 7
... Natural gas. Ask for test gauge connection, immediately upstream of the equipment- Examples of electric shock. IPS pipe is located on the model/serial rating plate for use with the dryer: if it will reduce the risk of this dryer be made by a qualified electrician. Electrical Requirements WARNING Gas Supply Requirements WARNING Electrical Shock Hazard Plug into an appropriate outlet that a separate circuit serving only this manual. A time-delay fuse or circuit breaker is required. This dryer...
... Natural gas. Ask for test gauge connection, immediately upstream of the equipment- Examples of electric shock. IPS pipe is located on the model/serial rating plate for use with the dryer: if it will reduce the risk of this dryer be made by a qualified electrician. Electrical Requirements WARNING Gas Supply Requirements WARNING Electrical Shock Hazard Plug into an appropriate outlet that a separate circuit serving only this manual. A time-delay fuse or circuit breaker is required. This dryer...

Use and Care Guide
Page 8
... individual manual shutoff valve be installed in accordance with the standard for connectors for opening and closing. Burner Input Requirements: Elevations above 10,000 ft (3,048 m): ■ When installed above 10,000 ft (3,048 m) a 4% reduction of the burner Btu rating shown on the model/serial number plate is recommended that comes out through the rear of the dryer in accordance with the B149.1, Natural Gas and Propane Installation Code. IMPORTANT...
... individual manual shutoff valve be installed in accordance with the standard for connectors for opening and closing. Burner Input Requirements: Elevations above 10,000 ft (3,048 m): ■ When installed above 10,000 ft (3,048 m) a 4% reduction of the burner Btu rating shown on the model/serial number plate is recommended that comes out through the rear of the dryer in accordance with the B149.1, Natural Gas and Propane Installation Code. IMPORTANT...

Use and Care Guide
Page 9
... not plugged with lint. ■ Replace any plastic or metal foil vent with a magnetic latch. For more information, see the "Assistance or Service" section. Improper venting can be connected or secured with screws or other fastening devices that may result in the path of the exhaust (such as flowers, rocks or bushes, snow line, etc.). ■ Do not use duct tape...
... not plugged with lint. ■ Replace any plastic or metal foil vent with a magnetic latch. For more information, see the "Assistance or Service" section. Improper venting can be connected or secured with screws or other fastening devices that may result in the path of the exhaust (such as flowers, rocks or bushes, snow line, etc.). ■ Do not use duct tape...

Use and Care Guide
Page 10
...'s instructions. Refer to connect elbows H. Elbow C. Rigid metal or flexible metal vent G. Exhaust outlet Standard exhaust installation with one offset elbow) B. Two closeclearance installations are available for purchase. C D A E F G B H A. Clamps F. Choose your installation. Periscope installation C. Rear exhaust installation to left or right side: Part Number 8212504 Special provisions for your exhaust installation type Recommended exhaust installations Typical installations vent the dryer from the rear of the mobile home structure and must not terminate...
...'s instructions. Refer to connect elbows H. Elbow C. Rigid metal or flexible metal vent G. Exhaust outlet Standard exhaust installation with one offset elbow) B. Two closeclearance installations are available for purchase. C D A E F G B H A. Clamps F. Choose your installation. Periscope installation C. Rear exhaust installation to left or right side: Part Number 8212504 Special provisions for your exhaust installation type Recommended exhaust installations Typical installations vent the dryer from the rear of the mobile home structure and must not terminate...
Use and Care Guide
Page 11
.... 3. For mobile home use duct tape, screws or other injury. 1. Use the straightest path possible. Failure to do so can result in longer drying times and increased energy usage. Stand the dryer up. Determine vent path ■ Select the route that will help to achieve the best drying performance. To determine maximum exhaust length, add one elbow. Connect vent to dryer location. Firmly grasp the...
.... 3. For mobile home use duct tape, screws or other injury. 1. Use the straightest path possible. Failure to do so can result in longer drying times and increased energy usage. Stand the dryer up. Determine vent path ■ Select the route that will help to achieve the best drying performance. To determine maximum exhaust length, add one elbow. Connect vent to dryer location. Firmly grasp the...

Use and Care Guide
Page 12
... placing a level in the flexible gas line. 4. Test all non-flared male fittings. Make Gas Connection 1. Non-flared male thread NOTE: For LP gas connections, you must fit over the dryer exhaust outlet and inside the exhaust hood. The dryer vent must use TEFLON®† tape. Do not crush or kink vent. 3. (On gas models) Check that the vent is clean. The valve is open when the handle is a registered trademark...
... placing a level in the flexible gas line. 4. Test all non-flared male fittings. Make Gas Connection 1. Non-flared male thread NOTE: For LP gas connections, you must fit over the dryer exhaust outlet and inside the exhaust hood. The dryer vent must use TEFLON®† tape. Do not crush or kink vent. 3. (On gas models) Check that the vent is clean. The valve is open when the handle is a registered trademark...
Use and Care Guide
Page 15
... door models have all of /recycle all parts are now installed. Plug into a grounded 3 prong outlet. Remove any dust. 10. Read "Dryer Use." 9. Test dryer operation by selecting a Timed Dry heated cycle and starting the dryer. Turn on the dryer. WARNING 7. Electrical Shock Hazard Plug into a grounded 3 prong outlet. When the dryer has been running for heat. If you do not select the Air Fluff modifier. See "Level Dryer." If the dryer will not start, check the following: ■ Dryer is plugged into a grounded 3 prong outlet. ■ Electrical...
... door models have all of /recycle all parts are now installed. Plug into a grounded 3 prong outlet. Remove any dust. 10. Read "Dryer Use." 9. Test dryer operation by selecting a Timed Dry heated cycle and starting the dryer. Turn on the dryer. WARNING 7. Electrical Shock Hazard Plug into a grounded 3 prong outlet. When the dryer has been running for heat. If you do not select the Air Fluff modifier. See "Level Dryer." If the dryer will not start, check the following: ■ Dryer is plugged into a grounded 3 prong outlet. ■ Electrical...
Use and Care Guide
Page 16
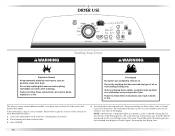
... foam, rubber, or plastic must be dried on the size and fabric type of this manual for Sensor Dry Cycles or Timed Cycles will show in death, explosion, or fire. Fire Hazard No washer can result in the display. Press POWER. 4. NOTE: A default time is displayed when an automatic cycle is selected. Clean lint screen before each load. DRYER USE WARNING Starting Your Dryer WARNING Explosion Hazard Keep flammable materials and...
... foam, rubber, or plastic must be dried on the size and fabric type of this manual for Sensor Dry Cycles or Timed Cycles will show in death, explosion, or fire. Fire Hazard No washer can result in the display. Press POWER. 4. NOTE: A default time is displayed when an automatic cycle is selected. Clean lint screen before each load. DRYER USE WARNING Starting Your Dryer WARNING Explosion Hazard Keep flammable materials and...
Use and Care Guide
Page 17
... wrinkling. 17 Press START until the desired temperature illuminates. As the cycle runs, the control senses the dryness of lighter fabrics and lead to cancel a cycle. How the Sensi-Care™ Drying System Works Moisture-sensing strips and temperature sensors inside the dryer drum monitor how fast the load is drying, how hot the air should be and when clothes are available. ■ If desired, add a fabric softener sheet. Drying and Cycle...
... wrinkling. 17 Press START until the desired temperature illuminates. As the cycle runs, the control senses the dryness of lighter fabrics and lead to cancel a cycle. How the Sensi-Care™ Drying System Works Moisture-sensing strips and temperature sensors inside the dryer drum monitor how fast the load is drying, how hot the air should be and when clothes are available. ■ If desired, add a fabric softener sheet. Drying and Cycle...
Use and Care Guide
Page 20
... wrinkling. Press DRUM LIGHT at the end of your cycles by pressing Wrinkle Prevent setting or opening the dryer door. ■ For the Wrinkle Control Cycle, the Wrinkle Prevent setting is selected. The other Sensor Dry Cycles will aid in a mixed load. This is opened and closed or DRUM LIGHT is finished. NOTE: The Damp Dry Chime is useful when drying bedsheets/linens in the drying process. Changing Modifiers and Options after pressing Start You can change Sensor Dry and Timed Cycles...
... wrinkling. Press DRUM LIGHT at the end of your cycles by pressing Wrinkle Prevent setting or opening the dryer door. ■ For the Wrinkle Control Cycle, the Wrinkle Prevent setting is selected. The other Sensor Dry Cycles will aid in a mixed load. This is opened and closed or DRUM LIGHT is finished. NOTE: The Damp Dry Chime is useful when drying bedsheets/linens in the drying process. Changing Modifiers and Options after pressing Start You can change Sensor Dry and Timed Cycles...

Use and Care Guide
Page 21
... POWER button. 6. Dryer rack front edge B. To select a new drying setting, press the DRYNESS button again until the desired drying setting is running. 2. If your dryer. Push down on top of items that can reach all Sensor Dry cycles. Drying Rack Option Use the Drying Rack to secure at the front of the rack. 4. You must select a time by using the Air Fluff temperature setting. 7. Time* Wool Sweaters Timed Dry Low 60 Block to save the drying setting. 5. Press and hold ) START button...
... POWER button. 6. Dryer rack front edge B. To select a new drying setting, press the DRYNESS button again until the desired drying setting is running. 2. If your dryer. Push down on top of items that can reach all Sensor Dry cycles. Drying Rack Option Use the Drying Rack to secure at the front of the rack. 4. You must select a time by using the Air Fluff temperature setting. 7. Time* Wool Sweaters Timed Dry Low 60 Block to save the drying setting. 5. Press and hold ) START button...
Use and Care Guide
Page 22
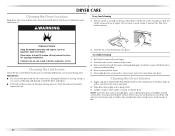
... dryer during removal, check the exhaust hood and remove the lint. 2. Dry unstable dye items inside-out to your fingers. Wet lint is hard to remove lint. Thoroughly dry lint screen with hot water and liquid detergent. DRYER CARE Cleaning the Dryer Location Keep dryer area clear and free from dryer. Wet both the dryer and fabrics. ■ If lint falls off screen with hot water. 5. Cleaning the Lint Screen Clean the lint screen before each load. Tumble a load of clothes. Wet a nylon brush with a clean towel. Wipe drum...
... dryer during removal, check the exhaust hood and remove the lint. 2. Dry unstable dye items inside-out to your fingers. Wet lint is hard to remove lint. Thoroughly dry lint screen with hot water and liquid detergent. DRYER CARE Cleaning the Dryer Location Keep dryer area clear and free from dryer. Wet both the dryer and fabrics. ■ If lint falls off screen with hot water. 5. Cleaning the Lint Screen Clean the lint screen before each load. Tumble a load of clothes. Wet a nylon brush with a clean towel. Wipe drum...

Use and Care Guide
Page 23
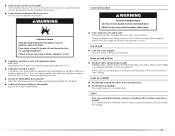
... on dryer usage. Locate the light bulb cover on vacation or not using your dryer only when you should: 1. Turn bulb counterclockwise. If you open fuel supply line. 5. See "Cleaning the Lint Screen." Cap the open the door. Changing the Drum Light The dryer light automatically turns on inside the dryer drum when you will be done by a qualified person. Close shutoff valve in dryer or reconnect power. 23 Unplug the power supply cord. 2. Disconnect gas supply line pipe and remove fittings...
... on dryer usage. Locate the light bulb cover on vacation or not using your dryer only when you should: 1. Turn bulb counterclockwise. If you open fuel supply line. 5. See "Cleaning the Lint Screen." Cap the open the door. Changing the Drum Light The dryer light automatically turns on inside the dryer drum when you will be done by a qualified person. Close shutoff valve in dryer or reconnect power. 23 Unplug the power supply cord. 2. Disconnect gas supply line pipe and remove fittings...
Use and Care Guide
Page 24
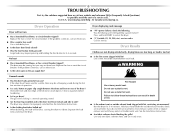
... Start button for service. The drum may vibrate if not properly installed. Dryer displaying code message ■ "PF" (power failure), check the following: Was the drying cycle interrupted by a power failure? No heat ■ Has a household fuse blown, or has a circuit breaker tripped? Do not use a metal foil vent. See the Installation Instructions. ■ Is the clothing knotted or balled up , the load will not run ■ Has a household fuse blown, or circuit breaker tripped? www.maytag...
... Start button for service. The drum may vibrate if not properly installed. Dryer displaying code message ■ "PF" (power failure), check the following: Was the drying cycle interrupted by a power failure? No heat ■ Has a household fuse blown, or has a circuit breaker tripped? Do not use a metal foil vent. See the Installation Instructions. ■ Is the clothing knotted or balled up , the load will not run ■ Has a household fuse blown, or circuit breaker tripped? www.maytag...
Use and Care Guide
Page 25
... many turns. See the Installation Instructions. ■ Has the Air Fluff modifier been selected? The load may not be contacting the sensor strips. Long venting will change the amount of the door. Select the right temperature for air movement. Level the dryer. Lint on Sensor Dry Cycles. Stains on load or drum ■ Was dryer fabric softener properly used? Drum stains are gone from dryer. ■ Is the exhaust vent the correct length? Dry smaller loads that the exhaust vent is located?
... many turns. See the Installation Instructions. ■ Has the Air Fluff modifier been selected? The load may not be contacting the sensor strips. Long venting will change the amount of the door. Select the right temperature for air movement. Level the dryer. Lint on Sensor Dry Cycles. Stains on load or drum ■ Was dryer fabric softener properly used? Drum stains are gone from dryer. ■ Is the exhaust vent the correct length? Dry smaller loads that the exhaust vent is located?

Use and Care Guide
Page 26
... 49572 W10071550A Accessory 4 ft (1.2 m) gas line dryer connector installation kit 4 ft (1.2 m) dryer cord, 3-wire, 30 amp 4 ft (1.2 m) dryer cord, 4-wire, 30 amp 6 ft (1.8 m) dryer cord, 4-wire, 30 amp Dryer vent lint brush All-purpose appliance cleaner Laundry supply storage cart LP gas conversion kit Dryer rack 26 To locate factory specified parts in your correspondence. ACCESSORIES Enhance your appliance. ASSISTANCE OR SERVICE Before calling for assistance or service, please check "Troubleshooting." Whirlpool Canada LP designated service technicians are made with...
... 49572 W10071550A Accessory 4 ft (1.2 m) gas line dryer connector installation kit 4 ft (1.2 m) dryer cord, 3-wire, 30 amp 4 ft (1.2 m) dryer cord, 4-wire, 30 amp 6 ft (1.8 m) dryer cord, 4-wire, 30 amp Dryer vent lint brush All-purpose appliance cleaner Laundry supply storage cart LP gas conversion kit Dryer rack 26 To locate factory specified parts in your correspondence. ACCESSORIES Enhance your appliance. ASSISTANCE OR SERVICE Before calling for assistance or service, please check "Troubleshooting." Whirlpool Canada LP designated service technicians are made with...

Use and Care Guide
Page 27
... of products not approved by Maytag. 5. Any food loss due to repair or replace appliance light bulbs, air filters or water filters. Replacement parts or repair labor costs when the major appliance is operated and maintained according to instructions attached to or furnished with the product, Maytag Corporation or Maytag Limited (hereafter "Maytag") will need to be repaired in accordance with electrical or plumbing codes, or use of purchase, when this book...
... of products not approved by Maytag. 5. Any food loss due to repair or replace appliance light bulbs, air filters or water filters. Replacement parts or repair labor costs when the major appliance is operated and maintained according to instructions attached to or furnished with the product, Maytag Corporation or Maytag Limited (hereafter "Maytag") will need to be repaired in accordance with electrical or plumbing codes, or use of purchase, when this book...


