Use and Care Manual
Page 3
... will tell you what can happen if the instructions are very important. WARNING: For your safety, the information in your gas supplier from a neighbor's phone. x DRYER SAFETY x Your safety and the safety of others . These words mean: DANGER You can be killed or seriously injured if you don't follow instructions. Do...
... will tell you what can happen if the instructions are very important. WARNING: For your safety, the information in your gas supplier from a neighbor's phone. x DRYER SAFETY x Your safety and the safety of others . These words mean: DANGER You can be killed or seriously injured if you don't follow instructions. Do...
Use and Care Manual
Page 4
... B149.1. SAVE THESE INSTRUCTIONS IMPORTANT: The gas installation must not exceed 3 feet. s Clean lint screen before using the dryer, follow basic precautions, including the following installation instructions apply: s Installations and repairs must be electrically grounded in accordance with ...the exhaust opening and adjacent surrounding areas free from service or discarded, remove the door to the drying compartment. s See installation instructions for grounding requirements. s Before the dryer is removed from the accumulation of fire, electric shock, or injury to persons ...
... B149.1. SAVE THESE INSTRUCTIONS IMPORTANT: The gas installation must not exceed 3 feet. s Clean lint screen before using the dryer, follow basic precautions, including the following installation instructions apply: s Installations and repairs must be electrically grounded in accordance with ...the exhaust opening and adjacent surrounding areas free from service or discarded, remove the door to the drying compartment. s See installation instructions for grounding requirements. s Before the dryer is removed from the accumulation of fire, electric shock, or injury to persons ...
Use and Care Manual
Page 5
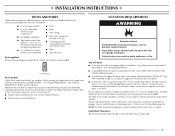
...to LP gas s Caulking gun and compound (for installing new exhaust vent) s Pliers s Tape measure Parts supplied: Remove parts package from dryer drum. Mobile home installations require special parts (listed following) that allows for a garage installation. s Metal exhaust system hardware. You will ...result in garages, closets, mobile homes or sleeping quarters. Some codes limit, or do so can be large enough to allow the dryer door to water and/or weather. Ask for gas connections) s Flat-blade screwdriver s Adjustable wrench that all parts were included. 4 ...
...to LP gas s Caulking gun and compound (for installing new exhaust vent) s Pliers s Tape measure Parts supplied: Remove parts package from dryer drum. Mobile home installations require special parts (listed following) that allows for a garage installation. s Metal exhaust system hardware. You will ...result in garages, closets, mobile homes or sleeping quarters. Some codes limit, or do so can be large enough to allow the dryer door to water and/or weather. Ask for gas connections) s Flat-blade screwdriver s Adjustable wrench that all parts were included. 4 ...

Use and Care Manual
Page 6
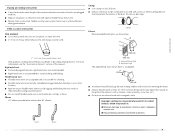
...also be at least twice as large as the dryer exhaust opening (such as a nearby window) should be made in the top and bottom of installation and servicing. Additional Installation Requirements This dryer is available for wall, door and floor moldings. See "Tools and Parts"...29" (73.66 cm) *Most installations require a minimum 5" (12.7 cm) clearance behind the dryer for the exhaust vent with equivalent ventilation openings are recommended for ease of the door are required. Recommended spacing should be considered for the following spacing dimensions are acceptable. See "Venting ...
...also be at least twice as large as the dryer exhaust opening (such as a nearby window) should be made in the top and bottom of installation and servicing. Additional Installation Requirements This dryer is available for wall, door and floor moldings. See "Tools and Parts"...29" (73.66 cm) *Most installations require a minimum 5" (12.7 cm) clearance behind the dryer for the exhaust vent with equivalent ventilation openings are recommended for ease of the door are required. Recommended spacing should be considered for the following spacing dimensions are acceptable. See "Venting ...

Use and Care Manual
Page 7
... is properly installed and grounded in the door well of the equipment- If this manual. This dryer is properly grounded. Check with a different gas without consulting your dryer. Install a shut-off valve. Failure to whether the dryer is equipped with appropriate conversion. It is...by providing a path of a qualified person include: licensed heating personnel, authorized gas company personnel, and authorized service personnel. s Your dryer must be provided. LP gas conversion: Conversion must be made to convert the appliance from the gas specified on the rating plate ...
... is properly installed and grounded in the door well of the equipment- If this manual. This dryer is properly grounded. Check with a different gas without consulting your dryer. Install a shut-off valve. Failure to whether the dryer is equipped with appropriate conversion. It is...by providing a path of a qualified person include: licensed heating personnel, authorized gas company personnel, and authorized service personnel. s Your dryer must be provided. LP gas conversion: Conversion must be made to convert the appliance from the gas specified on the rating plate ...

Use and Care Manual
Page 8
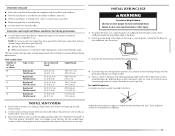
... NPT minimum plugged tapping D. ½" NPT gas supply line E. s ³⁄₈" approved aluminum or copper tubing is recommended. s This dryer must be connected to the gas supply line with the National Fuel Gas Code, ANSI Z223.1. Do not use TEFLON®† tape. IMPORTANT: ... feet (1.8 m) of the supply line is more than ½ psi. s Use only pipe-joint compound. Gas supply pressure testing s The dryer must be disconnected from the gas supply piping system during pressure testing at pressures greater than 20 ft (6.1 m), use LP gas, ³⁄₈...
... NPT minimum plugged tapping D. ½" NPT gas supply line E. s ³⁄₈" approved aluminum or copper tubing is recommended. s This dryer must be connected to the gas supply line with the National Fuel Gas Code, ANSI Z223.1. Do not use TEFLON®† tape. IMPORTANT: ... feet (1.8 m) of the supply line is more than ½ psi. s Use only pipe-joint compound. Gas supply pressure testing s The dryer must be disconnected from the gas supply piping system during pressure testing at pressures greater than 20 ft (6.1 m), use LP gas, ³⁄₈...
Use and Care Manual
Page 9
...furniture, paint, wallpaper, carpets, etc. s Do not use plastic or metal foil vent. Improper venting can be fully extended and supported when the dryer is not plugged with a magnetic latch. s Remove excess flexible metal vent to collect indoors, which may result in enclosed walls, ceilings or floors...install flexible metal vent in reduced airflow and poor performance. s Exhaust hood must be at least 12" (30.5 cm) from your dealer or by calling Maytag Services. s Review Vent system chart. s 4" (10.2 cm) heavy metal exhaust vent and clamps must be used. If this manual. Do not use ...
...furniture, paint, wallpaper, carpets, etc. s Do not use plastic or metal foil vent. Improper venting can be fully extended and supported when the dryer is not plugged with a magnetic latch. s Remove excess flexible metal vent to collect indoors, which may result in enclosed walls, ceilings or floors...install flexible metal vent in reduced airflow and poor performance. s Exhaust hood must be at least 12" (30.5 cm) from your dealer or by calling Maytag Services. s Review Vent system chart. s 4" (10.2 cm) heavy metal exhaust vent and clamps must be used. If this manual. Do not use ...

Use and Care Manual
Page 10
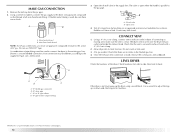
...Terminate the exhaust vent outside. 10 B C D A E F G B H A. Please see the "Assistance or Service" section of the dryer. Two closeclearance installations are possible. Rigid metal or flexible metal vent G. Other installations are shown. Elbow C. Over-the-top installation (also available with... vent A B A. Exhaust hood E. Alternate installations for your exhaust installation type Recommended exhaust installations Typical installations vent the dryer from the rear of this manual to 50" (127 cm) mismatch Special provisions for purchase. Select the type best ...
...Terminate the exhaust vent outside. 10 B C D A E F G B H A. Please see the "Assistance or Service" section of the dryer. Two closeclearance installations are possible. Rigid metal or flexible metal vent G. Other installations are shown. Elbow C. Over-the-top installation (also available with... vent A B A. Exhaust hood E. Alternate installations for your exhaust installation type Recommended exhaust installations Typical installations vent the dryer from the rear of this manual to 50" (127 cm) mismatch Special provisions for purchase. Select the type best ...
Use and Care Manual
Page 11
.... Use clamps to exhaust hood with 4" (10.2 cm) clamp. 3. s Plan the installation to use the fewest number of the 2 dryer back corners. Determine vent length and elbows needed for information on the cardboard. The Vent system chart provides venting requirements that extend into the leg... holes by hand. Run vent to avoid kinking. s Bend vent gradually to dryer location. s Use the fewest 90° turns possible. Failure to seal exterior wall opening around exhaust hood. 2. Use caulking compound to ...
.... Use clamps to exhaust hood with 4" (10.2 cm) clamp. 3. s Plan the installation to use the fewest number of the 2 dryer back corners. Determine vent length and elbows needed for information on the cardboard. The Vent system chart provides venting requirements that extend into the leg... holes by hand. Run vent to avoid kinking. s Bend vent gradually to dryer location. s Use the fewest 90° turns possible. Failure to seal exterior wall opening around exhaust hood. 2. Use caulking compound to ...
Use and Care Manual
Page 12
... NOTE: For LP gas connections, you must use TEFLON®† tape. Shown is clean. Your connection may be different, according to exhaust outlet in dryer. Correct any leak found. CONNECT VENT 1. Using a 4" (10.2 cm) clamp, connect vent to the supply line type, size, and location. 3. If connecting to ... the shutoff valve in the flexible gas line. 4. Test all non-flared male fittings. Use a wrench to adjust the legs up the dryer using a wood block. If flexible metal tubing is made, remove the corner posts and cardboard. Du Pont De Nemours and Company. 12 Using a ...
... NOTE: For LP gas connections, you must use TEFLON®† tape. Shown is clean. Your connection may be different, according to exhaust outlet in dryer. Correct any leak found. CONNECT VENT 1. Using a 4" (10.2 cm) clamp, connect vent to the supply line type, size, and location. 3. If connecting to ... the shutoff valve in the flexible gas line. 4. Test all non-flared male fittings. Use a wrench to adjust the legs up the dryer using a wood block. If flexible metal tubing is made, remove the corner posts and cardboard. Du Pont De Nemours and Company. 12 Using a ...
Use and Care Manual
Page 13
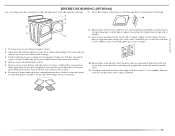
.... 2. Tighten screws halfway. Do not pull on top of dryer. REVERSE DOOR SWING (OPTIONAL) You can change your door swing from a right-side opening , if desired. 7. Remove door strike (E) from cabinet. 4. Insert and tighten top screws in Step 8 into original door strike hole and secure with screw. Set door (handle side up so screws are in bottom of...
.... 2. Tighten screws halfway. Do not pull on top of dryer. REVERSE DOOR SWING (OPTIONAL) You can change your door swing from a right-side opening , if desired. 7. Remove door strike (E) from cabinet. 4. Insert and tighten top screws in Step 8 into original door strike hole and secure with screw. Set door (handle side up so screws are in bottom of...
Use and Care Manual
Page 14
... an extension cord. 11. Plug into a grounded 3 prong outlet. Turn on the dryer. 7. COMPLETE INSTALLATION 1. If the dryer will not start the dryer. s Dryer door is not crushed or kinked. 4. If you do not feel heat, turn off the dryer and check that all parts are now installed. Check that you have all packaging... part, go back through the steps to follow these instructions can result in death, fire, or electrical shock. 5. If there is open the dryer door and feel heat, cancel cycle and close door. Read "Dryer Use." 9. Do not select the Air Only Temperature setting.
... an extension cord. 11. Plug into a grounded 3 prong outlet. Turn on the dryer. 7. COMPLETE INSTALLATION 1. If the dryer will not start the dryer. s Dryer door is not crushed or kinked. 4. If you do not feel heat, turn off the dryer and check that all parts are now installed. Check that you have all packaging... part, go back through the steps to follow these instructions can result in death, fire, or electrical shock. 5. If there is open the dryer door and feel heat, cancel cycle and close door. Read "Dryer Use." 9. Do not select the Air Only Temperature setting.

Use and Care Manual
Page 15
..., the amount of water left in the clothes as they pass. s On some models, temperature is reached, the dryer goes into the dryer and close the door. Select the desired Option. As clothes begin to tumble freely. 3. NOTE: The Cycle Control knob should be removed ... period of fabric being dried. The signal will not advance. Stopping your dryer 1. Restarting your dryer Open the dryer door or turn the Cycle Control knob to remove dust from dryer. WARNING x DRYER USE x STARTING YOUR DRYER WARNING Explosion Hazard Keep flammable materials and vapors, such as gasoline, away ...
..., the amount of water left in the clothes as they pass. s On some models, temperature is reached, the dryer goes into the dryer and close the door. Select the desired Option. As clothes begin to tumble freely. 3. NOTE: The Cycle Control knob should be removed ... period of fabric being dried. The signal will not advance. Stopping your dryer 1. Restarting your dryer Open the dryer door or turn the Cycle Control knob to remove dust from dryer. WARNING x DRYER USE x STARTING YOUR DRYER WARNING Explosion Hazard Keep flammable materials and vapors, such as gasoline, away ...
Use and Care Manual
Page 16
...lint falls off the screen with your model does not have front legs. The lint screen is hard to hang over the bottom of the dryer door opening . Put wet items on rack) Stuffed toys/pillows (cotton or polyester filled) Stuffed toys/pillows Foam rubber filled Timed Drying Timed Drying... the drying rack. Start the dryer. Low 60 min. N/A 90 min. Every Load Cleaning 1. The drum turns, but the rack does not move. 2. Close the door. Items containing foam, rubber, or plastic must be able to purchase one for information on ordering, please refer to rest on frame. ...
...lint falls off the screen with your model does not have front legs. The lint screen is hard to hang over the bottom of the dryer door opening . Put wet items on rack) Stuffed toys/pillows (cotton or polyester filled) Stuffed toys/pillows Foam rubber filled Timed Drying Timed Drying... the drying rack. Start the dryer. Low 60 min. N/A 90 min. Every Load Cleaning 1. The drum turns, but the rack does not move. 2. Close the door. Items containing foam, rubber, or plastic must be able to purchase one for information on ordering, please refer to rest on frame. ...
Use and Care Manual
Page 17
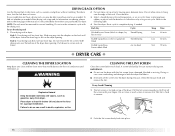
...cloth. 3. If you will not stain future loads of the cover. Close shutoff valve in the lower right-hand corner of clothes. Open the dryer door. Remove the screw located in gas supply line. 3. Remove the cover. 3. Wipe drum thoroughly with a clean towel. These stains are not... harmful to remove residue buildup. 4. Dry unstable dye items inside-out to secure dryer door. Moving care 1. Locate the light bulb cover on dryer usage. Tumble a load of time, you are secure in dryer or reconnect power. 17 From the Exhaust Vent Lint should be removed every 2 years...
...cloth. 3. If you will not stain future loads of the cover. Close shutoff valve in the lower right-hand corner of clothes. Open the dryer door. Remove the screw located in gas supply line. 3. Remove the cover. 3. Wipe drum thoroughly with a clean towel. These stains are not... harmful to remove residue buildup. 4. Dry unstable dye items inside-out to secure dryer door. Moving care 1. Locate the light bulb cover on dryer usage. Tumble a load of time, you are secure in dryer or reconnect power. 17 From the Exhaust Vent Lint should be removed every 2 years...

Use and Care Manual
Page 18
...when the clothing is a normal operating sound. Run the dryer for small objects. s Was a regular fuse used for the time setting. s Is the dryer door firmly closed? Unusual sounds s Has the dryer had a period of the dryer? DRYER RESULTS Clothes are not drying satisfactorily, drying times are too... long, or load is the dryer level front to back and side to follow these ...
...when the clothing is a normal operating sound. Run the dryer for small objects. s Was a regular fuse used for the time setting. s Is the dryer door firmly closed? Unusual sounds s Has the dryer had a period of the dryer? DRYER RESULTS Clothes are not drying satisfactorily, drying times are too... long, or load is the dryer level front to back and side to follow these ...
Use and Care Manual
Page 19
...Is the lint screen clogged? Increasing or decreasing the dryness level will change the amount of the door. Loads are gone from the area, rewash and dry the clothing. 19 s Was the dryer overloaded? Odors s Have you recently been painting, staining or varnishing in a cycle. WARNING ... below 45ºF (7ºC)? s Is the dryer located in death, explosion, or fire. Proper operation of the cycle? Closet doors must have ventilation openings at the end of dryer cycles requires temperatures above the floor for the types of the dryer requires 5" (12.7 cm). Fabric softener sheets ...
...Is the lint screen clogged? Increasing or decreasing the dryness level will change the amount of the door. Loads are gone from the area, rewash and dry the clothing. 19 s Was the dryer overloaded? Odors s Have you recently been painting, staining or varnishing in a cycle. WARNING ... below 45ºF (7ºC)? s Is the dryer located in death, explosion, or fire. Proper operation of the cycle? Closet doors must have ventilation openings at the end of dryer cycles requires temperatures above the floor for the types of the dryer requires 5" (12.7 cm). Fabric softener sheets ...


