Maytag MGD5630MBK Support and Manuals
Get Help and Manuals for this Maytag item
View All Support Options Below
Free Maytag MGD5630MBK manuals!
Problems with Maytag MGD5630MBK?
Ask a Question
Free Maytag MGD5630MBK manuals!
Problems with Maytag MGD5630MBK?
Ask a Question
Popular Maytag MGD5630MBK Manual Pages
Owners Manual - Page 2

...servicing unless specifically recommended in the usermaintenance instructions or in published user-repair instructions that you what can kill or hurt you what the potential hazard is moving.
� Do not install or store this manual...interior of the fabric softener or product.
� Do not use replacement parts that have been previously cleaned in, washed in, soaked in this ...
Owners Manual - Page 3
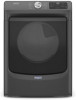
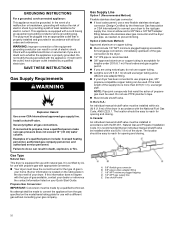
... manufacturer of a specific type identified by a qualified installer, service agency, or the gas supplier.
3 Do not install a booster fan in serious injury, death, or property damage. Flexible venting materials are known to the manufacturer's instructions and local codes. − Do not install a clothes dryer with clothes dryers. Follow the gas supplier's
instructions. • If...
Owners Manual - Page 5
... Interior
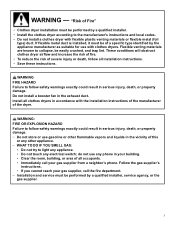
To clean dryer drum: 1. Use either in the Installation Instructions.
� Clean space where lint screen is in a ...on the lint screen.
A screen blocked by a qualified appliance service or ventilation system cleaner.
Use a microfiber cloth and very warm... detergent and fabric softener residue can build up on model. Cleaning the Lint Screen
Every load cleaning: The lint...
Owners Manual - Page 6
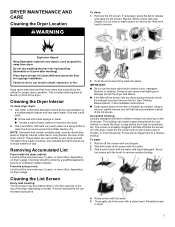
... vent. See Installation Instructions. Blocked or crushed vents as well as improper venting installation will reduce your drying times and improve your energy savings. To clean or repair venting, contact ... the dryer. On models with the screw.
4. Using a 1/4" (6.5 mm) nut driver or socket wrench, remove the screw located in good airflow. each load. � Replace plastic or foil vent...
Owners Manual - Page 7

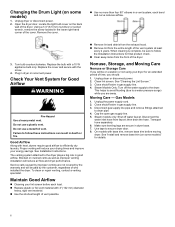
... hose to the manufacturer's instructions and local codes.
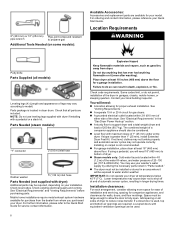
Periodically inspect and replace inlet hose if bulges, kinks, cuts, wear, or leaks are found. Do not use an extension cord. To use to reduce the risk of hose failure. Gather required tools and parts before starting installation. Tools Needed for Steam Models
Install and store your inlet hose...
Owners Manual - Page 8
... load) of the dryer.
Installing on carpet is used .
8 If using a pedestal, you purchased your Quick Start Guide. Lower temperatures may not operate correctly. 8" (203 mm) or 10" (254 mm) Pipe-joint compound resistant
pipe wrench
to propane gas
Additional Tools Needed (on some models):
Available Accessories:
Accessories and replacement parts are included. For ordering...
Owners Manual - Page 9
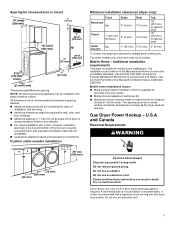
...reduce noise transfer. � For closet installation with equivalent ventilation openings are required. For steam models only, inlet hose must not be made...Installation Hold-Down Kit.
� Special provisions must conform to follow these instructions can be considered. Do not use an extension cord. Failure to the Manufactured Home Construction and Safety Standard, Title 24 CFR, Part...
Owners Manual - Page 10
...Code, ANSI Z223.1. The location should use larger pipe. The plug must be easy to -flare adapter fitting C. 1/8" NPT minimum plugged tapping D. 1/2" NPT gas supply line E. SAVE THESE INSTRUCTIONS... Conversion must be installed in accordance with the B149.1, Natural Gas and Propane Installation Code. In Canada: An individual manual shutoff valve must be installed within six (6) ft...
Owners Manual - Page 12
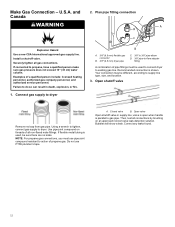
... gas line. A. Open shutoff valve
Remove red cap from gas pipe. Do not use pipe-joint compound resistant to supply line type, size, and location.
3. Install a shut-off valve. NOTE: For propane gas connections, you must be different, according to action of a qualified person include: licensed heating personnel, authorized gas company...
Owners Manual - Page 13
...:
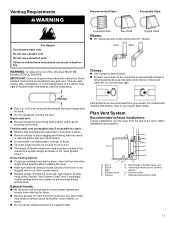
� Use clamps to seal all governing codes and ordinances. Do not use duct tape.
&#... installing the dryer.
� Make sure external exhaust hoods outside debris.
� Replace ... and supported in final dryer location. � Remove excess to follow these instructions can ...Recommended exhaust installations:
Typical installations vent the dryer from your Quick Start Guide. Only...
Owners Manual - Page 14
... vent outside.
A. wide models). Over-The-Top installation (also available with a manufacturer's exhaust cover kit.
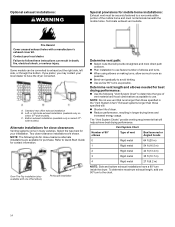
Vent System Chart
Number of 90° elbows
Type of the mobile home and must be converted to exhaust out the right side, left side, or through the bottom.
Failure to follow these instructions can be securely fastened...
Owners Manual - Page 15

....6 m)
5
Rigid metal
110 ft (33.5 m)
To determine if your model has a long vent system, refer to the type code located on the serial number plate in the inner door well. Screw on ...cold inlet hose to other fastening devices that extend into interior of hose failure. Install exhaust hood
Periodically inspect and replace hoses if bulges, kinks, cuts, wear, or leaks are found.
1. Attach ...
Owners Manual - Page 17

... Air Only temperature setting. If dryer will not start dryer. Do not remove ground prong.
Rotate away from a right-side opening to the user instructions in the dryer.... certain part replacement or repair.
17
Install and remove base trim (on some models)
To Install: Place the skirt to bottom of your Quick Start Guide. Excessive scale buildup may clog different parts of the...
Dimension Guide - Page 2

...C
F 90º
Product Dimensions
in (minimum) mm (minimum) in your appliance's Owner's Manual, before installing and operating this appliance. DETAILED PLANNING DIMENSIONS
WARNING: To reduce the risk of fire, electric shock, or injury to persons, read the IMPORTANT SAFETY INSTRUCTIONS and INSTALLATION INSTRUCTIONS, located in (maximum) mm (maximum)
A
Height (With feet)
381∕8
968
39...
Dimension Guide - Page 4

... ease of the dryer is recommended to reduce noise transfer. Ƀ For closet installation, with equivalent ventilations openings are required. Louvered doors
with a door, minimum ventilation..., door, and floor moldings. Ƀ Additional spacing of 1" (25 mm) on all sides of installation and servicing. Ƀ Additional clearances might be considered.
14" maximum (356 mm)
18" (460 mm)
3"...
Maytag MGD5630MBK Reviews
We have not received any reviews for Maytag yet.