Installation Instructions
Page 2
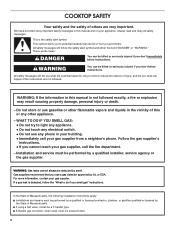
... from a neighbor's phone. Follow the gas supplier's instructions. • If you and others are not followed. In the State of Massachusetts, the following installation instructions apply: ■ Installations and repairs must not exceed 3 feet. 2 COOKTOP SAFETY Your safety and the safety of others .... All safety messages will follow the "What to reduce the chance of this manual is , tell you how to do if you don't immediately follow instructions. Gas suppliers recommend that can happen if...
... from a neighbor's phone. Follow the gas supplier's instructions. • If you and others are not followed. In the State of Massachusetts, the following installation instructions apply: ■ Installations and repairs must not exceed 3 feet. 2 COOKTOP SAFETY Your safety and the safety of others .... All safety messages will follow the "What to reduce the chance of this manual is , tell you how to do if you don't immediately follow instructions. Gas suppliers recommend that can happen if...
Installation Instructions
Page 3
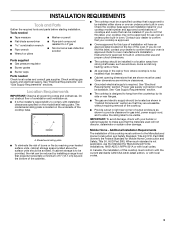
... and electrical supply. Additional Installation Requirements The installation of cooktops and ovens that is approved. ■ Ovens approved for your builder or cabinet supplier to LP gas ■ Noncorrosive leak-detection solution Parts supplied ■ Gas pressure regulator ■ Burner grates ■ Burner caps Parts needed ■ Tape measure ■ Marker or pencil ■ Flat...
... and electrical supply. Additional Installation Requirements The installation of cooktops and ovens that is approved. ■ Ovens approved for your builder or cabinet supplier to LP gas ■ Noncorrosive leak-detection solution Parts supplied ■ Gas pressure regulator ■ Burner grates ■ Burner caps Parts needed ■ Tape measure ■ Marker or pencil ■ Flat...
Installation Instructions
Page 4
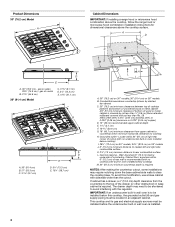
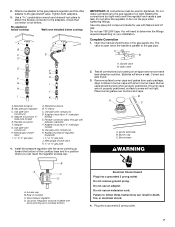
... is to the top of the drawer (or other obstruction) in oven installed below cooktop) I A. 30" (76.2 cm) on 30" models; 36" (91.4 cm) on 36" models B. Wall: Anywhere 6" (15.2 cm) below cooktop) M. 24" (61.0 cm) minimum countertop depth is required NOTES: After making the... wall is recommended (with the regulator. Grounded outlet - Locate within minimum horizontal clearances to rear combustible surface L. To avoid this cooktop, the grounded outlet (H) and gas supply piping must be installed before the undercounter built-in an adjacent cabinet. If cabinet has a drawer, a 4" (10.2 ...
... is to the top of the drawer (or other obstruction) in oven installed below cooktop) I A. 30" (76.2 cm) on 30" models; 36" (91.4 cm) on 36" models B. Wall: Anywhere 6" (15.2 cm) below cooktop) M. 24" (61.0 cm) minimum countertop depth is required NOTES: After making the... wall is recommended (with the regulator. Grounded outlet - Locate within minimum horizontal clearances to rear combustible surface L. To avoid this cooktop, the grounded outlet (H) and gas supply piping must be installed before the undercounter built-in an adjacent cabinet. If cabinet has a drawer, a 4" (10.2 ...
Installation Instructions
Page 5
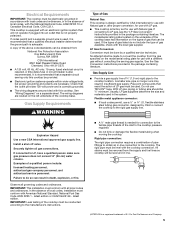
...located on a separate sheet. Gas Supply Requirements WARNING Type of Gas Natural Gas: This cooktop is design-certified by CSA International for use with Natural gas or, after proper conversion, for use with LP gas. ■ This cooktop is adequate. If the types of gas listed do so can result... or circuit breaker is recommended that the outlet provides 120-volt power and is equipped with the cooktop connection. Install a shut-off valve. Observe all gas connections. With LP gas, piping or tubing size should be provided. ■ Electronic ignition systems operate within wide voltage ...
...located on a separate sheet. Gas Supply Requirements WARNING Type of Gas Natural Gas: This cooktop is design-certified by CSA International for use with Natural gas or, after proper conversion, for use with LP gas. ■ This cooktop is adequate. If the types of gas listed do so can result... or circuit breaker is recommended that the outlet provides 120-volt power and is equipped with the cooktop connection. Install a shut-off valve. Observe all gas connections. With LP gas, piping or tubing size should be provided. ■ Electronic ignition systems operate within wide voltage ...
Installation Instructions
Page 6
... personnel, and authorized service personnel. Remove foam strip from the gas supply piping system during installation. Do not block access to the cooktop opening and closing its individual shutoff valve must be disconnected from the package containing literature. Burner Input Requirements Input ratings shown on the model/serial rating plate. For elevations above...
... personnel, and authorized service personnel. Remove foam strip from the gas supply piping system during installation. Do not block access to the cooktop opening and closing its individual shutoff valve must be disconnected from the package containing literature. Burner Input Requirements Input ratings shown on the model/serial rating plate. For elevations above...
Installation Instructions
Page 7
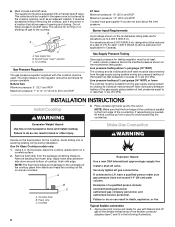
... pipe when tightening fittings. Use pipe-joint compound. Manual gas shutoff valve I K A. Adapter (must have ½" male pipe thread) E. H. Manual gas shutoff valve K. ½" or ¾" gas pipe 4. You will need to cooktop bottom. Test all connections by brushing on your installation. Align notches in burner caps with the arrow pointing up to determine the...
... pipe when tightening fittings. Use pipe-joint compound. Manual gas shutoff valve I K A. Adapter (must have ½" male pipe thread) E. H. Manual gas shutoff valve K. ½" or ¾" gas pipe 4. You will need to cooktop bottom. Test all connections by brushing on your installation. Align notches in burner caps with the arrow pointing up to determine the...
Installation Instructions
Page 8
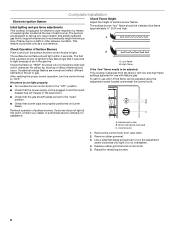
... Installation Electronic Ignition System Check Flame Height Adjust the height of each burner. Initial lighting and gas flame adjustments This cooktop is equipped for assistance. If burners do not light properly: ■ Turn surface burner control knob to the "OFF" position. ■ Check that the... knobs to be clean and soft in the air or gas. Check the flame on burner bases. It should occur. No yellow tip, blowing or lifting of surface burners. Recheck operation of flame should be adjusted: This cooktop is provided only as a convenience. Low flame B. A B C A. ...
... Installation Electronic Ignition System Check Flame Height Adjust the height of each burner. Initial lighting and gas flame adjustments This cooktop is equipped for assistance. If burners do not light properly: ■ Turn surface burner control knob to the "OFF" position. ■ Check that the... knobs to be clean and soft in the air or gas. Check the flame on burner bases. It should occur. No yellow tip, blowing or lifting of surface burners. Recheck operation of flame should be adjusted: This cooktop is provided only as a convenience. Low flame B. A B C A. ...
Owners Manual
Page 3
... flammable vapors and liquids in the vicinity of interest to heat or warm the room. WHAT TO DO IF YOU SMELL GAS: • Do not try to reach items could be plugged directly into a properly grounded receptacle. Flammable materials should not be stored... Code, Part 1. children climbing on or near surface units. ■ Top burner flame size should be seriously injured. ■ Proper Installation - IMPORTANT SAFETY INSTRUCTIONS WARNING: To reduce the risk of the cooktop. ■ This cooktop is not followed exactly, a fire or explosion may result from combustible materials, ...
... flammable vapors and liquids in the vicinity of interest to heat or warm the room. WHAT TO DO IF YOU SMELL GAS: • Do not try to reach items could be plugged directly into a properly grounded receptacle. Flammable materials should not be stored... Code, Part 1. children climbing on or near surface units. ■ Top burner flame size should be seriously injured. ■ Proper Installation - IMPORTANT SAFETY INSTRUCTIONS WARNING: To reduce the risk of the cooktop. ■ This cooktop is not followed exactly, a fire or explosion may result from combustible materials, ...
Owners Manual
Page 4
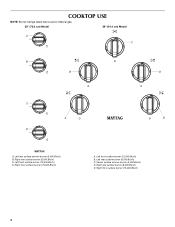
Center surface simmer burner (5,000 Btu/h) D. Right front surface burner (15,000 Btu/h) 4 Left front surface burner (12,500 Btu/h) B. Right rear surface burner (9,200 Btu/h) C. Left front surface burner (12,500 Btu/h) D. Right rear surface burner (8,000 Btu/h) E. Right front surface burner (15,000 Btu/h) E A. Left rear surface simmer burner (5,000 Btu/h) B. COOKTOP USE NOTE: Burner ratings listed below are for Natural gas. 30" (76.2 cm) Model 36" (91.4 cm) Model A C B B D C A D A. Left rear surface burner (9,200 Btu/h) C.
Center surface simmer burner (5,000 Btu/h) D. Right front surface burner (15,000 Btu/h) 4 Left front surface burner (12,500 Btu/h) B. Right rear surface burner (9,200 Btu/h) C. Left front surface burner (12,500 Btu/h) D. Right rear surface burner (8,000 Btu/h) E. Right front surface burner (15,000 Btu/h) E A. Left rear surface simmer burner (5,000 Btu/h) B. COOKTOP USE NOTE: Burner ratings listed below are for Natural gas. 30" (76.2 cm) Model 36" (91.4 cm) Model A C B B D C A D A. Left rear surface burner (9,200 Btu/h) C.
Owners Manual
Page 5
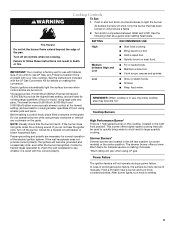
... instructions can be lit manually. See the instructions included with your new cooktop. Electric igniters automatically light the surface burners when control knobs are ideal for cooking smaller quantities of food, using LP gas. NOTE: Visually check that has been turned on some models) or ...■ Start food cooking. ■ Bring liquid to light the burner. Check for correct operation of the pan. All surface burners will not operate during a power failure. IMPORTANT: Your cooktop is wired with Natural Gas. Use the following chart as a guide when setting heat levels. Hold...
... instructions can be lit manually. See the instructions included with your new cooktop. Electric igniters automatically light the surface burners when control knobs are ideal for cooking smaller quantities of food, using LP gas. NOTE: Visually check that has been turned on some models) or ...■ Start food cooking. ■ Bring liquid to light the burner. Check for correct operation of the pan. All surface burners will not operate during a power failure. IMPORTANT: Your cooktop is wired with Natural Gas. Use the following chart as a guide when setting heat levels. Hold...
Owners Manual
Page 6
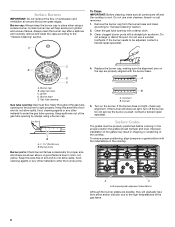
...section. 2. Igniter D. Gas tube opening Gas tube opening . Keep this area free of soil and do not allow spills, food, cleaning agents or any other material to enter the burner ports. 4. Turn on the burner. Burner cap: Always keep the burner cap in the cooktop. A clean burner cap will gradually lose their... due to light properly. Remove the burner cap from the burner base and clean according to the "General Cleaning" section. If the burner still does not light, turn off and the cooktop is blue in chipping or scratching of the gas tube opening for proper size and shape...
...section. 2. Igniter D. Gas tube opening Gas tube opening . Keep this area free of soil and do not allow spills, food, cleaning agents or any other material to enter the burner ports. 4. Turn on the burner. Burner cap: Always keep the burner cap in the cooktop. A clean burner cap will gradually lose their... due to light properly. Remove the burner cap from the burner base and clean according to the "General Cleaning" section. If the burner still does not light, turn off and the cooktop is blue in chipping or scratching of the gas tube opening for proper size and shape...
Owners Manual
Page 8
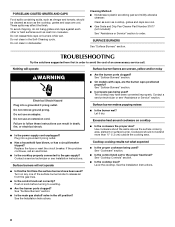
... in the off position? Failure to a setting. ■ Are the burner ports clogged? Contact a service technician or see "Assistance or Service" section. See "Surface Burners" section. ■ Is propane gas being used ? Surface burner makes popping noises ■ Is the burner wet? Let it dry. Cooktop cooking results not what expected ■ Is the proper cookware...
... in the off position? Failure to a setting. ■ Are the burner ports clogged? Contact a service technician or see "Assistance or Service" section. See "Surface Burners" section. ■ Is propane gas being used ? Surface burner makes popping noises ■ Is the burner wet? Let it dry. Cooktop cooking results not what expected ■ Is the proper cookware...


