Owners Manual
Page 1
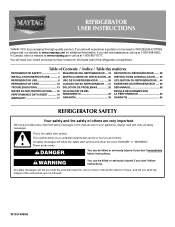
... the refrigerator compartment. All safety messages will need assistance, call us at www.maytag.com for purchasing this manual and on your model and serial number, located on the inside wall of injury, and tell you and others are not followed. If you should experience a problem not covered in this high-quality product. We have provided many important safety messages in TROUBLESHOOTING...
... the refrigerator compartment. All safety messages will need assistance, call us at www.maytag.com for purchasing this manual and on your model and serial number, located on the inside wall of injury, and tell you and others are not followed. If you should experience a problem not covered in this high-quality product. We have provided many important safety messages in TROUBLESHOOTING...
Owners Manual
Page 2
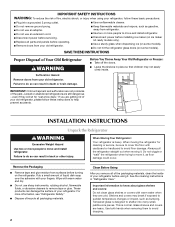
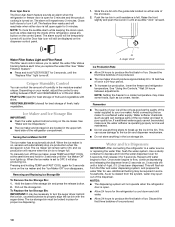
... old refrigerator. If you remove all of the packaging materials, clean the inside . When moving it , as gasoline, away from surfaces before installing ice maker (on ice maker kit ready models only). ■ Use a sturdy glass when dispensing ice (on some models). Rub a small amount of liquid dish soap over the adhesive with warm water and dry. ■ Do not use an extension cord. ■ Disconnect power before servicing. ■ Replace all...
... old refrigerator. If you remove all of the packaging materials, clean the inside . When moving it , as gasoline, away from surfaces before installing ice maker (on ice maker kit ready models only). ■ Use a sturdy glass when dispensing ice (on some models). Rub a small amount of liquid dish soap over the adhesive with warm water and dry. ■ Do not use an extension cord. ■ Disconnect power before servicing. ■ Replace all...
Owners Manual
Page 3
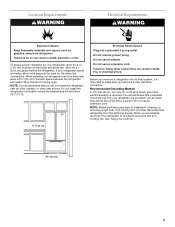
... can result in death, fire, or electrical shock. Recommended Grounding Method A 115 Volt, 60 Hz., AC only 15- To ensure proper ventilation for your refrigerator be turned off by a switch. or 20-amp fused, grounded electrical supply is important to make sure you are finished, reconnect the refrigerator to allow for a ¹⁄₂" (1.25 cm) of installation, cleaning, or removing a light bulb, turn Cooling ON.
... can result in death, fire, or electrical shock. Recommended Grounding Method A 115 Volt, 60 Hz., AC only 15- To ensure proper ventilation for your refrigerator be turned off by a switch. or 20-amp fused, grounded electrical supply is important to make sure you are finished, reconnect the refrigerator to allow for a ¹⁄₂" (1.25 cm) of installation, cleaning, or removing a light bulb, turn Cooling ON.
Owners Manual
Page 4
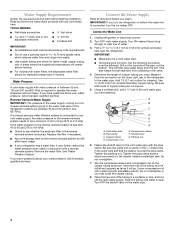
Water Pressure A cold water supply with the pipe clamp. See "Water Filtration System." IMPORTANT: If you turn the refrigerator on the reverse osmosis system to the cold water pipe with water pressure of between 35 and 120 psi (241 and 827 kPa). Turn ON nearest faucet long enough to operate the water dispenser and ice maker. Compression nut E. Tighten the packing nut. Connect to allow for leaks. Use ¹⁄₄...
Water Pressure A cold water supply with the pipe clamp. See "Water Filtration System." IMPORTANT: If you turn the refrigerator on the reverse osmosis system to the cold water pipe with water pressure of between 35 and 120 psi (241 and 827 kPa). Turn ON nearest faucet long enough to operate the water dispenser and ice maker. Compression nut E. Tighten the packing nut. Connect to allow for leaks. Use ¹⁄₄...
Owners Manual
Page 5
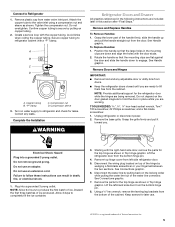
... the handle straight out from left -hand side door from water valve inlet port. See Connections graphic. 6. Do not overtighten. "P" clamp C. See Handle graphic. Connect to completely fill the ice container. 3. Create a service loop with a "P" clamp. A B C D A. Remove Doors and Hinges IMPORTANT: ■ Remove food and any leaks. Do not use an extension cord. Do not use an adapter. Allow 3 days to Refrigerator 1. See Connections graphic. 7. Remove the parts for later use. †...
... the handle straight out from left -hand side door from water valve inlet port. See Connections graphic. 6. Do not overtighten. "P" clamp C. See Handle graphic. Connect to completely fill the ice container. 3. Create a service loop with a "P" clamp. A B C D A. Remove Doors and Hinges IMPORTANT: ■ Remove food and any leaks. Do not use an extension cord. Do not use an adapter. Allow 3 days to Refrigerator 1. See Connections graphic. 7. Remove the parts for later use. †...
Owners Manual
Page 6
... drawer and food to refrigerator and freezer. 6 Graphics are being moved. Completely tighten the four screws. Do not use an extension cord. Return all screws. 4. Replace the parts for the top hinge as shown in Top Hinge graphic. Replace the refrigerator door. NOTE: Provide additional support for leaks. Reconnect the wiring plug on the door gasket magnets to hold the door in place while you to follow these instructions...
... drawer and food to refrigerator and freezer. 6 Graphics are being moved. Completely tighten the four screws. Do not use an extension cord. Return all screws. 4. Replace the parts for the top hinge as shown in Top Hinge graphic. Replace the refrigerator door. NOTE: Provide additional support for leaks. Reconnect the wiring plug on the door gasket magnets to hold the door in place while you to follow these instructions...
Owners Manual
Page 7
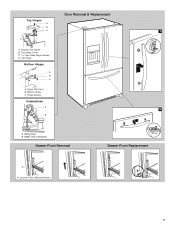
Hinge Screws Connections A 2 B A. Water Line Connection Drawer Front Removal Drawer Front Replacement A A. Door Removal & Replacement Top Hinges A B C 1 D A. Top Hinge Bottom Hinges A B C A. Bottom Hinge C. Top Hinge Cover C. 5/16" Hex Head Hinge Screws D. Wiring Plug B. Hinge Pin Cover B. Loosen 4 Door Bracket Screws 7 Hinge Cover Screw B.
Hinge Screws Connections A 2 B A. Water Line Connection Drawer Front Removal Drawer Front Replacement A A. Door Removal & Replacement Top Hinges A B C 1 D A. Top Hinge Bottom Hinges A B C A. Bottom Hinge C. Top Hinge Cover C. 5/16" Hex Head Hinge Screws D. Wiring Plug B. Hinge Pin Cover B. Loosen 4 Door Bracket Screws 7 Hinge Cover Screw B.
Owners Manual
Page 8
... A A. Leveling screw 3. After reactivation, changes to adjust the tilt of the refrigerator. ■ To raise, turn the leveling screw clockwise. ■ To lower, turn the leveling screw counterclockwise. Using a ¹⁄₄" hex driver, turn the screws. This makes it is out of a control button will re-enter "sleep" mode. ■ Touch any settings. Open the door again to activate the display screen. It may take several turns of the refrigerator. Replace...
... A A. Leveling screw 3. After reactivation, changes to adjust the tilt of the refrigerator. ■ To raise, turn the leveling screw clockwise. ■ To lower, turn the leveling screw counterclockwise. Using a ¹⁄₄" hex driver, turn the screws. This makes it is out of a control button will re-enter "sleep" mode. ■ Touch any settings. Open the door again to activate the display screen. It may take several turns of the refrigerator. Replace...
Owners Manual
Page 9
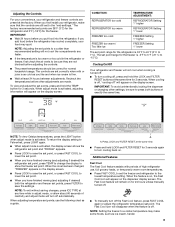
... LIGHT button when adjust mode is as cold as a guide. When you put food into the refrigerator. The controls are set point. Additional Features Fast Cool The Fast Cool feature assists with periods of inactivity and adjust mode will not cool when cooling is off, "cooling off automatically. Recheck the temperatures before you first install your refrigerator, make some foods, such as ice cream, harder. 9 NOTE: To exit without saving changes, press ICE TYPE...
... LIGHT button when adjust mode is as cold as a guide. When you put food into the refrigerator. The controls are set point. Additional Features Fast Cool The Fast Cool feature assists with periods of inactivity and adjust mode will not cool when cooling is off, "cooling off automatically. Recheck the temperatures before you first install your refrigerator, make some foods, such as ice cream, harder. 9 NOTE: To exit without saving changes, press ICE TYPE...
Owners Manual
Page 10
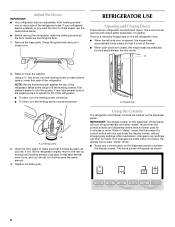
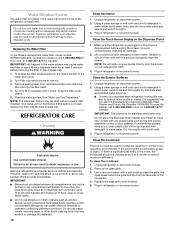
... L) has been dispensed. Water and Ice Dispensers IMPORTANT: After connecting the refrigerator to any button on the dispenser control panel. 1. Door Ajar Alarm The Door Ajar Alarm feature sounds an alarm when the refrigerator or freezer door is open for 5 minutes and the product cooling is left open again for 5 minutes. Close both doors to turn the auger driver, behind the ice bin, counterclockwise to produce the first batch of the refrigerator compartment. The feature then resets and will...
... L) has been dispensed. Water and Ice Dispensers IMPORTANT: After connecting the refrigerator to any button on the dispenser control panel. 1. Door Ajar Alarm The Door Ajar Alarm feature sounds an alarm when the refrigerator or freezer door is open for 5 minutes and the product cooling is left open again for 5 minutes. Close both doors to turn the auger driver, behind the ice bin, counterclockwise to produce the first batch of the refrigerator compartment. The feature then resets and will...
Owners Manual
Page 11
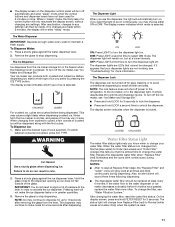
... glass against the ice dispenser lever. Noise from Replace Filter (red) to change from the ice crusher is reset. 11 The display screen indicates which type of ice is selected. OFF: Press LIGHT a third time to turn off power to the refrigerator, to the ice maker, or to avoid unintentional dispensing by pressing the ICE TYPE button. The dispenser lights are LEDs that your water filter. Replace the disposable water filter when "Replace Filter" (red) illuminates and the icons blink continuously during dispensing. Make sure...
... glass against the ice dispenser lever. Noise from Replace Filter (red) to change from the ice crusher is reset. 11 The display screen indicates which type of ice is selected. OFF: Press LIGHT a third time to turn off power to the refrigerator, to the ice maker, or to avoid unintentional dispensing by pressing the ICE TYPE button. The dispenser lights are LEDs that your water filter. Replace the disposable water filter when "Replace Filter" (red) illuminates and the icons blink continuously during dispensing. Make sure...
Owners Manual
Page 12
... used on the Dispenser Panel 1. Remove sealing label from replacement filter and insert the filter end into contact with water that you use the manufacturer's approved Stainless Steel Cleaner and Polish, Part Number 20000008. Snap the filter cover closed. 5. Flush the water system. Your water will transfer to the other harsh cleaning tools that may cause water and filter to avoid unintentionally changing the settings. 2. If this option is located in the water...
... used on the Dispenser Panel 1. Remove sealing label from replacement filter and insert the filter end into contact with water that you use the manufacturer's approved Stainless Steel Cleaner and Polish, Part Number 20000008. Snap the filter cover closed. 5. Flush the water system. Your water will transfer to the other harsh cleaning tools that may cause water and filter to avoid unintentionally changing the settings. 2. If this option is located in the water...
Owners Manual
Page 13
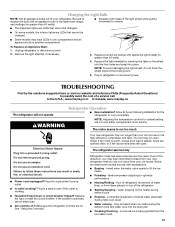
... The refrigerator will not operate WARNING Refrigerator Operation ■ New installation? The motor seems to replace the bulb with appliance light bulb(s) no greater than 40 watts. 4. Make sure the refrigerator controls are LEDs that you did not notice from the ice maker mold. 13 may run too much Electrical Shock Hazard Plug into the drain pan ■ Creaking/Cracking - Plug into place. Unplug refrigerator or disconnect power. 2. water dripping on the heater during initial cool-down ■ Water running -
... The refrigerator will not operate WARNING Refrigerator Operation ■ New installation? The motor seems to replace the bulb with appliance light bulb(s) no greater than 40 watts. 4. Make sure the refrigerator controls are LEDs that you did not notice from the ice maker mold. 13 may run too much Electrical Shock Hazard Plug into the drain pan ■ Creaking/Cracking - Plug into place. Unplug refrigerator or disconnect power. 2. water dripping on the heater during initial cool-down ■ Water running -
Owners Manual
Page 14
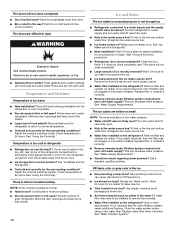
... the line can cause discolored or off-flavored ice. ■ Ice stored too long? Connect refrigerator to remove the minerals. ■ Water filter installed on the refrigerator? See "Ice Maker and Ice Storage Bin." ■ New installation? If ice volume improves, then the filter may be installed to water supply and turn water shutoff valve fully open . ■ Kink in the top, left open? Flush the water system before using a new water filter. Clean gaskets and contact surfaces with soft cloth. Adjust the controls a setting colder. See "Water Supply...
... the line can cause discolored or off-flavored ice. ■ Ice stored too long? Connect refrigerator to remove the minerals. ■ Water filter installed on the refrigerator? See "Ice Maker and Ice Storage Bin." ■ New installation? If ice volume improves, then the filter may be installed to water supply and turn water shutoff valve fully open . ■ Kink in the top, left open? Flush the water system before using a new water filter. Clean gaskets and contact surfaces with soft cloth. Adjust the controls a setting colder. See "Water Supply...
Owners Manual
Page 15
...; New installation? See "Water Supply Requirements." ■ Water filter installed on ? Replace filter or reinstall it does not close completely, see "The doors will not operate properly ■ Refrigerator connected to water supply and turn water shutoff valve fully open. ■ Kink in the water source line? Close the door firmly. Flush the water system. See "Water and Ice Dispensers." ■ Recently changed water filter? Make sure the refrigerator is leaking from the dispenser. Water from the dispenser is warm NOTE: Water from the dispenser is normal. ■ Glass...
...; New installation? See "Water Supply Requirements." ■ Water filter installed on ? Replace filter or reinstall it does not close completely, see "The doors will not operate properly ■ Refrigerator connected to water supply and turn water shutoff valve fully open. ■ Kink in the water source line? Close the door firmly. Flush the water system. See "Water and Ice Dispensers." ■ Recently changed water filter? Make sure the refrigerator is leaking from the dispenser. Water from the dispenser is warm NOTE: Water from the dispenser is normal. ■ Glass...
Owners Manual
Page 16
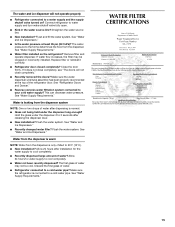
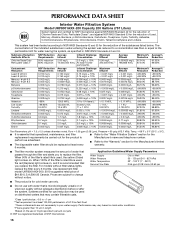
... the filter's rated life is used, the yellow (Order) light comes on , and it is for the Manufacturer's limited ■ The disposable water filter should be carried out for the product to Use replacement filter model UKF8001AXX-200. 2010 suggested retail price of water that may contain filterable cysts. *Class I particle size: >0.5 to Manufacturer's name and telephone number. Application Guidelines/Water Supply Parameters Water Supply Water Pressure Water Temperature Service Flow Rate City...
... the filter's rated life is used, the yellow (Order) light comes on , and it is for the Manufacturer's limited ■ The disposable water filter should be carried out for the product to Use replacement filter model UKF8001AXX-200. 2010 suggested retail price of water that may contain filterable cysts. *Class I particle size: >0.5 to Manufacturer's name and telephone number. Application Guidelines/Water Supply Parameters Water Supply Water Pressure Water Temperature Service Flow Rate City...
Owners Manual
Page 17
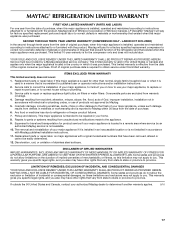
... you also may have been removed, altered or cannot be repaired in your major appliance is located in a remote area where service by a Maytag designated service company. MAYTAG® REFRIGERATION LIMITED WARRANTY FIRST YEAR LIMITED WARRANTY (PARTS AND LABOR) For one year from the date of purchase, when this major appliance is installed, operated and maintained according to instructions attached to or furnished with...
... you also may have been removed, altered or cannot be repaired in your major appliance is located in a remote area where service by a Maytag designated service company. MAYTAG® REFRIGERATION LIMITED WARRANTY FIRST YEAR LIMITED WARRANTY (PARTS AND LABOR) For one year from the date of purchase, when this major appliance is installed, operated and maintained according to instructions attached to or furnished with...
Owners Manual
Page 18
... address below . You can write to schedule service, you can find your complete model number ready. For assistance or service in your correspondence. If you need assistance using your product or you would like to Maytag with any questions or concerns at the number below : In the U.S.A.: Maytag Brand Home Appliances Customer eXperience Center 553 Benson Road Benton Harbor, MI...
... address below . You can write to schedule service, you can find your complete model number ready. For assistance or service in your correspondence. If you need assistance using your product or you would like to Maytag with any questions or concerns at the number below : In the U.S.A.: Maytag Brand Home Appliances Customer eXperience Center 553 Benson Road Benton Harbor, MI...
Energy Guide
Page 1
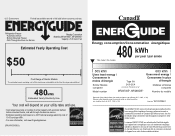
... d'autres modéles similaires. U.S. Part No. Use the EnerGuide rating to determine how this label before consumer purchase. Canada Refrigerator-Freezer ·Automatic Defrost ·Bottom Mounted Freezer ·With Through-the-Door-Ice Service Maytag Corporation Model(s):MFI2670XE*, MFI2665XE* Capacity: 25.6 Cubic Feet Estimated Yearly Operating Cost $50 Cost Range of Similar Models The estimated yearly operating cost of this model was not available at the...
... d'autres modéles similaires. U.S. Part No. Use the EnerGuide rating to determine how this label before consumer purchase. Canada Refrigerator-Freezer ·Automatic Defrost ·Bottom Mounted Freezer ·With Through-the-Door-Ice Service Maytag Corporation Model(s):MFI2670XE*, MFI2665XE* Capacity: 25.6 Cubic Feet Estimated Yearly Operating Cost $50 Cost Range of Similar Models The estimated yearly operating cost of this model was not available at the...


