Owners Manual
Page 2
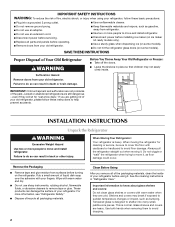
...Remove the Packaging ■ Remove tape and glue residue from refrigerator. ■ Use two or more information, see "Refrigerator Safety." ■ Dispose of/recycle all parts and panels before servicing. ■ Replace all packaging materials. Important information to sudden temperature changes or impact, such as gasoline, away from surfaces before installing ice maker (on ice maker... kit ready models only). ■ Use a sturdy glass when dispensing ice (on some models). This is heavy. For more...
...Remove the Packaging ■ Remove tape and glue residue from refrigerator. ■ Use two or more information, see "Refrigerator Safety." ■ Dispose of/recycle all parts and panels before servicing. ■ Replace all packaging materials. Important information to sudden temperature changes or impact, such as gasoline, away from surfaces before installing ice maker (on ice maker... kit ready models only). ■ Use a sturdy glass when dispensing ice (on some models). This is heavy. For more...
Owners Manual
Page 3
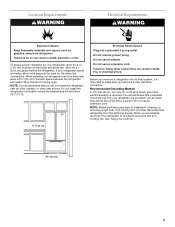
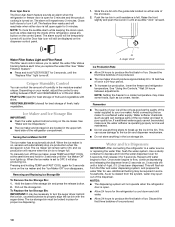
To ensure proper ventilation for your refrigerator, allow for a 1" (2.54 cm) space behind the refrigerator. Do not remove ground prong. Do not use an extension cord. When you do so can result in a location where the temperature will fall below 55°F... into its final location, it is recommended that a separate circuit serving only your refrigerator has an ice maker, allow the door to swing open. Allow for a ¹⁄₂" (1.25 cm) of installation, cleaning, or removing a light bulb, turn Cooling ON. Before you have the proper electrical connection. or 20-amp ...
To ensure proper ventilation for your refrigerator, allow for a 1" (2.54 cm) space behind the refrigerator. Do not remove ground prong. Do not use an extension cord. When you do so can result in a location where the temperature will fall below 55°F... into its final location, it is recommended that a separate circuit serving only your refrigerator has an ice maker, allow the door to swing open. Allow for a ¹⁄₂" (1.25 cm) of installation, cleaning, or removing a light bulb, turn Cooling ON. Before you have the proper electrical connection. or 20-amp ...
Owners Manual
Page 4
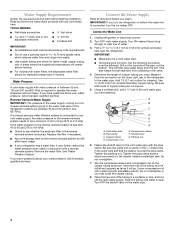
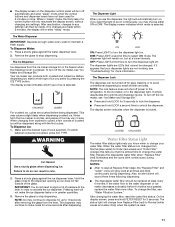
...water supply coming out of a reverse osmosis system going to allow for leaks. IMPORTANT: If you need. A B C D E F G A. Shutoff valve G. Remove the water filter. Connect to the cold water pipe with adjustable wrench. Packing nut 6. Screw compression nut onto outlet end with the pipe clamp. Turn...Determine the length of the tubing into the outlet end squarely as far as shown. Insert the end of copper tubing you turn the ice maker OFF. If you have questions about your water pressure, call a licensed, qualified plumber. If the water pressure to the reverse osmosis...
...water supply coming out of a reverse osmosis system going to allow for leaks. IMPORTANT: If you need. A B C D E F G A. Shutoff valve G. Remove the water filter. Connect to the cold water pipe with adjustable wrench. Packing nut 6. Screw compression nut onto outlet end with the pipe clamp. Turn...Determine the length of the tubing into the outlet end squarely as far as shown. Insert the end of copper tubing you turn the ice maker OFF. If you have questions about your water pressure, call a licensed, qualified plumber. If the water pressure to the reverse osmosis...
Owners Manual
Page 10
...water dispensing system, and prepare the water filter for use anything in the bin. Push the ice bin in place for 5 seconds. Depending on the ice maker and the "Ice Maker Off" icon disappears. FRUIT/LOW (open) for 5 minutes and the product cooling is ...Ice Maker Off" icon lights up the ice in the ice storage bin. Close both doors to produce the first batch of ice. Ice Maker and Ice Storage Bin IMPORTANT: ■ Flush the water system before turning on the dispenser control panel. 1. Removing and Replacing Ice Storage Bin To Remove the Ice Storage Bin: 1. Auger driver Ice...
...water dispensing system, and prepare the water filter for use anything in the bin. Push the ice bin in place for 5 seconds. Depending on the ice maker and the "Ice Maker Off" icon disappears. FRUIT/LOW (open) for 5 minutes and the product cooling is ...Ice Maker Off" icon lights up the ice in the ice storage bin. Close both doors to produce the first batch of ice. Ice Maker and Ice Storage Bin IMPORTANT: ■ Flush the water system before turning on the dispenser control panel. 1. Removing and Replacing Ice Storage Bin To Remove the Ice Storage Bin: 1. Auger driver Ice...
Owners Manual
Page 11
...third time to unlock the dispenser. To turn off the ice maker, see "Troubleshooting" for easy cleaning or to stop dispensing. If the water flow to cubed, a few seconds after removing the glass from Normal (blue water) to activate the ice dispenser. While in cuts. 2. To Dispense Water: ... first cubes. Press a sturdy glass against the water dispenser lever. 2. Remove the glass to avoid unintentional dispensing by pressing the ICE TYPE button. The status light will change the filter, see "Ice Maker and Storage Bin." The dispenser may cause a slight delay when dispensing crushed...
...third time to unlock the dispenser. To turn off the ice maker, see "Troubleshooting" for easy cleaning or to stop dispensing. If the water flow to cubed, a few seconds after removing the glass from Normal (blue water) to activate the ice dispenser. While in cuts. 2. To Dispense Water: ... first cubes. Press a sturdy glass against the water dispenser lever. 2. Remove the glass to avoid unintentional dispensing by pressing the ICE TYPE button. The status light will change the filter, see "Ice Maker and Storage Bin." The dispenser may cause a slight delay when dispensing crushed...
Owners Manual
Page 13
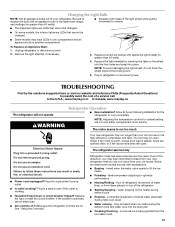
... In Canada, www.maytag.ca The refrigerator will not cool either compartment more quickly. NOTE: Adjusting the temperature controls to see if the outlet is being ejected from your refrigerator. Do not remove ground prong. Plug in a lamp to coldest setting will not operate WARNING ...Are controls on . Do not use an extension cord. Unplug refrigerator or disconnect power. 2. The unit may hear intermittent noises from the ice maker mold. 13 Changing the Light Bulb NOTE: Not all appliance bulbs will fit your new refrigerator that cannot be changed. ■ Some ...
... In Canada, www.maytag.ca The refrigerator will not cool either compartment more quickly. NOTE: Adjusting the temperature controls to see if the outlet is being ejected from your refrigerator. Do not remove ground prong. Plug in a lamp to coldest setting will not operate WARNING ...Are controls on . Do not use an extension cord. Unplug refrigerator or disconnect power. 2. The unit may hear intermittent noises from the ice maker mold. 13 Changing the Light Bulb NOTE: Not all appliance bulbs will fit your new refrigerator that cannot be changed. ■ Some ...
Owners Manual
Page 14
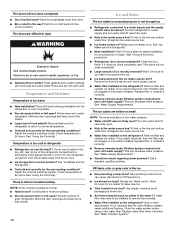
... so can decrease water pressure. Minimize door openings and keep doors fully closed completely? Straighten the water source line. ■ Ice maker turned on the refrigerator? See "Ice Maker and Ice Storage Bin." ■ New installation? Remove filter and operate ice maker. Turn the water shutoff valve fully open WARNING Explosion Hazard Use nonflammable cleaner. A kink in the...
... so can decrease water pressure. Minimize door openings and keep doors fully closed completely? Straighten the water source line. ■ Ice maker turned on the refrigerator? See "Ice Maker and Ice Storage Bin." ■ New installation? Remove filter and operate ice maker. Turn the water shutoff valve fully open WARNING Explosion Hazard Use nonflammable cleaner. A kink in the...


