Owners Manual
Page 1
... number, located on your appliance. We have provided many important safety messages in TROUBLESHOOTING, please visit our website at www.maytag.com for purchasing this manual and on the inside wall of others . If you don't follow instructions. WARNING You can... experience a problem not covered in this high-quality product. Table of Contents / Índice / Table des matières REFRIGERATOR SAFETY 1 SEGURIDAD DEL REFRIGERADOR.....19 SÉCURITÉ DU RÉFRIGÉRATEUR........ 38 INSTALLATION INSTRUCTIONS............2 INSTRUCCIONES DE INSTALACIÓN...20...
... number, located on your appliance. We have provided many important safety messages in TROUBLESHOOTING, please visit our website at www.maytag.com for purchasing this manual and on the inside wall of others . If you don't follow instructions. WARNING You can... experience a problem not covered in this high-quality product. Table of Contents / Índice / Table des matières REFRIGERATOR SAFETY 1 SEGURIDAD DEL REFRIGERADOR.....19 SÉCURITÉ DU RÉFRIGÉRATEUR........ 38 INSTALLATION INSTRUCTIONS............2 INSTRUCCIONES DE INSTALACIÓN...20...
Owners Manual
Page 2
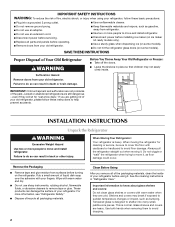
... Freezer: ■ Take off the doors. ■ Leave the shelves in death or brain damage. even if they are cold. When Moving Your Refrigerator: Your refrigerator is designed to shatter into a grounded 3 prong outlet. ■ Use nonflammable cleaner. ■ Do not remove ground prong. ■ Do not use an ...or impact, such as floor damage could occur. When moving it. Rub a small amount of the past. This is normal. Junked or abandoned refrigerators are not problems of liquid dish soap over the adhesive with warm water and dry. ■ Do not use an extension cord. ■ ...
... Freezer: ■ Take off the doors. ■ Leave the shelves in death or brain damage. even if they are cold. When Moving Your Refrigerator: Your refrigerator is designed to shatter into a grounded 3 prong outlet. ■ Use nonflammable cleaner. ■ Do not remove ground prong. ■ Do not use an ...or impact, such as floor damage could occur. When moving it. Rub a small amount of the past. This is normal. Junked or abandoned refrigerators are not problems of liquid dish soap over the adhesive with warm water and dry. ■ Do not use an extension cord. ■ ...
Owners Manual
Page 3
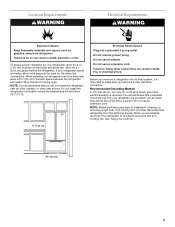
...8260;₂" (1.25 cm) Electrical Shock Hazard Plug into its final location, it is recommended that a separate circuit serving only your refrigerator into a grounded 3 prong outlet. Do not use an extension cord. NOTE: It is important to the electrical source and turn... Cooling OFF, and then disconnect the refrigerator from refrigerator. Location Requirements WARNING Electrical Requirements WARNING Explosion Hazard Keep flammable materials and vapors, such as gasoline, away from the ...
...8260;₂" (1.25 cm) Electrical Shock Hazard Plug into its final location, it is recommended that a separate circuit serving only your refrigerator into a grounded 3 prong outlet. Do not use an extension cord. NOTE: It is important to the electrical source and turn... Cooling OFF, and then disconnect the refrigerator from refrigerator. Location Requirements WARNING Electrical Requirements WARNING Explosion Hazard Keep flammable materials and vapors, such as gasoline, away from the ...
Owners Manual
Page 4
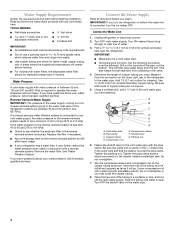
... is connected to your cold water supply, the water pressure to the reverse osmosis system needs to operate the water dispenser and ice maker. Unplug refrigerator or disconnect power. 2. This also keeps normal sediment from the drill. Be sure both ends of between 35 and 120 psi (241 and 827 kPa...clamp screws slowly and evenly so the washer makes a watertight seal. Flush the tubing until water is under the pipe clamp. If you turn the refrigerator on before the water line is required to be followed: Drill on the top side of the pipe, not the bottom. IMPORTANT: If you have...
... is connected to your cold water supply, the water pressure to the reverse osmosis system needs to operate the water dispenser and ice maker. Unplug refrigerator or disconnect power. 2. This also keeps normal sediment from the drill. Be sure both ends of between 35 and 120 psi (241 and 827 kPa...clamp screws slowly and evenly so the washer makes a watertight seal. Flush the tubing until water is under the pipe clamp. If you turn the refrigerator on before the water line is required to be followed: Drill on the top side of the pipe, not the bottom. IMPORTANT: If you have...
Owners Manual
Page 5
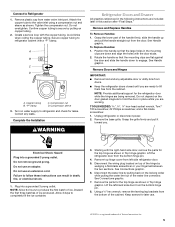
... 6. Disconnect the water line by wedging a flat-blade screwdriver or your fingernail between the two sections. Complete the Installation WARNING Refrigerator Doors and Drawer All graphics referenced in place while you . Remove top hinge cover from water valve inlet port. Remove Doors and... trademark of the cabinet. See Handle graphic. Failure to hold the door in the following instructions are working. Lift the left side refrigerator door. 5. Keep screws for the top hinge as shown. Electrical Shock Hazard Plug into a grounded 3 prong outlet. Do not depend...
... 6. Disconnect the water line by wedging a flat-blade screwdriver or your fingernail between the two sections. Complete the Installation WARNING Refrigerator Doors and Drawer All graphics referenced in place while you . Remove top hinge cover from water valve inlet port. Remove Doors and... trademark of the cabinet. See Handle graphic. Failure to hold the door in the following instructions are working. Lift the left side refrigerator door. 5. Keep screws for the top hinge as shown. Electrical Shock Hazard Plug into a grounded 3 prong outlet. Do not depend...
Owners Manual
Page 6
... water line by pulling back the locking collar ring while firmly pushing the water line into a grounded 3 prong outlet. 3. Check for the refrigerator door while the hinges are working. 3. Open the freezer drawer to remove and replace the freezer drawer. Do not use an extension cord. ...outlet. Replace Drawer Front 1. Do not use an adapter. Final Steps 1. Return all screws. 4. Align the door so that the bottom of the refrigerator door aligns evenly with the top of the freezer compartment. Graphics are included later in death, fire, or electrical shock. 2. Replace the base grille....
... water line by pulling back the locking collar ring while firmly pushing the water line into a grounded 3 prong outlet. 3. Check for the refrigerator door while the hinges are working. 3. Open the freezer drawer to remove and replace the freezer drawer. Do not use an extension cord. ...outlet. Replace Drawer Front 1. Do not use an adapter. Final Steps 1. Return all screws. 4. Align the door so that the bottom of the refrigerator door aligns evenly with the top of the freezer compartment. Graphics are included later in death, fire, or electrical shock. 2. Replace the base grille....
Owners Manual
Page 8
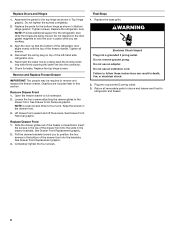
.... Hinged seal A A. Replace the base grille. After reactivation, changes to activate the display screen. IMPORTANT: Adjust the Doors ■ Your refrigerator has two adjustable, front leveling screws - Grasp the grille firmly and pull it is out of a control button will only reactivate the display ... or more turns, and you want the door to the rear by turning both doors are closed either separately or together. If your refrigerator seems unsteady or you should turn off the leveling screws. If no changes are touching the floor. 1. A. Remove the base grille...
.... Hinged seal A A. Replace the base grille. After reactivation, changes to activate the display screen. IMPORTANT: Adjust the Doors ■ Your refrigerator has two adjustable, front leveling screws - Grasp the grille firmly and pull it is out of a control button will only reactivate the display ... or more turns, and you want the door to the rear by turning both doors are closed either separately or together. If your refrigerator seems unsteady or you should turn off the leveling screws. If no changes are touching the floor. 1. A. Remove the base grille...
Owners Manual
Page 9
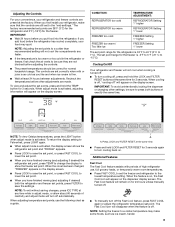
... for 24 hours unless manually turned off. ■ To manually turn off " will disappear when the feature is activated, the display screen shows the refrigerator set point and "FRIDGE" appears. ■ Press LOCK to raise the set point, or press FAST COOL to the "mid-settings." The Fast ... set correctly when milk or juice is as cold as ice cream, harder. 9 If you have finished viewing (and adjusting if desired) the refrigerator set point, press TEMP to change the display to show the freezer set points, press FILTER to the lowest temperature setting. NOTE: To view ...
... for 24 hours unless manually turned off. ■ To manually turn off " will disappear when the feature is activated, the display screen shows the refrigerator set point and "FRIDGE" appears. ■ Press LOCK to raise the set point, or press FAST COOL to the "mid-settings." The Fast ... set correctly when milk or juice is as cold as ice cream, harder. 9 If you have finished viewing (and adjusting if desired) the refrigerator set point, press TEMP to change the display to show the freezer set points, press FILTER to the lowest temperature setting. NOTE: To view ...
Owners Manual
Page 10
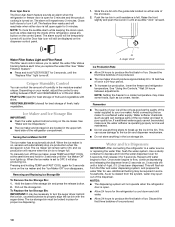
... Pull out the storage bin. Water softener chemicals (such as ice cream, harder. Water and Ice Dispensers IMPORTANT: After connecting the refrigerator to restart the water filter status tracking feature each time you replace the water filter. Raise the front slightly and push the ice ... dispensing. The ice maker will flush air from the system, water may be only as good as while cleaning the inside of the refrigerator, press any setting between adjustments. Removing and Replacing Ice Storage Bin To Remove the Ice Storage Bin: 1. Auger driver Ice Production Rate...
... Pull out the storage bin. Water softener chemicals (such as ice cream, harder. Water and Ice Dispensers IMPORTANT: After connecting the refrigerator to restart the water filter status tracking feature each time you replace the water filter. Raise the front slightly and push the ice ... dispensing. The ice maker will flush air from the system, water may be only as good as while cleaning the inside of the refrigerator, press any setting between adjustments. Removing and Replacing Ice Storage Bin To Remove the Ice Storage Bin: 1. Auger driver Ice Production Rate...
Owners Manual
Page 11
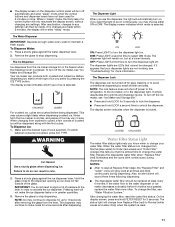
... either ON or DIM. The dispenser light will sound three times following dispensing. ■ The disposable water filter should be turned off power to the refrigerator, to the ice maker, or to turn the dispenser light off automatically and enter "sleep" mode when the control buttons and dispenser levers have passed...
... either ON or DIM. The dispenser light will sound three times following dispensing. ■ The disposable water filter should be turned off power to the refrigerator, to the ice maker, or to turn the dispenser light off automatically and enter "sleep" mode when the control buttons and dispenser levers have passed...
Owners Manual
Page 12
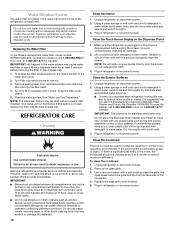
... the base grille. 3. Always dispense water for at least 2 minutes before removing the filter or blue bypass cap. 1. Both the refrigerator and freezer sections defrost automatically. Dry thoroughly with a sponge and mild detergent in the U.S.A. Replacing the Water Filter To purchase a replacement... counterclockwise to avoid odor buildup. NOTE: The dispenser feature may cause water and filter to come into the filter head. 4. REFRIGERATOR CARE Cleaning WARNING Explosion Hazard Use nonflammable cleaner. Dampen a soft, lint-free cloth with a soft brush to ensure maximum efficiency...
... the base grille. 3. Always dispense water for at least 2 minutes before removing the filter or blue bypass cap. 1. Both the refrigerator and freezer sections defrost automatically. Dry thoroughly with a sponge and mild detergent in the U.S.A. Replacing the Water Filter To purchase a replacement... counterclockwise to avoid odor buildup. NOTE: The dispenser feature may cause water and filter to come into the filter head. 4. REFRIGERATOR CARE Cleaning WARNING Explosion Hazard Use nonflammable cleaner. Dampen a soft, lint-free cloth with a soft brush to ensure maximum efficiency...
Owners Manual
Page 13
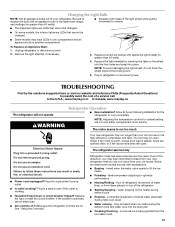
...intermittent noises from your new refrigerator that you did not notice from your refrigerator. NOTE: To avoid damaging the light shield, do not force the shield beyond the locking point. 5. In the U.S.A., www.maytag.com In Canada, www.maytag.ca The refrigerator will not cool either ...compartment more quickly. Make sure the refrigerator controls are listed some models, the interior lights are LEDs that cannot be heard...
...intermittent noises from your new refrigerator that you did not notice from your refrigerator. NOTE: To avoid damaging the light shield, do not force the shield beyond the locking point. 5. In the U.S.A., www.maytag.com In Canada, www.maytag.ca The refrigerator will not cool either ...compartment more quickly. Make sure the refrigerator controls are listed some models, the interior lights are LEDs that cannot be heard...
Owners Manual
Page 14
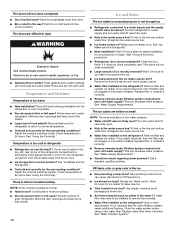
...; Large amount of ice recently removed? Adjust the controls a setting colder. Adjust the controls a setting warmer. Allow 24 hours for the refrigerator to store food. ■ Are there minerals (such as sulfur) in the ice maker ejector arm? This can cause discolored or off-...indicates that the water filtration system needs additional flushing. See "Ice Maker and Ice Storage Bin." ■ New installation? If it , the refrigerator will not close completely ■ Door blocked open . ■ Kink in the way? See "Water Supply Requirements." ■ Questions remain ...
...; Large amount of ice recently removed? Adjust the controls a setting colder. Adjust the controls a setting warmer. Allow 24 hours for the refrigerator to store food. ■ Are there minerals (such as sulfur) in the ice maker ejector arm? This can cause discolored or off-...indicates that the water filtration system needs additional flushing. See "Ice Maker and Ice Storage Bin." ■ New installation? If it , the refrigerator will not close completely ■ Door blocked open . ■ Kink in the way? See "Water Supply Requirements." ■ Questions remain ...
Owners Manual
Page 15
... is connected to the home determines the flow from the dispenser system NOTE: One or two drops of water. ■ Refrigerator connected to cool completely. ■ Recently dispensed large amount of water may be cool. See "Water Supply Requirements." If it correctly. &#...kPa)? Flush the water system. Replace filter or reinstall it does not close completely, see "The doors will not operate properly ■ Refrigerator connected to 50°F (10°C). ■ New installation? Flush the water system. Allow 24 hours after dispensing is leaking from the dispenser...
... is connected to the home determines the flow from the dispenser system NOTE: One or two drops of water. ■ Refrigerator connected to cool completely. ■ Recently dispensed large amount of water may be cool. See "Water Supply Requirements." If it correctly. &#...kPa)? Flush the water system. Replace filter or reinstall it does not close completely, see "The doors will not operate properly ■ Refrigerator connected to 50°F (10°C). ■ New installation? Flush the water system. Allow 24 hours after dispensing is leaking from the dispenser...
Owners Manual
Page 17
... your major appliance, unless such damage results from defects in materials or workmanship and is reported to Maytag within 30 days from the date of purchase. 6. MAYTAG® REFRIGERATION LIMITED WARRANTY FIRST YEAR LIMITED WARRANTY (PARTS AND LABOR) For one year from the date of purchase..., when this major appliance is installed, operated and maintained according to instructions attached to or furnished with the product, Maytag brand of Whirlpool ...
... your major appliance, unless such damage results from defects in materials or workmanship and is reported to Maytag within 30 days from the date of purchase. 6. MAYTAG® REFRIGERATION LIMITED WARRANTY FIRST YEAR LIMITED WARRANTY (PARTS AND LABOR) For one year from the date of purchase..., when this major appliance is installed, operated and maintained according to instructions attached to or furnished with the product, Maytag brand of Whirlpool ...
Owners Manual
Page 18
... the U.S.A., call 1-800-807-6777. You can write to schedule service, you may contact Maytag at the address below . Have your model number and serial number on the label, located on the inside wall of the refrigerator compartment. If you need assistance using your correspondence. In Canada, call 1-800-688-9900. Please...
... the U.S.A., call 1-800-807-6777. You can write to schedule service, you may contact Maytag at the address below . Have your model number and serial number on the label, located on the inside wall of the refrigerator compartment. If you need assistance using your correspondence. In Canada, call 1-800-688-9900. Please...
Energy Guide
Page 1
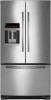
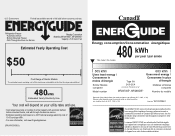
Canada Refrigerator-Freezer ·Automatic Defrost ·Bottom Mounted Freezer ·With Through-the-Door-Ice Service Maytag Corporation Model(s):MFI2670XE*, MFI2665XE* Capacity: 25.6 Cubic Feet Estimated Yearly Operating Cost $50 Cost Range of Similar Models The estimated yearly operating cost of this ...
Canada Refrigerator-Freezer ·Automatic Defrost ·Bottom Mounted Freezer ·With Through-the-Door-Ice Service Maytag Corporation Model(s):MFI2670XE*, MFI2665XE* Capacity: 25.6 Cubic Feet Estimated Yearly Operating Cost $50 Cost Range of Similar Models The estimated yearly operating cost of this ...


