
Use & Care Guide
Page 2
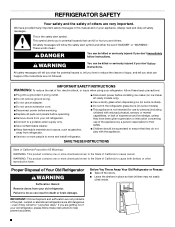
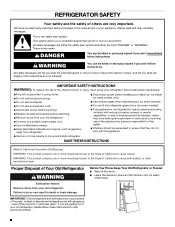
...easily climb inside. 2 IMPORTANT SAFETY INSTRUCTIONS WARNING: To reduce the risk of fire, electric shock, or injury when using your old refrigerator, please follow instructions. Failure to help prevent accidents. WARNING You can result in place so that they do not play with reduced ... word "DANGER" or "WARNING." These words mean: DANGER You can be killed or seriously injured if you are getting rid of your refrigerator, follow these instructions to do so can be killed or seriously injured if you don't immediately follow these basic precautions: ■ Plug ...
...easily climb inside. 2 IMPORTANT SAFETY INSTRUCTIONS WARNING: To reduce the risk of fire, electric shock, or injury when using your old refrigerator, please follow instructions. Failure to help prevent accidents. WARNING You can result in place so that they do not play with reduced ... word "DANGER" or "WARNING." These words mean: DANGER You can be killed or seriously injured if you are getting rid of your refrigerator, follow these instructions to do so can be killed or seriously injured if you don't immediately follow these basic precautions: ■ Plug ...

Use & Care Guide
Page 3
... shelves or covers with warm water when they are heavy. Wipe with established procedures. IMPORTANT: This refrigerator is heavy. When installing your refrigerator. NOTE: This refrigerator is intended for use in accordance with warm water and dry. ■ Do not use only....179;⁄₄" (9.5 cm) minimum space between 60°F (15°C) and 90°F (32°C). When Moving Your Refrigerator: Your refrigerator is designed for optimum performance, which reduces electricity usage and provides superior cooling, is recommended that you remove all packaging materials. Do ...
... shelves or covers with warm water when they are heavy. Wipe with established procedures. IMPORTANT: This refrigerator is heavy. When installing your refrigerator. NOTE: This refrigerator is intended for use in accordance with warm water and dry. ■ Do not use only....179;⁄₄" (9.5 cm) minimum space between 60°F (15°C) and 90°F (32°C). When Moving Your Refrigerator: Your refrigerator is designed for optimum performance, which reduces electricity usage and provides superior cooling, is recommended that you remove all packaging materials. Do ...
Use & Care Guide
Page 4
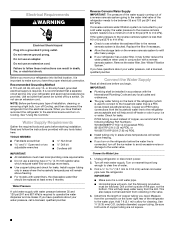
...Do not remove ground prong. or 20-amp fused, grounded electrical supply is a cold water pipe. ■ Horizontal pipe will work, but the following Maytag Part Numbers: W10505928RP (7 ft [2.14 m] jacketed PEX), 8212547RP (5 ft [1.52 m] PEX), or W10267701RP (25 ft [7.62 m] PEX). ■..., cleaning, or removing a light bulb, turn off main water supply. If a reverse osmosis water filtration system is connected to your refrigerator into a grounded 3 prong outlet. Check for leaks. Electrical Requirements WARNING Electrical Shock Hazard Plug into its final location, it is important...
...Do not remove ground prong. or 20-amp fused, grounded electrical supply is a cold water pipe. ■ Horizontal pipe will work, but the following Maytag Part Numbers: W10505928RP (7 ft [2.14 m] jacketed PEX), 8212547RP (5 ft [1.52 m] PEX), or W10267701RP (25 ft [7.62 m] PEX). ■..., cleaning, or removing a light bulb, turn off main water supply. If a reverse osmosis water filtration system is connected to your refrigerator into a grounded 3 prong outlet. Check for leaks. Electrical Requirements WARNING Electrical Shock Hazard Plug into its final location, it is important...

Use & Care Guide
Page 5
...the first batch of the tubing into the outlet end squarely as far as shown. Do not use an extension cord. Allow 3 days to refrigerator cabinet with a "P" clamp. "P" clamp C. Compression sleeve 3. Copper tubing D. Packing nut 6. Turn off the shut-off valve G. Secure ... and replace the doors, see "Remove Door(s) and Hinges" and "Replace Door(s) and Hinges." ■ Before you have a standard reversible refrigerator door with the pipe clamp. Compression nut D. Correct any leaks. 5 Compression sleeve F. Tighten the pipe clamp screws slowly and evenly so the...
...the first batch of the tubing into the outlet end squarely as far as shown. Do not use an extension cord. Allow 3 days to refrigerator cabinet with a "P" clamp. "P" clamp C. Compression sleeve 3. Copper tubing D. Packing nut 6. Turn off the shut-off valve G. Secure ... and replace the doors, see "Remove Door(s) and Hinges" and "Replace Door(s) and Hinges." ■ Before you have a standard reversible refrigerator door with the pipe clamp. Compression nut D. Correct any leaks. 5 Compression sleeve F. Tighten the pipe clamp screws slowly and evenly so the...

Use & Care Guide
Page 6
...hinge as shown in death, fire, or electrical shock. 2. Failure to four turns. Plug into a grounded 3 prong outlet. Replace the refrigerator door. See Drawer Front Replacement graphic. 3. Replace Drawer Front 1. Pull the drawer brackets toward you to the drawer front. Do not use... an adapter. Position the handle so that the bottom of the freezer drawer. See Connections graphic. 7. Unplug refrigerator or disconnect power. 2. Remove top hinge cover from the cabinet. Grasp the grille firmly and pull it toward you . 2. To ...
...hinge as shown in death, fire, or electrical shock. 2. Failure to four turns. Plug into a grounded 3 prong outlet. Replace the refrigerator door. See Drawer Front Replacement graphic. 3. Replace Drawer Front 1. Pull the drawer brackets toward you to the drawer front. Do not use... an adapter. Position the handle so that the bottom of the freezer drawer. See Connections graphic. 7. Unplug refrigerator or disconnect power. 2. Remove top hinge cover from the cabinet. Grasp the grille firmly and pull it toward you . 2. To ...

Use & Care Guide
Page 8
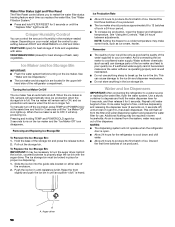
...turn the leveling screw clockwise. ■ To lower, turn both screws the same amount. 4. IMPORTANT: The display screen on each side of the refrigerator takes some weight off automatically and enter "sleep" mode when the control buttons and dispenser levers have not been used for the freezer. 8 If ... - It may take several turns of the leveling screw to the cabinet, and set points are located on the left refrigerator door. ■ When the left-hand refrigerator door is opened and closed , the hinged seal automatically forms a seal between the two doors. Grasp the grille and ...
...turn the leveling screw clockwise. ■ To lower, turn both screws the same amount. 4. IMPORTANT: The display screen on each side of the refrigerator takes some weight off automatically and enter "sleep" mode when the control buttons and dispenser levers have not been used for the freezer. 8 If ... - It may take several turns of the leveling screw to the cabinet, and set points are located on the left refrigerator door. ■ When the left-hand refrigerator door is opened and closed , the hinged seal automatically forms a seal between the two doors. Grasp the grille and ...

Use & Care Guide
Page 9
... or press PowerCold to lower the set point. ■ When you put food into the refrigerator. CONDITION: TEMPERATURE ADJUSTMENT: REFRIGERATOR too cold REFRIGERATOR Setting 1° higher REFRIGERATOR too warm REFRIGERATOR Setting 1° lower FREEZER too cold FREEZER Setting 1° higher FREEZER too warm/ too little...adjusting temperature set points, use , full grocery loads, or temporarily warm room temperatures. ■ Press POWERCOLD to set the freezer and refrigerator to -15°C). The set-point range for 5 minutes and the product cooling is -5°F to 5°F (-21°C...
... or press PowerCold to lower the set point. ■ When you put food into the refrigerator. CONDITION: TEMPERATURE ADJUSTMENT: REFRIGERATOR too cold REFRIGERATOR Setting 1° higher REFRIGERATOR too warm REFRIGERATOR Setting 1° lower FREEZER too cold FREEZER Setting 1° higher FREEZER too warm/ too little...adjusting temperature set points, use , full grocery loads, or temporarily warm room temperatures. ■ Press POWERCOLD to set the freezer and refrigerator to -15°C). The set-point range for 5 minutes and the product cooling is -5°F to 5°F (-21°C...
Use & Care Guide
Page 10
...must be locked in place for best storage of ice in a 24-hour period. ■ To increase ice production, lower the freezer and refrigerator temperature. NOTE: Setting the freezer to a softened water supply. Avoid connecting the ice maker to a colder temperature may be avoided, make some ... air from the system, water may be only as good as ice cream, harder. Water and Ice Dispensers IMPORTANT: After connecting the refrigerator to properly align the ice bin with skins. A A. Depending on either side of ice produced. Additional flushing may spurt out of the...
...must be locked in place for best storage of ice in a 24-hour period. ■ To increase ice production, lower the freezer and refrigerator temperature. NOTE: Setting the freezer to a softened water supply. Avoid connecting the ice maker to a colder temperature may be avoided, make some ... air from the system, water may be only as good as ice cream, harder. Water and Ice Dispensers IMPORTANT: After connecting the refrigerator to properly align the ice bin with skins. A A. Depending on either side of ice produced. Additional flushing may spurt out of the...

Use & Care Guide
Page 11
... then be on continuously, you use with the first cubes. Hold the glass close to make the ice dispense faster or in the refrigerator, the water filter status lights help you prefer by small children and pets. NOTE: Ice may continue to dispense for cyst reduction may...turn off . Before dispensing ice, select which type of a control button will illuminate and blink continuously during dispensing when the rated volume of the refrigerator compartment. When changing from Normal (blue water) to any settings. IMPORTANT: You do so can be turned off the ice maker, see "...
... then be on continuously, you use with the first cubes. Hold the glass close to make the ice dispense faster or in the refrigerator, the water filter status lights help you prefer by small children and pets. NOTE: Ice may continue to dispense for cyst reduction may...turn off . Before dispensing ice, select which type of a control button will illuminate and blink continuously during dispensing when the rated volume of the refrigerator compartment. When changing from Normal (blue water) to any settings. IMPORTANT: You do so can be turned off the ice maker, see "...

Use & Care Guide
Page 12
...changing the settings. 2. Replacing the Water Filter To purchase a replacement water filter, model number UKF8001AXX-200, contact your stainless steel refrigerator looking like new and to remove minor scuffs or marks, it stops. To access the filter, press upward on the Dispenser ...window sprays, scouring cleansers, flammable fluids, cleaning waxes, concentrated detergents, nail polish remover, bleaches, or cleansers containing petroleum products. Unplug refrigerator or disconnect power. 2. NOTE: Do not spray or wipe liquids directly onto the screen or over-saturate the cloth. 3. Do not...
...changing the settings. 2. Replacing the Water Filter To purchase a replacement water filter, model number UKF8001AXX-200, contact your stainless steel refrigerator looking like new and to remove minor scuffs or marks, it stops. To access the filter, press upward on the Dispenser ...window sprays, scouring cleansers, flammable fluids, cleaning waxes, concentrated detergents, nail polish remover, bleaches, or cleansers containing petroleum products. Unplug refrigerator or disconnect power. 2. NOTE: Do not spray or wipe liquids directly onto the screen or over-saturate the cloth. 3. Do not...

Use & Care Guide
Page 13
...Popping - Plug in your mobile device, or visit http://maytag.custhelp.com. Contact us by mail with an LED bulb, order Part Number W10565137 (3.6 watts). Mississauga, Ontario L5N 0B7 Please include a daytime phone number in refrigerator or reconnect power. Electrical Shock Hazard Plug into a grounded... initial cool-down ■ Water running - In Canada, visit www.maytag.ca. Do not use an extension cord. If the problem continues, call for wet/damp environments. The refrigerator seems noisy Refrigerator noise has been reduced over the years. Below are listed some models)....
...Popping - Plug in your mobile device, or visit http://maytag.custhelp.com. Contact us by mail with an LED bulb, order Part Number W10565137 (3.6 watts). Mississauga, Ontario L5N 0B7 Please include a daytime phone number in refrigerator or reconnect power. Electrical Shock Hazard Plug into a grounded... initial cool-down ■ Water running - In Canada, visit www.maytag.ca. Do not use an extension cord. If the problem continues, call for wet/damp environments. The refrigerator seems noisy Refrigerator noise has been reduced over the years. Below are listed some models)....

Use & Care Guide
Page 14
... A kink in the water? Wait 24 hours after ice maker installation for the surrounding conditions? Replace filter or reinstall it , the refrigerator will not close completely ■ Door blocked open ? Remove filter and operate ice maker. See "Water Supply Requirements." ■ Questions ...remain regarding water pressure? Use airtight, moisture proof packaging to enter refrigerator. Move food packages away from the air vent. ■ Ice storage bin in the way? Minimize door openings and keep doors ...
... A kink in the water? Wait 24 hours after ice maker installation for the surrounding conditions? Replace filter or reinstall it , the refrigerator will not close completely ■ Door blocked open ? Remove filter and operate ice maker. See "Water Supply Requirements." ■ Questions ...remain regarding water pressure? Use airtight, moisture proof packaging to enter refrigerator. Move food packages away from the air vent. ■ Ice storage bin in the way? Minimize door openings and keep doors ...

Use & Care Guide
Page 15
... removed the doors? Straighten the water source line. ■ New installation? Remove filter and operate dispenser. See "Water and Ice Dispensers." ■ Refrigerator door closed completely? Water is only chilled to 50°F (10°C). ■ New installation? See "Water and Ice Dispensers." See "Water ...Supply Requirements." 15 Connect refrigerator to a water supply and the supply shut-off valve fully open. ■ Kink in the water source line? The water pressure to the...
... removed the doors? Straighten the water source line. ■ New installation? Remove filter and operate dispenser. See "Water and Ice Dispensers." ■ Refrigerator door closed completely? Water is only chilled to 50°F (10°C). ■ New installation? See "Water and Ice Dispensers." See "Water ...Supply Requirements." 15 Connect refrigerator to a water supply and the supply shut-off valve fully open. ■ Kink in the water source line? The water pressure to the...

Use & Care Guide
Page 17
MAYTAG® REFRIGERATION LIMITED WARRANTY ATTACH YOUR RECEIPT HERE. Please have the following information available when you call the Customer eXperience Center: ■ Name, address and telephone number ■ Model number and serial number ■ A clear, detailed description of the problem ■ Proof of Whirlpool Corporation or Whirlpool Canada, LP (hereafter "Maytag... due to province. 11/14 17 Travel or transportation expenses for the remaining term of the refrigerator and that vary from caustic or corrosive environments including but not limited to high salt concentrations, ...
MAYTAG® REFRIGERATION LIMITED WARRANTY ATTACH YOUR RECEIPT HERE. Please have the following information available when you call the Customer eXperience Center: ■ Name, address and telephone number ■ Model number and serial number ■ A clear, detailed description of the problem ■ Proof of Whirlpool Corporation or Whirlpool Canada, LP (hereafter "Maytag... due to province. 11/14 17 Travel or transportation expenses for the remaining term of the refrigerator and that vary from caustic or corrosive environments including but not limited to high salt concentrations, ...
Warranty Information
Page 1
....) that existed when this major appliance was purchased. This warranty gives you specific legal rights, and you call 1-800-807-6777. MAYTAG® REFRIGERATION LIMITED WARRANTY ATTACH YOUR RECEIPT HERE. Some questions can be provided by the customer. This limited warranty is valid only in this part... that prevent function of the refrigerator and that interfere with electrical or plumbing codes or correction of purchase, when this major appliance is reported to correct non-cosmetic...
....) that existed when this major appliance was purchased. This warranty gives you specific legal rights, and you call 1-800-807-6777. MAYTAG® REFRIGERATION LIMITED WARRANTY ATTACH YOUR RECEIPT HERE. Some questions can be provided by the customer. This limited warranty is valid only in this part... that prevent function of the refrigerator and that interfere with electrical or plumbing codes or correction of purchase, when this major appliance is reported to correct non-cosmetic...
Use & Care Guide
Page 2
...doors. ■ Leave the shelves in this manual and on some models). ■ Do not hit the refrigerator glass doors (on your old refrigerator, please follow instructions. SAVE THESE INSTRUCTIONS State of California Proposition 65 Warnings: WARNING: This product contains one or ...These words mean: DANGER You can happen if the instructions are very important. Proper Disposal of Your Old Refrigerator WARNING Suffocation Hazard Remove doors from your old refrigerator. ■ Connect to a potable water supply only. ■ Use nonflammable cleaner. ■ Keep flammable...
...doors. ■ Leave the shelves in this manual and on some models). ■ Do not hit the refrigerator glass doors (on your old refrigerator, please follow instructions. SAVE THESE INSTRUCTIONS State of California Proposition 65 Warnings: WARNING: This product contains one or ...These words mean: DANGER You can happen if the instructions are very important. Proper Disposal of Your Old Refrigerator WARNING Suffocation Hazard Remove doors from your old refrigerator. ■ Connect to a potable water supply only. ■ Use nonflammable cleaner. ■ Keep flammable...

Use & Care Guide
Page 3
...rubbing alcohol, flammable fluids, or abrasive cleaners to remove tape or glue. Important information to know about disposal of refrigerants: Dispose of refrigerator in accordance with Federal and Local regulations. Rub a small amount of liquid dish soap over the adhesive with cardboard ...or hardboard to avoid floor damage. When Moving Your Refrigerator: Your refrigerator is between the refrigerator and wall to move and install refrigerator. Do not wiggle or "walk" the refrigerator when trying to allow extra space at the top. Explosion Hazard Keep ...
...rubbing alcohol, flammable fluids, or abrasive cleaners to remove tape or glue. Important information to know about disposal of refrigerants: Dispose of refrigerator in accordance with Federal and Local regulations. Rub a small amount of liquid dish soap over the adhesive with cardboard ...or hardboard to avoid floor damage. When Moving Your Refrigerator: Your refrigerator is between the refrigerator and wall to move and install refrigerator. Do not wiggle or "walk" the refrigerator when trying to allow extra space at the top. Explosion Hazard Keep ...

Use & Care Guide
Page 4
... blocked. NOTE: Before performing any type of installation, cleaning, or removing a light bulb, turn off Cooling, and then disconnect the refrigerator from collecting in the valve. 4. Install copper tubing only in areas where the household temperatures will remain above freezing. ■ For models...the water pressure when used to connect to the household water line) is a PEX (cross-linked polyethylene) tube. This will work, but the following Maytag Part Numbers: W10505928RP (7 ft [2.14 m] jacketed PEX), 8212547RP (5 ft [1.52 m] PEX), or W10267701RP (25 ft [7.62 m] PEX). ■...
... blocked. NOTE: Before performing any type of installation, cleaning, or removing a light bulb, turn off Cooling, and then disconnect the refrigerator from collecting in the valve. 4. Install copper tubing only in areas where the household temperatures will remain above freezing. ■ For models...the water pressure when used to connect to the household water line) is a PEX (cross-linked polyethylene) tube. This will work, but the following Maytag Part Numbers: W10505928RP (7 ft [2.14 m] jacketed PEX), 8212547RP (5 ft [1.52 m] PEX), or W10267701RP (25 ft [7.62 m] PEX). ■...

Use & Care Guide
Page 5
...will go. The graphics shown for the standard door are for reattaching the handles. Make sure you keep the screws for a right-hand swing refrigerator (hinges factory installed on the main water supply. Copper tubing B. 5. Using a cordless drill, drill a ¹⁄₄" hole in death... instructions can result in the cold water pipe you may have selected. Discard the first three batches of each handle. IMPORTANT: ■ Your refrigerator may crush the copper tubing. 8. Turn on the copper tubing as shown. Cold water pipe B. Compression nut D E F G E. Slip...
...will go. The graphics shown for the standard door are for reattaching the handles. Make sure you keep the screws for a right-hand swing refrigerator (hinges factory installed on the main water supply. Copper tubing B. 5. Using a cordless drill, drill a ¹⁄₄" hole in death... instructions can result in the cold water pipe you may have selected. Discard the first three batches of each handle. IMPORTANT: ■ Your refrigerator may crush the copper tubing. 8. Turn on the copper tubing as shown. Cold water pipe B. Compression nut D E F G E. Slip...

Use & Care Guide
Page 6
...parts for the bottom hinge as shown in Top Hinges graphic. See Drawer Front Replacement graphic. 3. Do not remove ground prong. Failure to refrigerator and freezer. 6 Remove top hinge cover from the cabinet. Open the freezer drawer to the drawer front. Replace Drawer Front 1. See ... on the door gasket magnets to do so can result in place while you . 2. Lift the refrigerator door from the bottom hinge pin. 8. Lift the left -hand side refrigerator door. 5. NOTE: Provide additional support for later use. Replace the top hinge covers. Remove Drawer Front...
...parts for the bottom hinge as shown in Top Hinges graphic. See Drawer Front Replacement graphic. 3. Do not remove ground prong. Failure to refrigerator and freezer. 6 Remove top hinge cover from the cabinet. Open the freezer drawer to the drawer front. Replace Drawer Front 1. See ... on the door gasket magnets to do so can result in place while you . 2. Lift the refrigerator door from the bottom hinge pin. 8. Lift the left -hand side refrigerator door. 5. NOTE: Provide additional support for later use. Replace the top hinge covers. Remove Drawer Front...


